Crochet Crossbody Bag Kit

$25.99
The Crochet Crossbody Bag Kit appeals to us because it bundles all necessary materials into a single package, making the crafting experience both simple and enjoyable.
With high-quality yarn, ergonomic hooks, and clear step-by-step instructions, we can dive straight into crocheting rather than hunting for stray supplies.
Carrying a bag we stitched ourselves is more than a fashion statement; it is a small, satisfying reminder that we turned yarn into something truly functional.
Description
Table of Contents
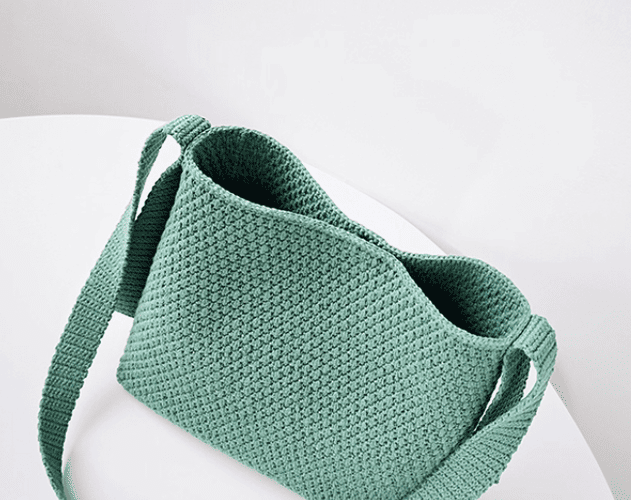
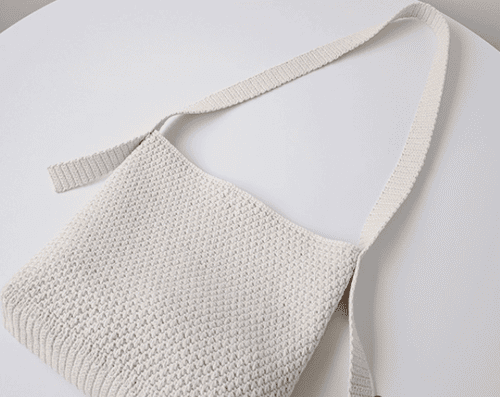
Crochet crossbody bag kit: looking for that one accessory that looks handmade and still gets the job done? A simple crochet crossbody bag might be exactly what you’re after!
It hardly weighs anything, sits comfortably on your shoulder, and you can tweak the colors to fit any outfit. In this mini-guide.
We’ll show you how to choose yarn, pick a stitch that turn a good bag into a great one. so whether you’re picking up a hook for the first time or you’ve been at it for years, you’re in the right place.
Why we love crochet crossbody bag?
Finding a purse that doesn’t skimp on style but still holds everything can feel impossible. That’s why crochet crossbody bags win in our book. Here’s why we keep coming back to them:
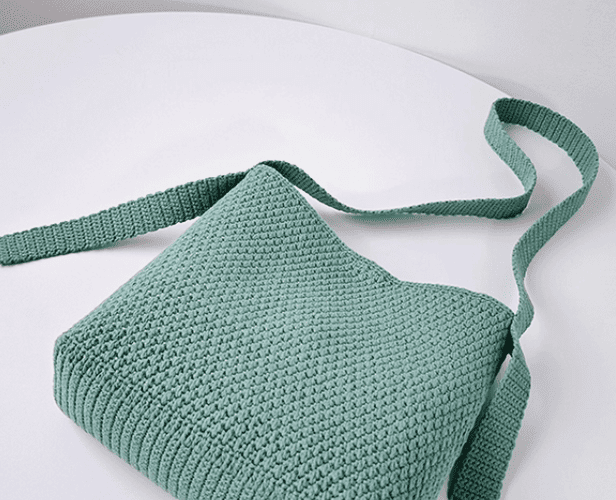
🧶 Lightweight & Hands-Free: The strap rests across your body, so you can wave, scroll, even juggle keys without the bag bumping around.
🌸 Customizable: Pick any hue, swap stitches mid-row, even add stripes or tiny flowers—it’s your canvas.
🌱 Eco-Friendly: Using leftover yarn or opting for organic cotton means less plastic in the planet’s future.
💖 Handmade with Love: Every slip stitch, every tiny mistake, tells a little story only you can tell.
Material of crochet crossbody bag kit
Okay, let’s queue up the tools before we chain that first stitch:
- Crochet hook: Peek at the yarn label for the best hook size. A 2.5 mm usually does the crochet crossbody bag.
- Stitch markers: Use these little clips to remember where each round starts and stops.
- Scissors & yarn needle: Keep sharp scissors and a blunt needle nearby to trim yarn and tuck in tails.
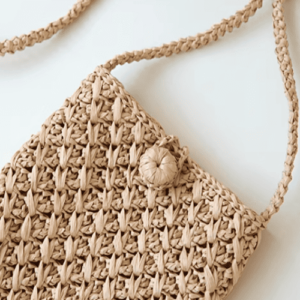
- Magnetic buckle:We slide a strong little magnetic snap onto our crochet bag so it stays shut, looks cute, and pops open with barely a tug.
- Yarn: Cotton is durable and shows off texture nicely.
How we crochet crossbody bag (step by step)
Step 1: Start with the base(bottom)
Foundation chain
First, make a chain of 19.
Round 1-58
Skip the first chain. Insert your hook into the next purl stitch and work one single crochet across, stopping after you have 18 single crochets. Chain 1, flip your piece, and do the same thing for a total of 58 rows.
Rround 59
Chain 3- that will count as your first double crochet- then work a double crochet into every stitch across the row until you reach the end. You should have 158 double crochets when you finish.
Step 2: Start with the body
Rounds 60-61
(1 sc, 1 sc, skip 1 st); repeat this 79 times.
Round 62
1 sc, (pattern st, ch 1, skip 1 st); repeat 78 times, then 1 pattern st.
Round 63
1 sc, (1 sc, ch 1, skip 1 st); repeat 78 times, then 1 sc.
Round 64
1 sc, (ch 1, skip 1 st, pattern st); repeat 78 times, finish with 1 ch.
Round 65
1 sc, (ch 1, skip 1 st, 1 sc); repeat 78 times, then 1 ch.
Round 66-89
Keep following steps R62–R65 over and over six times, or keep going until the bag is as tall as you want.
Step 3: Crochet the bag opening
1️⃣ Round 90:
Make 1 single crochet in every stitch around the round. This gives the edge a tidy, firm finish.
2️⃣ Round 91:
*Now slip stitch in each stitch around. It smooths the top, looks polished.
At end of each bag, we pull the sides together with a no-show slip stitch. This little move hides the yarn and leaves the project looking neat and pro.
Step 4: Crochet the bag strap
1️⃣ Foundation Chain
Start by chaining 9 stitches (ch).
2️⃣ Row 1
Skip the first chain and make 1 single crochet (sc) in each of the next 8 purl stitches. You will have 8 sc by the end of Row 1.
3️⃣ Rows 2-300
Turn your work and chain 1. Now work 1 sc into each of the 8 chain stitches. keep repeating this-turning, chaining, and stitching-until you reach 300 rounds.
The strap needs to be ironed so that it will not stretch and will be smoother.
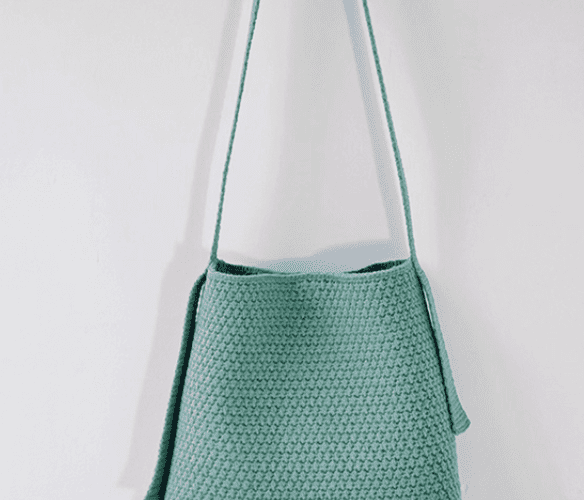
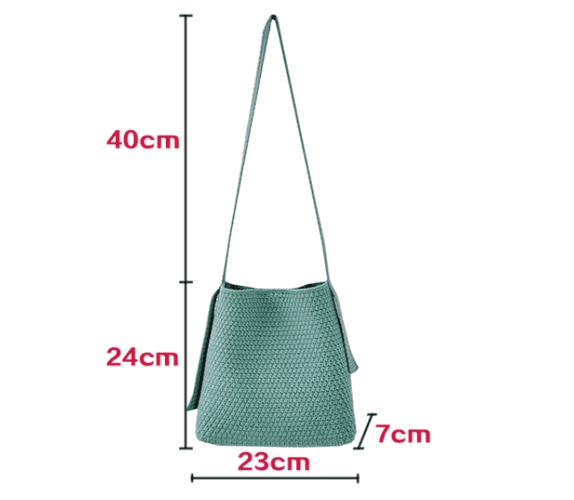
Step 5: Sewing the strap on the side of bag
Position the strap
To establish uniform anchor points, the bag is laid flat so both sides can be inspected simultaneously.
The raw edge of each strap panel is placed approximately one inch below the opening and centered along the side seam.
Thread the needle
A length of heavy-duty, color-matched thread is cut, then passed through the needle eye and knotted to form a tight, permanent loop.
Start stitching
Guided from the bag’s interior, the needle enters through the strap’s fold, shield-ing the starting knot from external view. Seasoned makers use a one-eighth-inch spacing, forwarding `back stitch-tights to build dense bar or cross-hatching that evenly disperses pull.
Reinforce the stitching
Three full passes-or four, for particularly weighty projects-satisfy the typical strength margin demanded of everyday carry.
Conceal yarn end
The cut thread tail is threaded through the sewing needle and slipped under a few previous stitches, then trimmed flush to stop any possibility of fraying.
Repeat on the other side
The entire sequence is mirrored on the opposite edge, yielding two complementary brackets of stitchwork.
Test the strap
A firm upward tug stresses every fiber yet takes no more than a second; if the joint remains firm, the bag is ready to-short errands, long trips, or post-secondary lecture notes.
Reference sources
1.Learn the most comprehensive guide for single crochet(sc)
Author:Sarah Stearns
Publication date: on June 15, 2021, updated:December 14, 2024
Title: How to single crochet (sc)for beginners
Summary as blow:
- Step-by-Step Single Crochet for Beginners
- Single Crochet into a Foundation Chain
- Single Crochet into another Row
- Single Crochet in the Round
- Increases and Decreases
- Working Single Crochet in Different Loops
Additional information
| color | white, green |
|---|