


Scrunchie Crochet Pattern The Most Comprehensive Step Tutorial Guide
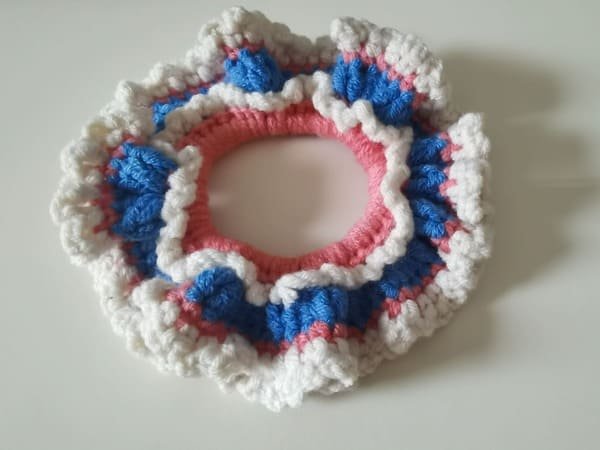
Scrunchie crochet pattern: the appeal of a crocheted scrunchie lies in the project speed: one can transform a scrap ball of yarn into a useful accessory in less than an hour. most sequences begin by wrapping a basic hair elastic with tightly packed single crochets, a step that anchors the fiber and gives the band a tidy sheath. a second pass-in double or half-double stitches-usually follows, injecting the characteristic ruffled flourish for scrunchie crochet pattern.
Color pairing invites playful experimentation-one skein per mood, if the maker is so inclined-and finished samples serve admirably as last-minute gifts.
Best of all, the whole process remains accessible to novices and increments of idle time alike. pick up a hook, clear the mental desk for a moment, and let a new scrunchie materialize almost of its own accord.
Table of Contents for scrunchie crochet pattern
Material kit of scrunchie crochet pattern
- Hook: 3.0 mm
- Yarn( rice write and pink & blue )
- Yarn needle
- Marker
List of necessary tools
- Scissors
- hair rope
Abbreviation for scrunchie crochet pattern
These are the required abbreviations for scrunchie crochet pattern
- ch = Chain stitch
- sc = Single crochet
- sl =Slip stitch
- st(s) =Stitch(es)
- mc =Magic circle (or magic ring)
- dc=Double crochet
- R=Round
- sk=Skip
Crochet the main body for scrunchie crochet pattern
- R1:sc repeat, sl
- R2:FLO-(3ch,sk1,sl) repeat,sl
- R3:BLO-2ch,(2dc,3dc)repeat,sl
- R4:sc repeat,sl
- R5:(sc,3ch) repeat,sl
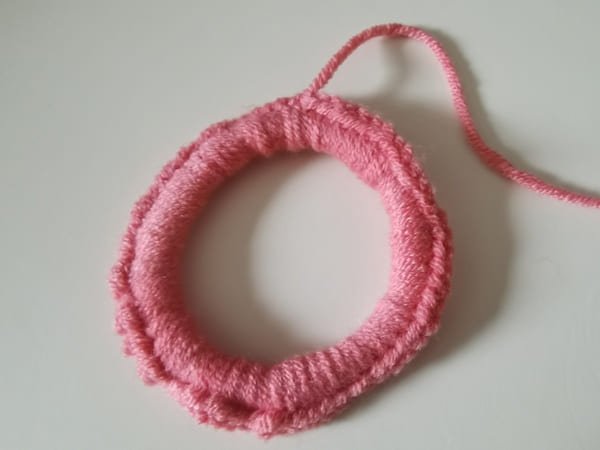
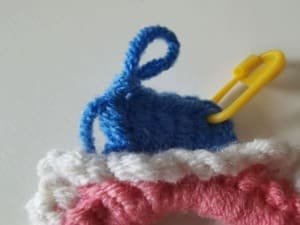
R1

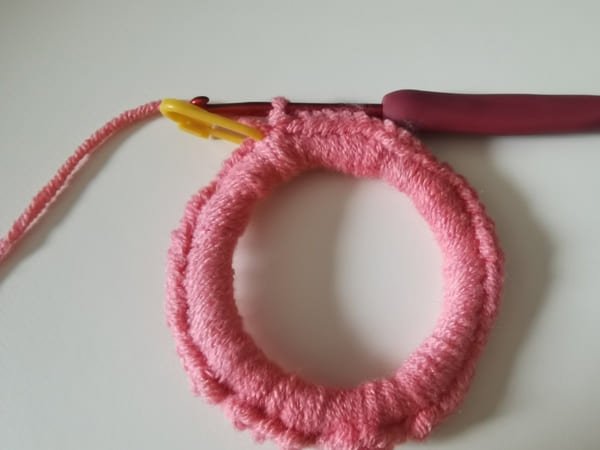
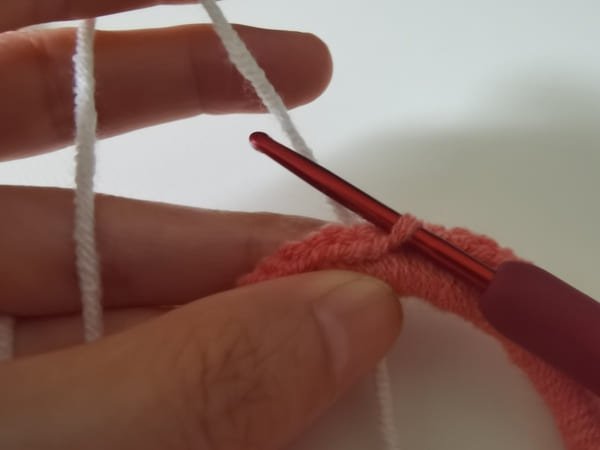
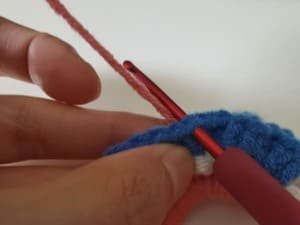
We need have one black hair rope firstyly.
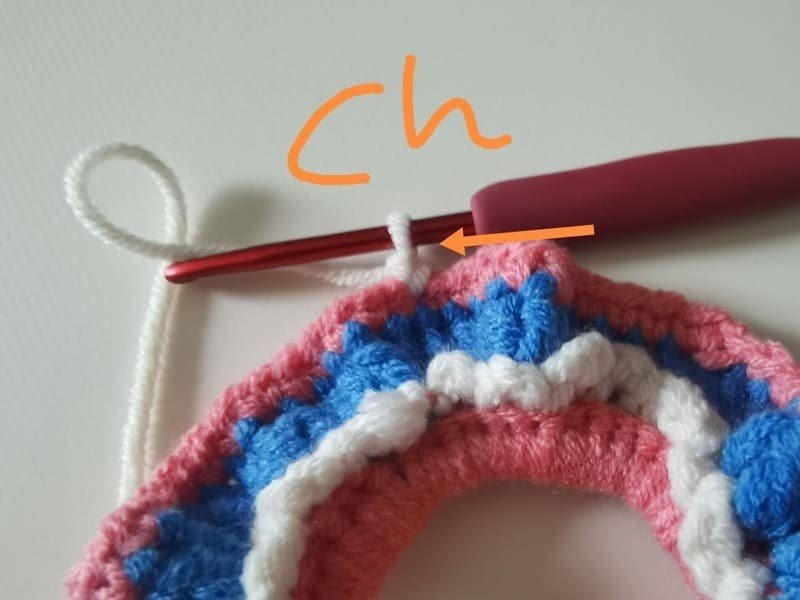
Then we use hook to bring out chain stitch ,which is more secure it .
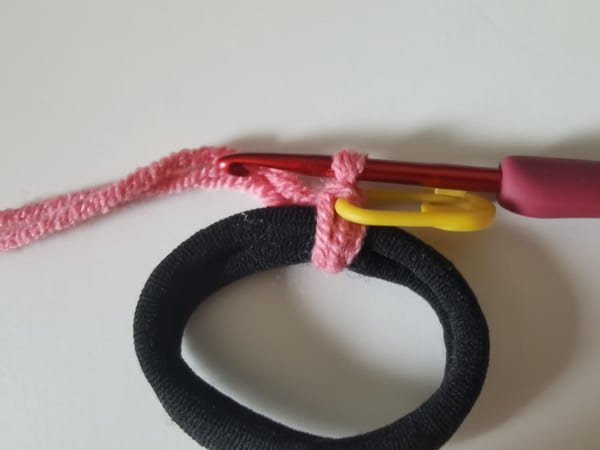
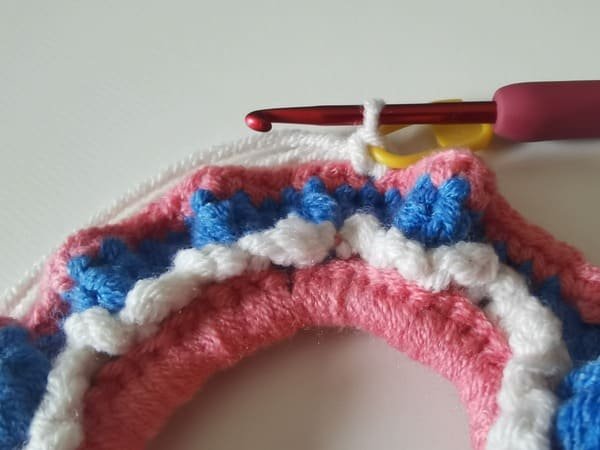
Then we crochet single crochet again , then put the yellow marker at the first stitch .
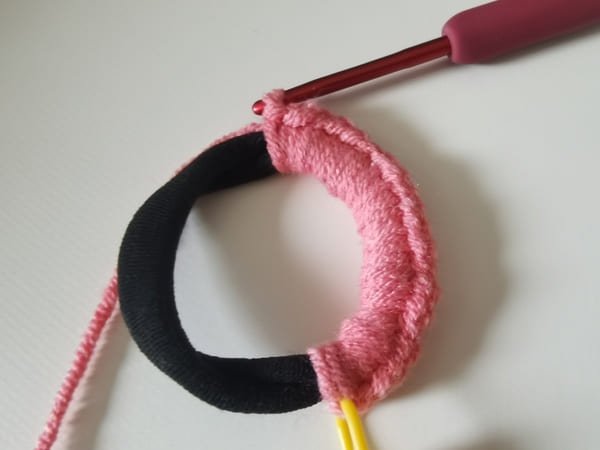
Crochet a half of round 1
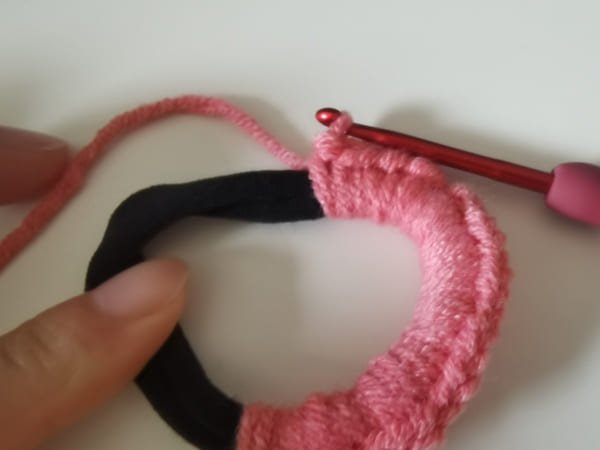
We need tighten up the black hair rope,It’s for the stitches to be tighter.
When we crochet the last stitch.
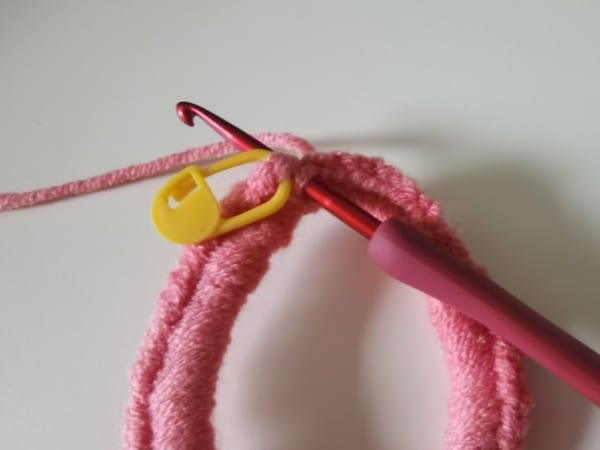
The hook insert the first stitch with yellow stitch for slip stitch .
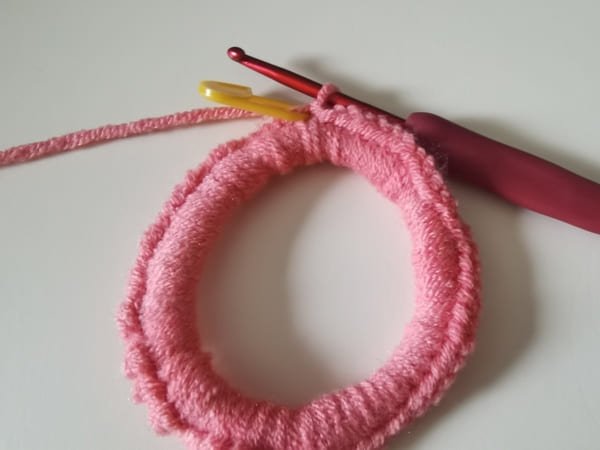
Slip stitch : yarn over, bring out the two loops on the hook,then we get one loop on the hook ,that is slip stitch.
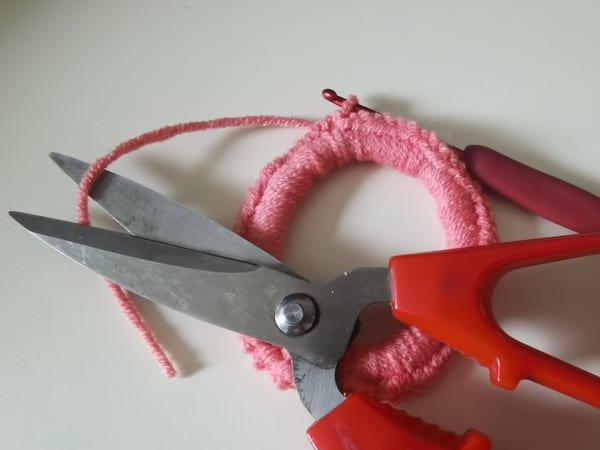
Cut yarn end.
Use hook to bring out yarn end.

Conceal yarn end: use yarn needle to conceal yarn end the next loops several times.
Conceal yarn end is completed.
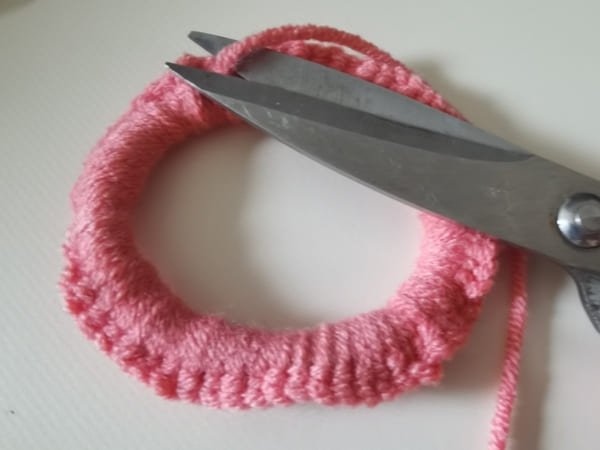
Cut off excess yarn.

Round 1 is completed.
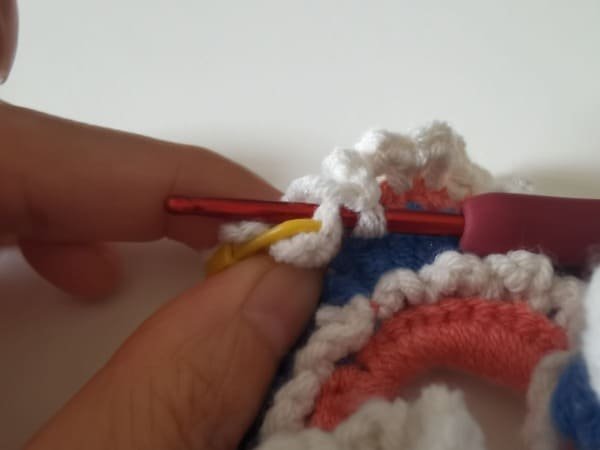
R2
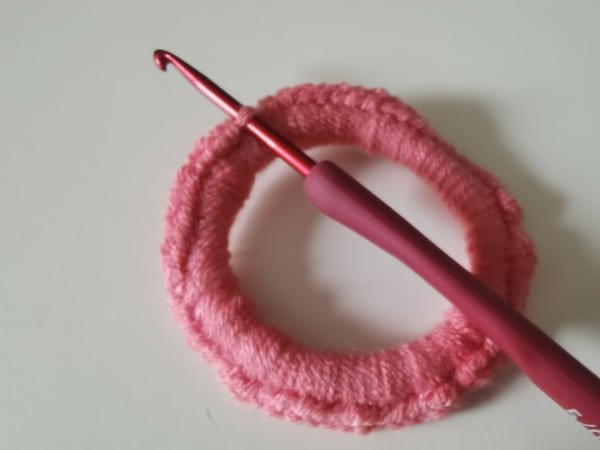
The hook insert the front loop for round 2.
Put write yarn end behind the fabric.
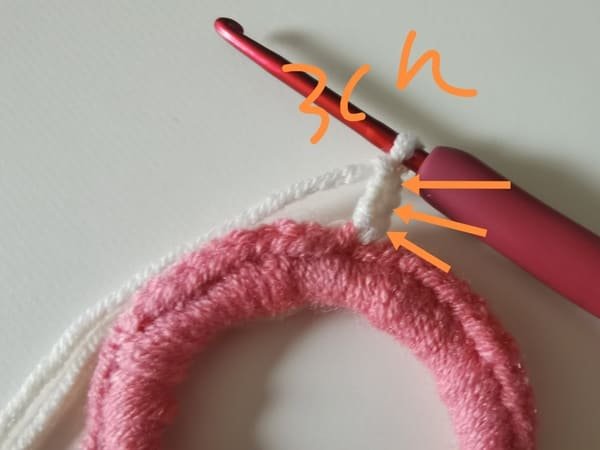
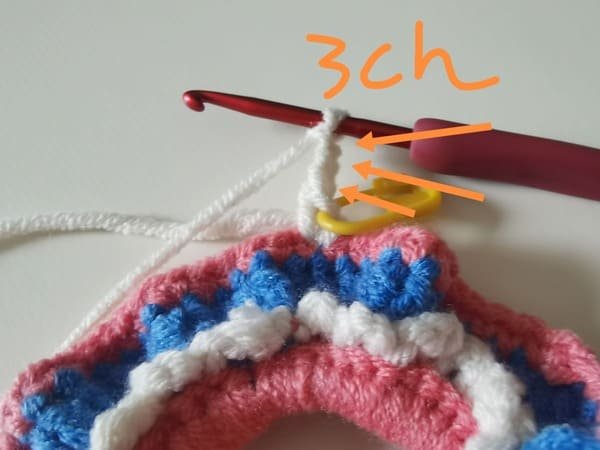
Crochet 3 chain stitch for the group
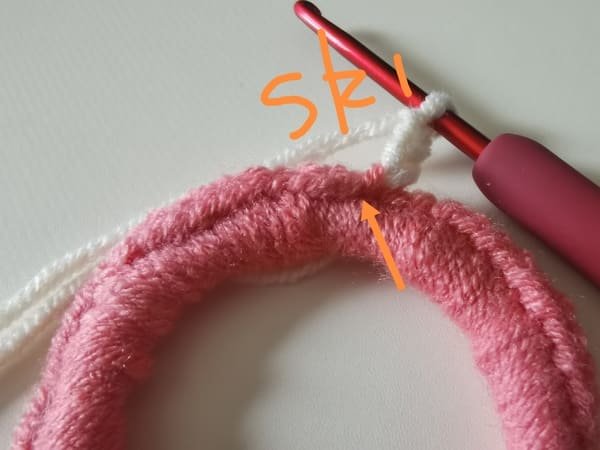
Skip one stitch.
Then slip stitch in next chain stitch.
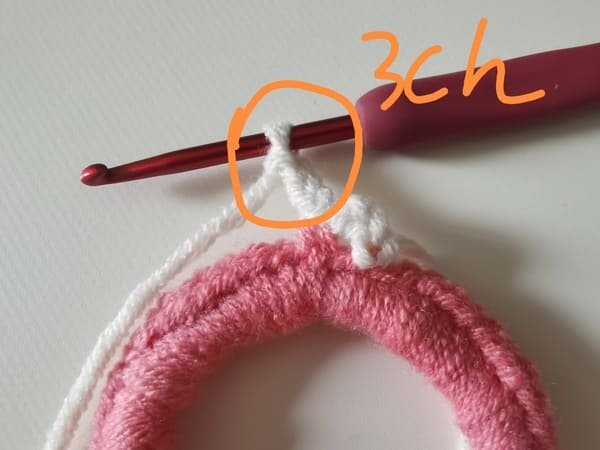
Crochet order: FLO-(3 ch, sk1,sl) repeat
Details as blow:
- Crochet 3 chain stitch
- Skip 1 stitch in next chain stitch
- Slip stitch in next front loop
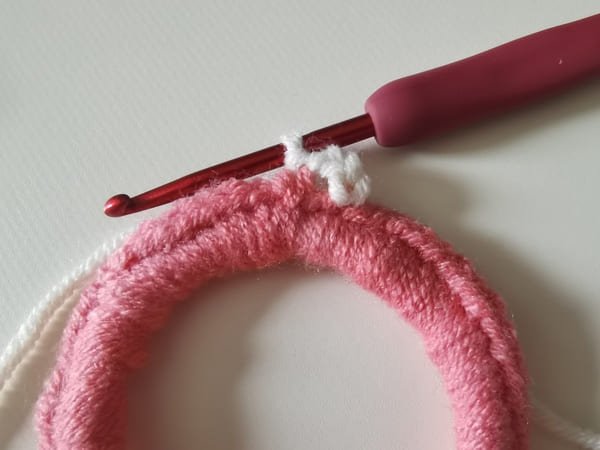
Repeat it again
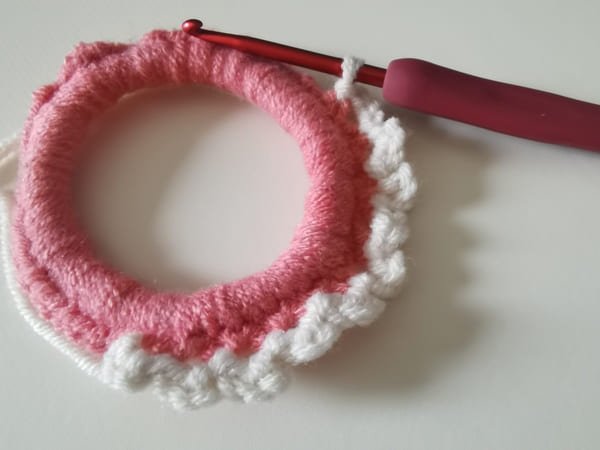
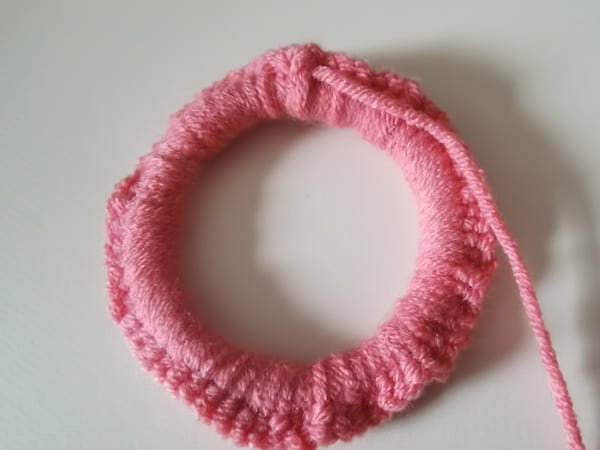
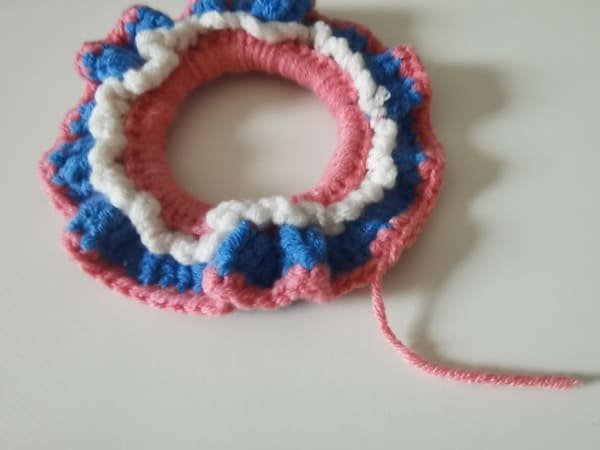
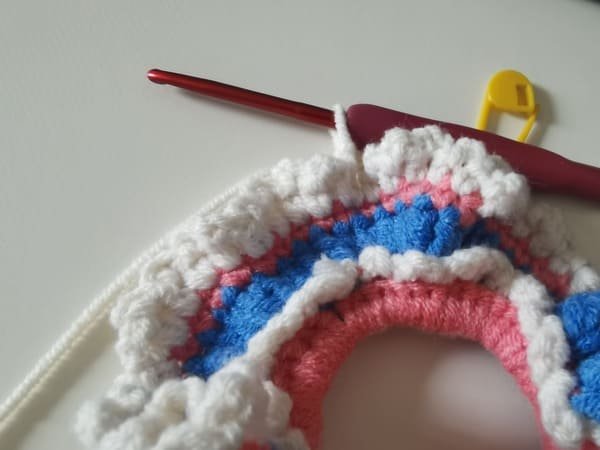
Crochet a half of round 2.
Similar as small petals.
We need crochet slip stitch until we crochet the last front loop.
Slip stitch is completed. show as picture.

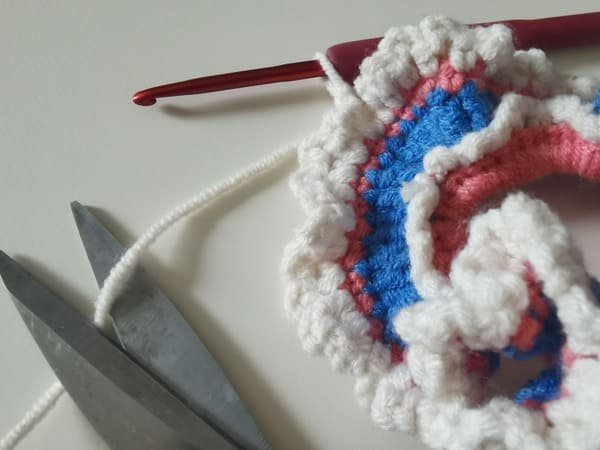
Leave 5 cm ,cut yarn end .
Use hook to bring out yarn end.
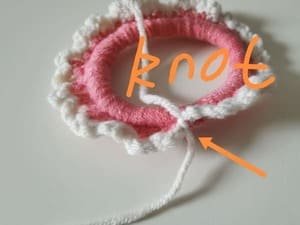
Tie knots several times, which is more secure it .
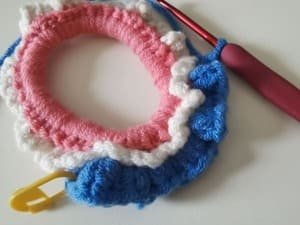
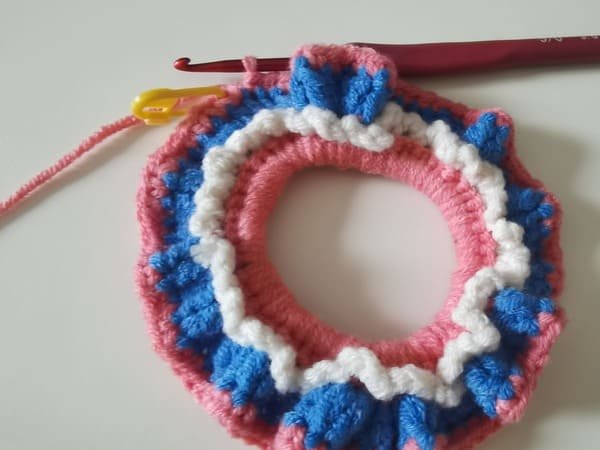
Conceal yarn end , then we get the small pedals with round 2.
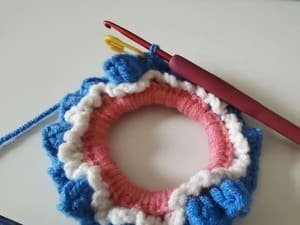
R3
The hook need insert the back loop for round 3.
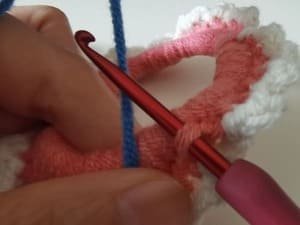
Put the blue yarn end behind the fabric.
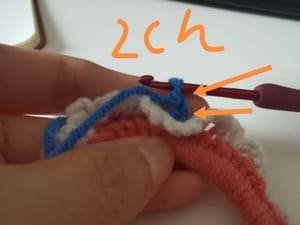
We crochet 2 chain stitches firstly.
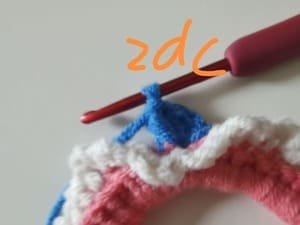
We crochet 2 double crochets in the same back loop.
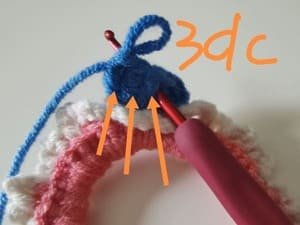
We crochet 3 double crochets in the next back loop.
When we completed the first groups, then we need put yellow marker at the first stitch.
We use crochet order (2dc, 3dc) to crochet it .
Show as picture: a part of round 3 is completed.
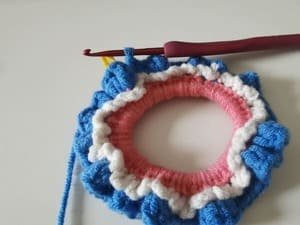
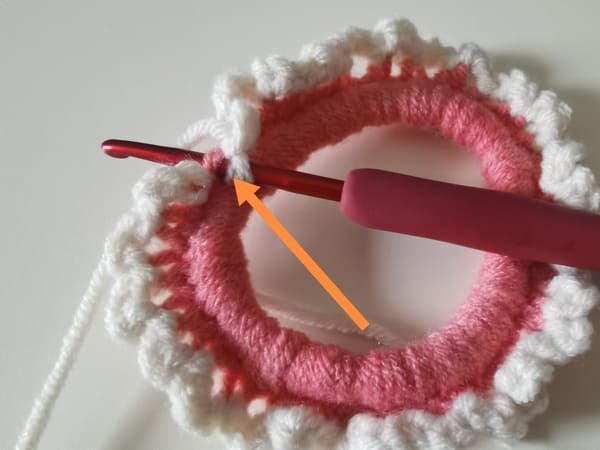
Last stitch is completed for round 3
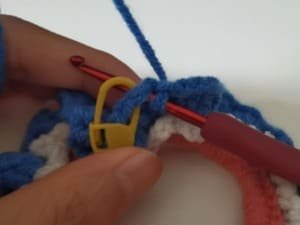
The hook insert the first stitches (with yellow marker) for slip stitch.
Slip stitch is completed( show as picture).
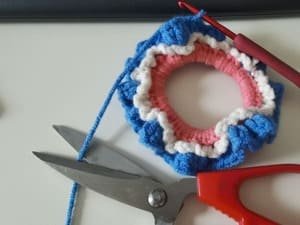
Leave 5 cm yarn end, and cut yarn end.
Use hook to bring out yarn end .
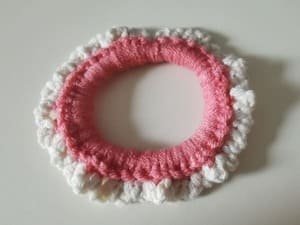
Round 3 is completed.
R4
Put the pink yarn behind fabric.
The hook insert the any of stitch for fabric.
We crochet single crochets around this round 4.
Show as picture, we had crocheted the last stitch.
Then the hook insert the first stitch for slip stitch.
Slip stitch is completed for round 4.
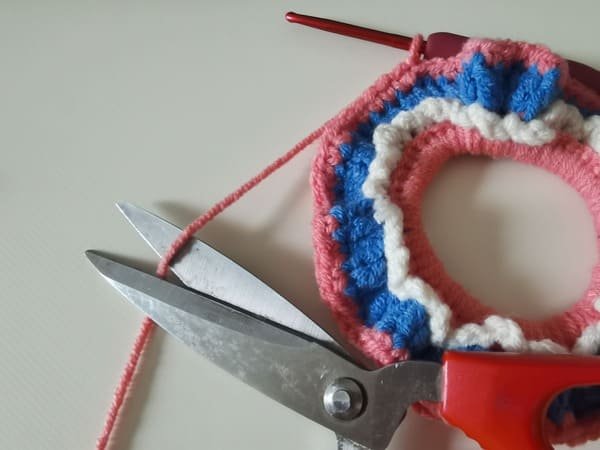
Leave 6 cm , cut yarn end .
Use the hook to bring out yarn end.
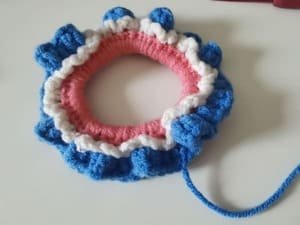
Round 4 is completed.
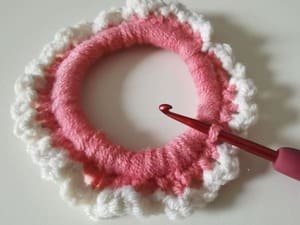
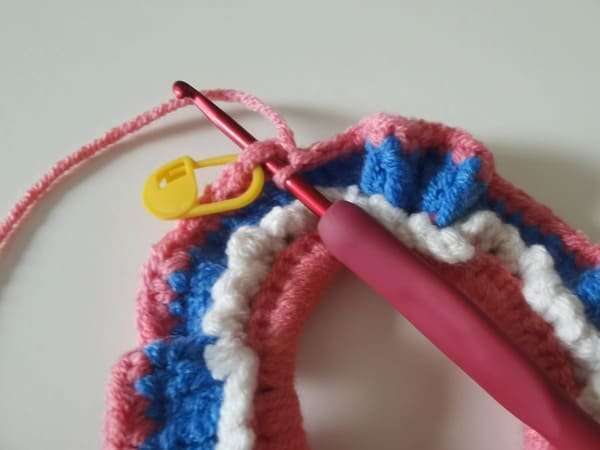
R5
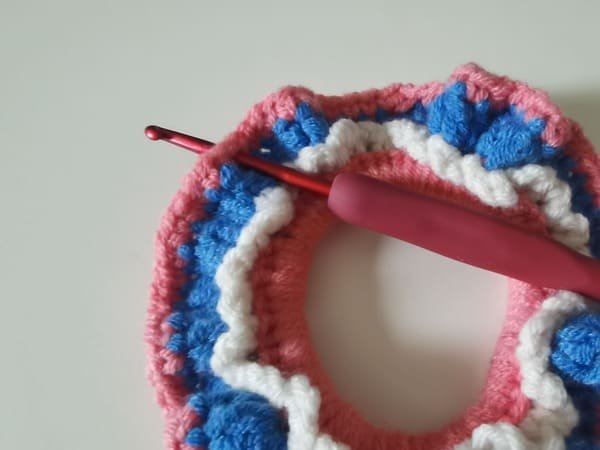
The hook insert the one of any stitch for round 5.
We need crochet single crochet firstly.
Then we put the yellow marker with first stitch.
We crochet 3 chain stitch at the single crochet .
Use same order (sc,3 ch) method ,repeated it again.
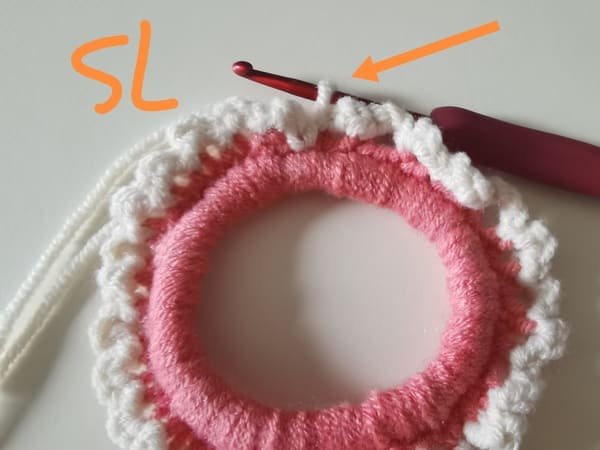
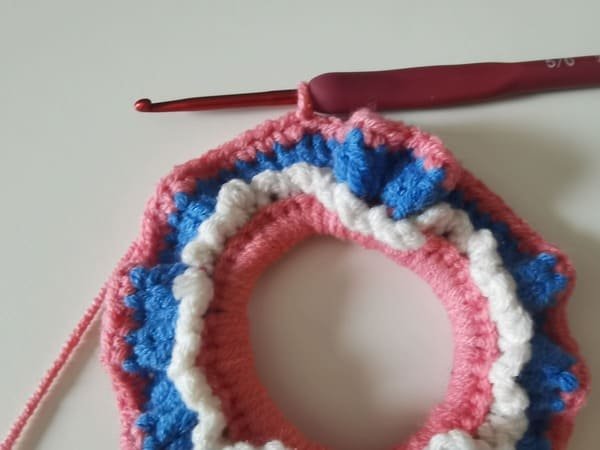
A part of round 5 is completed (show as picture).
The hook insert the first stitch for slip stitch.
Slip stitch is completed for round 5.
Leave 7 cm yarn end .
Use hook to bring out yarn end.
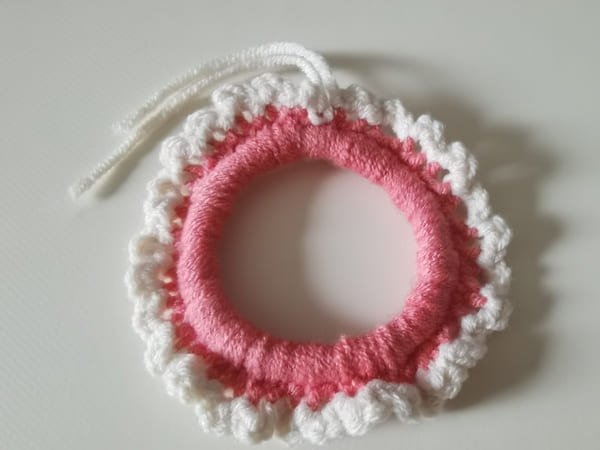
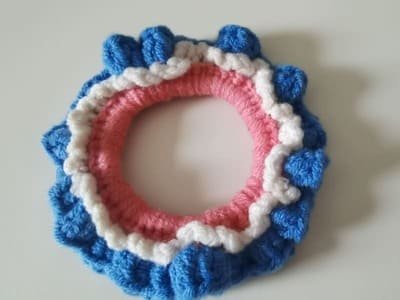
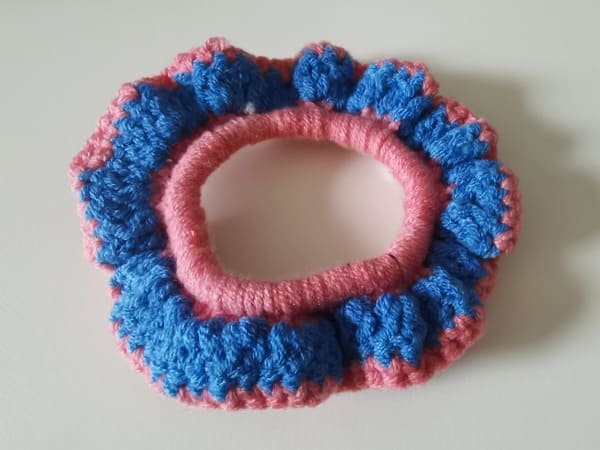
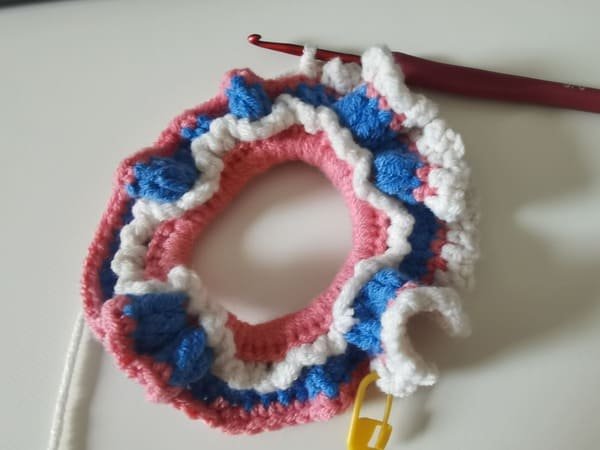
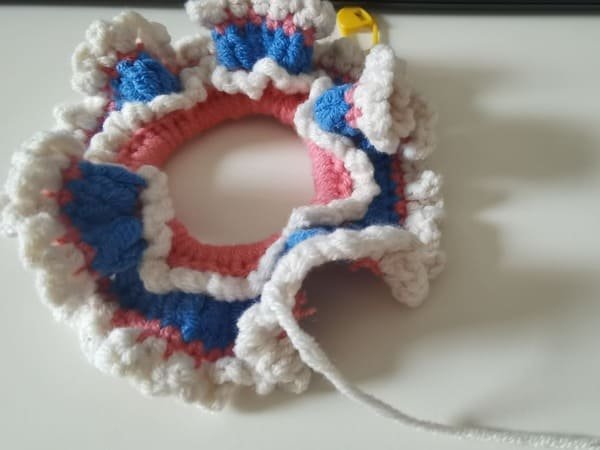
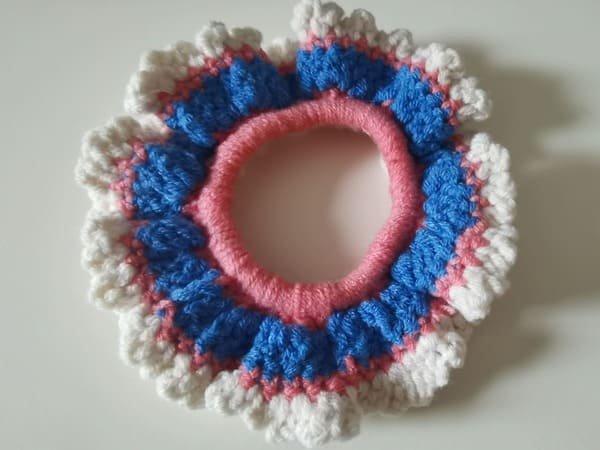
Side of round 5 is completed.
We use the rice write and pink and blue , total crochet 5 rounds to make the scrunchie, also we can other color instead it .
Another of round 5
Who doesnt love a crafty project thats as cute as it is useful? Crocheted scrunchies hit that sweet spot between fun, fashion, and function and spare a little leftover yarn at the same time. The soft, fluffy yarn slides easily across fingers and hooks.
For many of us, the motion of pulling yarn into tiny loops is its own form of meditation. Hearing the quiet clink of the hook turn into a warm spiral of fabric feels quietly satisfying after a long day. The finished band grips hair without snagging, leaving zero tug marks and no morning panic when ponytails go haywire.
A simple crocheted scrunchie always reminds us that craft projects can be practical keepsakes and little blasts of personal style all in one.
Frequently Asked Questions (FAQs)
Q:What type of yarn is best for scrunchies?
A: When we sit down to crochet a scrunchie, the first thing we do is grab a ball of yarn that feels soft and stretchy in our hands. Most of the time, a comfy cotton or a cotton-blend does the trick. Cotton yarn is breathable and smooth, plus it stays static-free all day, so it doesn t tug at your hair. If we want a little extra squish, a cotton-acrylic mix or shiny bamboo yarn slips right into the basket-easy to stretch, yet silky to the touch.
Rough fibers like mohair or straight wool get crossed off the shopping list because they snag faster than you d think. Super bulky yarn also has to go,which turns a dainty scrunchie into a wrist weight.
We search for yarn that won t chafe, keeps its shape after a dozen ponys, and, most important, treats hair kindly when you snap it on. That s how each handmade scrunchie ends up being both stylish to look at and friendly to wear.
Q:How long does it take to crochet a scrunchie?
A: A quick scrunchie crochet pattern project can burn through your spare half-hour . pick single crochet or half-double-only the easy stuff-and the whole piece snaps together in twenty minutes flat. Want ruffles, texture, Give yourself a full hour and maybe a little grace while you work.
But for Newbie , it have a more times ( more than 1 and a half hours )to completed the above scrunchie cochet pattern for your reference.
Q:Why is my crochet scrunchie flat?
A:every crafter knows that moment when the finished scrunchie crochet pattern just sits there looking sad. If yours came out flat instead of fluffy, keep reading.
- Too few stitches around the elastic ring is one of the biggest culprits. When we skimp on the number, the fabric has nothing to pull it into a ruffle.
- Yarn choice matters, too. A stiff fiber or a tiny hook can choke off stretch, so soft cotton or bamboo teamed with a size-appropriate or slightly larger hook works best.
- Finally, skip the single-row routine; extra volume comes from doubling stitches on the third round. Stack two or three double crochets in every hole and watch the magic happen.
Q:How do you wash crochet scrunchies?
- A: Hand wash:fill a bowl with lukewarm water and stir in a splash of mild detergent or baby shampoo. Swirl the scrunchie around for a few minutes-no twisting or wringing, just be gentle.
- Rinse:hold the scrunchie under clean water until every bit of soap disappears. Youll know its done when the water runs clear.
- Press out water:lay the scrunchie on a towel and press down to squeeze out extra water. Wringing will stretch the fabric and ruin the shape.
- Air dry flat:Let it dry flat so the fibers stay fluffy and bouncy.
Reference sources
1.Learn the most comprehensive guide for single crochet(sc)
Author:Sarah Stearns
Publication date: on June 15, 2021, updated:December 14, 2024
Title: How to single crochet (sc)for beginners
Summary as blow:
- Step-by-Step Single Crochet for Beginners
- Single Crochet into a Foundation Chain
- Single Crochet into another Row
- Single Crochet in the Round
- Increases and Decreases
- Working Single Crochet in Different Loops


