


Double Crochet Decrease The Ultimate Beginner’s Guide|(Step-By-Step With Explanation)
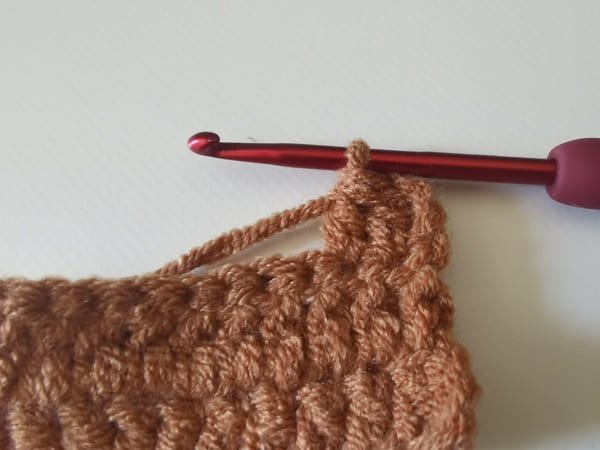
Table of Contents for double crochet decrease
Double crochet decrease: as we design the rows or contours of our crocheted pieces, we frequently encounter a deceptively straightforward yet highly effective maneuver: the double-crochet decrease. whether the goal is to contour a neckline, slim down a sleeve, or introduce gentle curves to an amigurumi creature, mastering a tidy decrease becomes an essential skill.
This guide walks through the steps required to execute a double-crochet decrease with precision. It covers the yarn and tools you will need, offers practical tips for ensuring even tension, identifies mistakes that tend to arise, suggests appropriate projects for practice, and answers several frequently asked questions—all aimed at giving you the confidence to shape your work regardless of the pattern in front of you.
What is a double crochet decrease?
A double crochet decrease, commonly noted as dc2tog, serves to merge two individual stitches into a single unit.
This technique effectively lowers the overall stitch count, enabling the crocheter to contour the piece or create a gradual taper without disrupting the fabric’s rhythm.
Materials we’ll need
| Material | Recommended Uses |
|---|---|
| Yarn | Cotton yarn is ideal for beginners testing new techniques. |
| Crochet Hook | Hook is same as yarn thickness. |
| Scissors | Keep them sharp for a clean, professional finish. |
| Tapestry Needle | Use this for tidying up loose yarn tails at the end of your project. |
| Stitch Markers | Conveniently mark decreases or pattern repeats in both rounds. |
What can we make with double crochet decrease?
Hats
Most hat patterns start with a wide band and end up hugging your head snugly. You can achieve that rounded top by working a few double or single crochet decreases across the crown. The trick is to space the decreases evenly so the last few stitches pull together neatly.
Sweaters
To keep sleeves from looking like floppy tubes, many crocheters taper them toward the wrist. Simply decrease one stitch every few rows, or add a tighter ribbed cuff at the end. Waist shaping can be handled the same way: add a couple of decreases in the sides near the bottom hem for a flattering silhouette.
Shawls
Classic triangular shawls gain their graceful shape from smart stitch management. You can create that signature point by decreasing one or both ends of the shawl edge as you complete each row. A few simple double crochet decreases make the fabric bend smoothly without flattening.
Bags
Bottom-heavy bags need structure. You can smooth the base by working a rounded series of decreases in the first few rounds, allowing the sides to flare out gently. If you want a slimmer profile, taper the sides upwards by skipping a stitch or two every few rows.
Amigurumi
Stuffed creatures owe much of their personality to precise shaping. By reducing stitches or skipping a few in the last few rounds of a body, head, or limb, you can avoid awkward lumps and direct the yarn where you want it to go.
Chevron Blankets
The zigzag effect of a chevron blanket isn’t all about increases. Each peak and valley relies on a carefully placed decrease at the dip of the wave. Pairing these with tall increase stitches keeps the fabric looking sharp and well-defined.
Mastering these small techniques opens up a world of polished projects, so don’t hesitate to start practicing them on your next cozy creation!
How to do double crochet decrease?
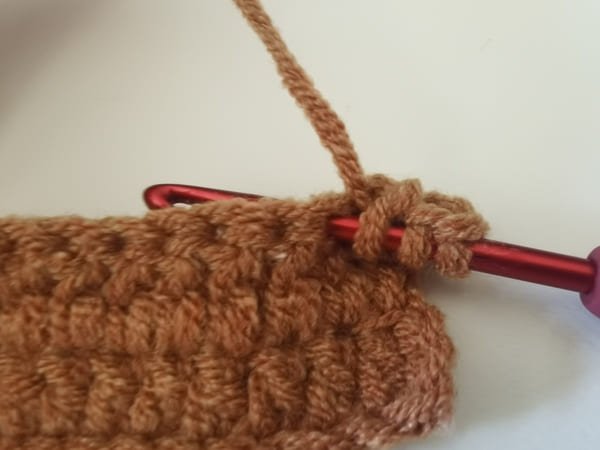
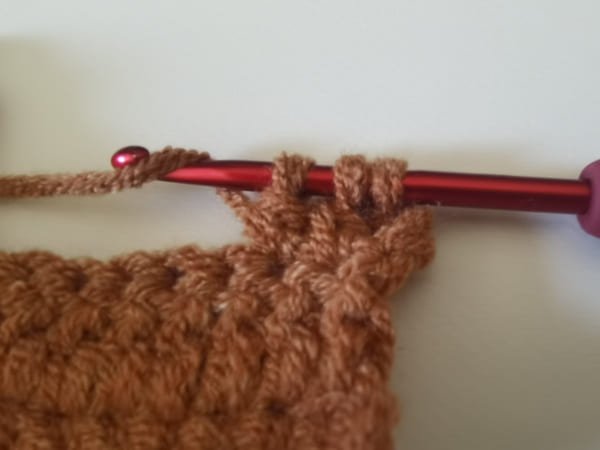
Step 1: yarn over, we need insert the hook into the first stitch firstly.
Steep 2: Yarn over, bring out 1 loop (3 loops on the hook).
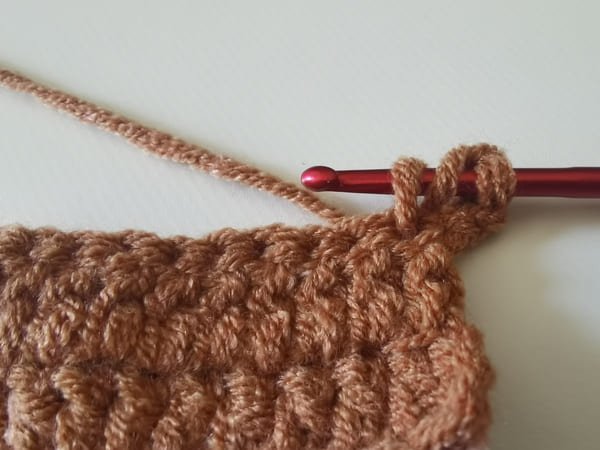
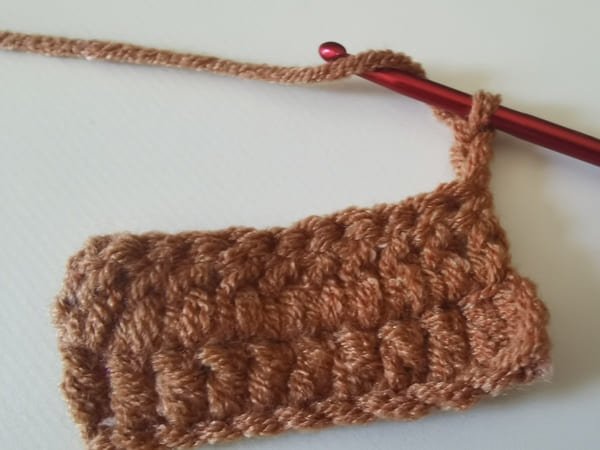
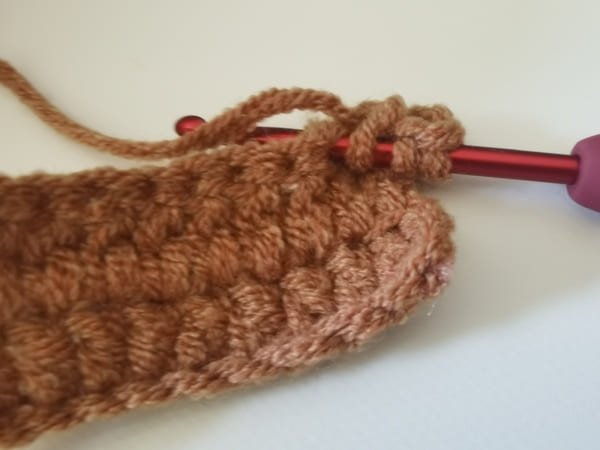
Step 3: Yarn over,bring out 2 loops (2 loops on the hook).
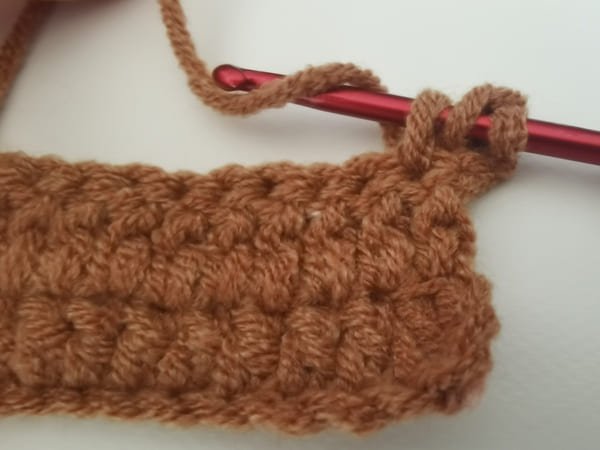
Step 4 : Yarn over, we need insert hook into the next stitch.
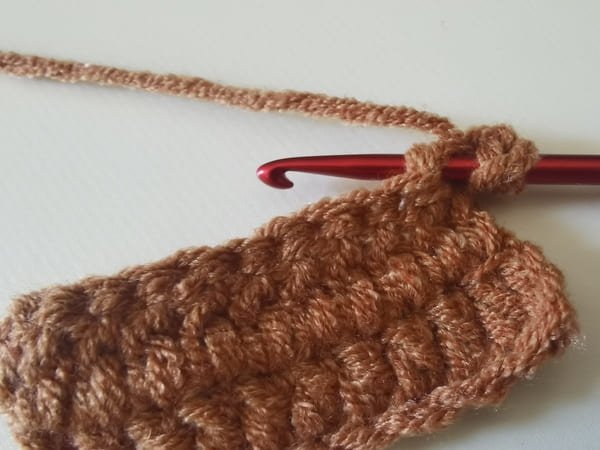
Step 5: Yarn over, bring out a loop (4 loops on the hook).
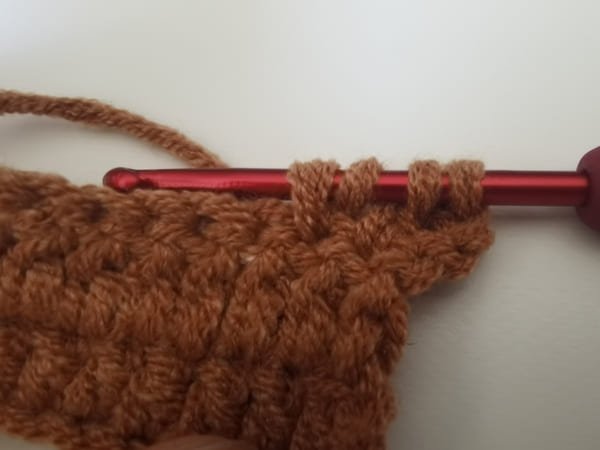
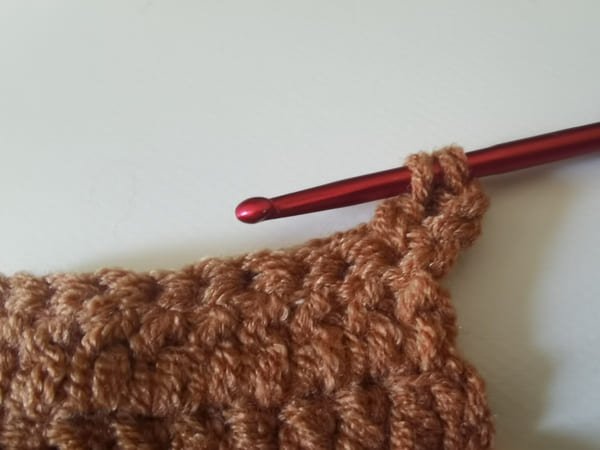
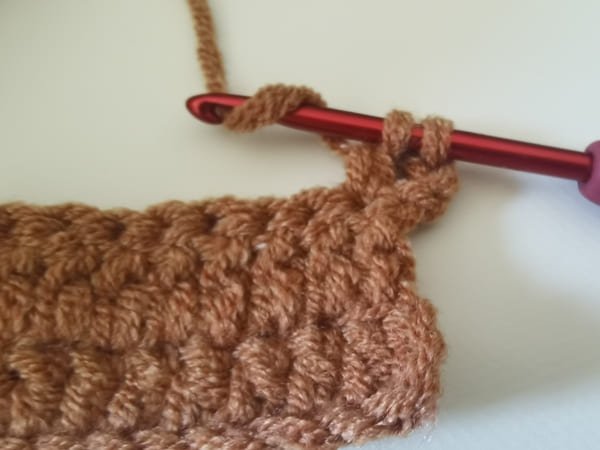
Step 6: Yarn over, bring out 2 loops (3 loops on the hook).
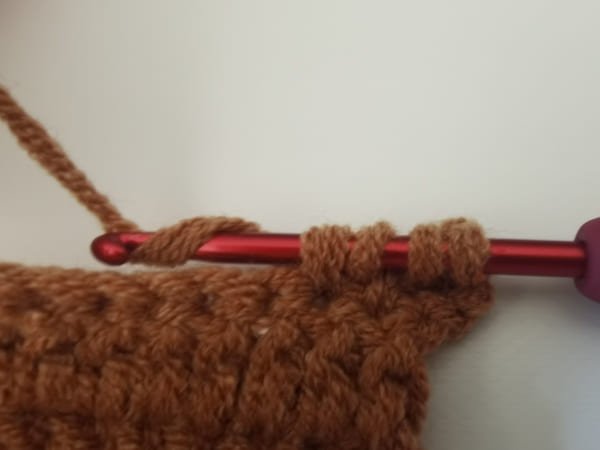
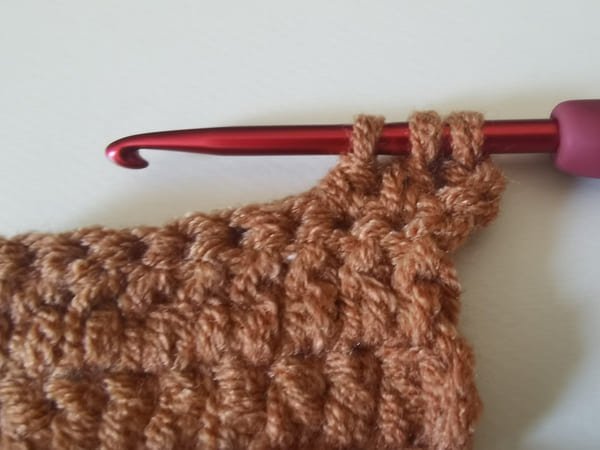
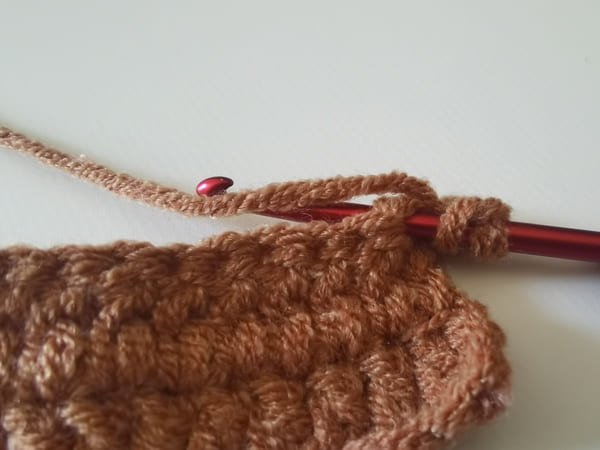
Step 7: Yarn over, bring out all 3 loops.( 1 hoop on the hook, which is double crochet decrease).
Pro tips to make double crochet decrease look clean
- Maintaining an orderly appearance in our decreases hinges on two key factors: tension and technique. When the tension is too relaxed, gaps can form and compromise the overall fabric; conversely, excessive tightness produces unsightly puckering.
- To ensure strength and precision, always insert the needle under both legs of the stitch V before pulling the yarn through. This simple adjustment stabilizes the line of the decrease and helps produce a clean, professional finish.
Flat vs. in the round
The double crochet decrease method maintains its fundamental approach regardless of whether the project is being worked in rows or in the round. The primary distinction between the two contexts lies in how and when the decreases are applied.
When crocheting flat rows, it is common to execute decreases at both the start and the finish of a row in order to achieve the desired shaping of the garment or motif. Conversely, when working in the round—such as on hats, sleeves, or amigurumi—the decreases are frequently spaced at regular intervals, for instance every sixth stitch, in order to create a smooth, domed silhouette.
Regardless of the technique employed, success hinges on thorough pattern review; understanding the designer’s instructions will reveal exactly where each decrease needs to occur for the final piece to take on the intended form.
How to count stitches after double crochet decrease?
For example:
2dc + 1 dc2tog = 3 stitches, not 4.
If a round begins with 12 stitches and includes 2 dc2tog decreases, it should end with 10 stitches
Common mistakes (and how we avoid them)
- Skipping the wrong stitches
Decreasing might seem simple, but it’s easy to rush and accidentally skip more stitches than planned. The key is to remember that you should be working into two neighboring stitches, Slow down at the end of the row and double-check before you pull the yarn through. - Decreasing in the wrong row
Every pattern has its own rhythm, and not every row should get a decrease. If your piece suddenly looks like it’s tightening up too quickly, chances are you’ve added an extra decrease or two along the way. Give the pattern a good read-through before you start, and trust the designer’s spacing. - Losing track of stitch count
Nothing is more frustrating than counting your stitches only to realize you’re off by five. Keep it simple: drop a stitch marker at the beginning of each row or jot a quick tally on paper. Those small reminders save a lot of frogging later!
Frequently asked questions (FAQs)
Why does my dc2tog leave a hole or gap?
When a double crochet decrease shows an unsightly gap, a few common causes are usually to blame.
- First, variations in tension can disrupt the stitch’s appearance; pulling the loops too tightly restricts the fabric, while an overly loose yarn-over leaves excess slack.
- Second, correct stitch placement is critical. If the hook is inadvertently skipped one stitch or inserted incorrectly, the resulting decrease will not align properly with the surrounding fabric.
With mindful repetition, most crocheters discover a consistent technique that produces neat, seamless decreases.
Reference sources
1.Learn the most comprehensive guide for single crochet(sc)
Author:Sarah Stearns
Publication date: on June 15, 2021, updated:December 14, 2024
Title: How to single crochet (sc)for beginners
Summary as blow:
- Step-by-Step Single Crochet for Beginners
- Single Crochet into a Foundation Chain
- Single Crochet into another Row
- Single Crochet in the Round
- Increases and Decreases
- Working Single Crochet in Different Loops


