


Single Crochet Two Together (sc2tog): The Ultimate Beginner’s Guide

Table of Contents
Single crochet two together: when we crochet, shrinking the fabric is often part of the plan / that usually means making fewer stitches. One of the cleanest ways to do that is by working a single crochet two together, or sc2tog. This little trick gives us a quick tidy pull together, so everyone-from beginners to pros-uses it on hats, toys, sweaters, and any piece that needs soft edges.
In this guide well break down sc2tog: well show the motion step by step, explain when and why to reach for it, and give fixes for common hiccups along with a few fun twists. So grab your hook, find some yarn, and lets jump right in!
What is single crochet two together (sc2tog)?
When a pattern tells us to sc2tog, it means we will pinch two stitches into one. In short, we insert our hook in each stitch, yarn over, and pull the work together at the top. Doing that cuts the stitch count by two while leaving a nearly invisible seam.
Why should we learn single crochet two together?
Decreasing in crochet works much like the reverse of adding stitches, pulling parts together to close gaps, round edges, or finish a piece snugly. Heres why *sc2tog deserves a regular spot on our hook:
- Versatility: Almost any pattern can ask for it, from hats to dishcloths.
- Simplicity: After a few tries, the motion feels second nature.
- Clean Shaping: It hides its own seam, leaving gentle curves instead of sharp corners.
- Essential for Amigurumi: Plush toys depend on sc2tog to give heads, bodies, and limbs their final form.
Whether we are just starting out or stitching our hundredth blanket, we circle back to this stitch over and over.
How to single crochet two together(step-by-step)
Ready to try it? Lets go slow so you can build muscle memory with each loop.
What youll need:
- Yarn: Any weight works, but medium makes learning easier because stitches show clearly.
- Crochet hook: Pick a size the yarn label suggests, usually a 5mm or 6mm for medium.
- Scissors.
- Yarn needle: Well use this later to tuck ends away.
Step-by-step instructions:
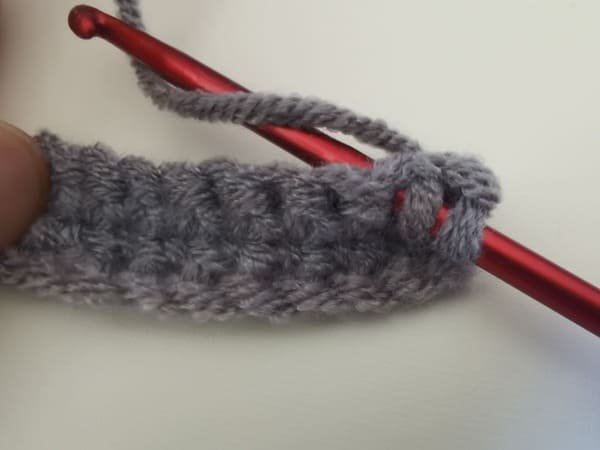
Insert your hook into the next stitch.
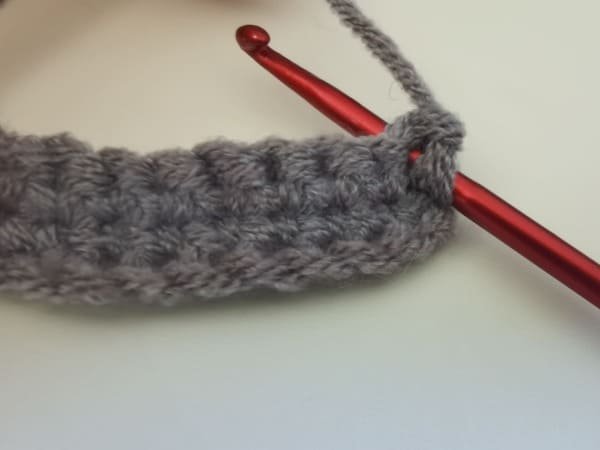
Yarn over and pull up a loop (you now have two loops on your hook).
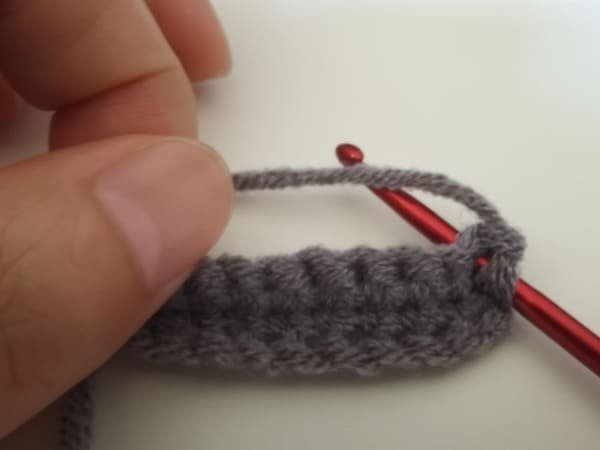
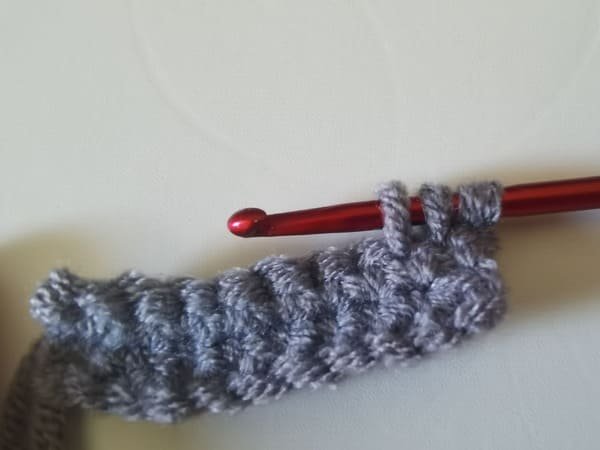
Insert your hook into the next stitch.
Yarn over and pull up another loop; you now have three loops on your hook.
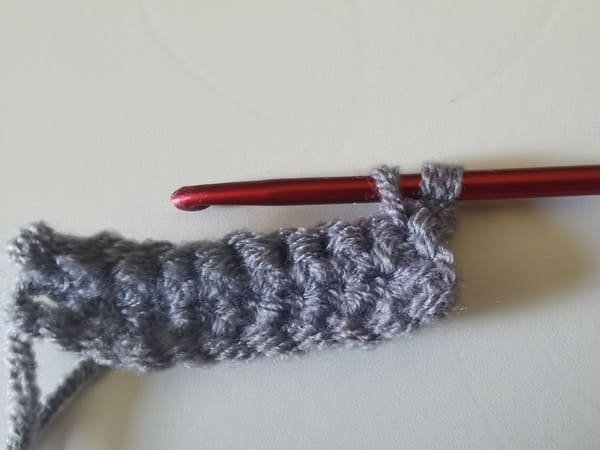
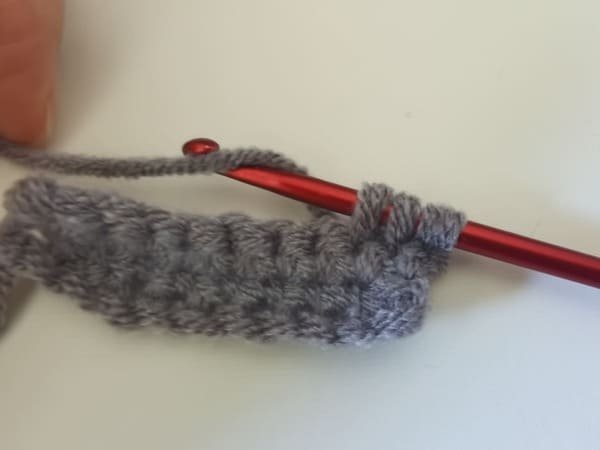
Yarn over once more and pull through all three loops.
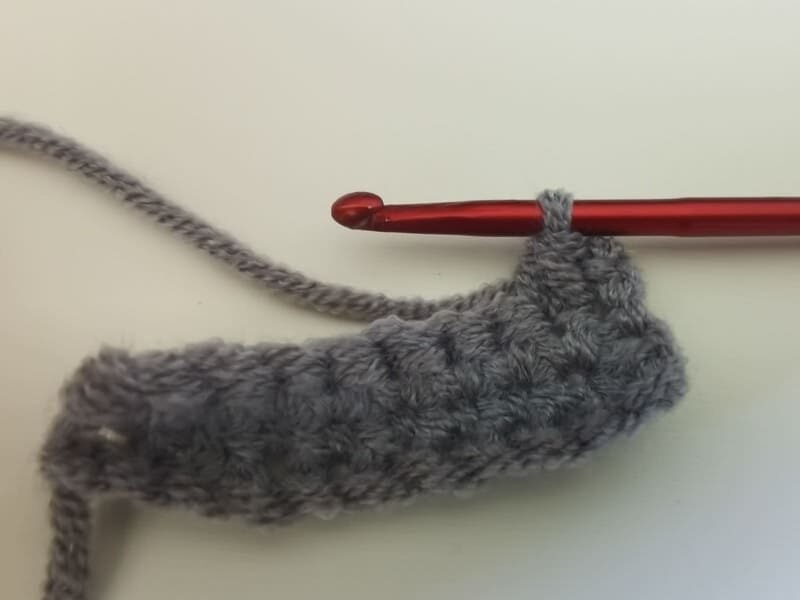
Congratulations! You just finished one single crochet two together, or sc2tog.
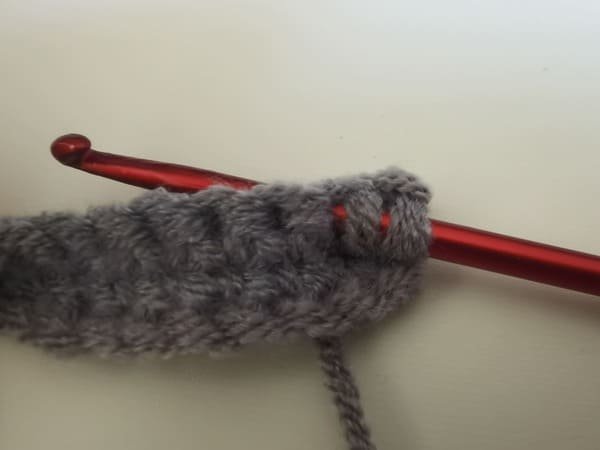
Repeat that exact motion each time your pattern says to decrease.
Common mistakes and how we fix them for single crochet two together
1. Skipping stitches accidentally
What happens:
A missed stitch before starting the sc2tog can throw off our edge and change the total stitch count.
How we fix it:
Count stitches before and after the decrease so we know exactly where we stand.
Drop a stitch marker in the first stitch of each row or round, and then just follow its lead.
Slow down, especially when working in the round; the yarn will still be there when we get t– believe me!
2. Pulling the yarn too tight
What happens:
Yarn pulled too tightly during the decrease leaves the fabric puckered, almost as if it were pinched in one spot.
How we fix it:
Keep tension relaxed and steady from the first to the last stitch, every row.
When finishing the sc2tog, resist the urge to yank; a gentle pull will do.
Still worried? Grab a spare piece of yarn and test on a swatch until happy with the feel.
3. Forgetting the final yarn over
What happens:
We lose track mid-stitch and forget the last yarn over, so several loops stay waiting on the hook.
How we fix it:
Keep the full step order clear: insert, yarn over, pull up a loop (twice), yarn over, pull through all the loops.
Say those steps aloud or to a patient dog while we work, and it sticks way better.
4. Uneven decreases
What happens:
If some sc2tog sit higher or lower than others, the whole piece looks lopsided, like its been standing on one leg.
How we fix it:
Line the decreases up where the pattern tells us to, and repeat the same move each time.
A quick glance after every few stitches will show if we are drifting off course.
Grab some graph paper or a quick sketch so you can clearly see where each decrease line should sit.
5. Holes forming at the decrease
What happens:
Suddenly little gaps appear exactly where you thought the line would even out.
How we fix it:
Test the invisible decrease trick when you work on amigurumi, or simply make every stitch a touch tighter. Make sure you’re hooking under the right loops each time, and pay attention to how hard you’re pulling the yarn.
Tips to avoid mistakes
Read through the entire pattern first, so you know every spot that asks for a decrease.
Practice those sc2tog stitches on leftover yarn until the move feels natural.
Finally, take breaks. Tired hands are far more likely to create wobbly tension.
By learning these quick fixes and giving them a try, we can turn the sc2tog into a clean, pro-looking line across any crochet project.
Comparing vs other decreases
| Decrease Type | Use Case | Appearance |
|---|---|---|
| sc2tog | General shaping in most projects | Slightly visible seam |
| invisible dec | Amigurumi and seamless work | Almost disappears |
| skip stitch | Quick shaping when precision isn’t key | Tiny hole or gap |
| sc3tog | Dramatic curve, sharper silhouette | Noticeable pull line |
FAQ
How does sc2tog compare to an invisible decrease?
Both stitches twist two loops together and leave one stitch behind, so they seem almost identical at first. The key difference is that the invisible decrease lifts only the front loops, giving finished work a cleaner look. That is why amigurumi makers favour it-the tighter fabric hides doll eyes and stuffing seams better.
Quick Comparison:
- sc2tog: Slides under both loops.
- Invisible Decrease: Hooks only the front loops for a gentler slope.
Use the invisible method when shapes must stay smooth. Reach for sc2tog whenever a project calls for a sturdy edge and hides them behind texture.
Is sc2tog beginner-friendly?
For sure! Many crafters grade sc2tog as the first decrease worth learning after the single crochet. It builds on skills we already know, so beginners rarely feel lost. A little practice on a spare swatch is all it takes to feel at home with it.
Beginner tip: Work a small test square before diving into a hat or basket. Watching how the stitches hug together on the swatch shows exactly what will happen later. Plus, it boosts confidence, which is half the fun of crochet.
Does sc2tog work in the round?
Absolutely! The sc2tog stitch works beautifully in round projects like amigurumi, baskets, or hats. Because it draws two stitches together, it lets us shape the fabric evenly as we move from one round to the next. This means we can slowly close small openings or gently lower the overall stitch count-without awkward steps.
Example: Picture the top of a beanie or cap you’re crocheting in circles. When you use sc2tog at the crown, the fabric gathers together cleanly and leaves no little holes.
How can we avoid holes when doing Sc2tog?
Even when the technique is simple, tiny gaps can sneak in. Here’s how to keep your work looking neat:
- Maintain steady tension. Stitches that are neither too loose nor too tight close up better.
- Try the invisible decrease. This method tilts the angle so that the edges barely show.
- Insert the hook right. Aim under both loops unless the pattern says otherwise. Skimming only one loop can leave a hole.
- Practice with smaller hooks. Thinner yarn often exposes mistakes, so tightening your gauge shows where to improve.
Pro Tip: When you’re making stuffed toys or any piece with very tight stitches, switching to the invisible decrease can save hours of stitching and ripping.
Can we substitute sc2tog for other decreases?
Many times, yes- but be careful! Each decrease shapes the fabric differently and may affect drape, stiffness, or even the overall look. If the pattern calls for skipping a stitch to leave a pretty hole (and it usually will say so) sc2tog will fill that space, so the decoration vanishes.
When to substitute: Use it whenever you want a smoother, tighter finish and don’t mind losing any stylistic detail the original decrease offered.
When a pattern doesnt use open holes, seeing where one stitch begins and another ends can get tricky.
How do we count stitches after doing sc2tog?
The short answer is that each sc2tog still counts as one single stitch. So if you start a row with twenty stitches and work that decrease five times, you end with fifteen stitches.
Tip: Always count at the end of the row or round to stay on track.
Reference sources
1.Learn the most comprehensive guide for single crochet(sc)
Author:Sarah Stearns
Publication date: on June 15, 2021, updated:December 14, 2024
Title: How to single crochet (sc)for beginners
Summary as blow:
- Step-by-Step Single Crochet for Beginners
- Single Crochet into a Foundation Chain
- Single Crochet into another Row
- Single Crochet in the Round
- Increases and Decreases
- Working Single Crochet in Different Loops


