


Crochet Peach Pattern The Most Comprehensive Step-By-Step Explanation
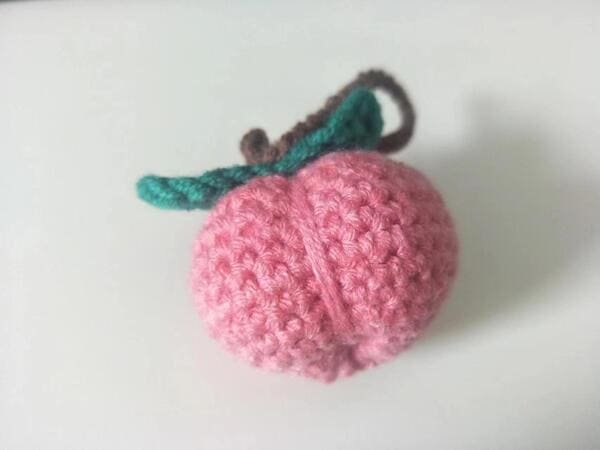
Table of Contents for crochet peach pattern
Material kit of crochet peach pattern
- Hook: 3.0mm
- Stuffing: (polyester fiberfill)
- Yarn(dark green&brown&pink )
- Yarn needle
- Marker
List of necessary tools
- Scissors
Abbreviation for crochet peach pattern
These are the required abbreviations for crochet peach pattern
- ch = Chain stitch
- sc = Single crochet
- sl =Slip stitch
- inc = Increase (usually 2 stitches in the same stitch)
- dec =Decrease (typically done by crocheting two stitches together)
- st(s) =Stitch(es)
- mc =Magic circle (or magic ring)
- hdc=half double crochet
- dc=double crochet
Best selling products
-

Raffia Cross Pattern Basket Handbag Kit
$19.99 -

Hexagonal Bucket Bag Kit
$29.99 -

Raffia Handbag Kit
$29.99 -

Hammock Bag Kit
$29.99 -

Wheat Bucket Bag Kit
$19.99
Buy crochet peach pattern kit
The peach design allows us to think about soft color palettes like blush pinks, and green for the leaf which is a lovely pop. In addition, it is quick and easy and perfect for the giver’s soul as much as the recipient’s. In added detail, the crocheted peach is uniquely fantastic because it depicts silliness paired with the artisan charm of gentle TLC from the creator.
All the essential parts are included in the Crochet Kit: yarn of good quality, stuffing, a robust crochet hook, and an instruction sheet. Those are all that is needed, so whether it is crafting or gifting, it is mess free as well as full of happiness. Something good is about to be made and it is full of sweet crochet touches.
Tips
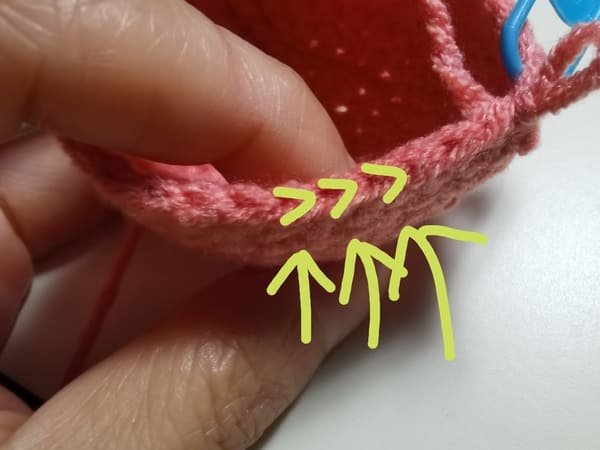
As with all rounds on a crochet piece, this one too has its distinct division of stitches, which as for this round, to be hand crocheted rightly, must be numerically precise.
A single crochet stitch is represented with a letter and V symbol, thus, termed a stitch.
Despite having some experience crocheting, I tend to forget stitches quite often.
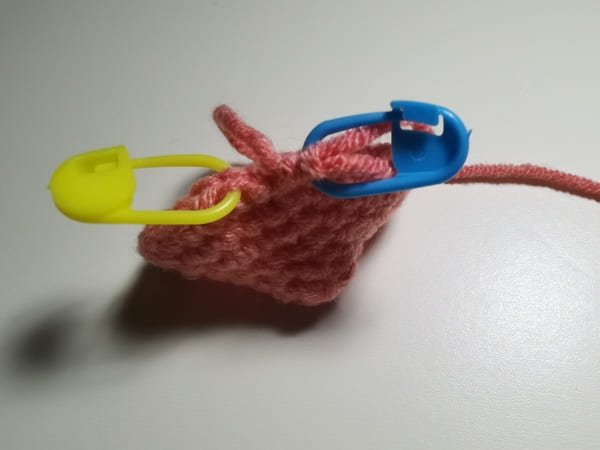
For the purposes of this article, the marking button refers to the yellow button which I suggest beginner crocheters to use after they finish their very first stitch.
Ensure you put on the blue marking button as shown in the picture after doing your final stitch.

Beginning with a chain stitch ensures the piece is even and manages the height of the rounds while crocheting.
The image shows that each raised circle is a round.
In this case, we have to determine how many rounds are there so that the total number of crochet rows is accurately verified .
Crochet the body (use pink yarn )for crochet peach pattern
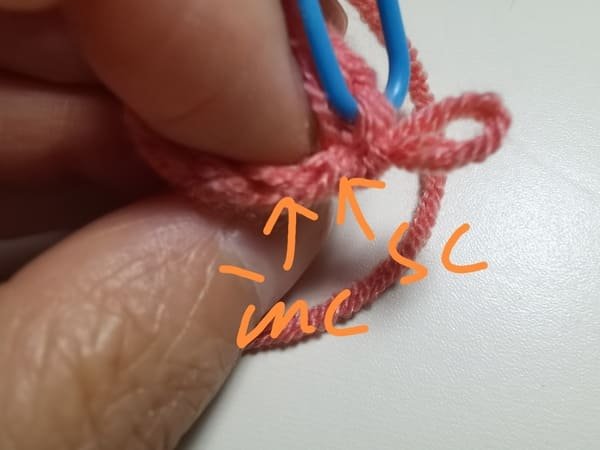
- R1: 6 sc into mc(6)
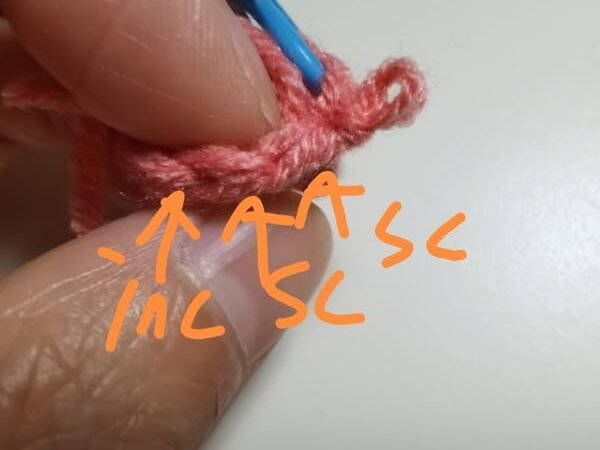
- R2:(sc,inc)*3(9)
- R3: (2sc,inc)*3(12)
- R4:(sc,inc)*6(18)
- R5:(2sc,inc)*6(24)
- R6:(3sc,inc)*6(30)
- R7-R11:30sc(30)
- R12:(3sc,dec)*6(24)
- R13:(2sc,dec)6(18)
- R14:(sc,dec)*6(12)
- Fiberfill
- R15:dec*6(6)
R1
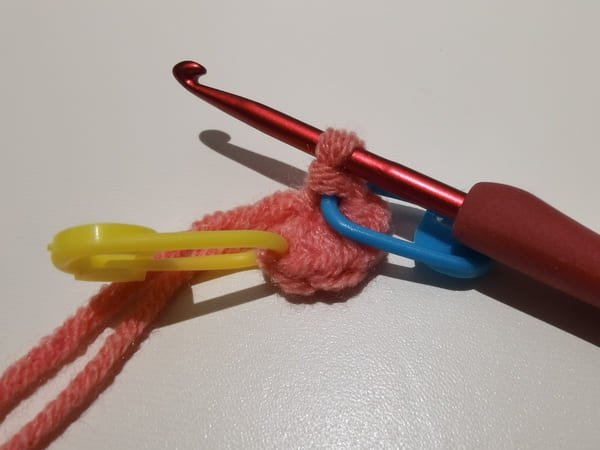
6sc into the magic ring .
Magic ring(mc): create the magic ring with your left hand’s thumb and index finger by drawing the yarn end towards the left and pinching the yarn with the right hand. this method will help in making the center of the circle or the part of the circle very small which can be compared to O gap.
In slip stitch(sl), take the hook into the first yellow V shape stitch. yarn overs and pull through two outer loops which are on the hook. then we get one loop this is called slip stitch.
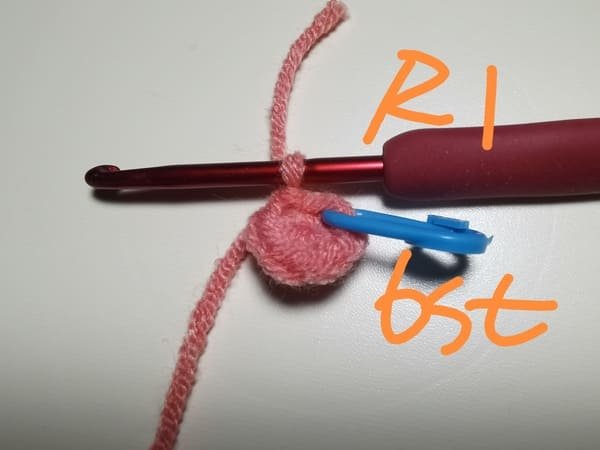
After the last slip stitch, round 1 contains 6 stitches.
Want to learn magic ring , please click:How To Crochet Magic Ring ? l Step-By-Step l Video & Text &Photo
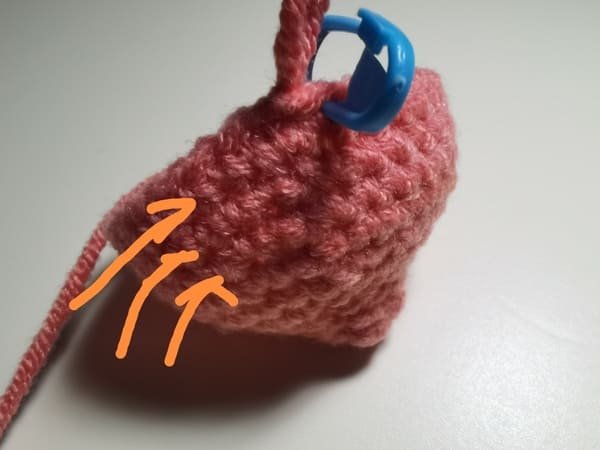
R2
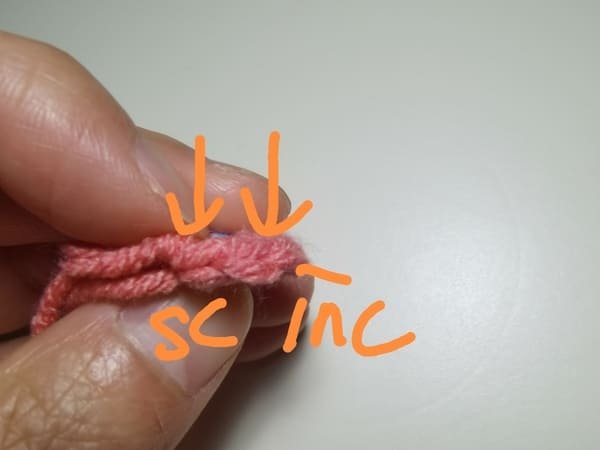
Crochet Order:(sc,inc); repeat three times.
As we are two stitches away from finishing this round, then crochet sc, inc again.
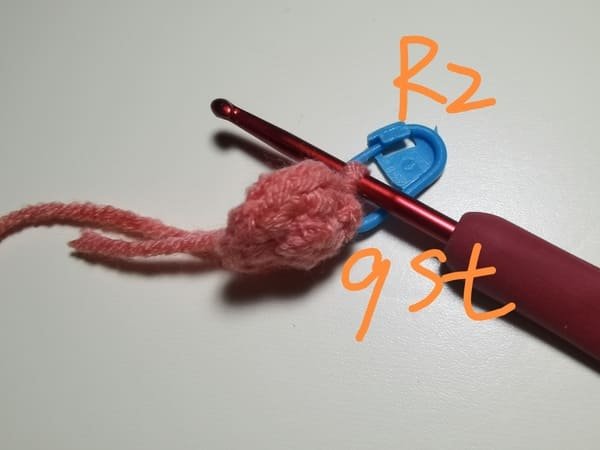
After the last slip stitch, round 2 contains 9 stitches.
R3
Crochet Order:(2sc,inc); repeat three times.
As we are three stitches away from finishing this round, then crochet 2sc, inc again.
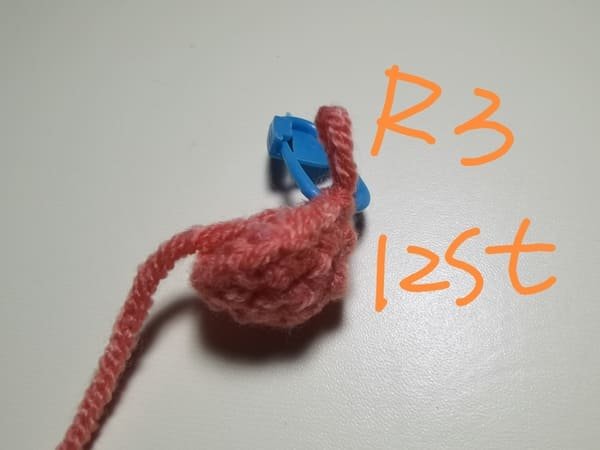
After the last slip stitch, round 3 contains 12 stitches.
R4
Crochet Order:(sc,inc); repeat six times.
As we are two stitches away from finishing this round, then crochet sc, inc again.
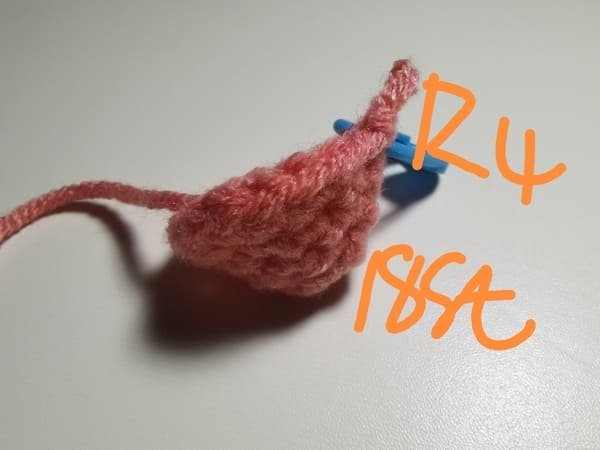
After the last slip stitch, round 4 contains 18 stitches.
R5
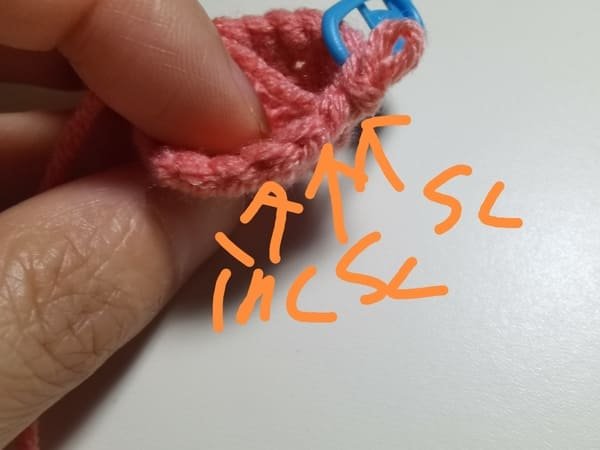
Crochet Order:(2sc,inc); repeat six times.
As we are three stitches away from finishing this round, then crochet 2sc, inc again.
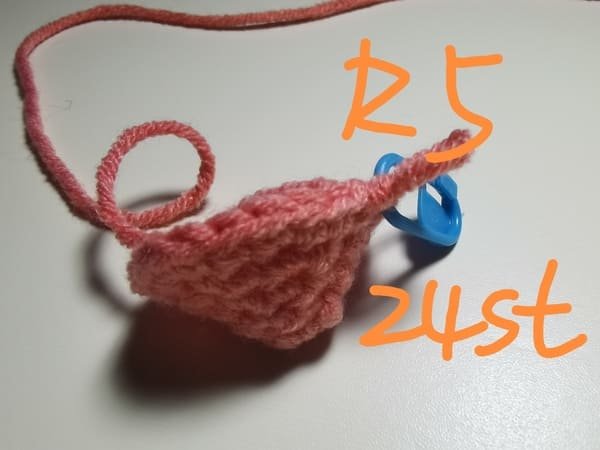
After the last slip stitch, round 5 contains 24 stitches.
R6
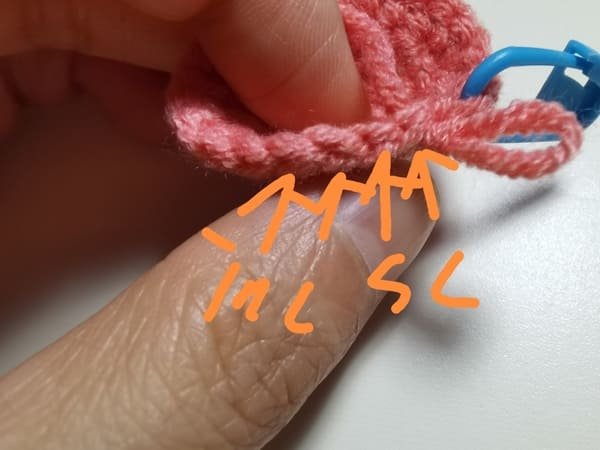
Crochet Order:(3sc,inc); repeat six times.
As we are four stitches away from finishing this round, then crochet 3sc, inc again.
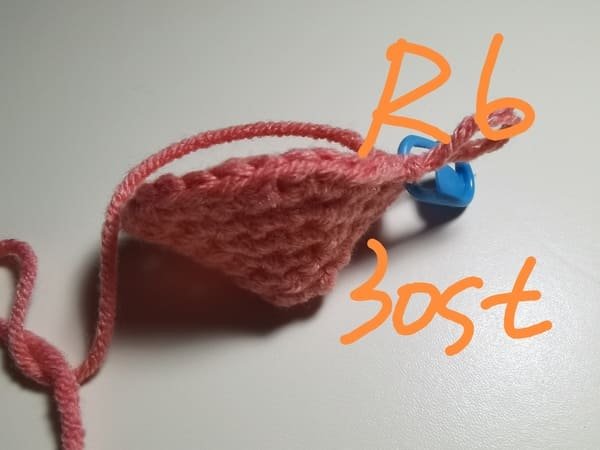
After the last slip stitch, round 6 contains 30 stitches.
R7
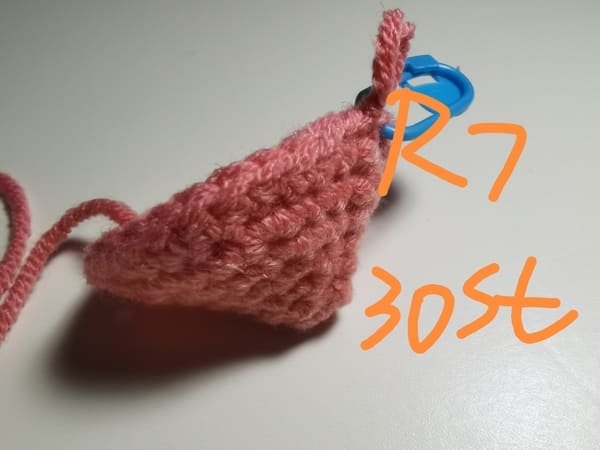
Crochet order :single crochet(sc) in each stitch, repeat 30 times.
After the last slip stitch, round 7 contains 30 stitches.
R8
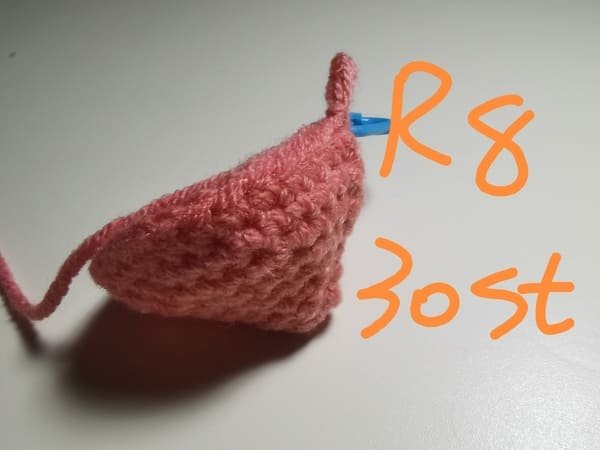
Same as round 7.
R9
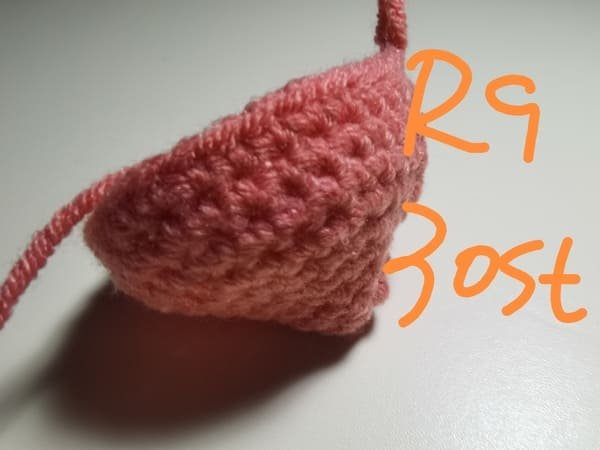
Same as round 8.
R10

Same as round 9.
R11
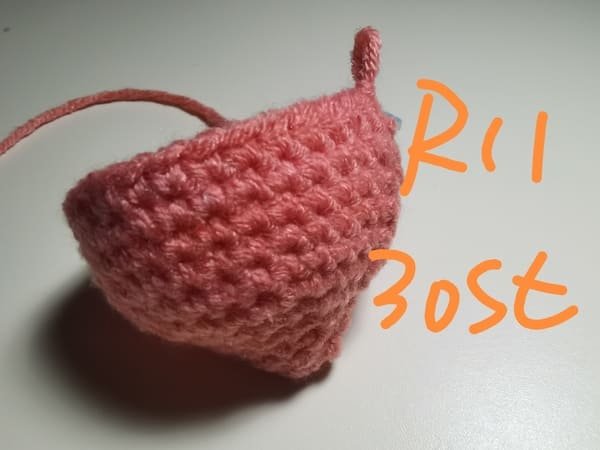
Same as round 10.
R12
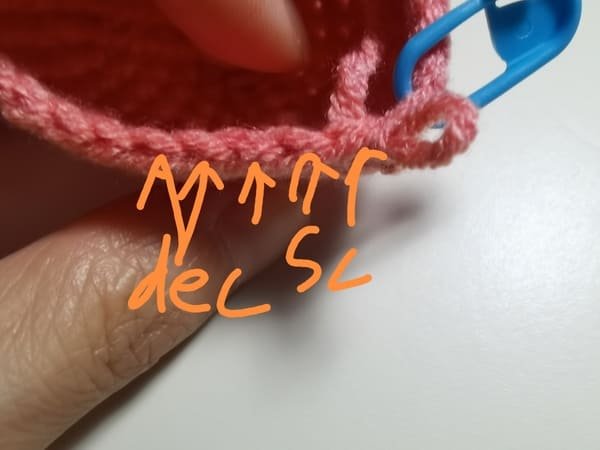
Crochet Order:(3sc,dec); repeat six times.
As we are five stitches away from finishing this round, then crochet 3sc, dec again.
We use invisible dec method to crochet it, please also write this article:Single Crochet Decrease -Three Method In More Details Slowly For Beginner | Video&Text&Picture
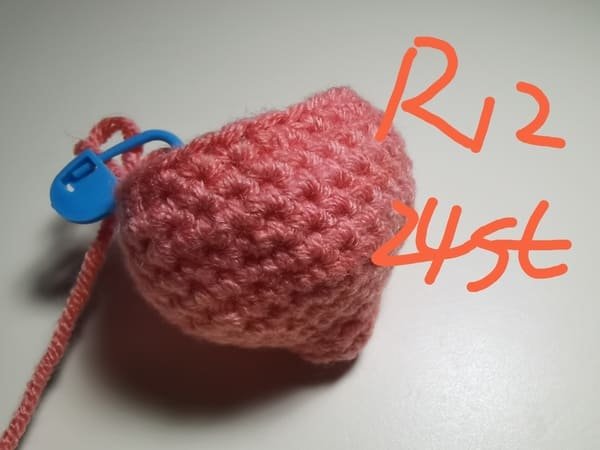
After the last slip stitch, round 12 contains 24 stitches.
R13
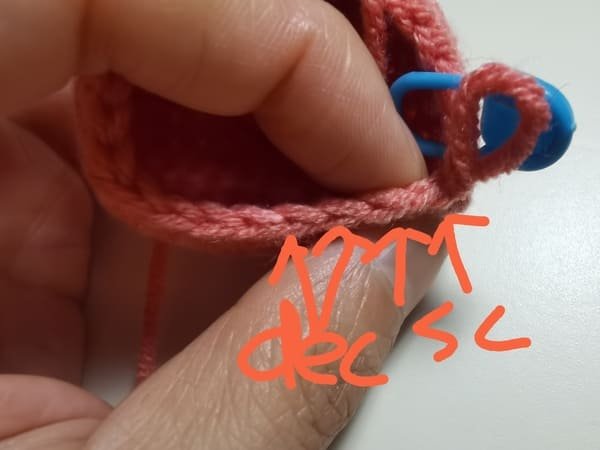
Crochet Order:(2sc,dec); repeat six times.
As we are four stitches away from finishing this round, then crochet 2sc, dec again.
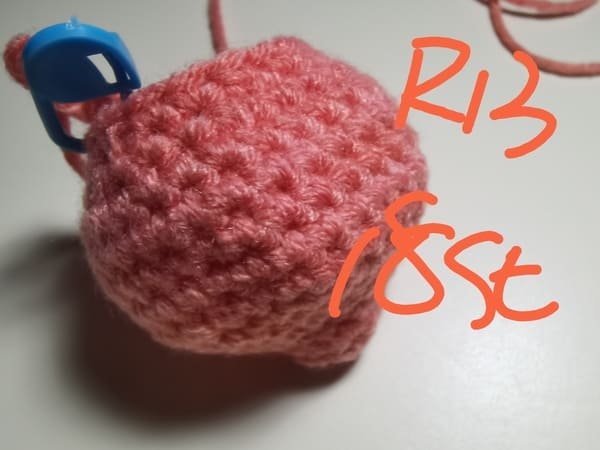
After the last slip stitch, round 13 contains 18 stitches.
R14
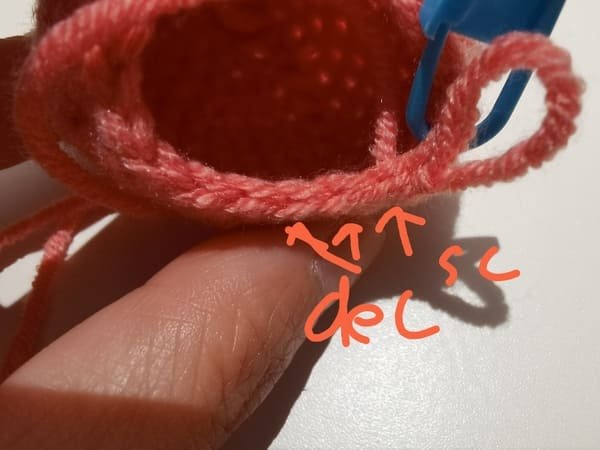
Crochet Order:(sc,dec); repeat six times.
As we are three stitches away from finishing this round, then crochet sc, dec again.
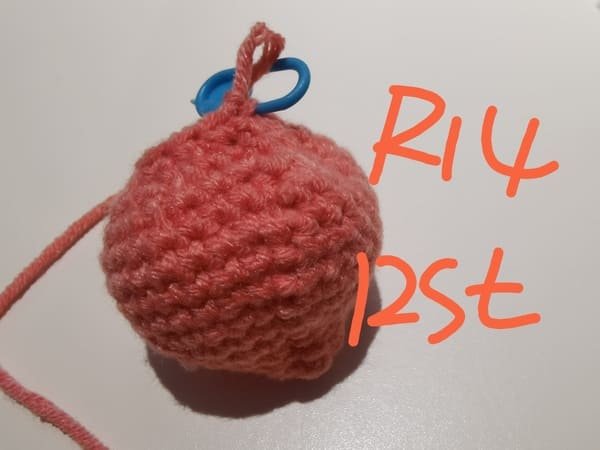
After the last slip stitch, round 14 contains 12 stitches.
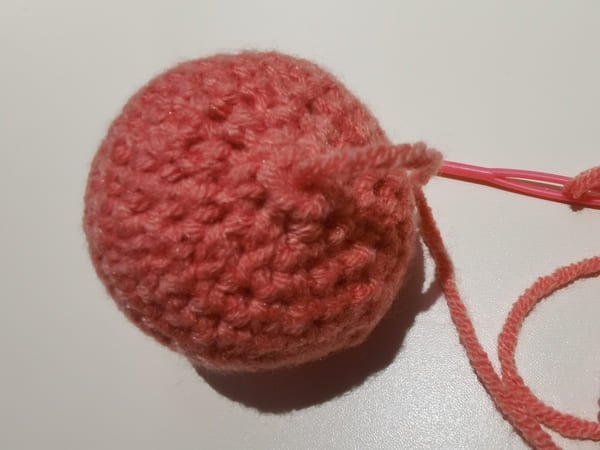
Fiberfill
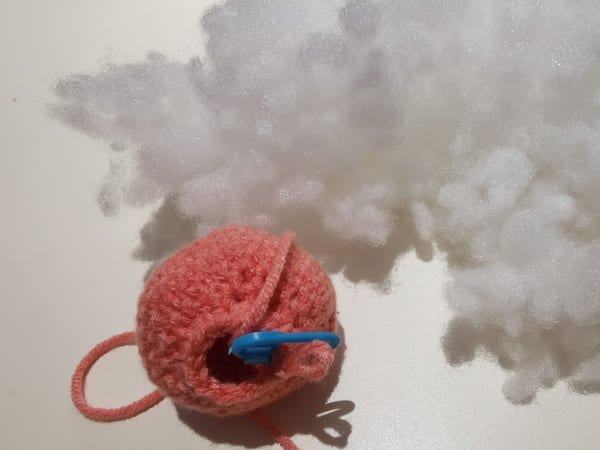
Drawing from my own personal experience, I can say that the fiberfill stuffing process for crocheted peaches becomes effortless with a few clever tips. First, we always take small amounts of fiberfill and fluff it before putting it in—this smooths the shape and maintains smoothness. If we put too much in, it could be lumpy, suggesting our peach is overstuffed.
When we are stuffing the crocheted peach, the back of the chopstick as well as the crochet should poke the stuffing and help push it into the dips and curves such as the bottom dip. It maintains the round and adorable shape which is wonderful. Remember that the sides need to be checked too—wobbly peaches can come from uneven stuffing on the sides.
To make the final outcome firm, a little more fiberfill should be used compared to the estimate placeholder, as long as the stitches won’t stretch too much. It should be noted that a few drops of essential oil can be added to the fiberfill making it smell sweet which is an enjoyable trick.
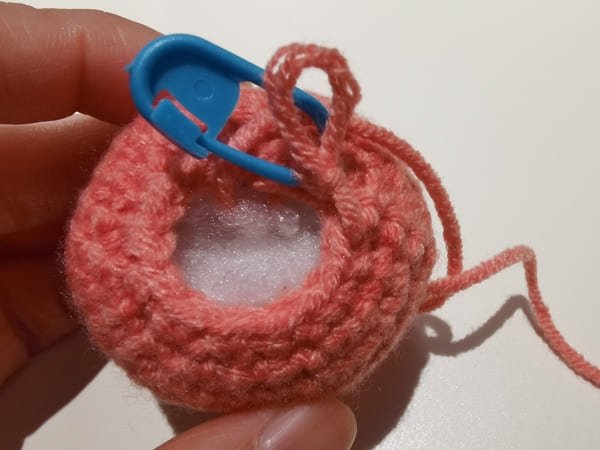
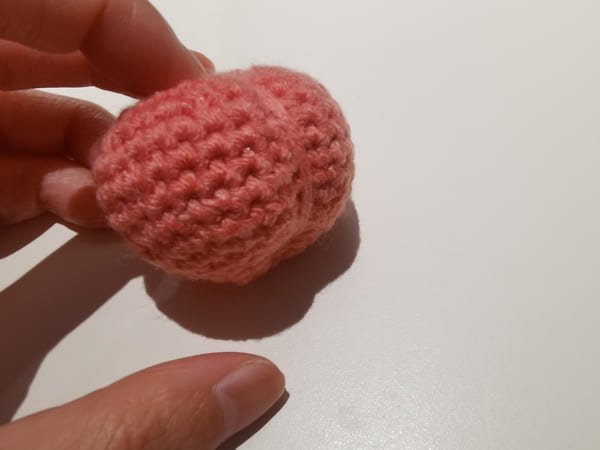
The fiberfill is completed.
R15
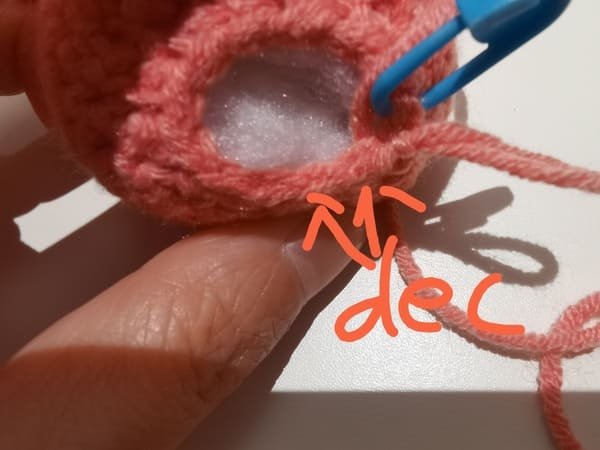
Crochet Order:(dec); repeat six times.
As we are two stitches away from finishing this round, then crochet dec again.
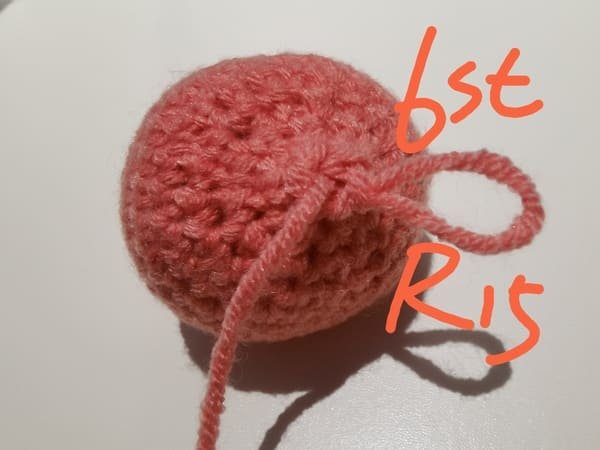
After the last slip stitch, round 15 contains 6 stitches.
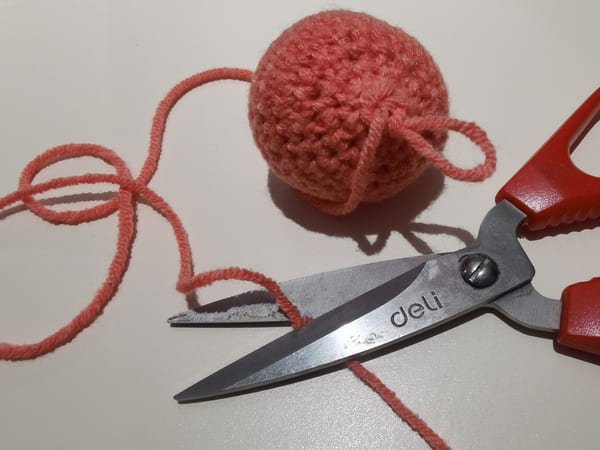
Leave 20 cm yarn end and use scissor to cut the yarn end .
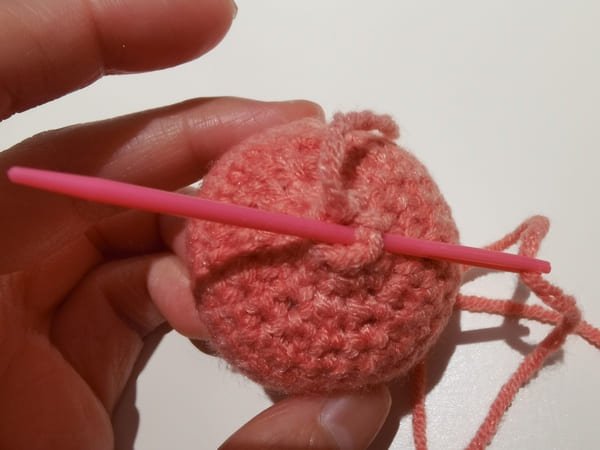
Use yarn needle with yarn end to the method of picking up one stitch every other stitch to close the opening again
The opening is get smaller than before.
The yarn needle with yarn end are passed from the bottom and then from the top, and repeated several times to form a peach shape.
Crochet the stem (use brown yarn )for crochet peach pattern
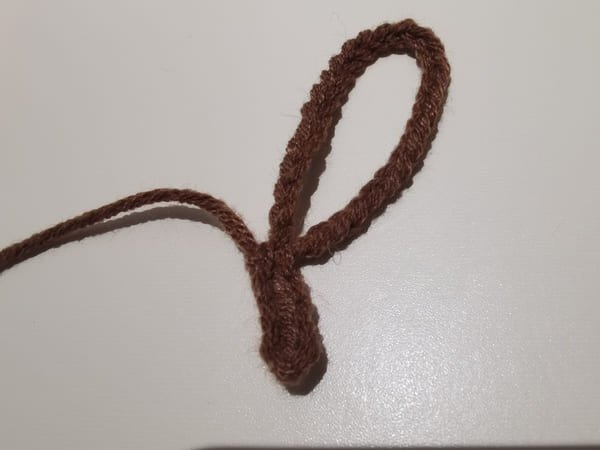
- 6 ch-(starting from second to last stitch-5sl)
- 30 ch for hand carrying
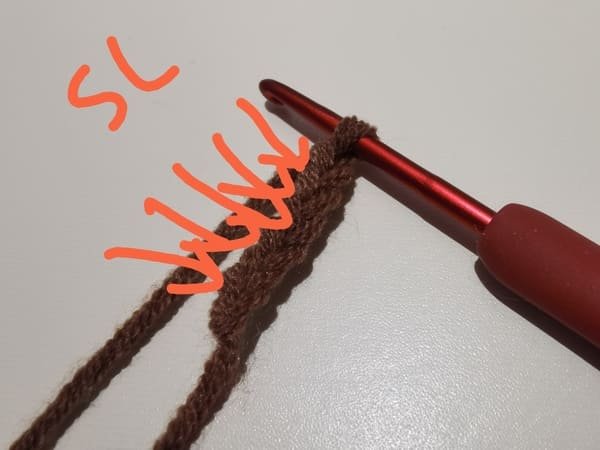
6 ch (now have a foundation chain stitch of 6.)
Now working on the second chain from the hook (so you skip the first chain and crochet into the second):
1 sl in 2nd ch from hook ,4 sl in next 4 ch.
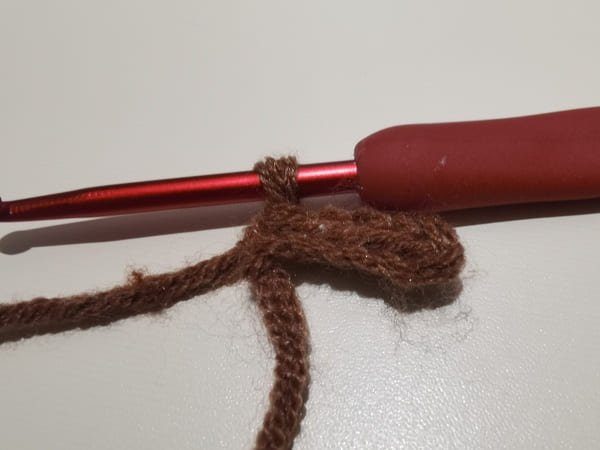
The stem is completed.
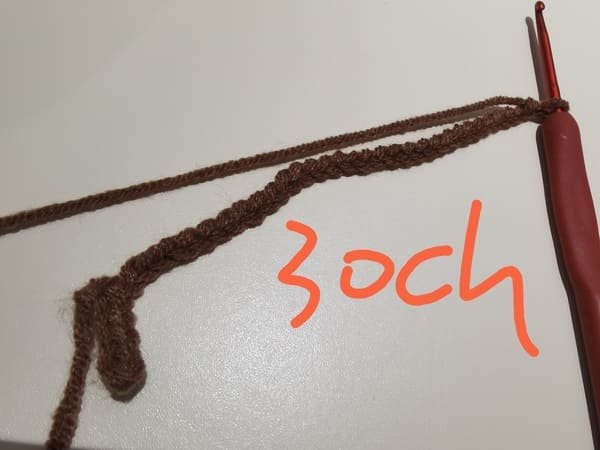
Crochet 30 chain stitches for hand carrying.
After completing 30 chain stitches, fold it in half and use a yarn needle to sew a handle carrying.
Crochet the leaf (use dark green yarn )for crochet peach pattern
- 12ch-(starting from second to last stitch-sc,hdc,dc,hdc,hdc,sc,hdc,hdc,dc,hdc,3sc,hdc,dc,hdc,hdc,sc,hdc,hdc,dc,hdc,inc)
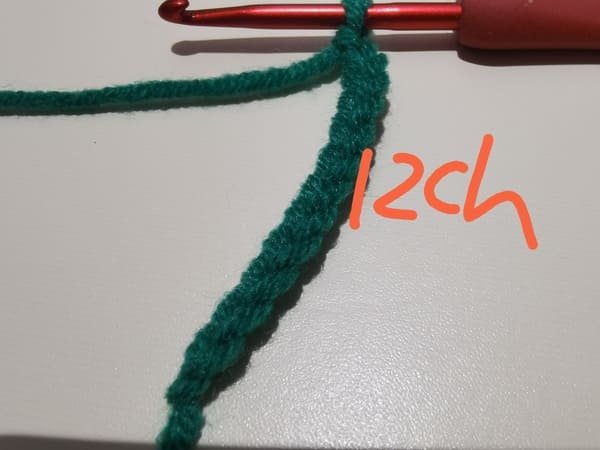
12 ch (now have a foundation chain stitch of 12.)
Now working on the second chain from the hook (so you skip the first chain and crochet into the second):
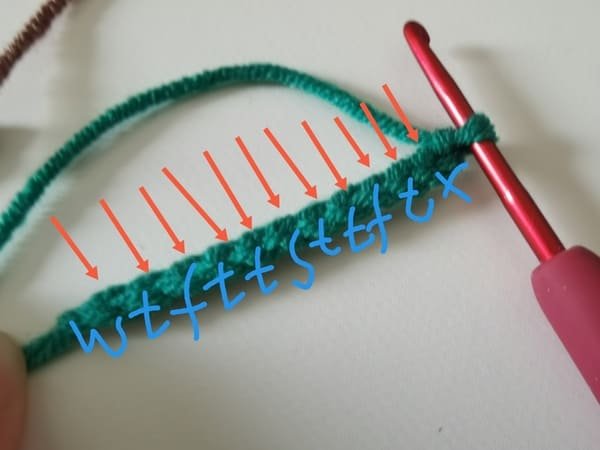
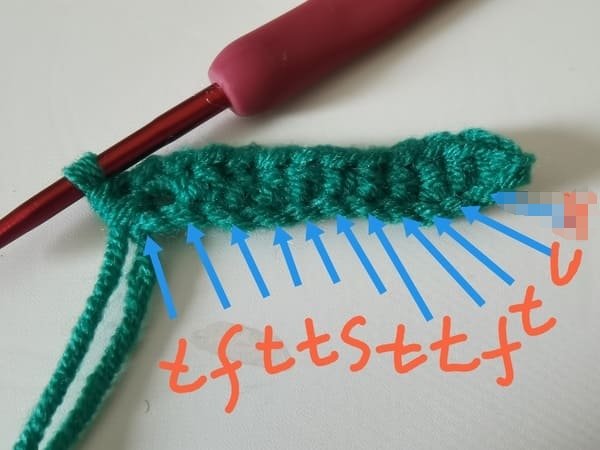
x=sc,t=hdc,f=dc,w=3sc,v=inc (In the picture we use the abbreviation)
Crochet order for the one side of leaf:
1 sc in 2nd ch from hook ,hdc in next ch,dc in next 1 ch, 2 hdc in next 2 ch,sc in nech 1 ch,2hdc in next 2 ch,dc in next 1 ch,hdc in next 1 ch, 3 sc in last ch.
Crochet order for the another side of leaf:
hdc in next ch,dc in next 1 ch, 2 hdc in next 2 ch,sc in nech 1 ch,2hdc in next 2 ch,dc in next 1 ch,hdc in next 1 ch, inc in 1 ch.
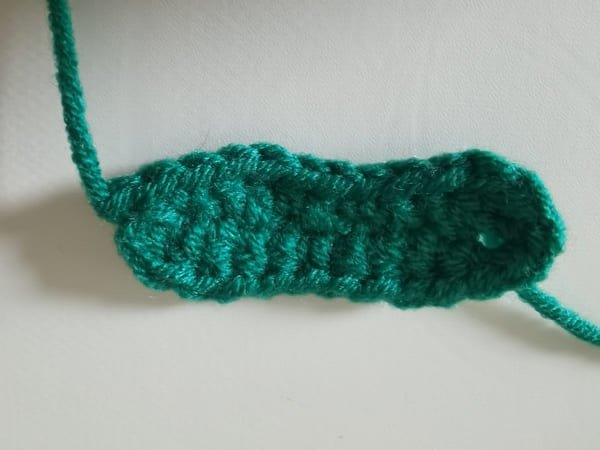
The leaf is completed.
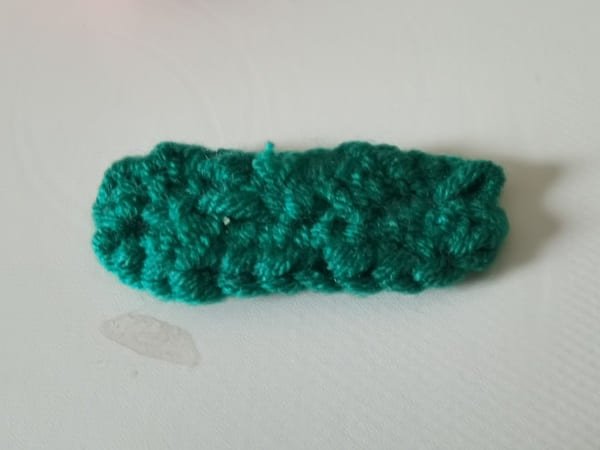
Turn the leaf over, use a yarn needle or hook to conceal the yarn ends, and then cut the yarn end.
Sew the leaf & stem on the body for crochet peach pattern
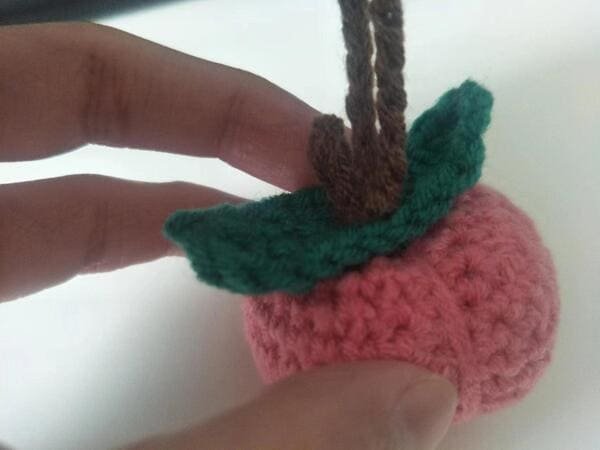
Put the leaves on the top of R15 first, then put the stem on top of the leaves, and sew the two main bodies together with a yarn needle.
It is best to sew several times to make the leaves and stems firmly sewed to the main body of the peach.
The crochet peach pattern is completed.
As passionate crafters, we ‘adore’ and ‘delight’ in pink shape crochet craft working mostly because it brings a soft, loving energy to our creations. Paint lovely is sweet, calming, and reminds us of compassion, tender kindheartedness and those soft things in life. We ‘delight’ in crocheting in pink color particularly when working in shapes like flowers, hearts, or fruits since it adds charm and a lot of joy.
Moreover, gifting pink crochet items to receivers feel like sharing pieces of my ‘love’ and inner feelings. Earlier we emphasized and discussed soothing and gentle feeling around kindness. Craft projects done in pink are easier and lighter when is done warmly, that is widely referenced in soft pink color, this makes our projects undertaken extra empowering.
Reference sources
1.Learn the most comprehensive guide for single crochet(sc)
Author:Sarah Stearns
Publication date: on June 15, 2021, updated:December 14, 2024
Title: How to single crochet (sc)for beginners
Summary as blow:
- Step-by-Step Single Crochet for Beginners
- Single Crochet into a Foundation Chain
- Single Crochet into another Row
- Single Crochet in the Round
- Increases and Decreases
- Working Single Crochet in Different Loops


