


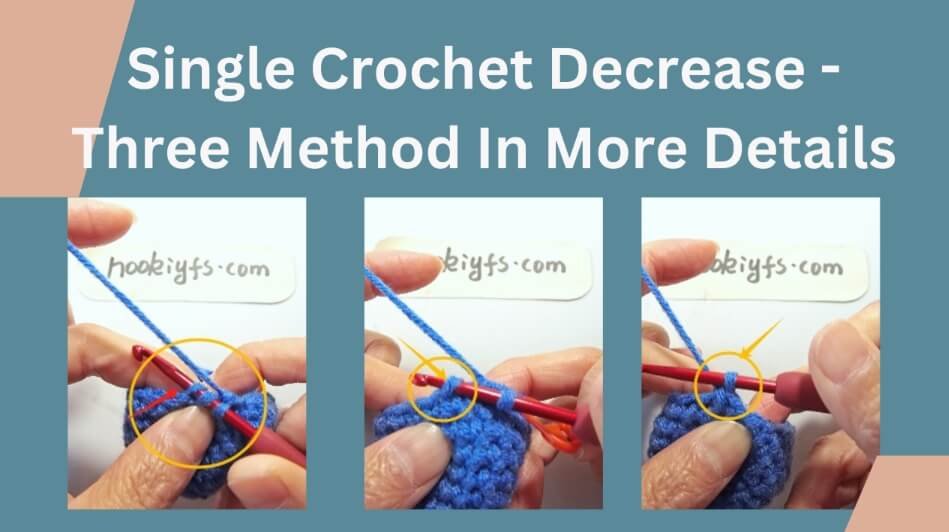
Single Crochet Decrease -Three Method In More Details Slowly For Beginner | Video&Text&Picture
Single crochet decrease merges two stitches into one, reducing the stitch count in a row or round.
Decrease stitches are essential for shaping projects such as dolls and amigurumi.
Every basic crochet stitch has a corresponding decrease, so once you master the single crochet decrease technique, you can apply the same method to other stitches like half double crochet and double crochet.
If you are a beginner and don’t know how to crochet single crochet, please click:Single Crochet-You Want To Know The Most Detailed Information
Table of Contents
Single crochet decrease video
We have specially made a video of the three methods of single crochet decrease, so that you can understand how to operate it more intuitively and deepen your understanding. I hope you can learn it and practice it.
Best selling products
-

Raffia Cross Pattern Basket Handbag Kit
$19.99 -

Hexagonal Bucket Bag Kit
$29.99 -

Raffia Handbag Kit
$29.99 -

Hammock Bag Kit
$29.99 -

Wheat Bucket Bag Kit
$19.99
Recommended articles
- Firstly, chain stitch is the most basic. If you want to learn it, you can click here :Chain Stitch For Beginners|Step By Step Guide| Text & Photo &Video
- Crocheting a doll requires learning single crochet ,You can click here: Single Crochet-You Want To Know The Most Detailed Information
- Doll crochet are usually made with magic ring , you can learn how to make magic ring here:How To Crochet Magic Ring ? l Step-By-Step l Video & Text &Photo
Single crochet decrease in the round
Single crochet decrease in the round is a method of shaping a crochet work by decreasing the number of single stitches per row.
Three methods of Single crochet decrease in the round as below
📝1.Standard single crochet decrease (sc2tog)
This is the most common method of reducing stitches.use the Standard sc2tog for Structural Support – While the invisible decrease is great for aesthetics, the standard single crochet decrease (sc2tog) is sturdier for items like bags or garments.
If you’re not a fan of the invisible decrease, you can always use this method as an alternative.
Insert the hook under the top loops of the next stitch.
Yarn over and pull through to draw up a loop.
You should have two loops on the hook.
Insert the hook under the top loops of the next stitch.
Yarn over and pull through to draw up a loop.
Now, there should be three loops on the hook.
Yarn over .Pull through all three loops.
leaving one loop remaining on the hook.
We should have a good habit of marking marker the first stitch after it is completed.
📝2.Invisible single crochet decrease
This method is often used for amigurumi (crocheted dolls) because it allows the decrease to be more subtle and the stitches to be tighter.
First you need to understand front loop & back loop
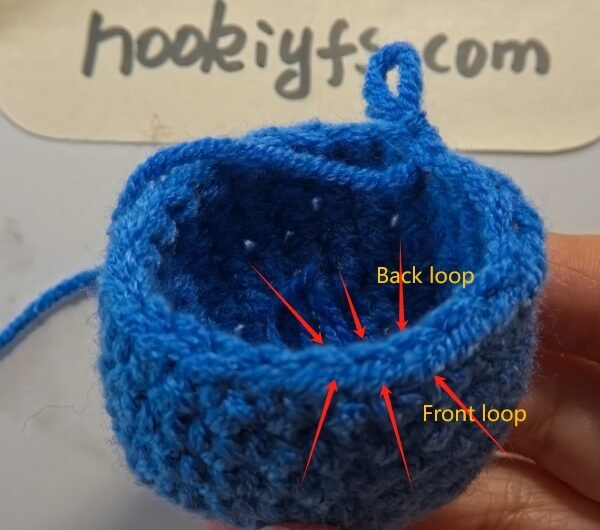
The Invisible Decrease follows a unique technique, making it essential to distinguish between the front and back loops of stitches.
In amigurumi, crocheting typically involves working through both loops.
The front loops are the ones on the outer edge of the circle, closest to you, while the back loops are on the inner side of the circle.
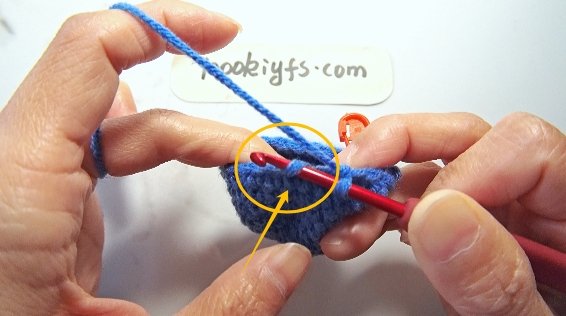
Insert the hook into the front loop only of the first stitch.
Without yarning over, insert the hook into the front loop of the next stitch.
Yarn over and pull through both front loops.
Yarn over again and pull through the remaining two loops.
Yarn over.
Pull through both loops on the hook, leaving one loop remaining.
📝3.Single crochet decrease over front loop & back loop (new mothod)
This method of decreasing stitches, because there are front loop and back of loop, when single crochet decrease after it is completed, the appearance looks more compact, dense and beautiful. I also recommend you to use it and practice it.
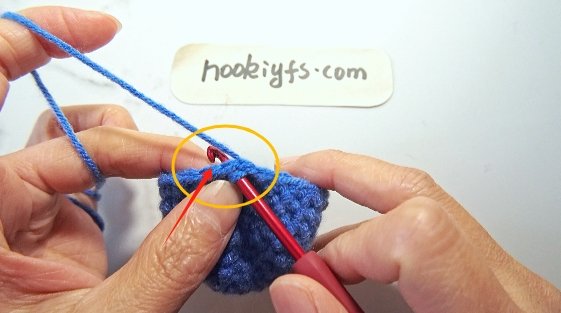
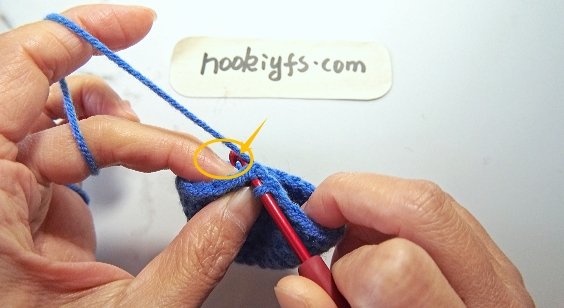
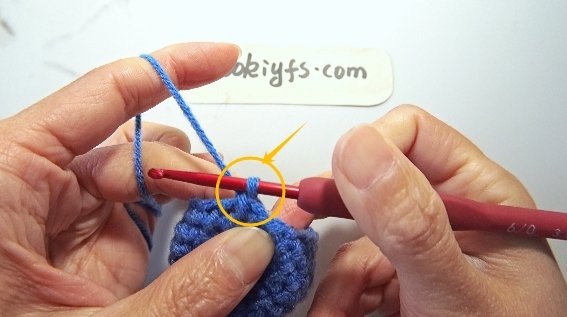
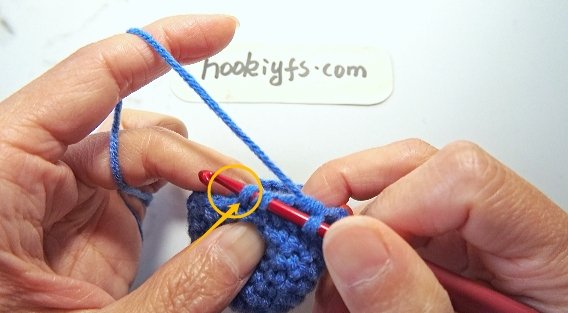
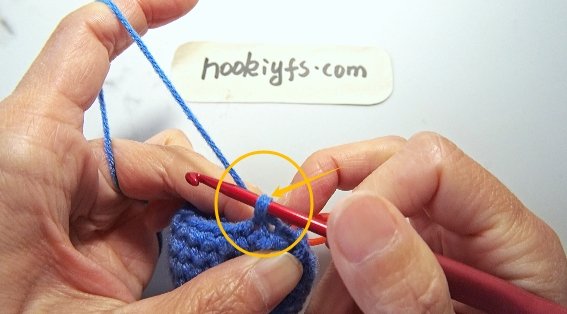
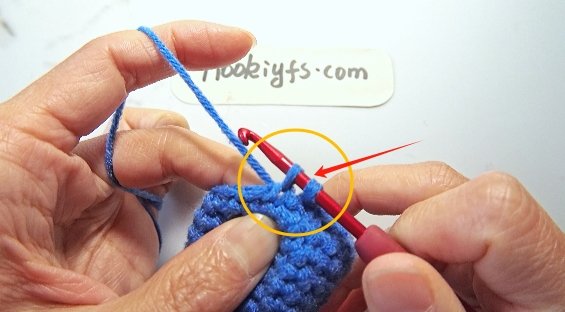
Insert the hook into the front loop only of the first stitch.
Insert the hook into the back loop only of the second stitch.
This is so different with invisible single crochet decrease.
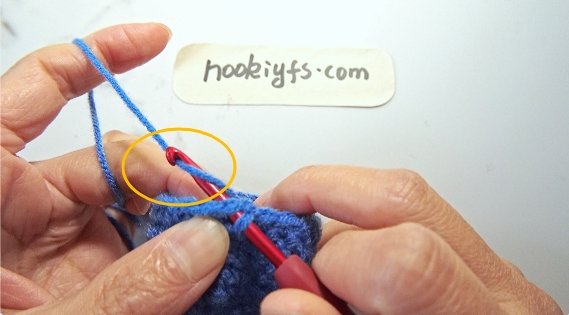
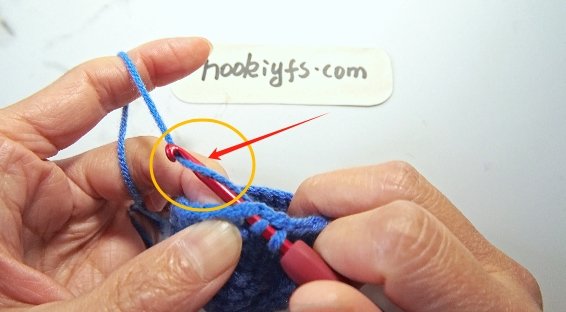
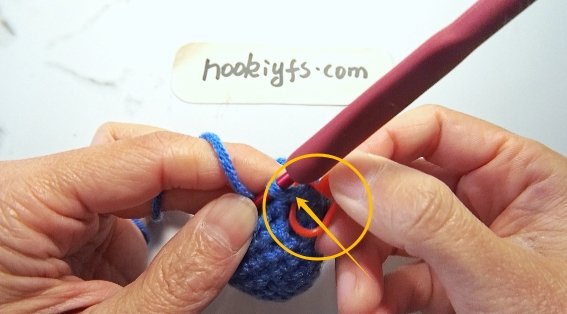
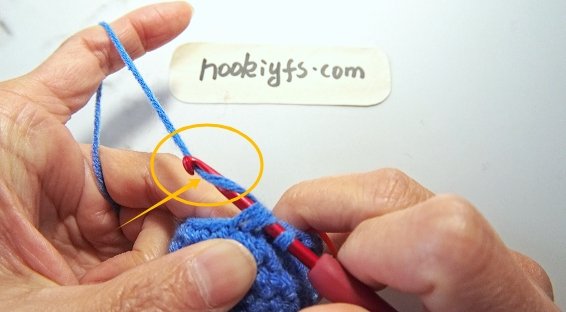
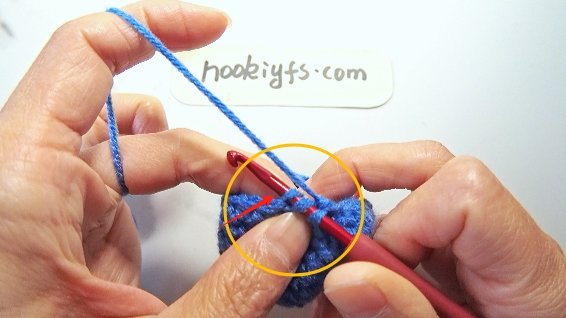
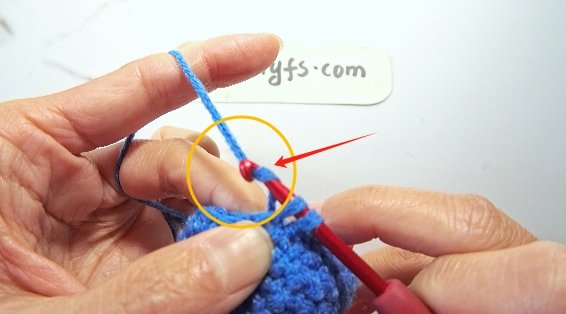
Yarn over.
Pull through the front and back loops , the remaining two loops left .
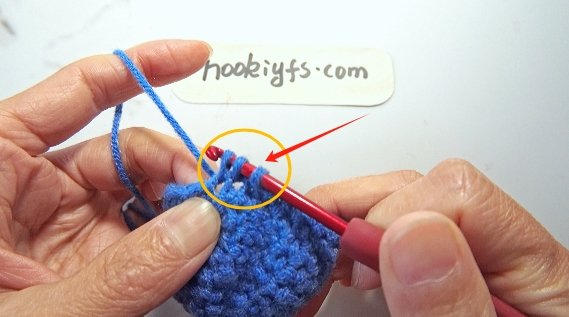
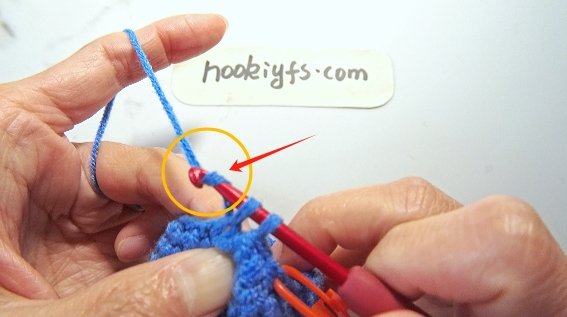
Yarn over.
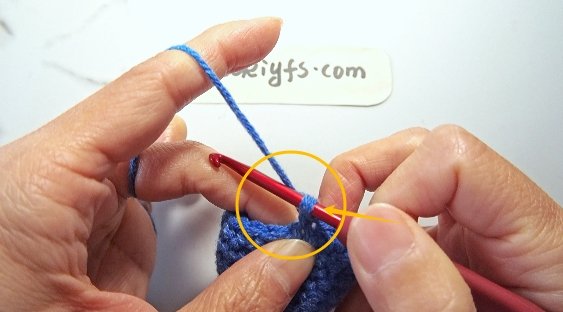
Pull through both loops on the hook, leaving one loop remaining.
🌟Helpful tips for beginners
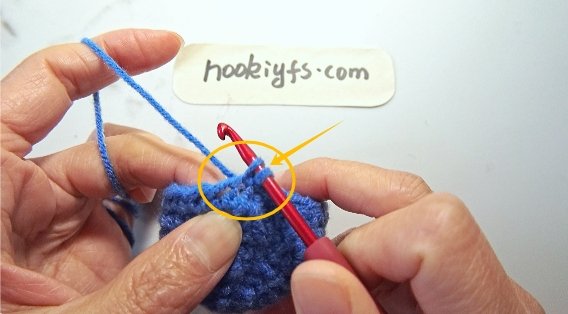
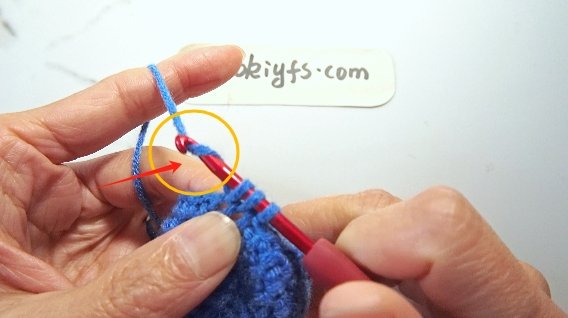
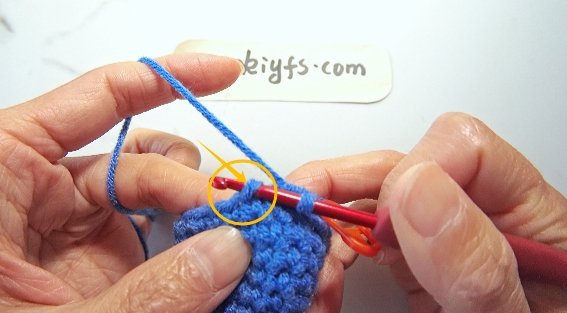
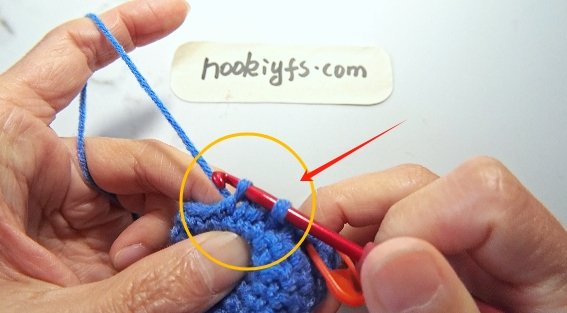
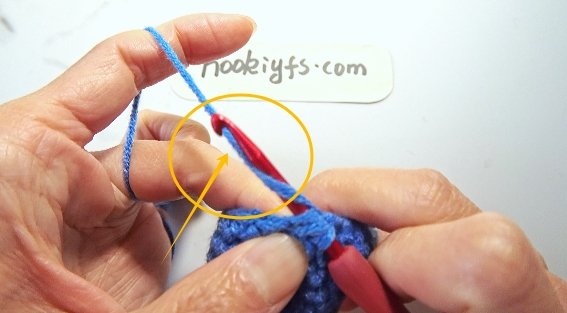
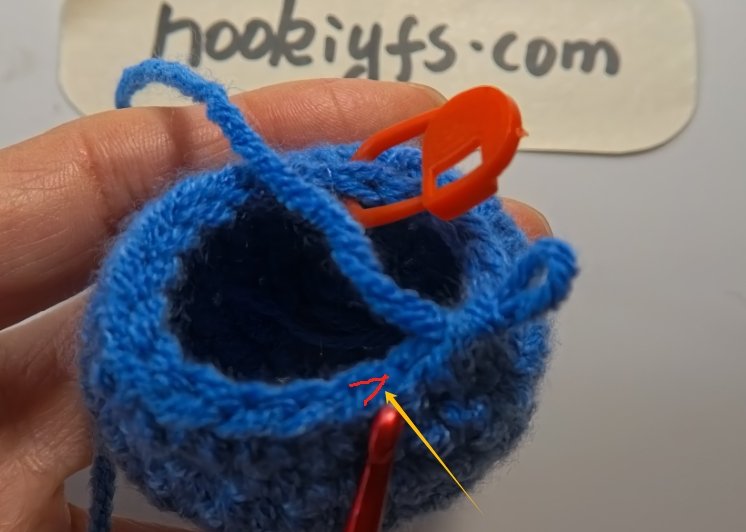
✅Finding the correct spot to insert the hook after a decrease can be tricky. The key indicator is the front loop—if you notice a pulled front loop, that means it’s part of the decrease. Insert the hook under the horizontal V next to it.
Please see photo: It is very useful for beginners because it is easy to make mistakes.
✅Tension Matters – Keep your tension even to avoid gaps or puckering when decreasing stitches.
✅Mark Your Decrease Points – Use stitch markers to keep track of where you need to decrease, especially when shaping projects.
✅Avoid Over-Tightening – Pulling the yarn too tight can make the decrease stiff and hard to work into in the next round.
What does 1 sc dec mean?
“1 sc dec” means:
👉 Make one single crochet decrease.
In other words, you’re turning two stitches into one stitch by crocheting them together.
Is single crochet 2 together the same as a decrease?
Yes! 💯
Single crochet 2 together (sc2tog) is exactly the same as a single crochet decrease.
They are just two ways of saying the same :
- “sc2tog” = more common in written patterns for reading
- “sc dec” = shorthand way of saying “do a single crochet decrease”
👉 Crochet 2 stitches together to turn them into 1 stitch
What does DEC 1 mean in crochet?
In crochet, “DEC 1” means:
👉 Decrease 1 stitch.
It tells you to reduce the stitch count by one — usually by combining two stitches into one.
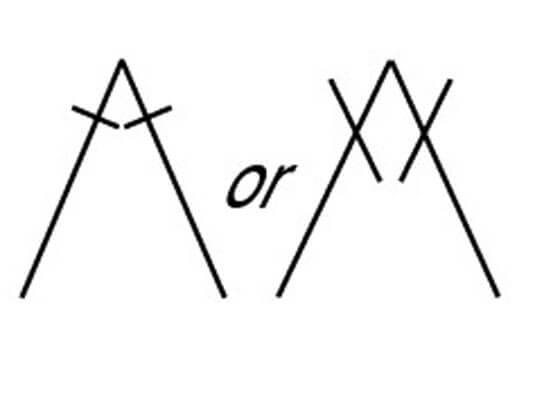
What is the symbol for decrease in crochet?
In crochet stitch diagrams, the symbols for single crochet decrease are specially designed to make it easy to decrease stitches without written instructions.
These diagrams can help crochet enthusiasts visually understand the decrease process, making it easier to follow and complete the pattern. please see picture as blow:
How to do a single crochet decrease left handed?
All the steps and methods of single crochet decrease are the same as those for normal right-handed use.
But it does not rule out the use of the left hand. we have made a comparison between the left and right hands for single crochet decrease, which is also convenient for everyone to understand.
🧶 Left-Handed vs Right-Handed Crochet – Tips Table
| Feature | Left-Handed (If you want to use ) | Right-Handed (Comparison) | Tips |
|---|---|---|---|
| Working Direction | Left to right | Right to left | Work in reverse of the right-handed pattern |
| Hook Grip | Hold the hook with your left hand | Hold the hook with your right hand | You can use a pencil grip for both hands |
| Decrease | Insert only the front half of the next 2 stitches (left to right) | Same operation (from right to left) | Practice more for amigurumi dolls and smoother decreases |
| Muscle Memory | Takes time to adapt | Most people use their right hand, so it’s ingrained | Use your left hand more in small swatches to build muscle memory |
What is the difference between invisible decrease and crochet decrease?
Although both are decreasing stitches, they are different in appearance and the position where the crochet hook enters the stitch.
- Invisible decrease stitches are crocheting in the front loop stitches, which can reduce the gap between the stitches and thus reduce the bloated of the stitches.
- Regular decrease stitches are crochet hooks inserted into two stitches, which will look more convex. but it will be more and firmer.
🧶 Invisible decrease vs crochet decrease – Tips Table
| Aspect | Invisible Decrease | Regular Crochet Decrease (sc2tog) |
|---|---|---|
| Appearance | Seamless fabric joint, no bulge | Noticeable bulge in the stitches at the decrease |
| Techniques | Insert hook into the front loops only of the next 2 stitches | Insert hook into the both loops of the next 2 stitches |
| Learning Time | Requires more practice and care | Easier to learn and master |


