


Mango Crochet The Most Comprehensive Step-By-Step Explanation
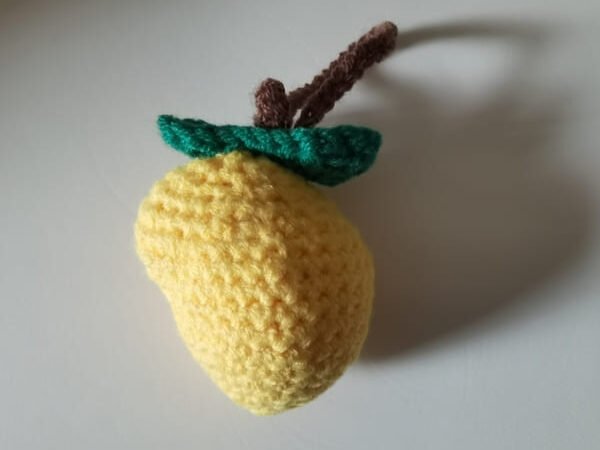
Table of Contents for mango crochet
Material kit of mango crochet
- Hook: 3.0mm
- Stuffing: (polyester fiberfill)
- Yarn(yellow&brown&dark green)
- Yarn needle
- Marker
List of necessary tools
- Scissors
Abbreviation for mango crochet
These are the required abbreviations for mango crochet
- ch = Chain stitch
- sc = Single crochet
- sl =Slip stitch
- inc = Increase (usually 2 stitches in the same stitch)
- dec =Decrease (typically done by crocheting two stitches together)
- st(s) =Stitch(es)
- mc =Magic circle (or magic ring)
- hdc=half double crochet
- dc=double crochet
Best selling products
-

Raffia Cross Pattern Basket Handbag Kit
$19.99 -

Hexagonal Bucket Bag Kit
$29.99 -

Raffia Handbag Kit
$29.99 -

Hammock Bag Kit
$29.99 -

Wheat Bucket Bag Kit
$19.99
Buy mango crochet kit
We enjoy mango crochet because it merges two things we love most: inventiveness and snugness. The colors derived from mangoes, rich yellows, dark green leaf, brown stem, give a vibrant tropical accent to our works.
Crocheting with mango colored yarn instantly boost our mood. The bright color evokes summer time and brings to mind delicious things which brings energy to our work adding a refreshing attitude to our handmade things. It also goes wonderfully with any neutral or bold colors making it easy for us to play with different color combinations.
Tips
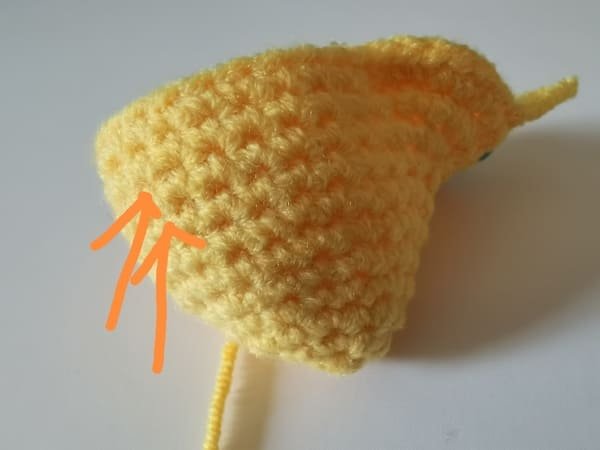
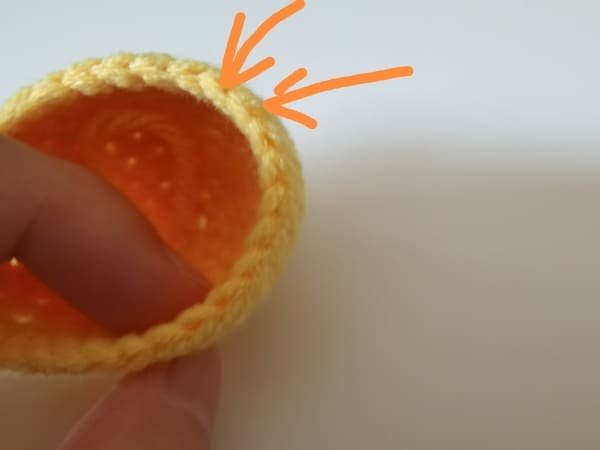
In this case we need to establish how many rounds are required for the total number of crochet rows to be accurately verified.
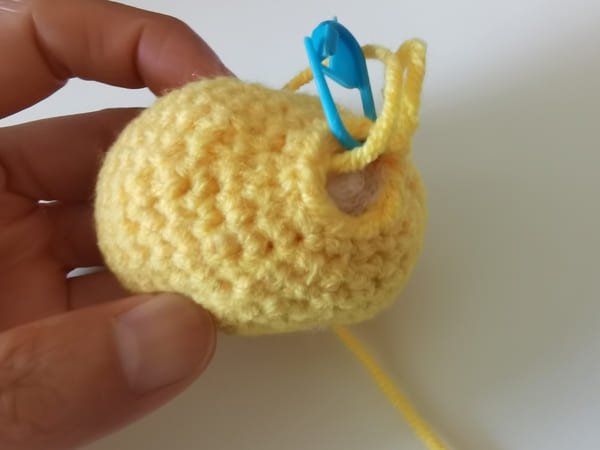
The image indicates each of the raised circles constitutes this round.
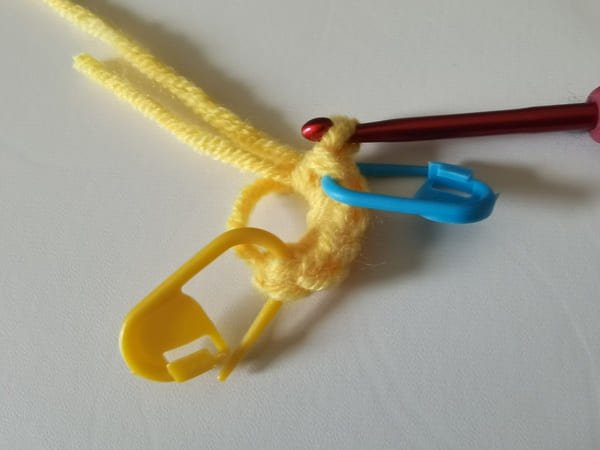
Even with my attempts at crocheting, I often forget complicated stitch patterns.
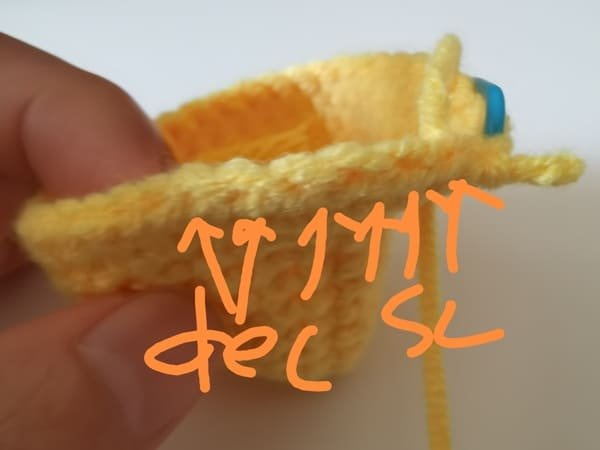
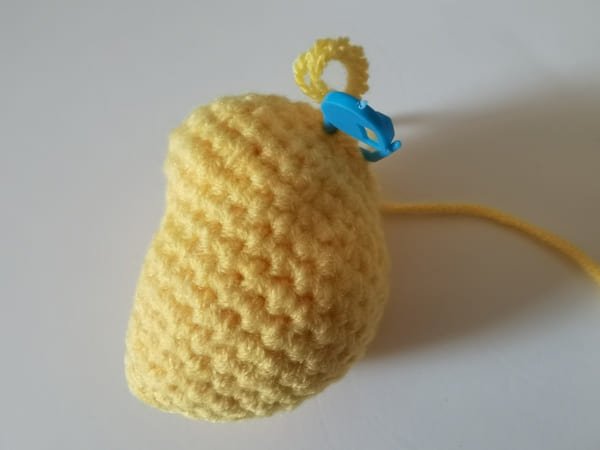
For the purpose of this article, marking button will be defined as the yellow button which I recommend beginner level crocheters to use after they complete their first stitch.
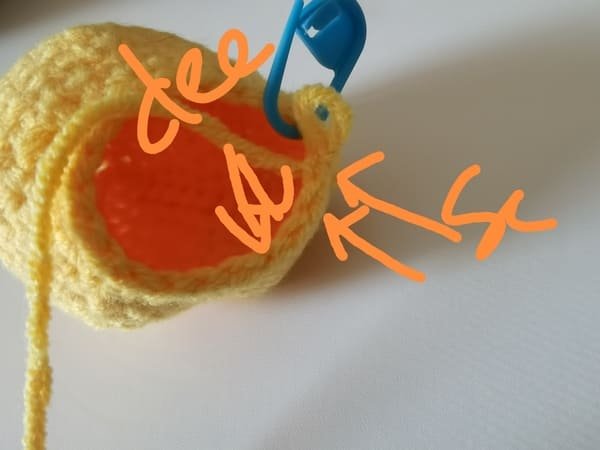
Do not forget to switch on blue marking button as shown after your last stitch is done.
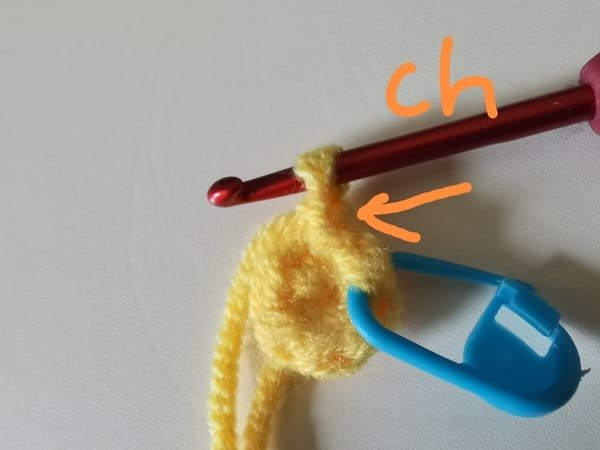
We make a chain stitch(ch) at the start of every round to bring it up to the right height. This takes care of the balance, tension, evenness, polish, and overall finishing touch of the work.
A letter combined with a v symbol indicates a single crochet stitch, therefore, it is “stitch”.
Crochet the body (use yellow yarn )for mango crochet
- R1: 6 sc into mc(6)
- R2:sc,inc*5(11)
- R3:sc,(sc,inc)*5(16)
- R4:16sc(16)
- R5:sc,(sc,inc,sc)*5(21)
- R6:sc,(3sc,inc)*5(26)
- R7-R8:26sc(26)
- R9:inc*2,22sc,inc*2(30)
- R10:inc*3,24sc,inc*3(36)
- R11:36sc(36)
- R12:(4sc,dec)*6(30)
- R13:3sc,(3sc.dec)*5,2sc(25)
- R14:(3sc,dec)*5(20)
- R15:(2sc,dec)*5(15)
- R16:(sc,dec)*5(10)
- Fiberfill
- R17:dec*5(5)
R1

6sc into the magic ring.
Magic ring(mc): To form the magic ring with your left hand’s thumb and index finger, pull the yarn end towards the left while pinching the yarn with the right hand’s thumb and finger. This approach helps in making the very center or the center part of the circle as small as O gap.
Want to learn magic ring , please click:How To Crochet Magic Ring ? l Step-By-Step l Video & Text &Photo
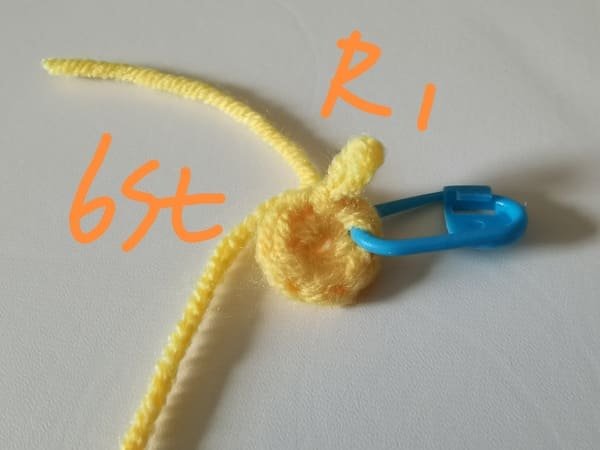
In slip stitch(sl), put the hook into first yellow V shape stitch. Yarn overs and pull through two outer loops which are on the hook. Thus we have one loop which is called as slip stitch.
Completing the last slip stitch indicates that round 1 has 6 stitches.
R2
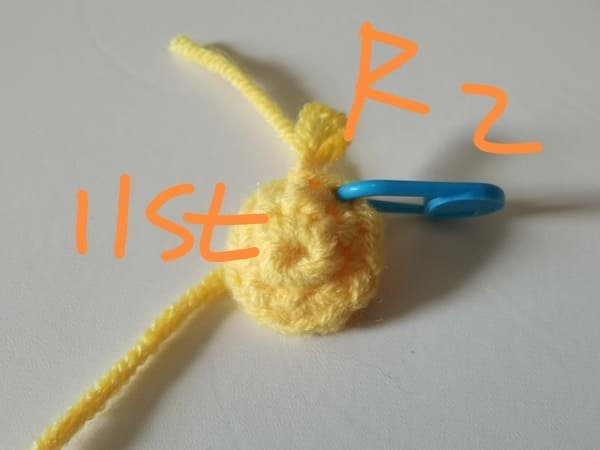
In Round 2, we have 1 single crochet, then crochet increase with five times to mold our piece and end with 11 stitches.
R3
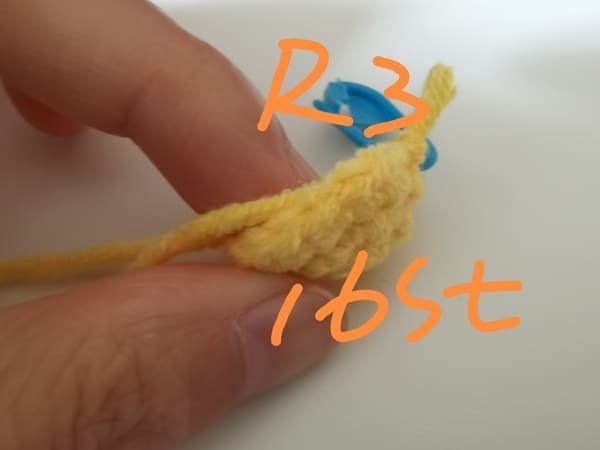
In Round 3, we start with a single crochet, After that, we will perform one single crochet and do an increase five times for a total of five repetitions. This way of increasing reshapes our work in a more controlled manner and increases our stitch count to 16.
R4
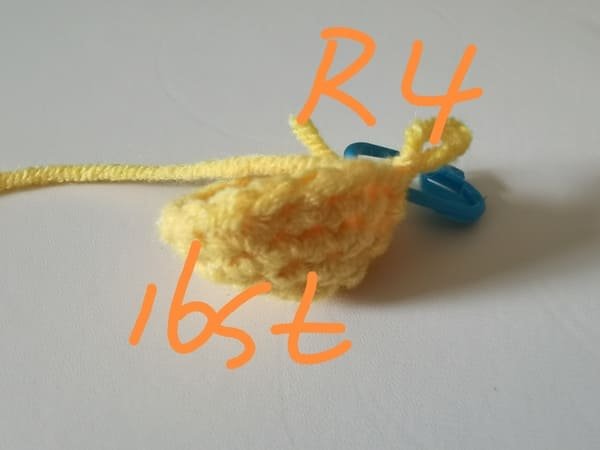
Crochet single crochet in each stitch, repeat 16 times.
Completing the last slip stitch indicates that round 4 has 16 stitches.
R5
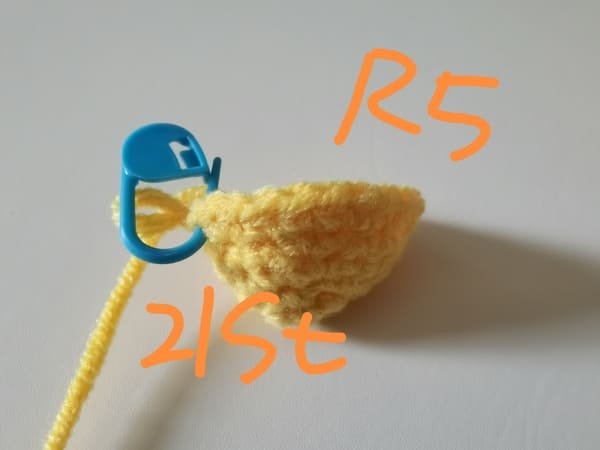
As it is indicated in the instructions, in Round 5 we commence with a single crochet and follow along with the other repeating pattern’s stickers: sc, inc, sc that we repeat five times. Following this method will allow us to equally sculpt the piece, finishing the round with 21 stitches.
R6
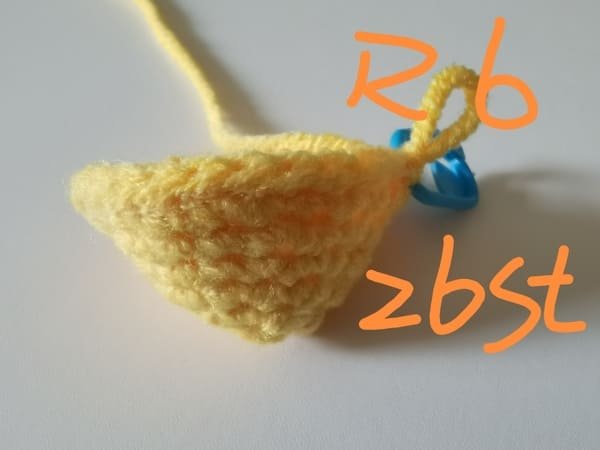
In Round 6, we start with a single crochet and do an increase after every three single crochets for five repetitions. This gentle increase evenly expands our work, bringing our total to 26 stitches by the end of the round.
R7
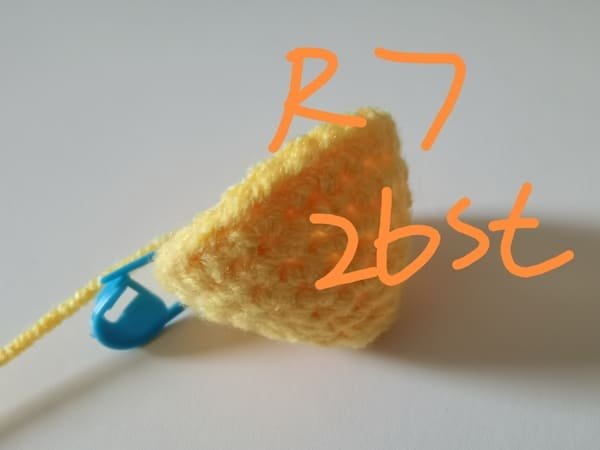
Crochet single crochet in each stitch, repeat 26 times.
Completing the last slip stitch indicates that round 7 has 26 stitches.
R8
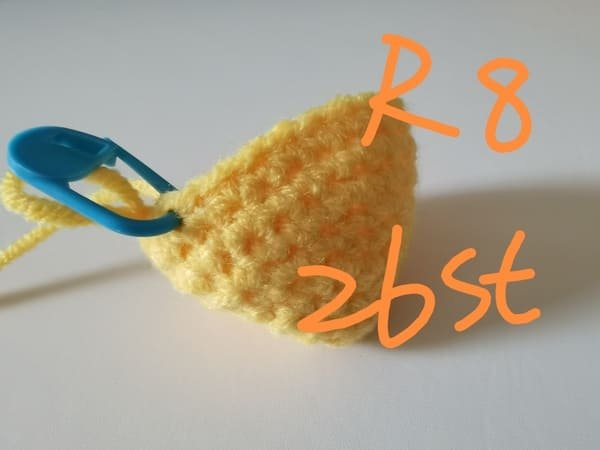
Same as round 7.
R9
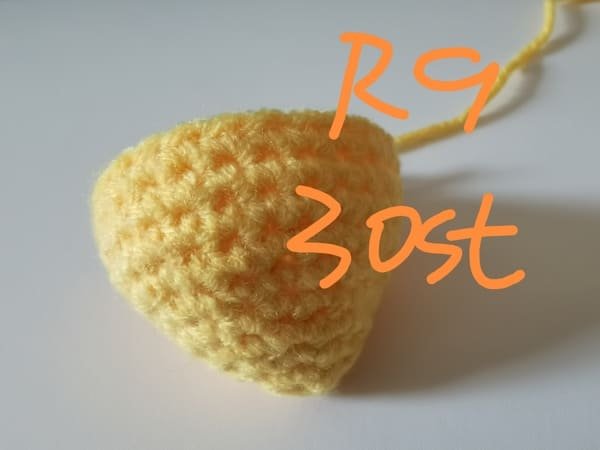
We commence Round 9 with two increases to gently form our shape. After that, we single crochet 22 times, followed by two additional increases which brings us to a total of 30 stitches.
R10

In Round 10, we begin with three increases then complete 24 single crochets in the middle. We end with three more increases which catches us to a total of 36 stitches.
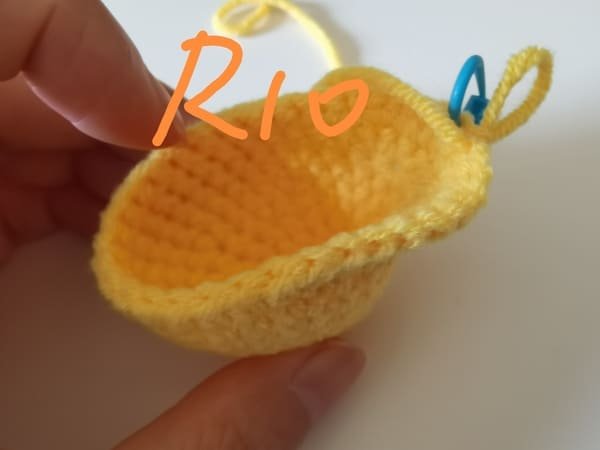
View of round 10.
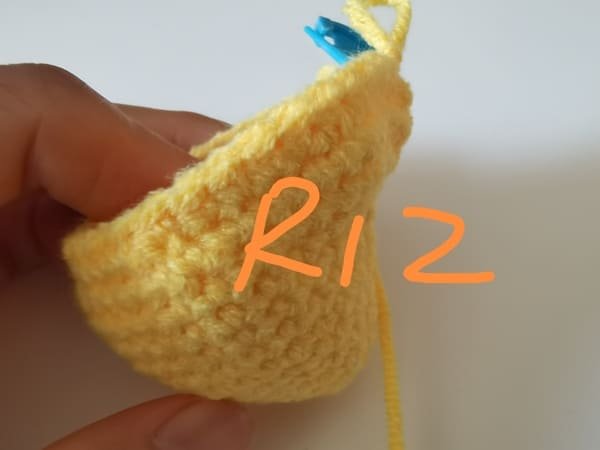
R11
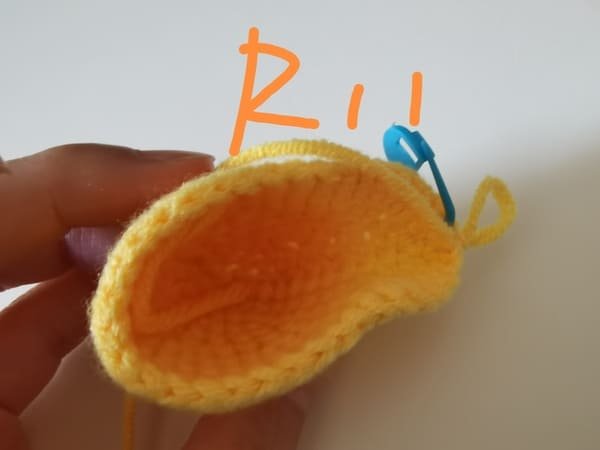
View of round 11.
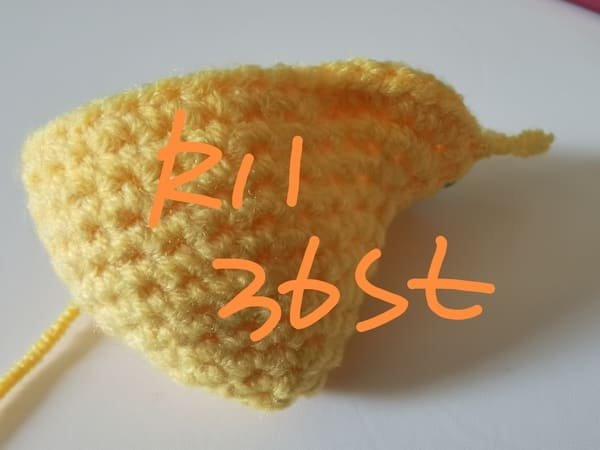
Crochet single crochet in each stitch, repeat 36 times.
Completing the last slip stitch indicates that round 11 has 36 stitches.
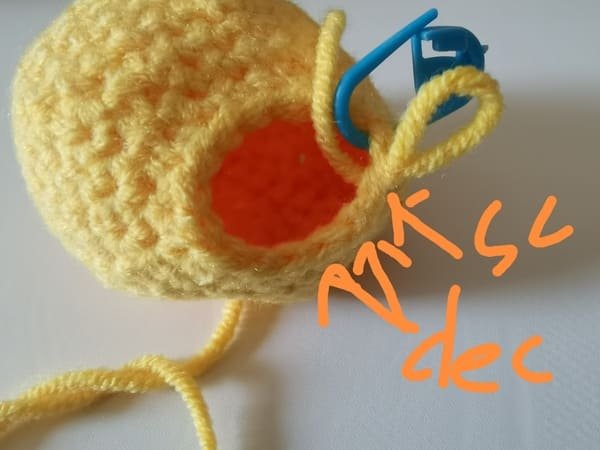
R12
In Round 12, we have again repeated the sequence four single crochets followed by one decrease six times.
We use invisible dec method to crochet it, please also write this article:Single Crochet Decrease -Three Method In More Details Slowly For Beginner | Video&Text&Picture
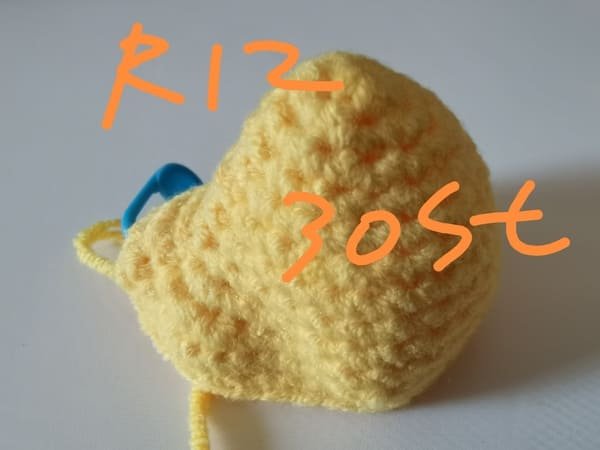
This allows us to reduce stitches evenly while shaping our work, thus finishing the round with 30 stitches for round 12.
View of round 12.
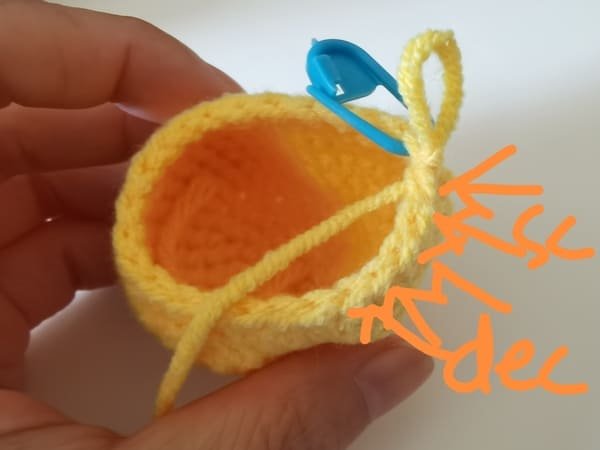
R13
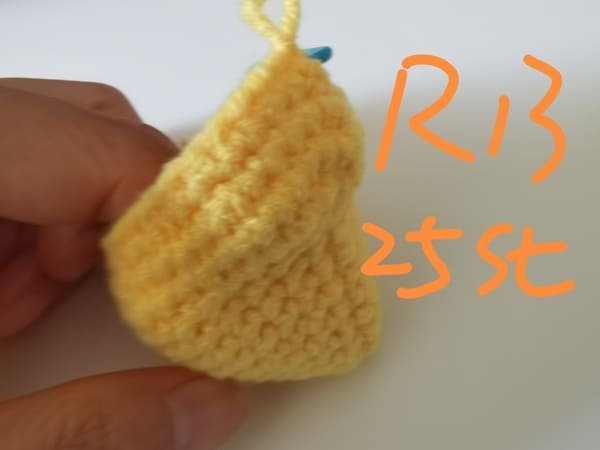
In Round 13, we begin with a base of three single crochets; we then continue with the pattern of three single crochets and one decrease five more times. The round is finished off with two single crochets. The total for this round is 25 stitches.
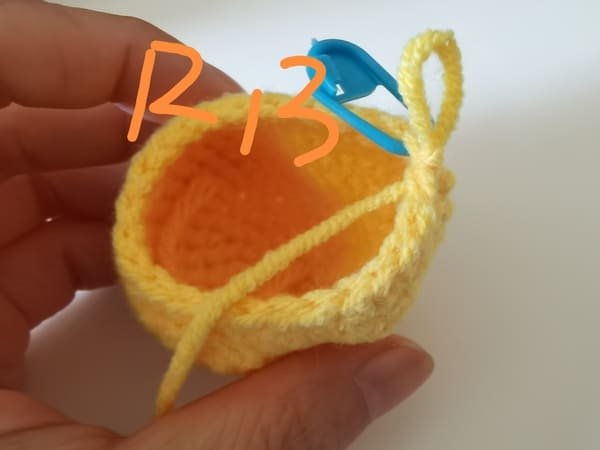
View of round 13.
R14
In Round 14, we have again repeated the sequence three single crochets followed by one decrease six times.
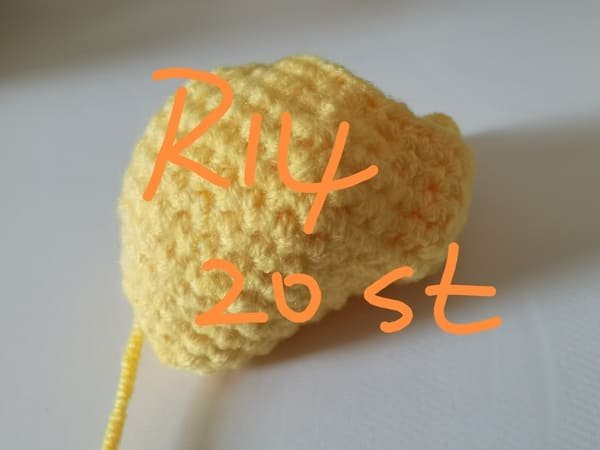
Completing the last slip stitch indicates that round 14 has 20 stitches.
R15
In Round 15, we have again repeated the sequence two single crochets followed by one decrease six times.
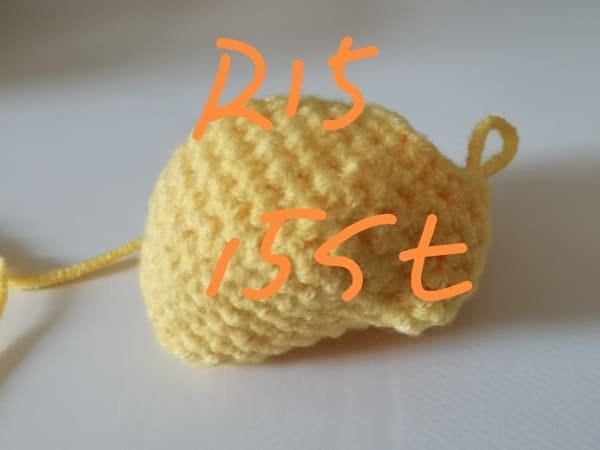
Completing the last slip stitch indicates that round 15 has 15 stitches.
R16
In Round 15, we have again repeated the sequence one single crochets followed by one decrease six times.
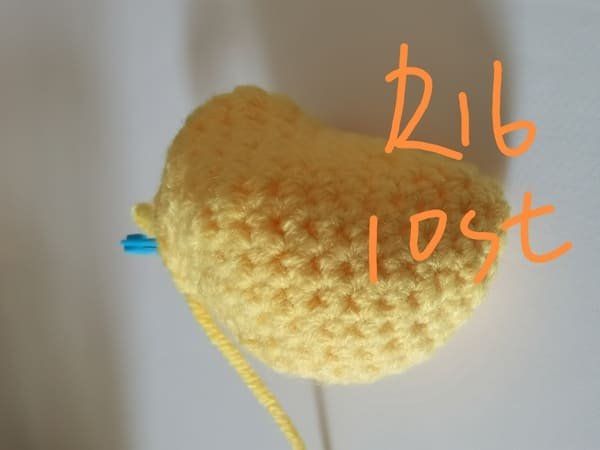
Completing the last slip stitch indicates that round 16 has 10 stitches.
Fiberfill

When filling a fiberfill into the mango, we ensure to fill just a bit at a time using the tweezers, to prevent overflowing. The fiberfill should not be packed too tightly or remain loose, rather be packed evenly so that the mango continues to be smooth without uneven patches.
View of fiberfill.
Fiberfill is completed.
R17
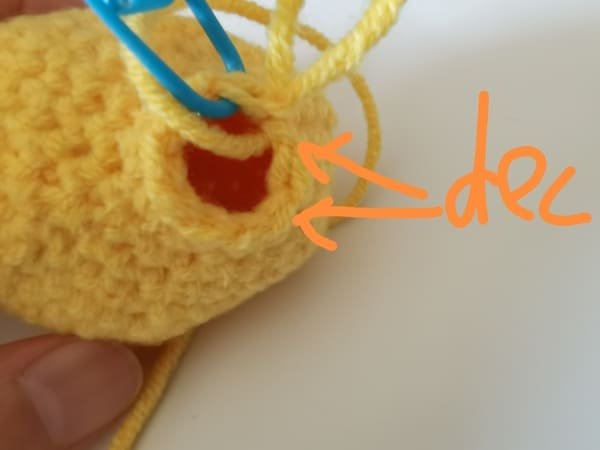
In Round 17, we make another 5 consecutive decreases.
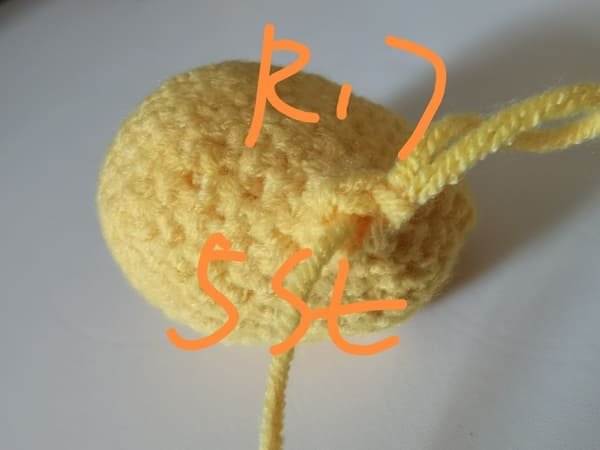
There are only 5 stitches remaining, and thus completing the shape for round 17.
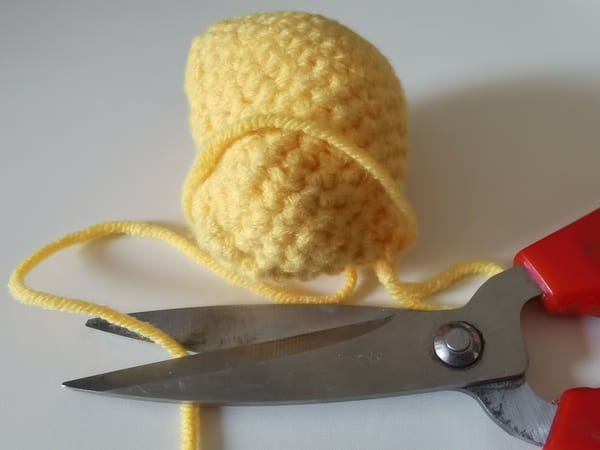
Leave 15 cm and use hook to bring out the yarn end .
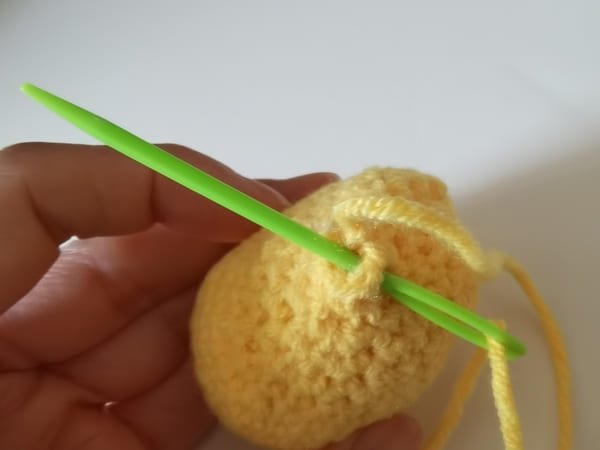
We use a yarn needle, employ the yarn to close the gap by picking up one stitch every other stitch.
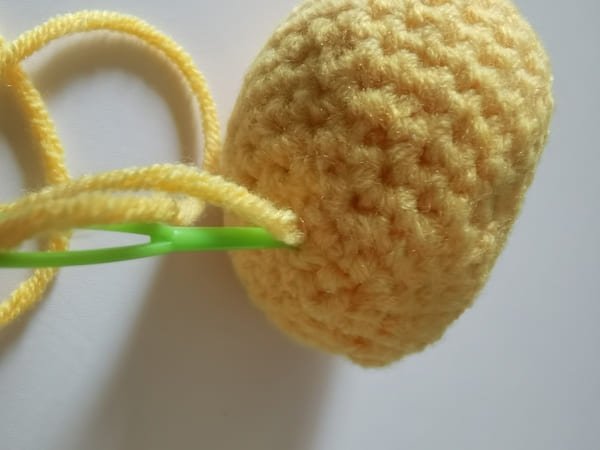
Conceal the yarn end.
This closes up the top part of our mango well.

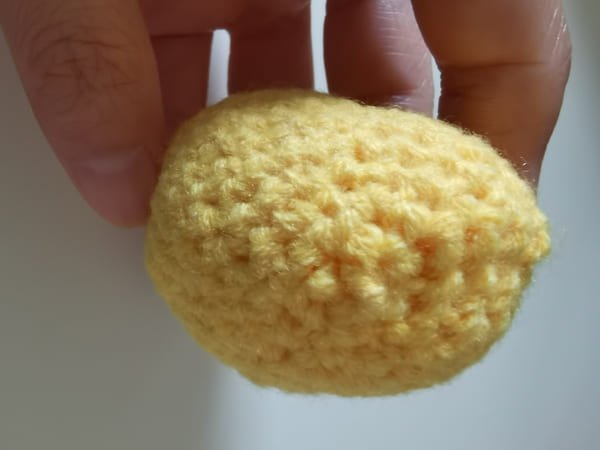
Body of mango is completed.
Crochet the stem (use brown yarn )for mango crochet
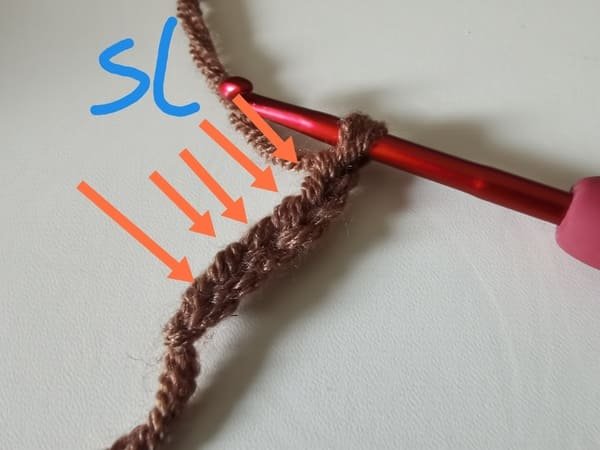
- 6 ch-(starting from second to last stitch-5sl)
- 30 ch for hand carrying
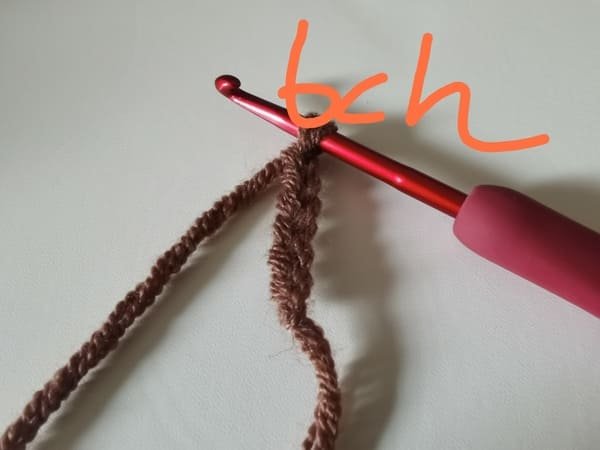
6 ch (now have a foundation chain stitch of 6.)
Now working on the second chain from the hook (so you skip the first chain and crochet into the second):
1 sl in 2nd ch from hook ,4 sl in next 4 ch.
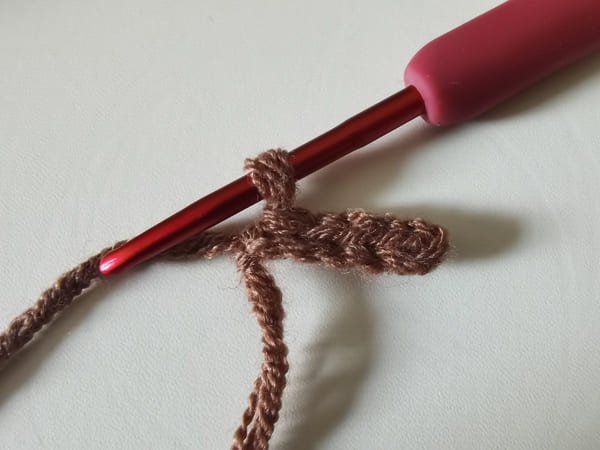
The stem is completed.
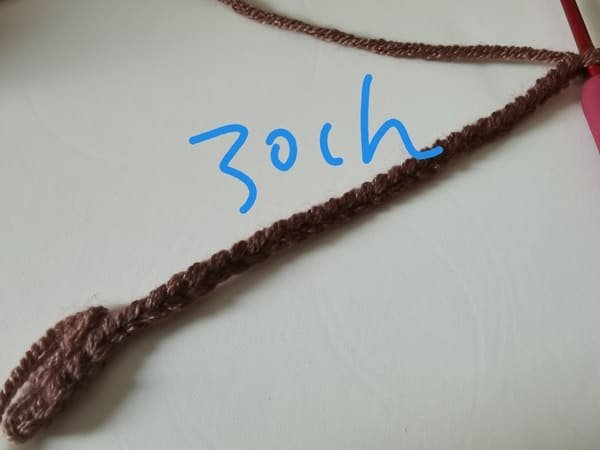
Crochet 30 chain stitches for hand carrying.
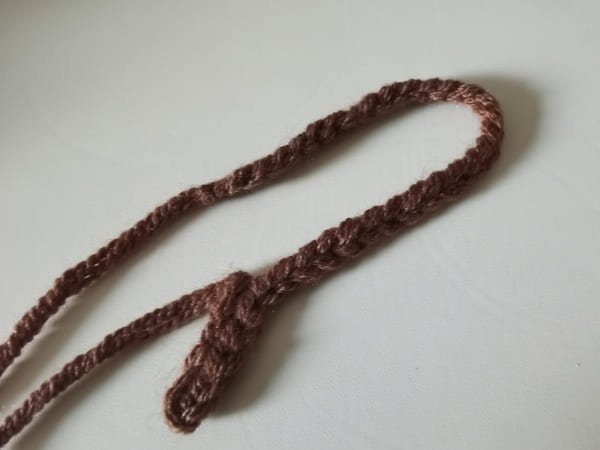
Fold it in half for hand carrying.

Once we’ve completed 30 chain stitches, and use a yarn needle to sew the carrying handle on.
Crochet the leaf (use brown yarn )for mango crochet
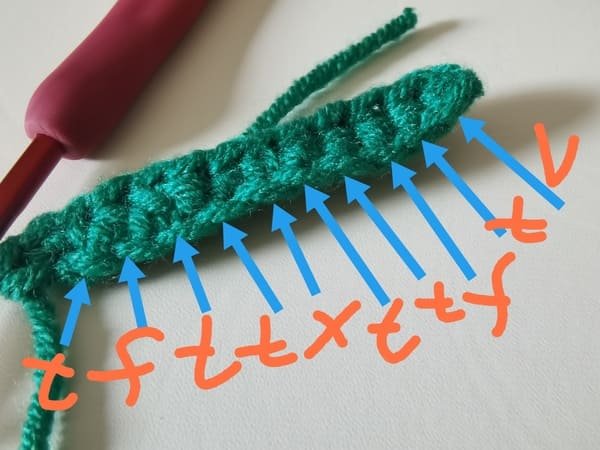
12ch-(starting from second to last stitch-sc,hdc,dc,hdc,hdc,sc,hdc,hdc,dc,hdc,3sc,hdc,dc,hdc,hdc,sc,hdc,hdc,dc,hdc,inc)
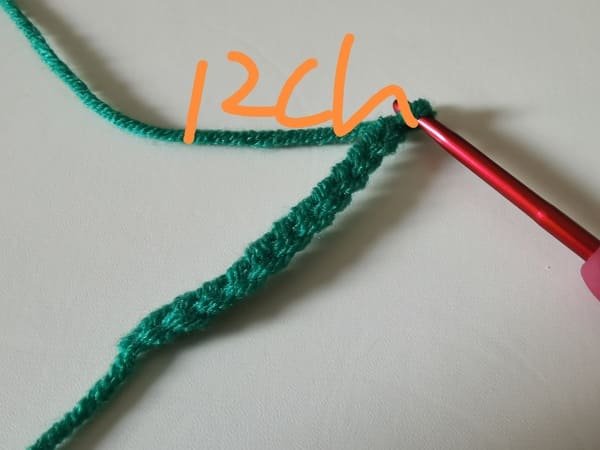
12 ch (now have a foundation chain stitch of 12.)
Now working on the second chain from the hook (so you skip the first chain and crochet into the second):
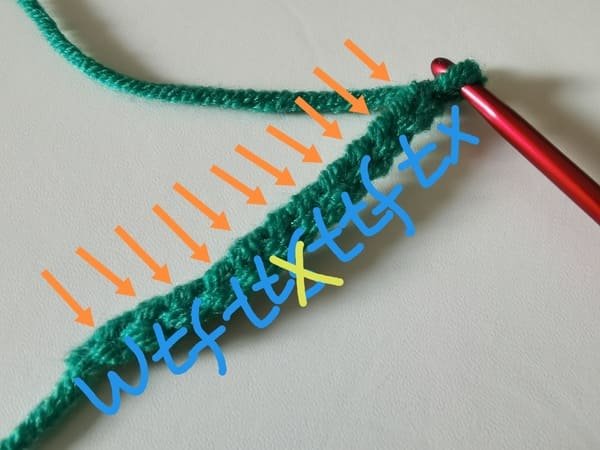
Crochet order for the one of side of leaf x=sc,t=hdc,f=dc,w=3sc,v=inc (In the picture we use the abbreviation)
Crochet order for the one side of leaf:
1 sc in 2nd ch from hook ,hdc in next ch,dc in next 1 ch, 2 hdc in next 2 ch,sc in nech 1 ch,2hdc in next 2 ch,dc in next 1 ch,hdc in next 1 ch, 3 sc in last ch.(from the right to left)
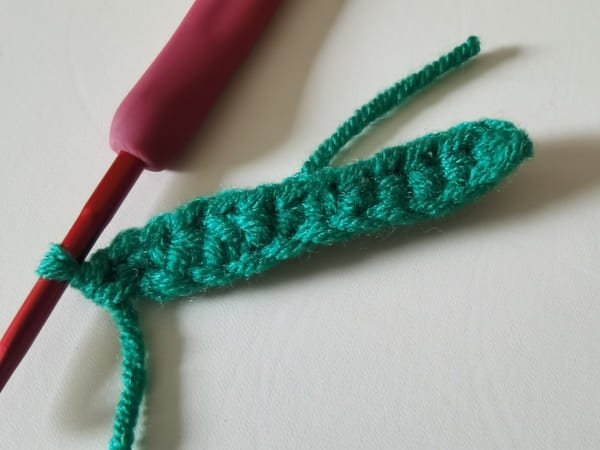
One side of leaf is completed.
Crochet order for the another side of leaf:
hdc in next ch,dc in next 1 ch, 2 hdc in next 2 ch,sc in nech 1 ch,2hdc in next 2 ch,dc in next 1 ch,hdc in next 1 ch, inc in 1 ch.(from left to right)
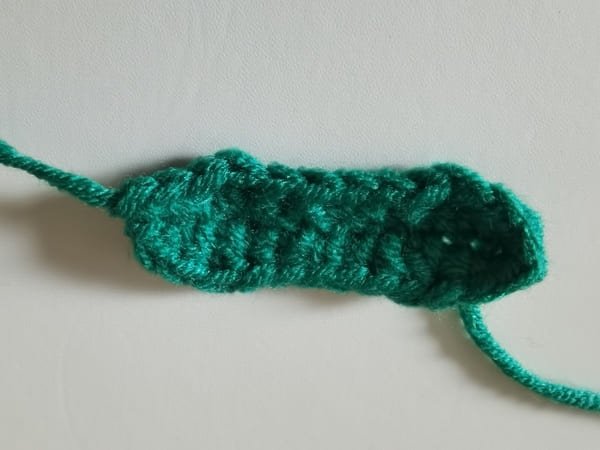
The leaf is completed.
Sew the hand carrying on the leaf

Sew the hand carrying on the leaf with yarn needle.
Sew the leaf on the body of mango
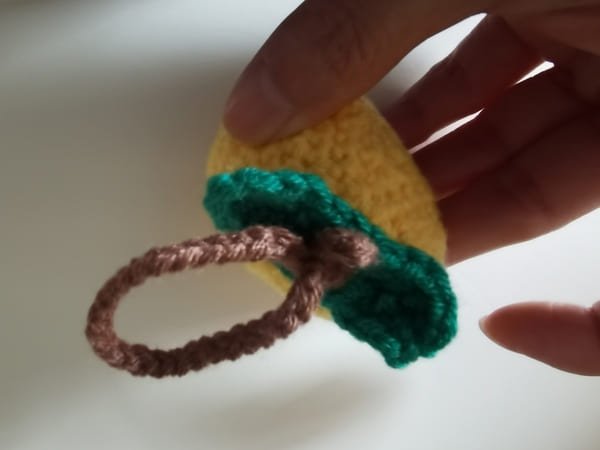
Sew the leaf on the center of Round 17 of body for mango.
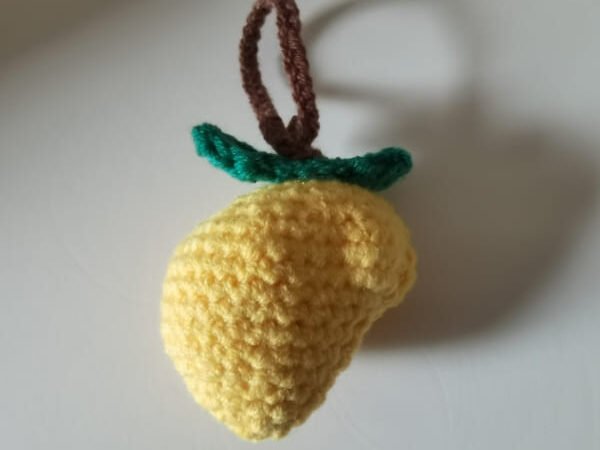
Mango crochet is completed.
Mango crocheting is a delightful form of art that combines soft textures and bright colors to create cute items. Our delightful mangoes are often yellow Their cuddly, rounded shapes make them perfect for small decorations or soft cuddly toys.
Tiny leaves make the mangoes more endearing by adding character to the them. The mangoes are simple in design, which encourages creativity while also allowing for fun.
Reference sources
1.Learn the most comprehensive guide for single crochet(sc)
Author:Sarah Stearns
Publication date: on June 15, 2021, updated:December 14, 2024
Title: How to single crochet (sc)for beginners
Summary as blow:
- Step-by-Step Single Crochet for Beginners
- Single Crochet into a Foundation Chain
- Single Crochet into another Row
- Single Crochet in the Round
- Increases and Decreases
- Working Single Crochet in Different Loops


