


Pig Crochet Pattern Step By Step Tutorial
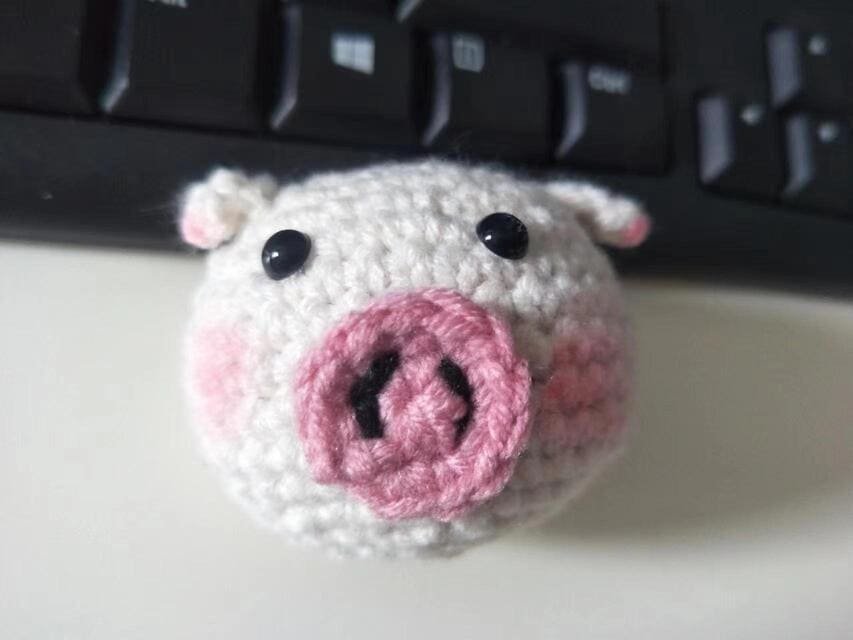
Table of Contents for pig crochet
Material kit of pig crochet
- Hook: 3.0mm
- Stuffing: (polyester fiberfill)
- Safety
- Yarn(rice white &pink &black)
- Yarn needle
- Marker
List of necessary tools
- Scissors
- Hot melt glue or glue
- Blush
Abbreviation for pig crochet
These are the required abbreviations for pig crochet
- ch – Chain stitch
- sc – Single crochet
- sl st – Slip stitch
- inc – Increase (usually 2 stitches in the same stitch)
- dec – Decrease (typically done by crocheting two stitches together)
- st(s) – Stitch(es)
- mc – Magic circle (or magic ring)
Crochet the body (use rice white yarn )for pig crochet
- R1: 6 sc into mc(6)
- R2: 2 sc in each st repeat 6 (12)
- R3: (1 sc, inc) repeat 6 (18)
- R4:(1sc,inc,1sc) repeat 6 (24)
- R5:(3sc,inc)repeat 6(30)
- R6:(2sc,inc,2sc)repeat 6(36)
- R7-11:36sc in each st (36)
- R12:(2sc,dec,2sc) repeat 6 (30)
- R13:(3sc,dec) repeat 6 (24)
- R14:(1sc,des,1sc )repeat 6(18)
- R15:(1sc,dec) repeat 6(12)
- Fiberfill
- R16:dec repeat 6(6)
Best selling products
-

Raffia Cross Pattern Basket Handbag Kit
$19.99 -

Hexagonal Bucket Bag Kit
$29.99 -

Raffia Handbag Kit
$29.99 -

Hammock Bag Kit
$29.99 -

Wheat Bucket Bag Kit
$19.99
Tips for pig crochet:
As below:
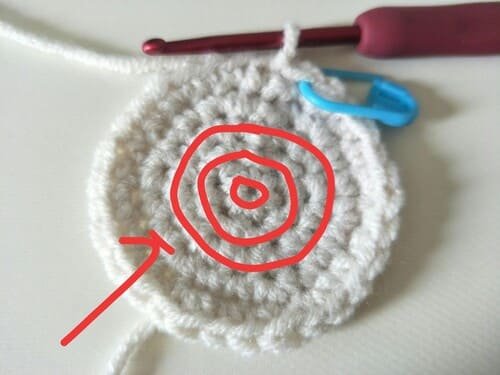
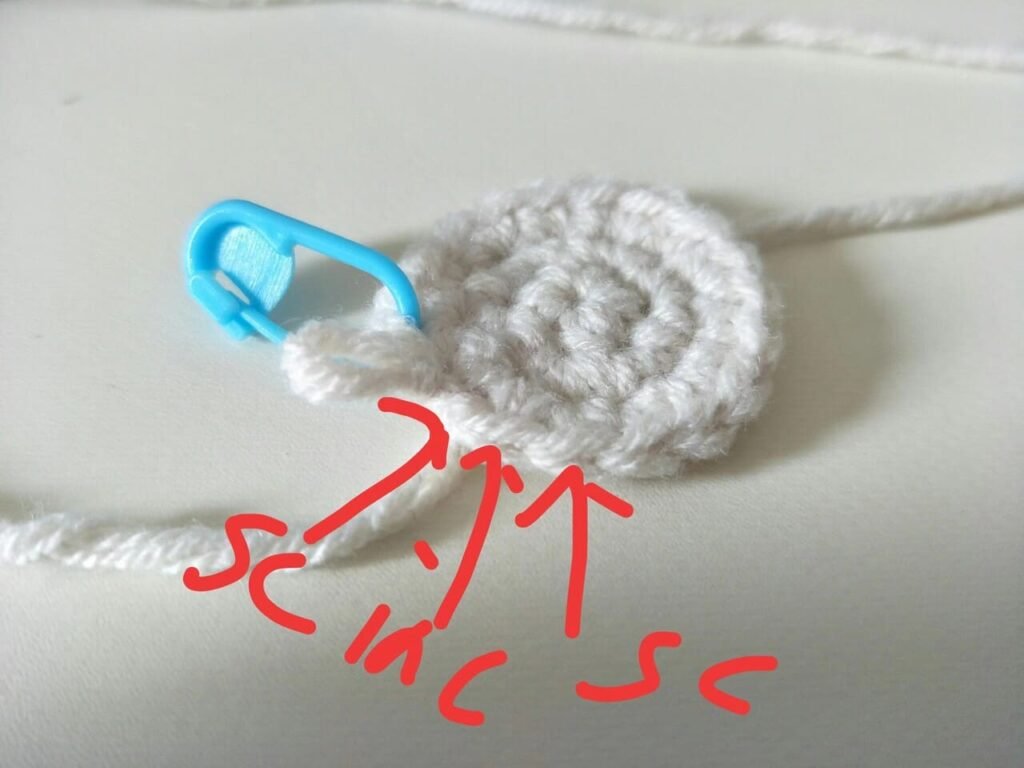
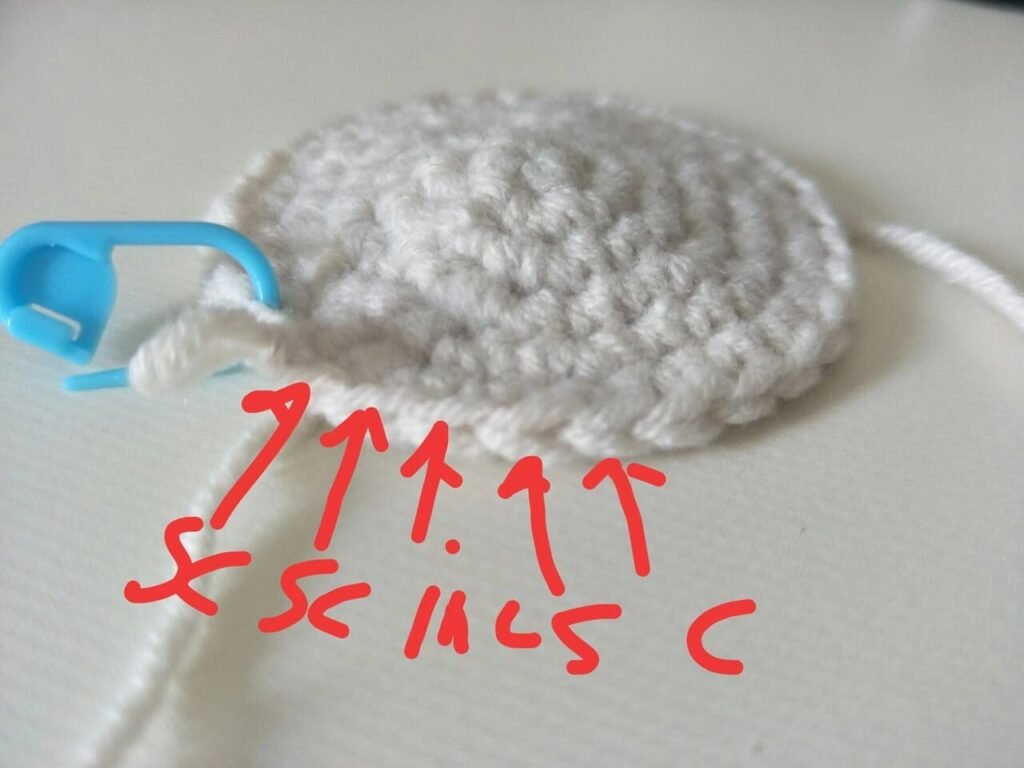
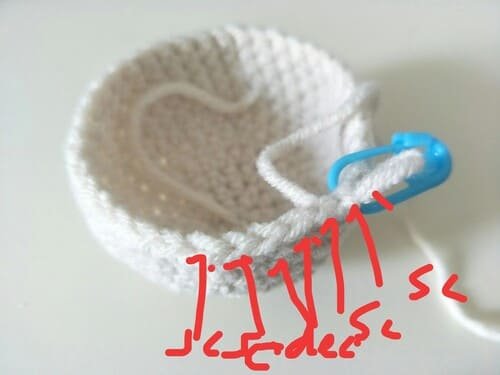
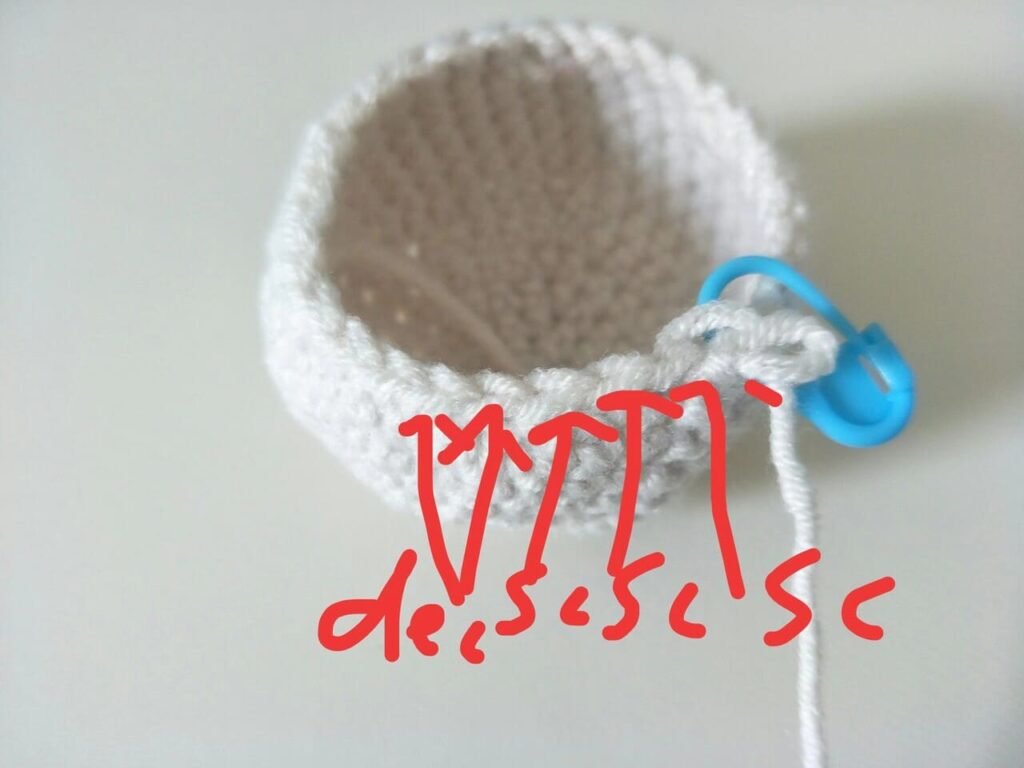
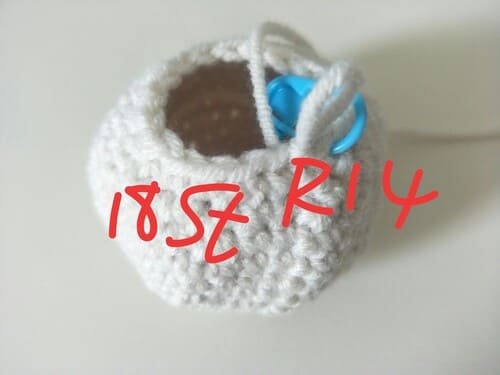
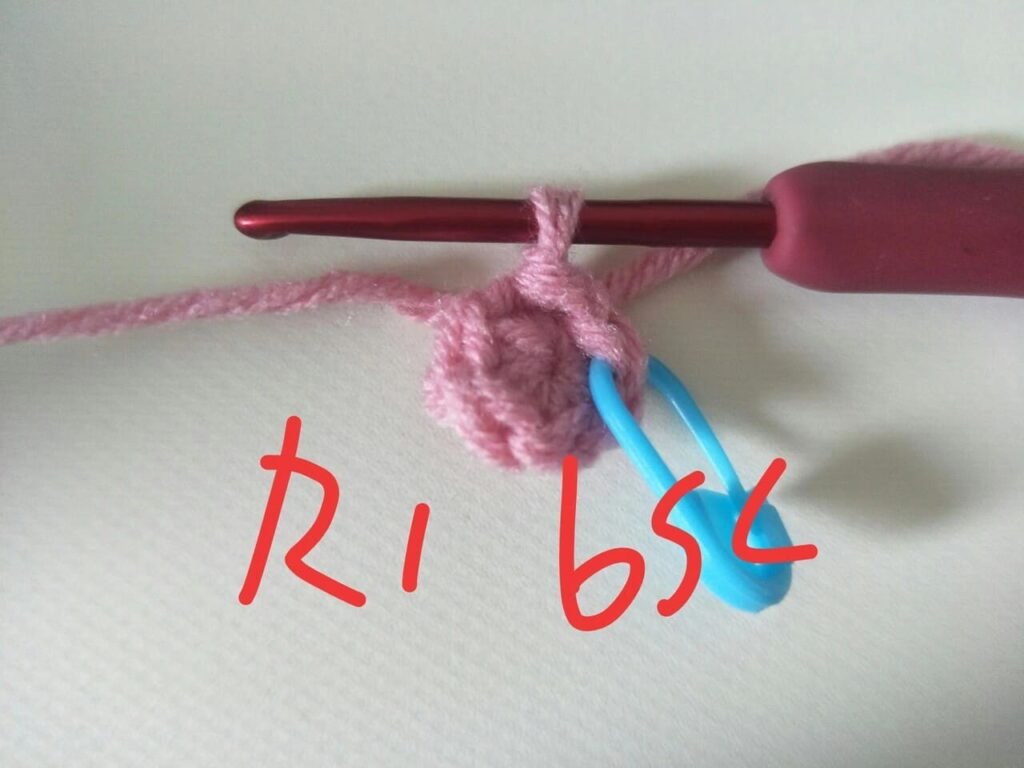
As shown in the picture, we can see that there are 4 red circles, each circle represents a row, and the whole row is raised.
V shape represents a stitch.
For beginners, it is difficult to find the stitches.
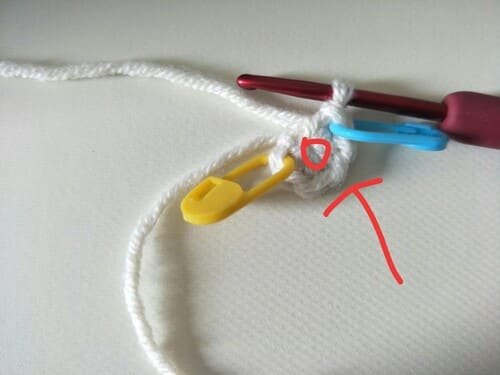
Use a yellow marker to mark the first stitch and a blue marker to mark the last stitch.
At the beginning of each round, add a chain stitch to keep the row high. Don’t forget.
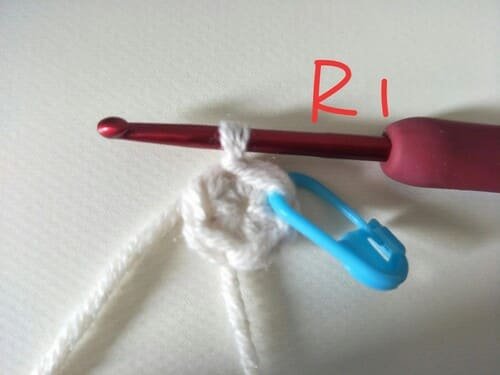
R1
6 sc in to magic ring.
We pinch the yarn end with the index finger and thumb of our left hand, pinch the fabric with our right hand, and then use the strength of our left hand to tighten the yarn end.
The center of the circle will slowly shrink.
Want to learn magic ring, please click:How To Crochet Magic Ring ? l Step-By-Step l Video & Text &Photo
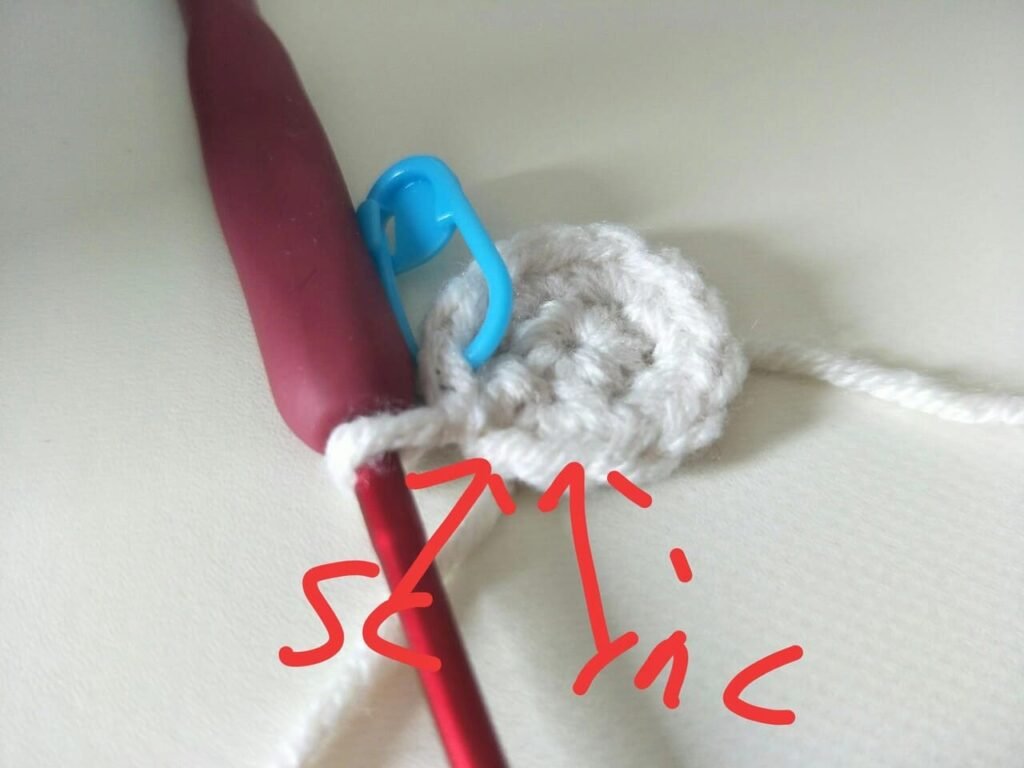
The hook passes through the first marker, and after yarn over, the two loops on the hook are brought out, and the slip stitch is completed.
Want to learn single crochet, please click: Single Crochet-You Want To Know The Most Detailed Information
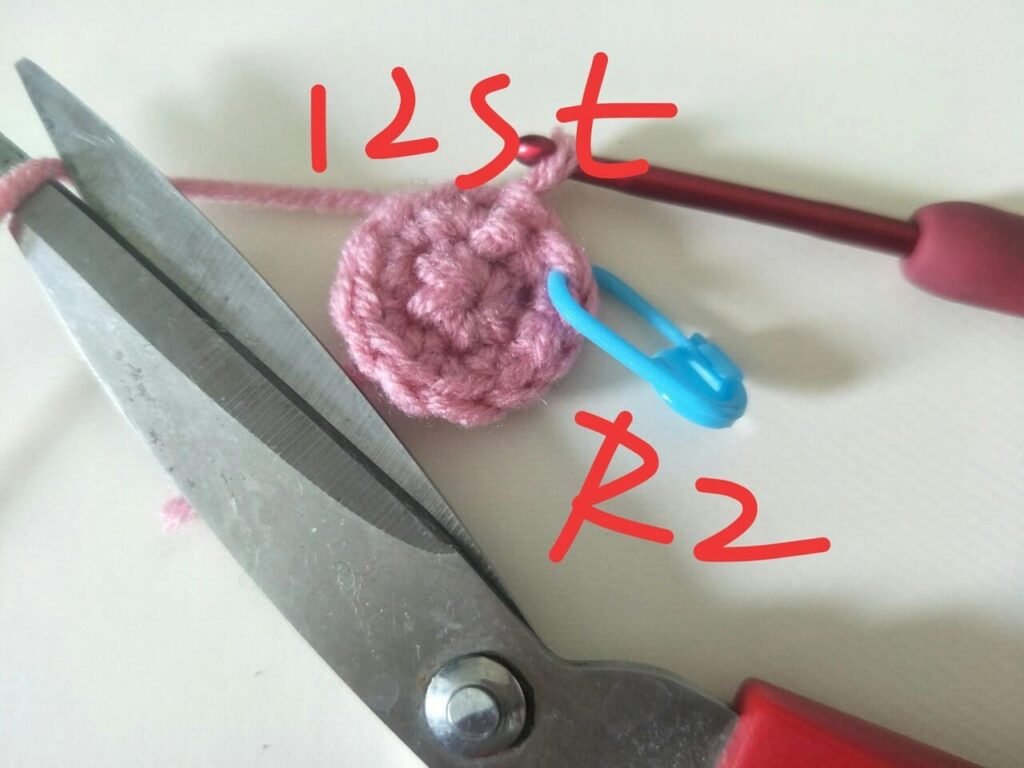
R2
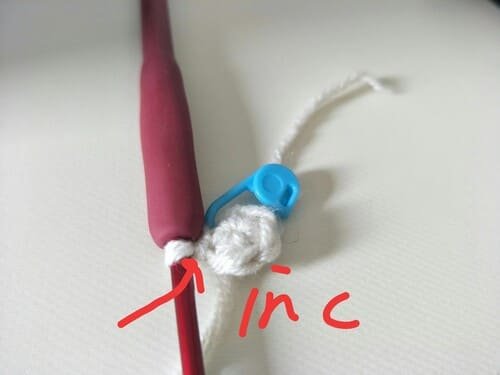
- 2 sc in each st repeat 6
- Finally, there are one stitch left in this round. then crochet inc again.
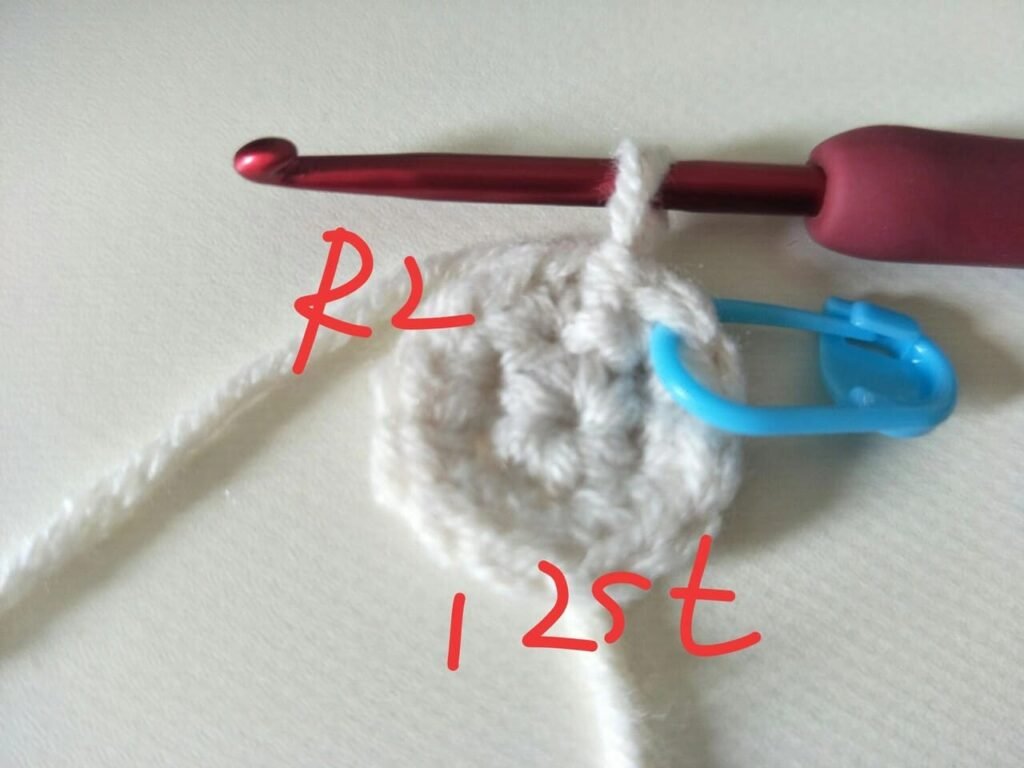
After slip stitch , we get 12st for R2.
We should not think it is easy, because sometimes we may miss some hooks when inc, so we need to confirm the number of stitches in each row when completing it.
R3
1.I put the fiber on the side to make it easier to observe the crocheting order(1 sc, inc) repeat 6 times
2.Finally, there are two stitch left in this round. then crochet sc, inc again.-Just make sure there are two stitches left at the end. If there is one more stitch or one less stitch, it means you made a mistake in the previous crochet. find the reason and correct it.
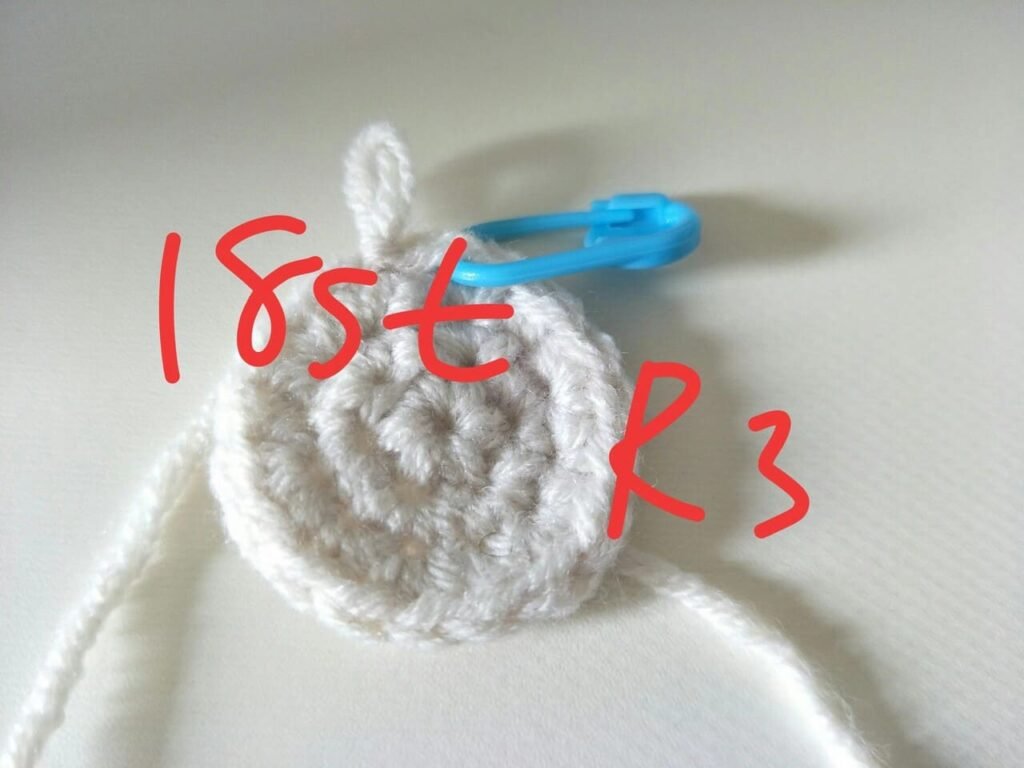
After slip stitch , we get 18st for R3.
R4
1.Put the fiber on the side to see crocheting order(1 sc, inc,1sc) repeat 6 times
2.Finally, there are three stitches left in this round. then crochet sc, inc,sc again.
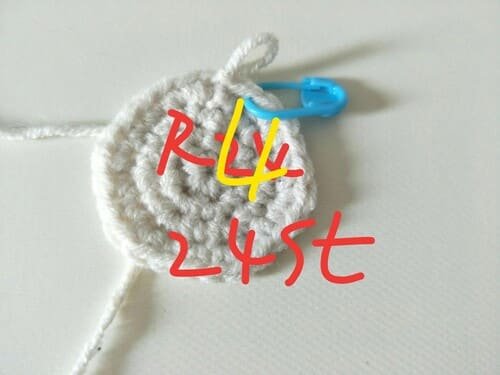
After slip stitch , we get 24st for R4.
Pure hand-crocheting requires patience.
R5
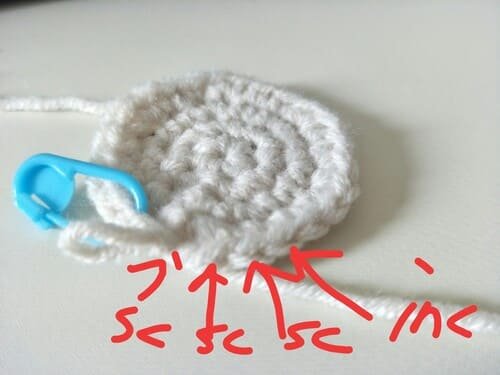
1.Put the fiber on the side to see crocheting order(3sc, inc) repeat 6 times .
2.Finally, there are four stitches left in this round. then crochet 3sc, inc again.
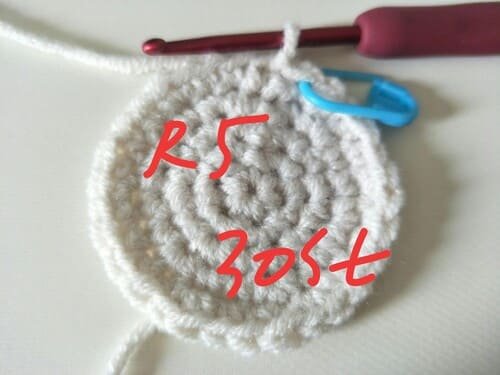
After slip stitch , we get 30st for R5.
R6
1.Put the fiber on the side to see crocheting order(2sc, inc,2sc) repeat 6 times .
2.Finally, there are five stitches left in this round. then crochet 2sc, inc,2sc,again.
In fact, it is easy to make mistakes during the crocheting process. we need to be patient to deal with it.
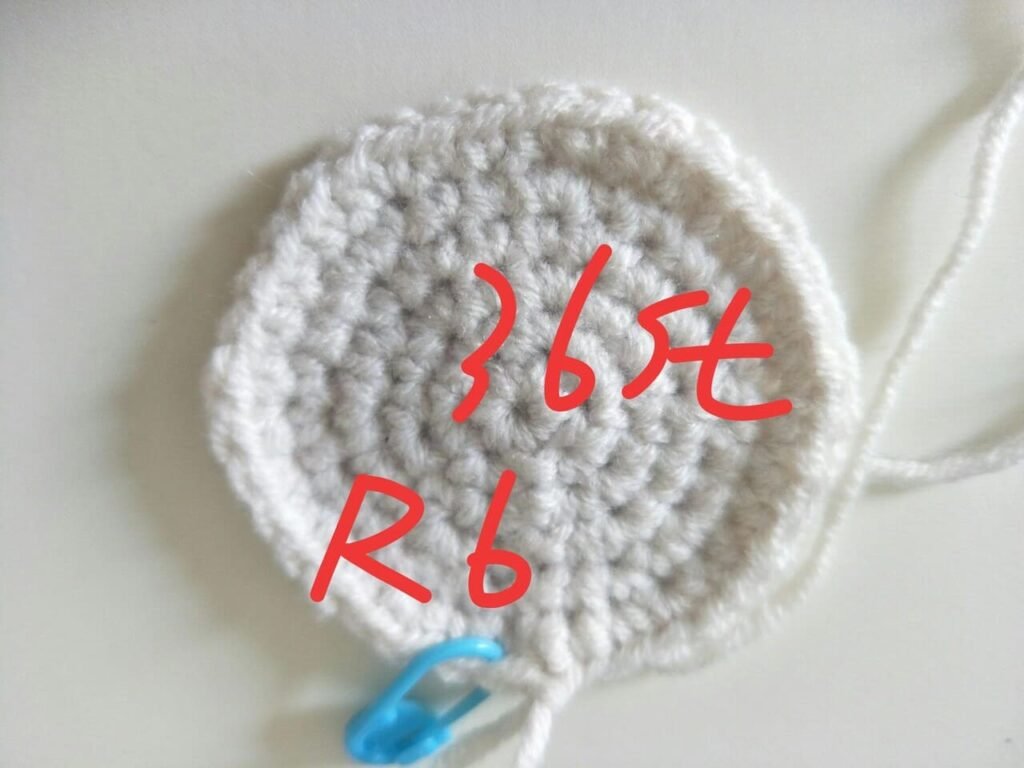
After slip stitch , we get 36st for R6.
R7
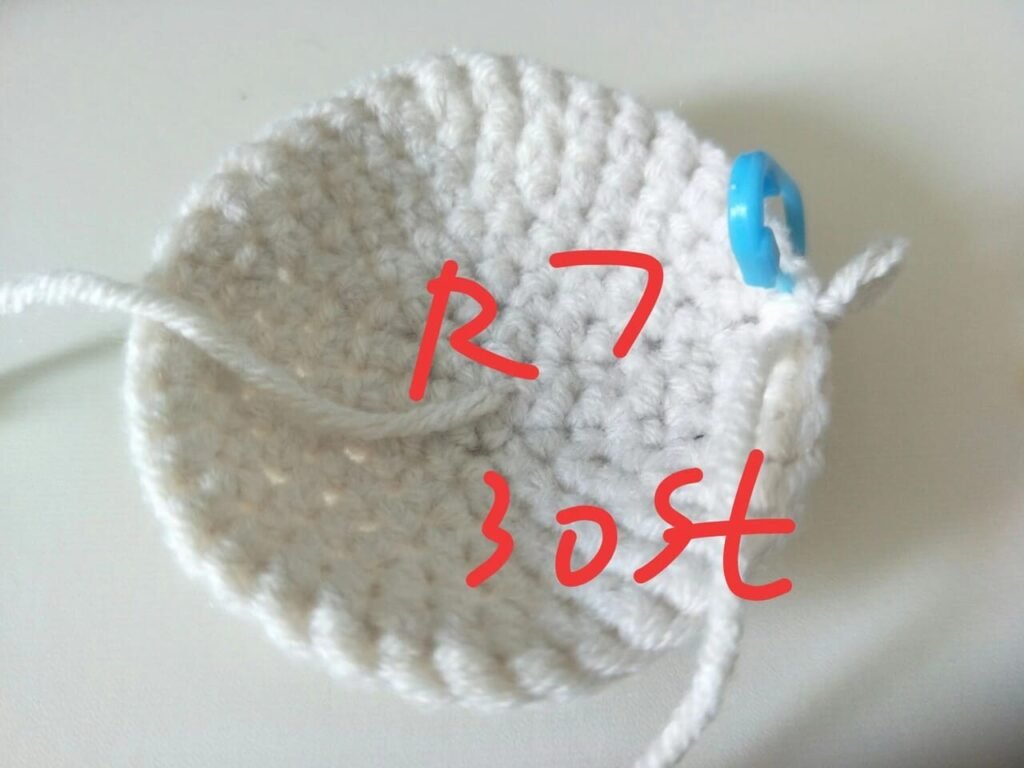
36sc in each stitch.
The picture is wrong, should be 36 st for R7.
R8
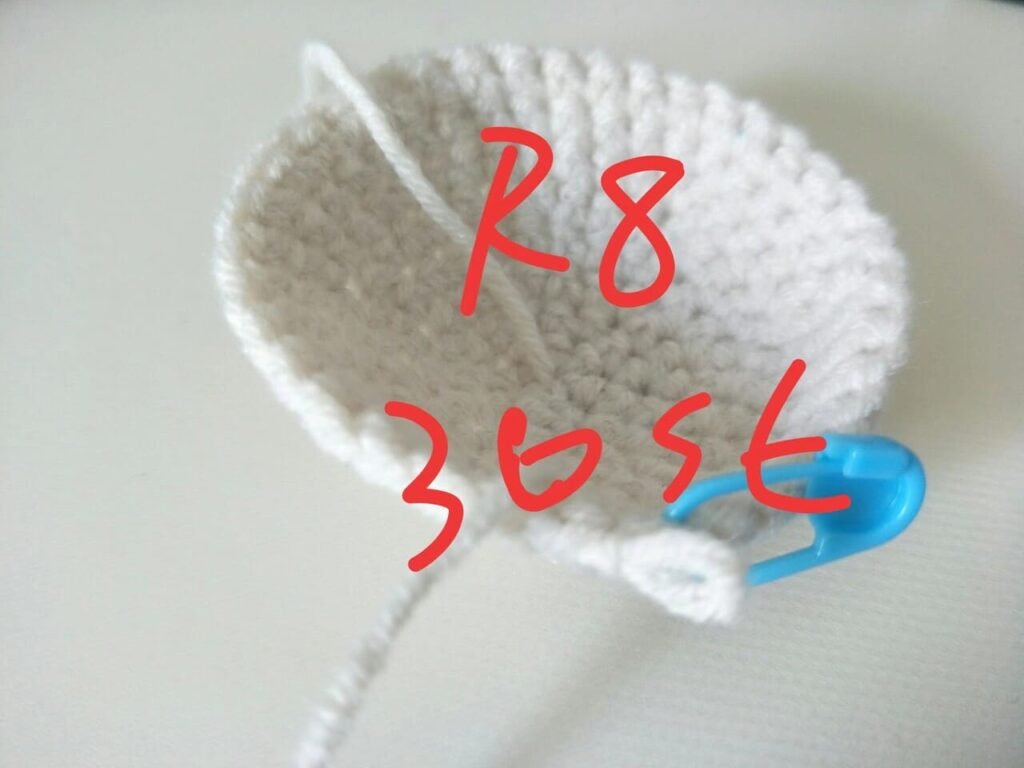
36sc in each stitch.
After sl , we get 36st for R8.
When it reaches R8, it will form a circular shape.
R9
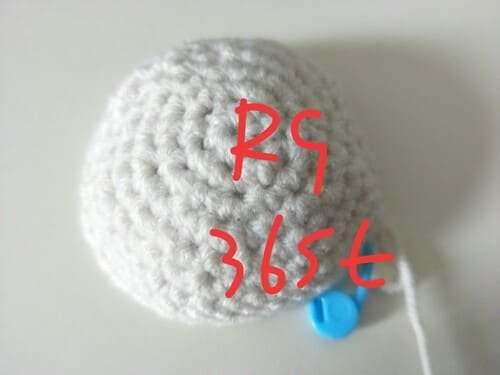
36sc in each stitch.
After sl , we get 36st for R9.
I turned the fabric upside down so I could clearly see the raised shapes of each row.
R10
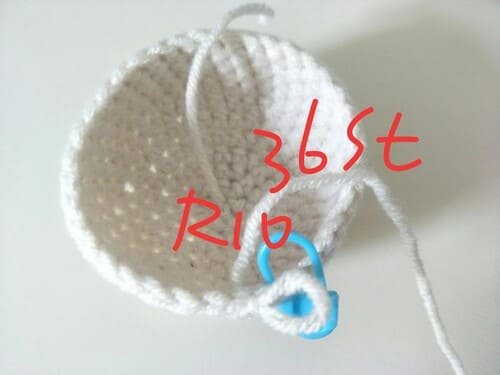
36sc in each stitch.
After sl , we get 36st for R10.
At this point we see the shape becoming more circle.
R11
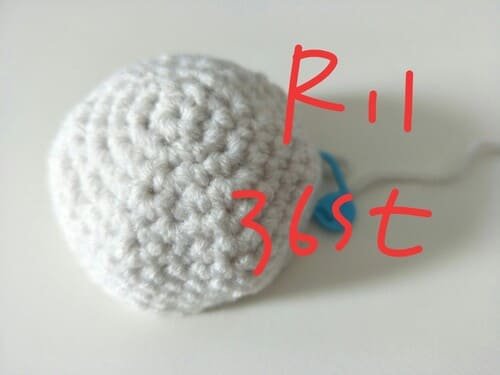
36sc in each stitch.
After sl , we get 36st for R11.
At this time, I turned the fabric upside down.
R12
1.Crocheting order(2sc,dec,2sc) repeat 6 times .
2.Finally, there are six stitch left in this round. then crochet 2sc, dec,2sc,again.
We use the invisible decrease method. If we don’t know how to do it, we can check this article:Single Crochet Decrease -Three Method In More Details Slowly For Beginner | Video&Text&Picture
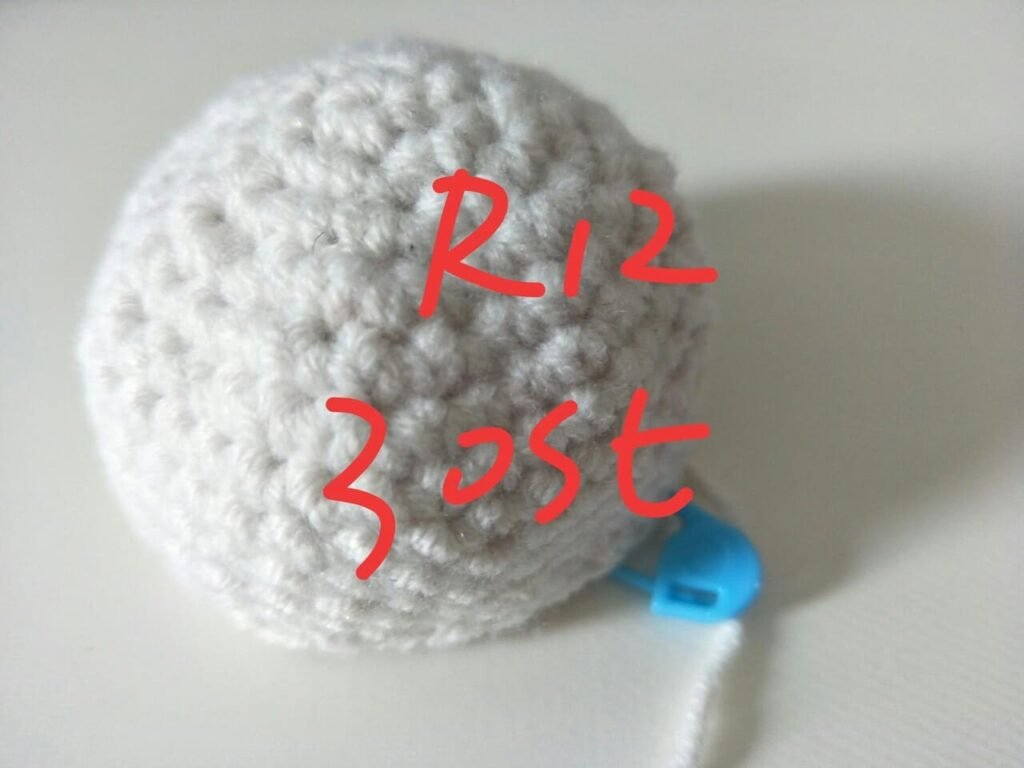
After sl , we get 30st for R12.
Starting from R12, the round starts to shrink slowly by decreasing stitches.
R13
1.Crocheting order(3sc,dec) repeat 6 times .
2.Finally, there are five stitch left in this round. then crochet 3sc, dec again.
As the fabric takes on a three-dimensional shape, it becomes easier to see the stitches(V shape).
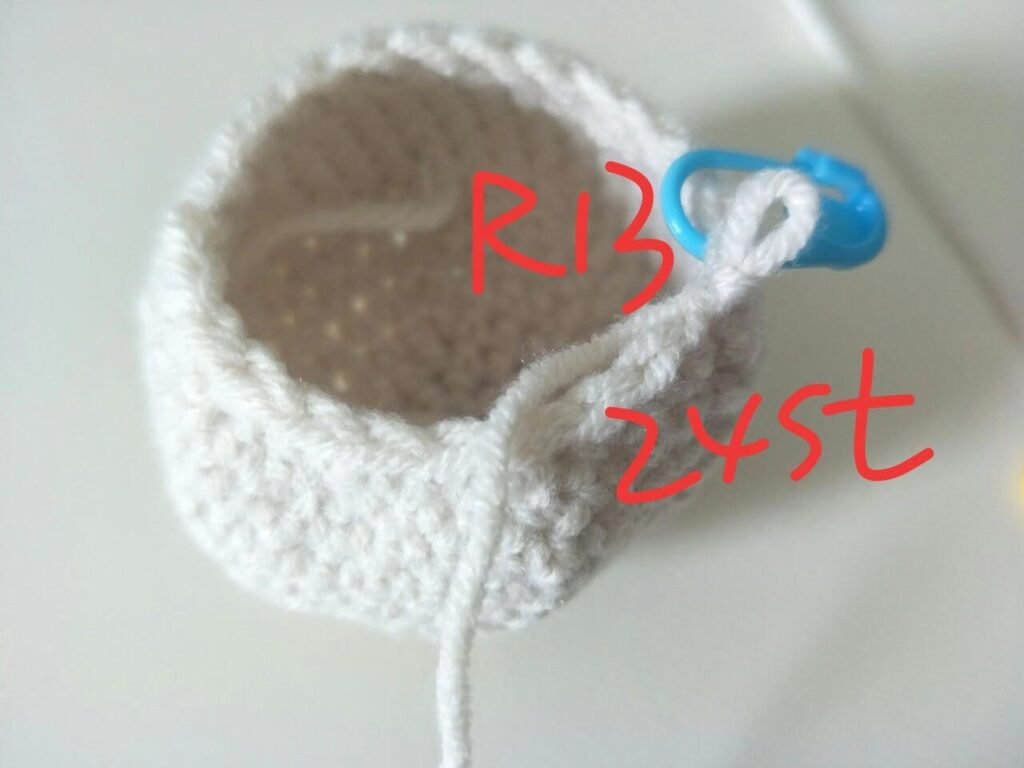
After sl , we get 24st for R13.
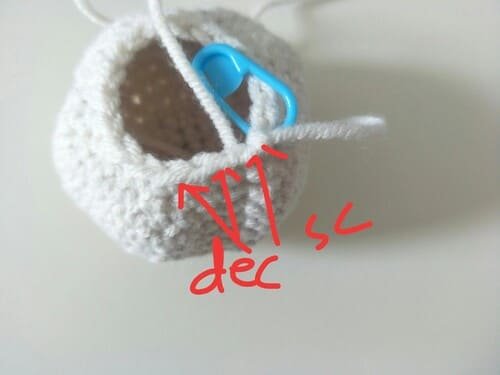
R14
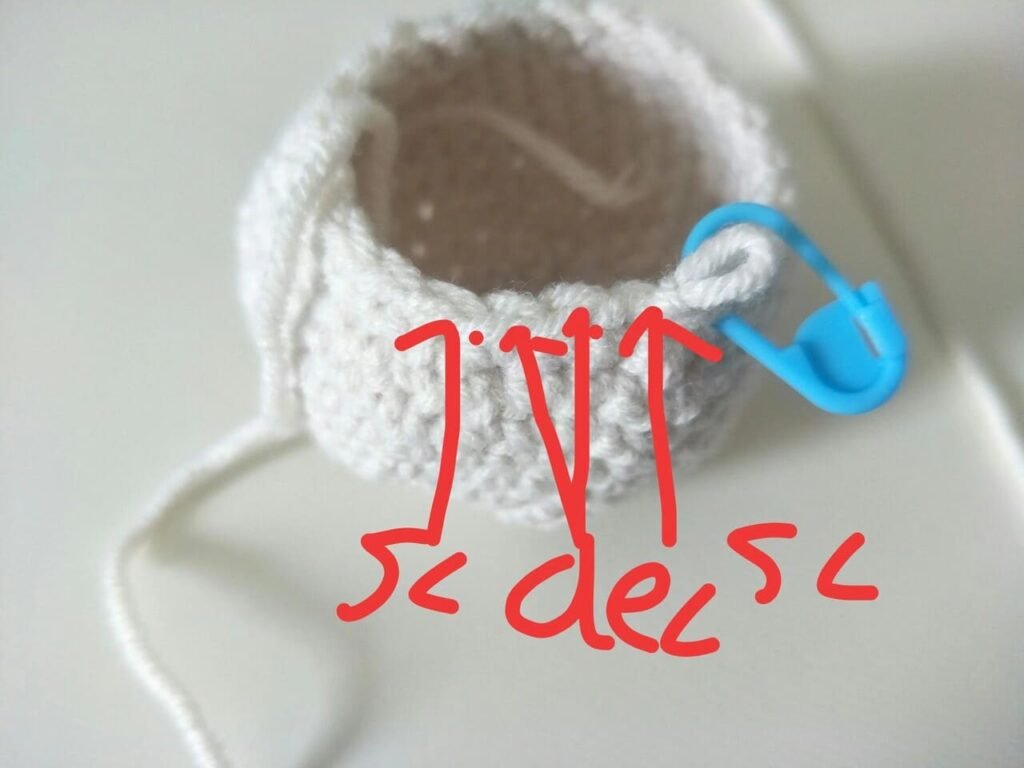
1.Crocheting order(sc,dec,sc) repeat 6 times .
2.Finally, there are four stitches left in this round. then crochet sc, dec,sc,again.
Here we can see clearly from the picture that decreasing stitches is to combine two stitches into one stitch.
After sl , we get 18st for R14.
At this point, we can see that the closing is getting smaller evenly.
R15
1.Crocheting order(sc,dec) repeat 6 times .
2.Finally, there are three stitches left in this round. then crochet sc, dec,sc,again.
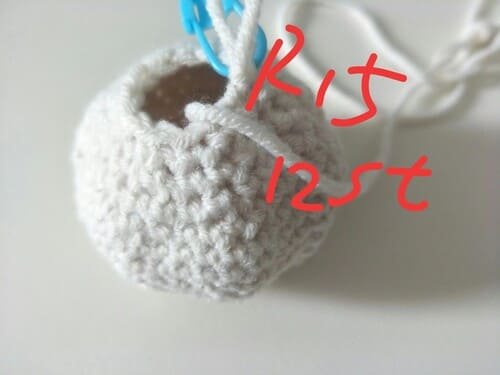
After sl , we get 12st for R15.
Fiberfill
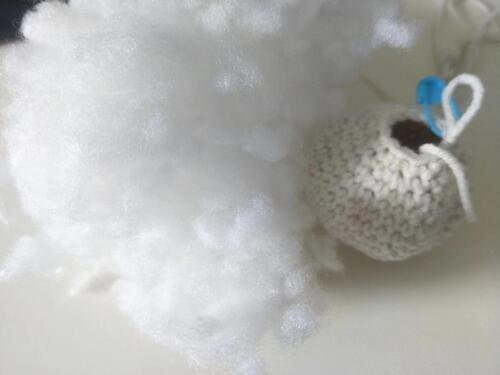
My suggestion is that when we hook to R15, you can add fiberfill into the hole of fabric.
We hold the fabric with our left hand and put the fiberfill into the hole of the fabric with the index finger of our right hand.
Don’t put too little fiberfill, or it will feel soft.
Don’t put too much fiberfill, or the stitch will be pulled too tight.
My suggestion is to put a small amount of fiberfill into the hole with multiple times, and the most obvious effect is a full shape.
R16
1.Crocheting order(dec) repeat 6 times .
2.Finally, there are two stitches left in this round. then crochet s dec again.
After sl , we get 6st for R16.
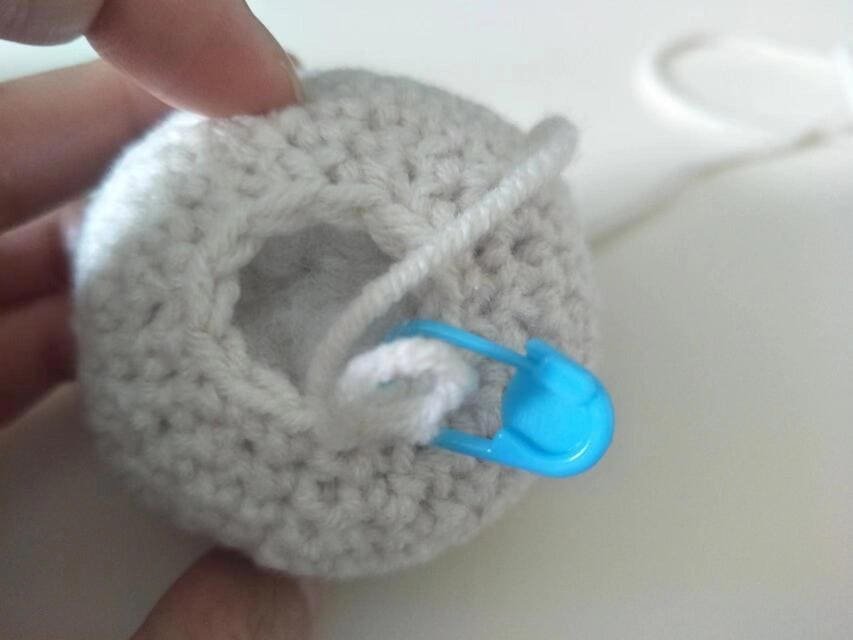
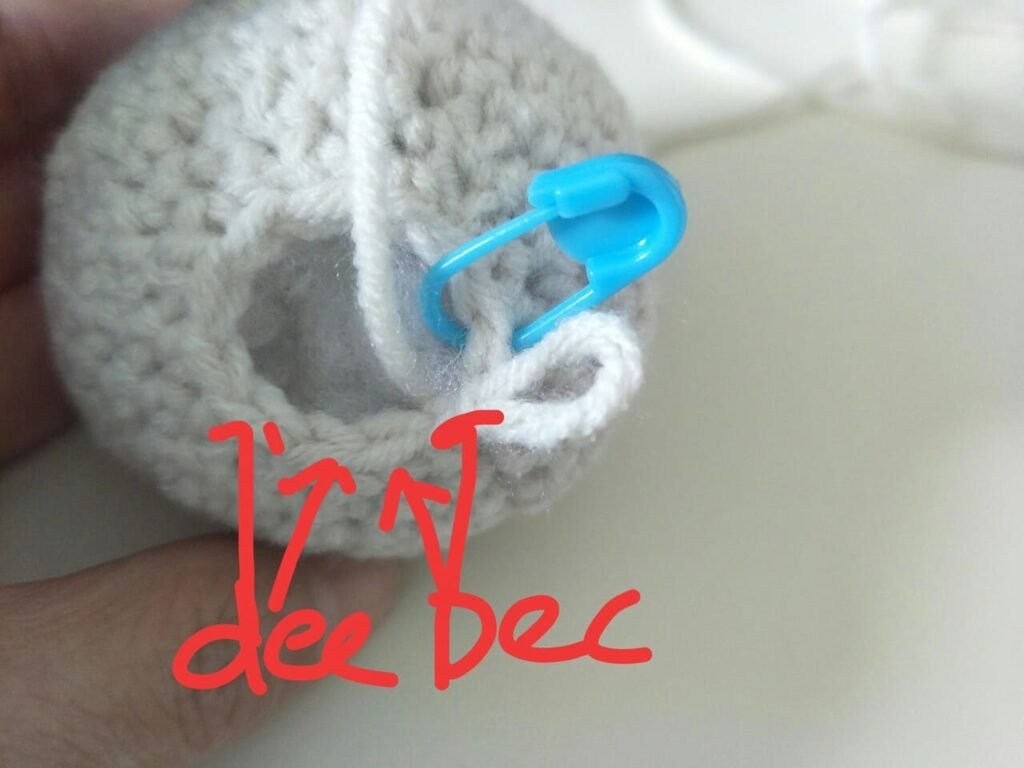
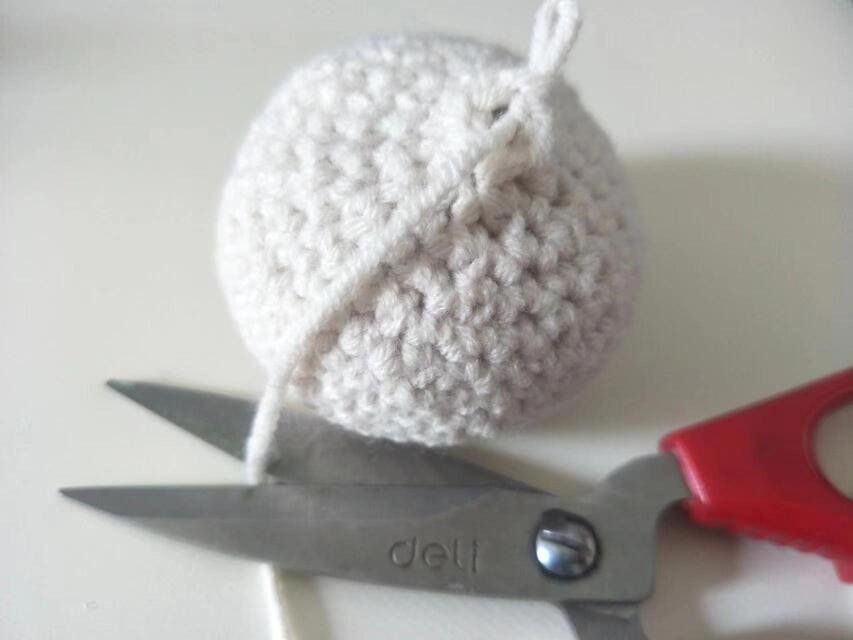
Leave about 10cm of yarn end and cut it with scissors.
Use a crochet hook to bring out the yarn end.
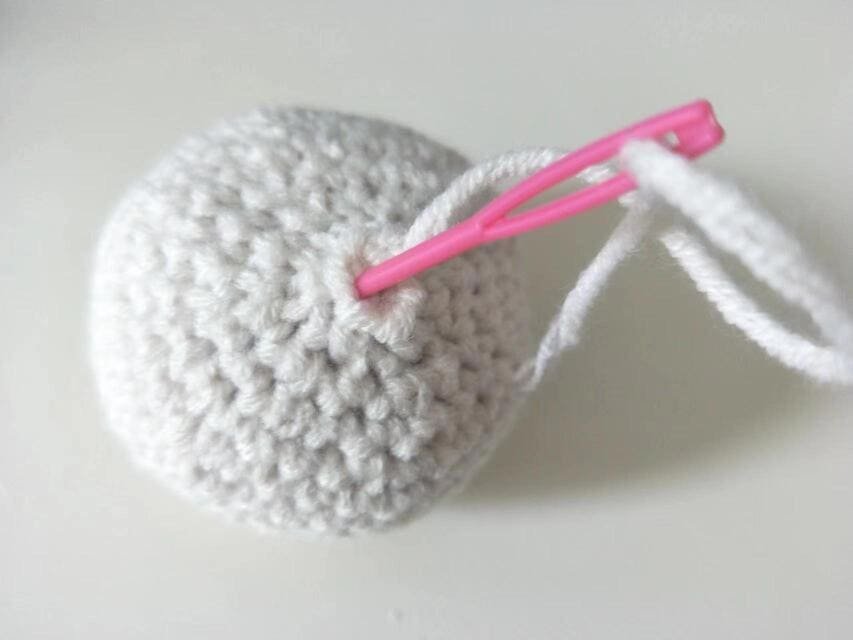
Use yarn needle with pig crochet kit, conceal yarn end.
The method is to conceal the yarn end several times at the place where the yarn comes out and insert the place again, and finally cut off the excess yarn with scissors.
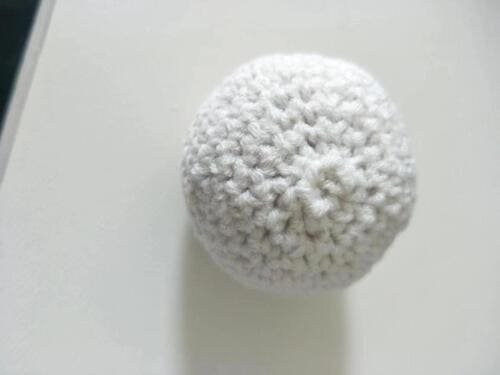
Body of pig crochet is completed.
Here we can see the bottom, after conceal end.
Pig crochet kit
If want to crochet cute pig, please click pig crochet kit to buy it .
Crochet the ear (use rice white yarn )for pig crochet
- 4ch
- sc,2hdc
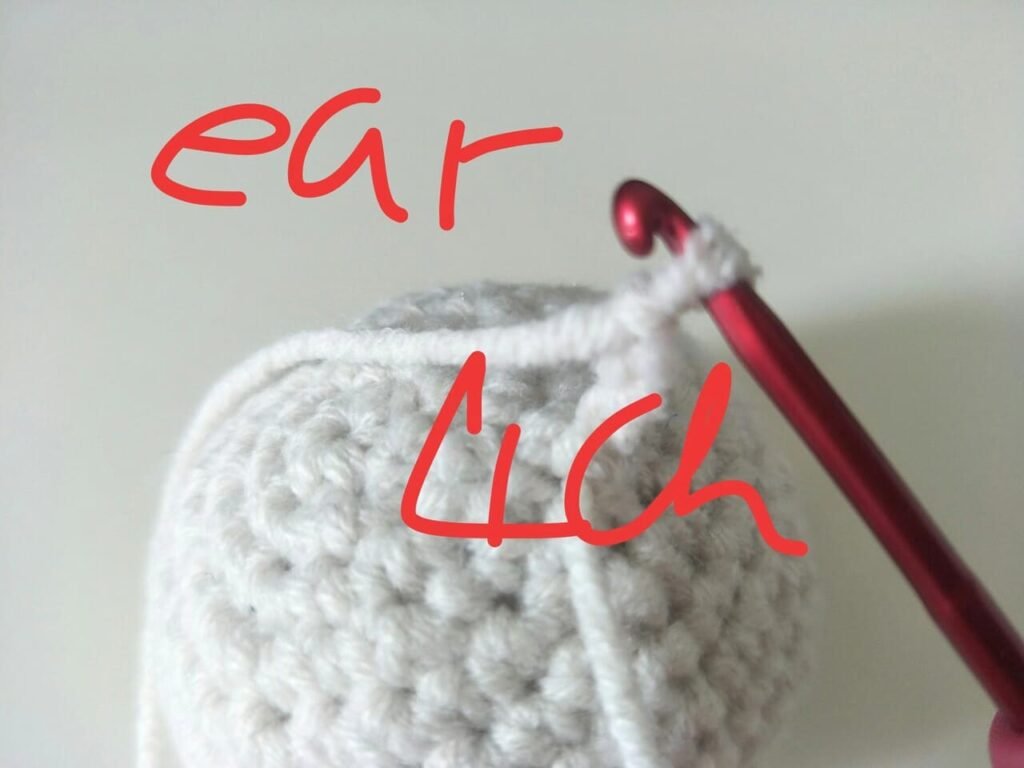
We need to find the hook insertion position:(count down to the fourth round from the top.at the same time, find the side where the slip stitch is located)
After the position is determined by the above method, crochet 4 chain stitches firstly

Hook the line at the penultimate hole,crochet order (sc,2hdc).
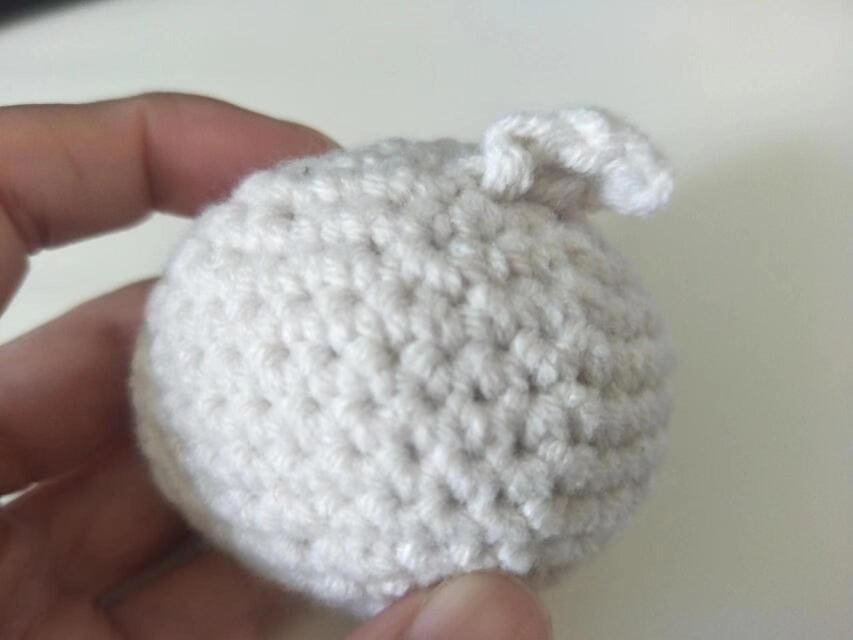
After hooking a single stitch in the next stitch on fourth round, cut the yarn end.
Use yarn needle to conceal yarn end.
Use the same method to crochet the other ear.

This is the effect of the ear that I took from above view.
Crochet the ear (use pig yarn )for pig crochet
- R1: 6 sc into mc(6)
- R2: 2 sc in each st repeat 6 (12)
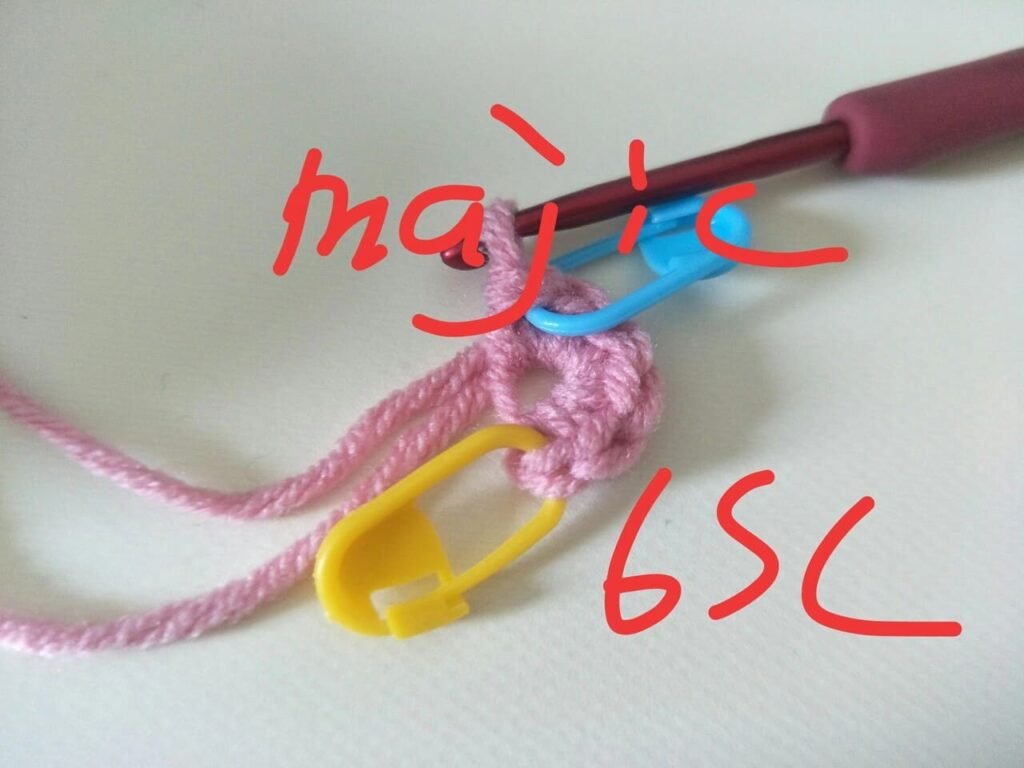
6 sc into magic ring(This is the best way to crochet doll.)
After si, we get R1.
1.2 sc in each st repeat 6 times for this round.
2.Finally, there are one stitch left in this round. then crochet inc again.
3.After sl, we get R2.
4.Then cut yarn end, then use hook to bring out the yarn end.
Tie a knot between the starting and ending yarn ends, and then cut off the excess yarn ends.

Use black yarn to crochet the nostrils.
Safety eyes & nose & apply blush for pig crochet
Safety eyes :the two eyes are placed on the sixth row, below the ears.
Safety nose:glue it in the middle just below the eyes.
Apply blush:Apply blush on both sides of the nose and the tips of the ears.
Reference sources
1.Learn the most comprehensive guide for single crochet(sc)
Author:Sarah Stearns
Publication date: on June 15, 2021, updated:December 14, 2024
Title: How to single crochet (sc)for beginners
Summary as blow:
- Step-by-Step Single Crochet for Beginners
- Single Crochet into a Foundation Chain
- Single Crochet into another Row
- Single Crochet in the Round
- Increases and Decreases
- Working Single Crochet in Different Loops


