


Single Crochet Rows Most Complete Information|Video&Text&Picture Guide
Single crochet rows: a major challenge I often faced was navigating back and forth in rows and determining where to place the first stitch in a new row.
Table of Contents
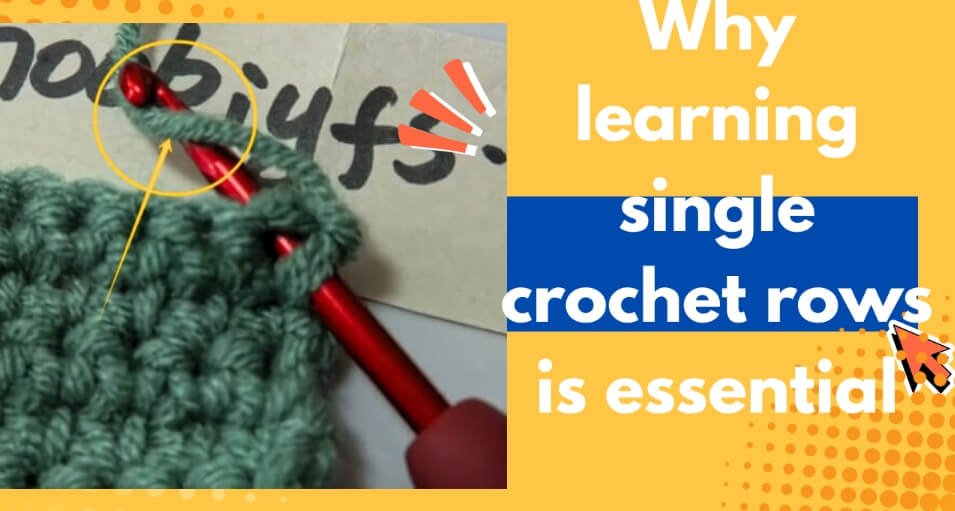
Why learning single crochet rows is essential?
If you want to crochet a new row, you must learn this technique.
We found that in the actual crochet process, many people don’t know how to change a row with a single stitch.
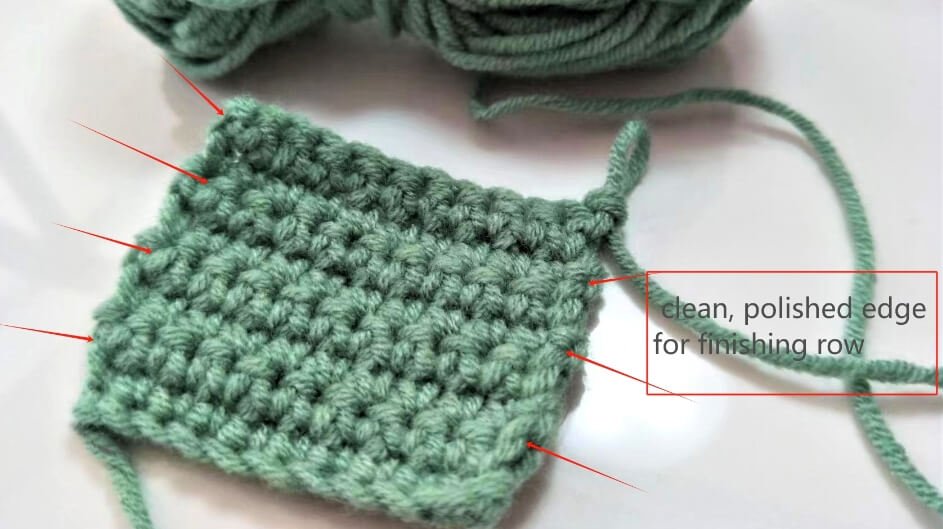
We have specially made a table to help you understand the benefits of this single crochet rows.
| Aspect | Explanation |
|---|---|
| Why to learn | – Easy to learn for beginners – Forms the foundation for more complex stitches – Allows for structured row-by-row progress |
| Where to use | – Crochet dolls (amigurumi) – Bags – Carpets and rugs |
| Edge/finish | – Neat and clean row endings – Gives a polished look to the crochet project |
Recommended articles
If you are a beginner and don’t know how to crochet short stitches, you can click here:Single Crochet Tutorial
If you are a beginner and need text and picture instructions about single crochet, you can click here: Single Crochet-You Want To Know The Most Detailed Information
If you want to learn how to make magic ring with single crochet, there are video with text and pictures , you can click here: How To Crochet Magic Ring ? l Step-By-Step l Video & Text &Photo
More cute short video,you can click here: https://www.youtube.com/@hookiyfs/shorts
Best selling products
-

Raffia Cross Pattern Basket Handbag Kit
$19.99 -

Hexagonal Bucket Bag Kit
$29.99 -

Raffia Handbag Kit
$29.99 -

Hammock Bag Kit
$29.99 -

Wheat Bucket Bag Kit
$19.99
Youtube single crochet rows
Single crochet in rows is a great technique for beginners!
We deliberately made it slow so that novices can learn and understand it.
Here’s a step-by-step guide on how to work single crochet rows:
How to make single crochet rows?
We record the most important steps in the form of text and pictures, which is also convenient for you to view and review.
Step 1: Create a foundation Chain
- Decide on the width of your fabric.
- Make a foundation chain stitch with the desired number of stitches plus one extra chain for turning.
Example: For a 10-stitch wide fabric, chain 11.
Step 2: Turn your work
- Once the foundation chain is complete, turn your work to prepare for the first row.

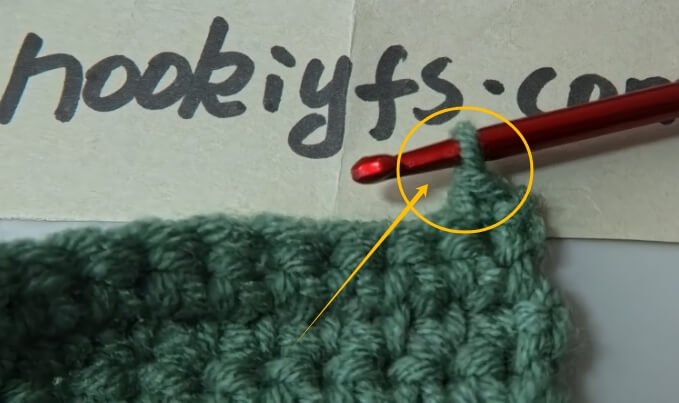
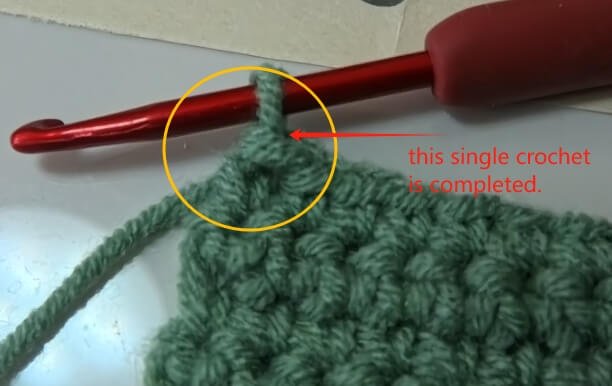
Step 3: Start the first single crochet stitch
- Insert your hook into the second chain from the hook (this is where the first single crochet begins).
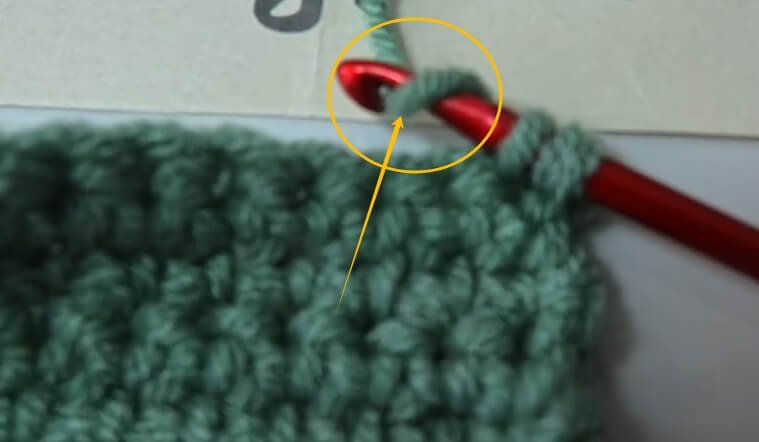
Step 4: Make a single crochet stitch
- Yarn over (wrap the yarn over the hook).
- Pull through the stitch (you should have two loops on the hook).
- Yarn over again and pull through both loops on the hook.
- Get one loop on the hook( this is first single crochet.)
Step 5: Continue across the row
- Repeat Step 4 in each chain until you reach the last stitch.
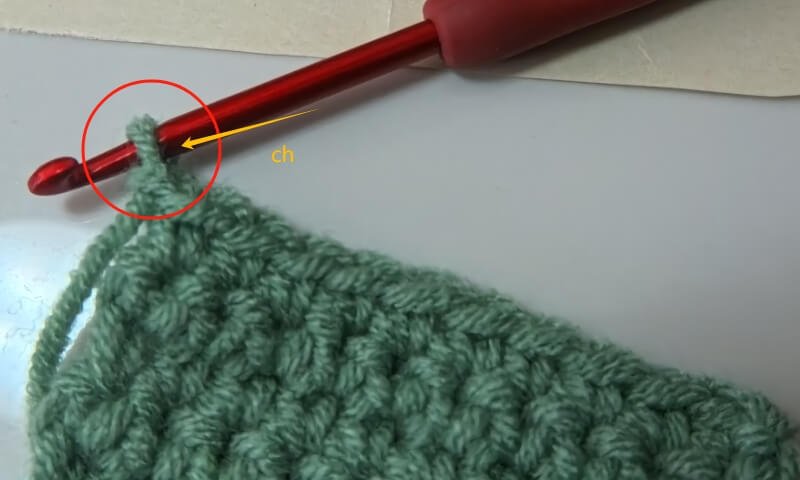
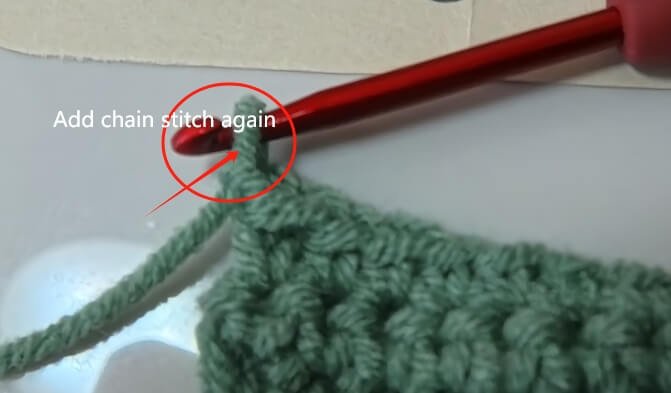
Step 6: Turn your work for the next row
- When you reach the end of the row, turn your work.
- Chain 1 (this acts as the turning chain for the next row).
Step 7: Repeat for additional rows
- Continue making single crochet stitches across each row.
Tips
In the single crochet rows of process, we summarize the most important points, you can refer to it.
| Tip | Explanation |
|---|---|
| Turning Chain | At the start of each new row, make 1 turning chain. This chain does not count as a stitch, but sets the correct height for the next row. |
| Tension Control | Maintain even tension throughout the row. |
| Avoid Too Tight | If stitches are too tight, it becomes hard to insert the hook. |
| Avoid Too Loose | If stitches are too loose, the crochet of project becomes floppy or uneven. |
How to count single crochet rows for beginners?
Firstly you need to clearly the following two key information:
- Use a stitch marker at the start of every single crochet row for beginners.
- Don’t count the starting chain row (foundation 1 chain stitch ) as a row of single crochet—it’s just the base.
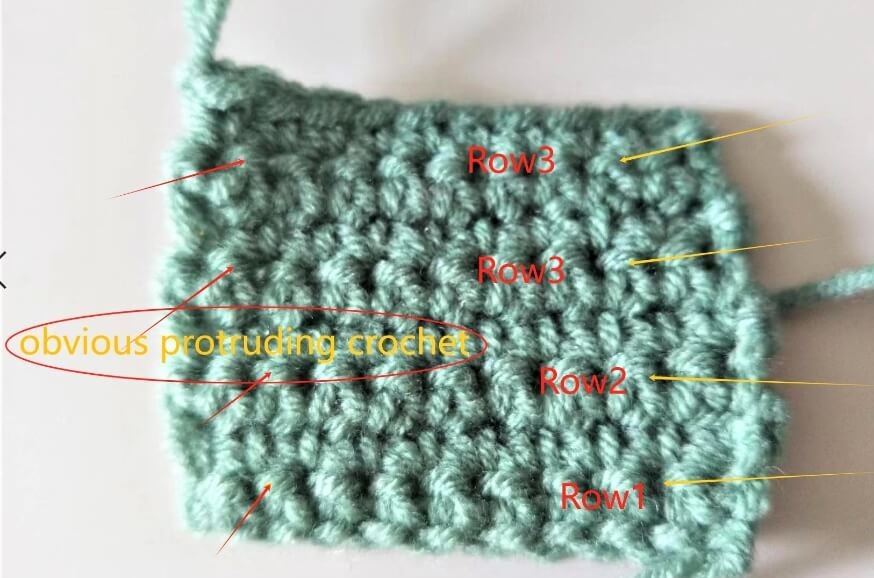
Method 1:Each horizontal ridge = 1 row. Count them from bottom to top.from the appearance, we can see that there is a very obvious protruding crochet, each protruding=1 row. please see picture as below:(There is a small error in the picture. The top row 3 should be row 4. Sorry for that)
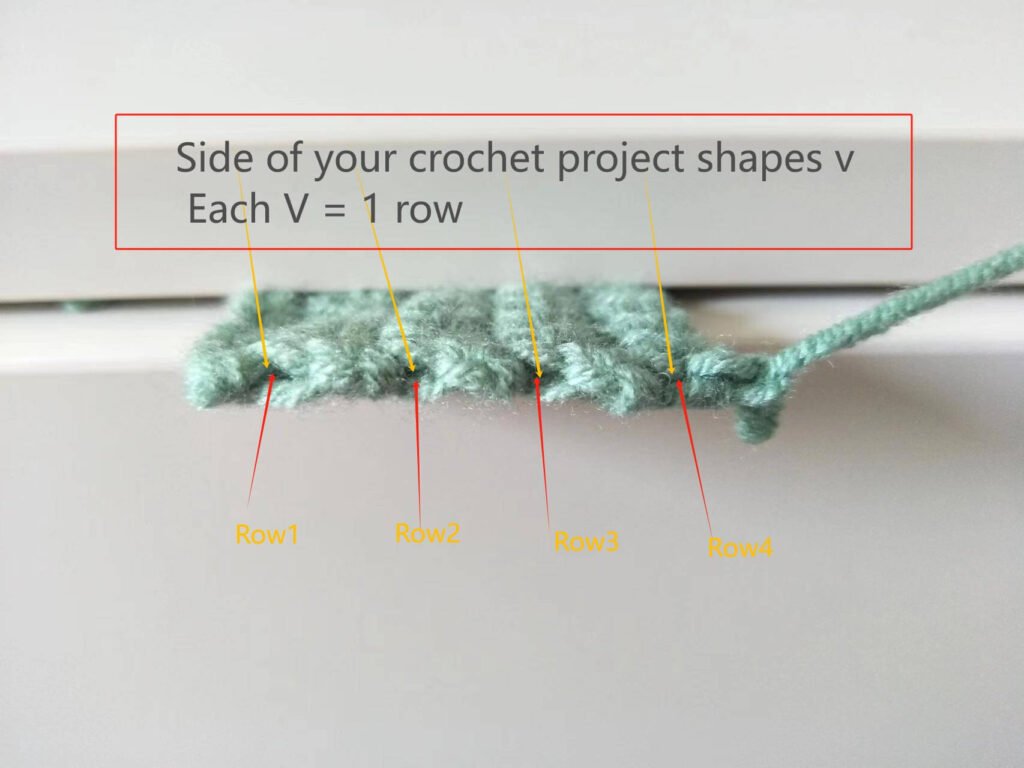
Method 2 :Look at the side of your crochet project—you will see horizontal ridges or “V” shapes. Each V = 1 row. please see picture as below:
How to measure crochet rows?
I think we don’t need complicated methods, we just need common methods that we know in daily life to measure crochet row.
| Measuring Method | Tools Required | Steps |
|---|---|---|
| Count rows visually | Use your eyes | Count the stitches in each row (usually appearing as a horizontal protruding or “V” shape) |
| Measure with tool | Tape measure or ruler | Measure the height of the piece vertically from the bottom to the top |
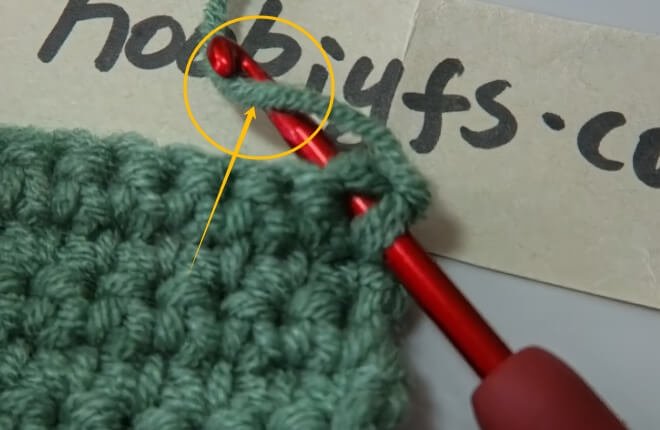
How to start a second row single crochet?
To start crocheting the second row, you just need to turn to your work first like turning the pages of a book, so that you can continue crocheting the previous row of stitches.
But to crochet the next single crochet row, the most important thing is to crochet the chain stitch (note that this chain stitch does not count as the first stitch, it only serves as a link), insert the crochet hook into the second stitch chain, and after completing a single crochet, the beginner will mark the button, which is the first stitch after the row.
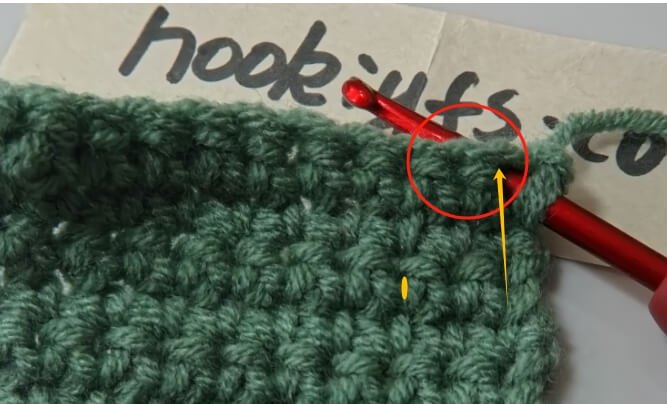
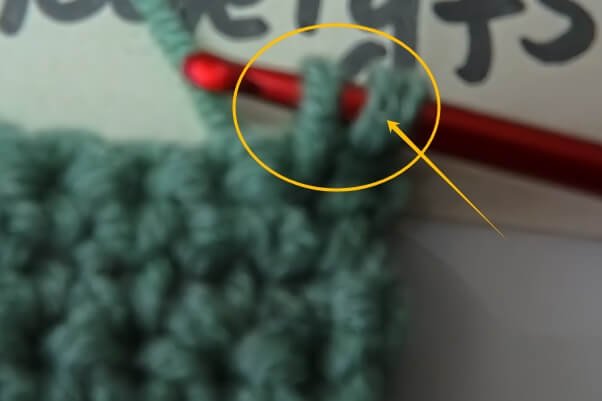
How to end a row of single crochet for beginners?
Insert the hook into the last single stitch of the previous row.
At the end of each row, before hooking the next row, stop and count to make sure the number of stitches is the same as the previous row.
(For example, if the previous row has 10 stitches, this row is equivalent to 10 stitches)


