


Chili Crochet Pattern The Most Comprehensive Step-By-Step Explanation
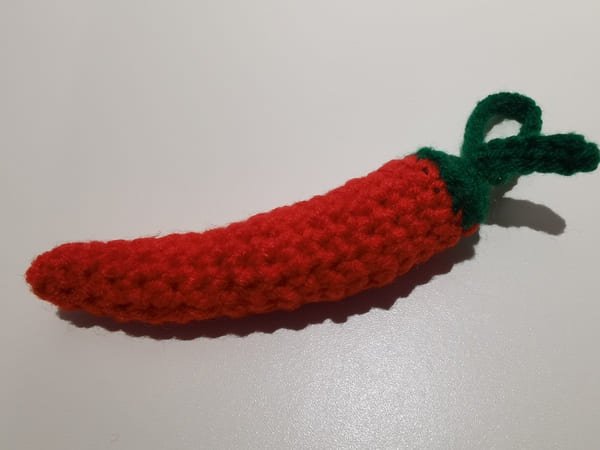
Table of Contents for chili crochet
Chili crochet appeals to us as it makes our work more enjoyable and adds an exciting element. every time we crochet a chili, it’s creating a small piece of imagination and adds an exciting element to our homes and gifts.
Chili crochet is challenging and creative at once, beginner friendly because of how it offers an easy means to achieve something.
Material kit of chili crochet
- Hook: 3.0mm
- Stuffing: (polyester fiberfill)
- Yarn(red & dark green )
- Yarn needle
- Marker
List of necessary tools
- Scissors
Abbreviation for chili crochet
These are the required abbreviations for chili crochet
- ch = Chain stitch
- sc = Single crochet
- sl =Slip stitch
- inc = Increase (usually 2 stitches in the same stitch)
- dec =Decrease (typically done by crocheting two stitches together)
- st(s) =Stitch(es)
- mc =Magic circle (or magic ring)
- Flo=( through front loops only)
Best selling products
-

Raffia Cross Pattern Basket Handbag Kit
$19.99 -

Hexagonal Bucket Bag Kit
$29.99 -

Raffia Handbag Kit
$29.99 -

Hammock Bag Kit
$29.99 -

Wheat Bucket Bag Kit
$19.99
Tips
Despite my efforts, my crocheting skills remain rudimentary as I tend to forget elaborate stitch sequences.
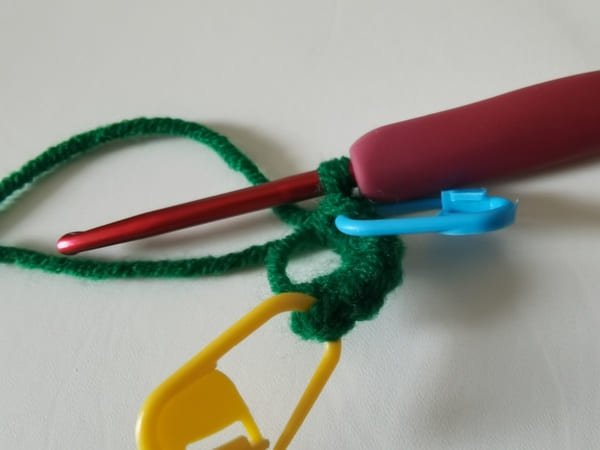
For the scope of this article, I will define the yellow button as “marking button” which I advocate recognizing for beginners once they finish their first stitch.
As demonstrated, blue marking button must be activated after your last stitch is completed.
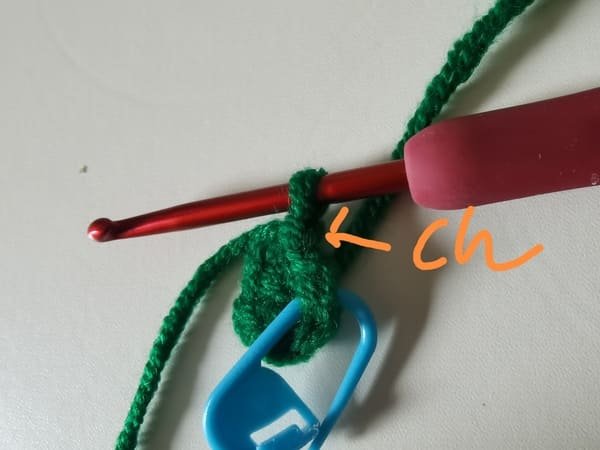
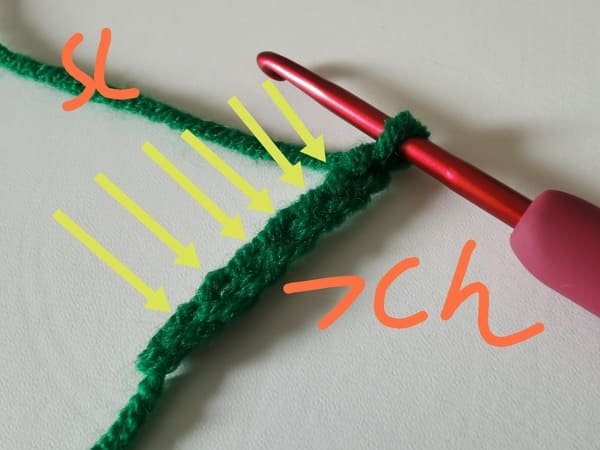
Every round begins with a chain stitch (ch) which serves to elevate the work to the appropriate height. This addresses the balance, tension, evenness, polish, and all finishing touches to the work.
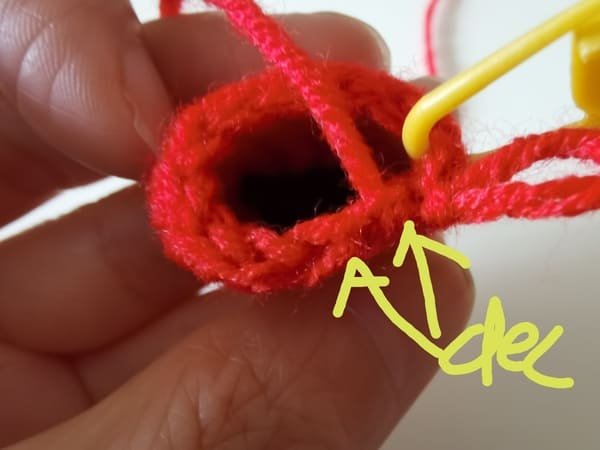
The reasoning behind our preference for using the invisible decrease is that it helps in achieving a polished appearance for our crochet pieces. In this case, slip your hook to the first back loop of the next two stitches, pull through, wrap around both loops then complete the stitch by wrapping around once more.
Crochet the body (use dark green yarn )for chili crochet
- 7 ch-(starting from second to last stitch-6sl)
- 20 ch for hand carrying
- R1: 6 sc into mc(6)
- R2:(sc,inc)*3(9)
- R3: flo-(sc,inc,sc)*3(12)
- R4-R7:12sc(12)
- R8:dec,10sc(11)
- R9:11sc(11)
- R10:dec,9sc(10)
- R11:10sc(10)
- R12:dec,8sc(9)
- R13:9sc(9)
- R14:dec,7sc(8)
- R15:8sc(8)
- R16:dec,6sc(7)
- R17:7sc(7)
- R18:dec,5sc(6)
- R19:6sc(6)
- Fiberfill
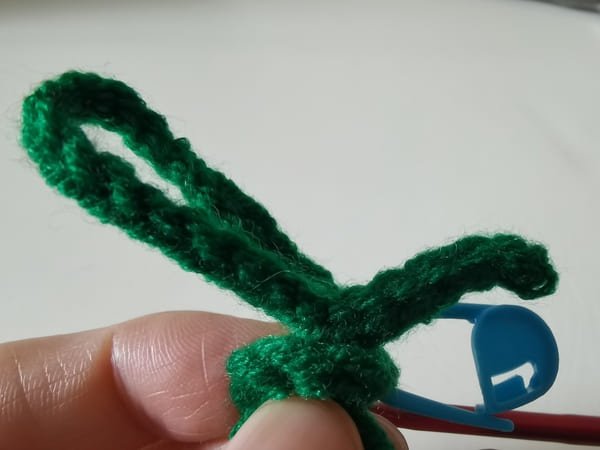
Stem & hand carrying
7 ch (now have a foundation chain stitch of 6.)
Now working on the second chain from the hook (so you skip the first chain and crochet into the second):
1 sl in 2nd ch from hook ,5 sl in next 5 ch.
Want to learn :Chain Stitch |Step By Step Guide| Text & Photo &Video
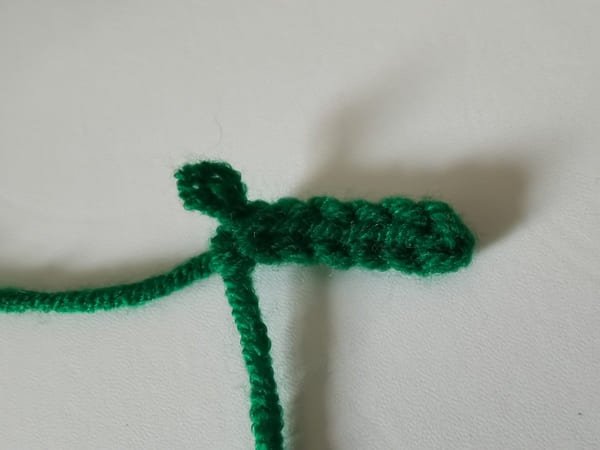
Stem is completed.

Crochet 20 chain stitches for hand carrying.
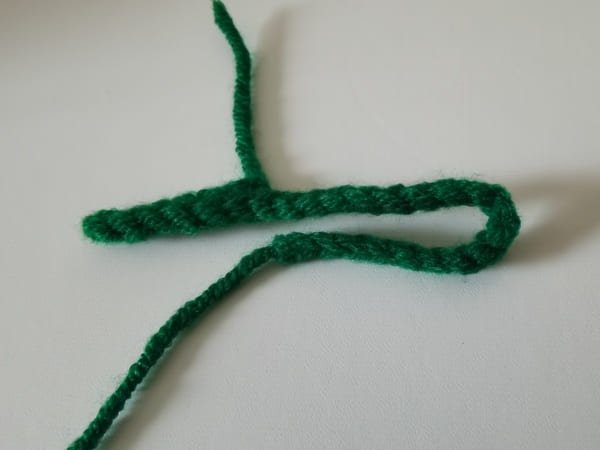
Fold it in half for hand carrying.
Upon finishing 20 chain stitches, we will attach the carrying handle using a yarn needle.
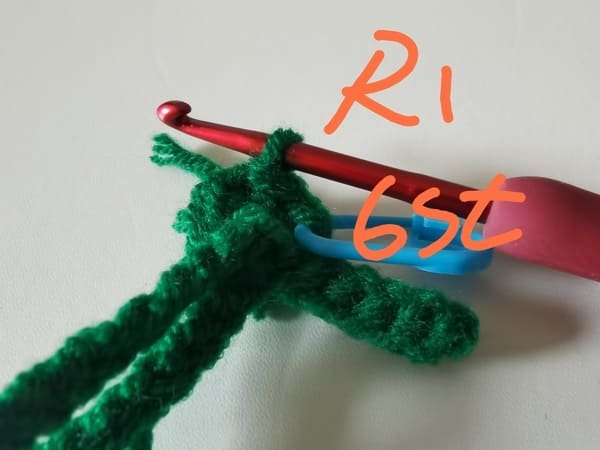
R1
6sc into the magic ring.
Magic ring or mc: For making mc or magic circle, use your left hand’s index & thumb to hold the yarn and pull its end towards left as you pinch the yarn with your right hand’s thumb and finger. This method aids in making the most pivotal portion, the center of the circle, the size of an O.
Want to learn magic ring , please click:How To Crochet Magic Ring ? l Step-By-Step l Video & Text &Photo
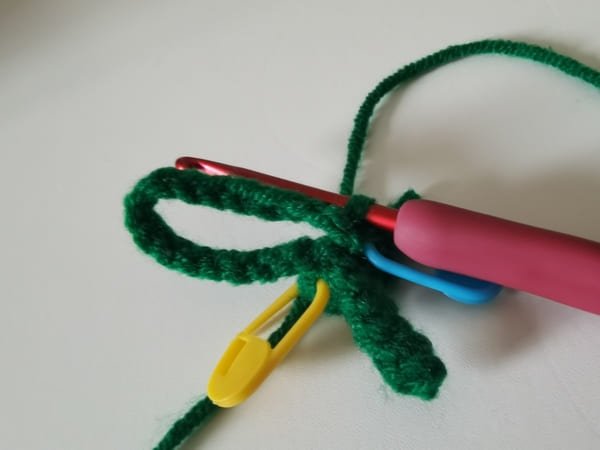
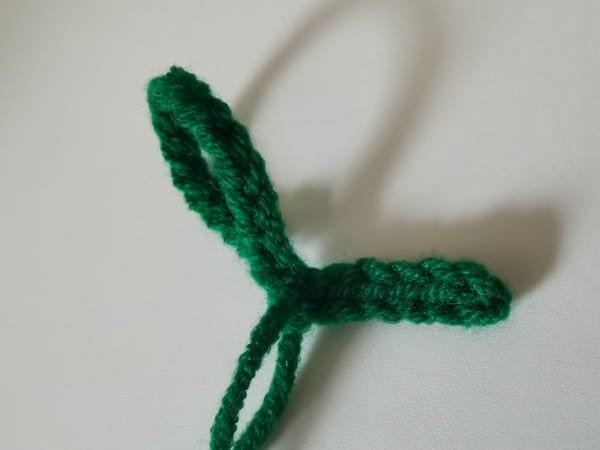
We put the hand carrying with stem on the center of magic ring.
Use the index finger and thumb of your left hand to tighten the yarn end to secure the handle carrying with stem to the magic ring.
Hand carrying with stem on the center of magic ring.
We need to pay attention to the fact that we need to tie more knots on the back for better fixation.
In slip stitch (sl), you place the hook into the first yellow V shap stitch. Yarn overs and pull through two outer loops which are on the hook. Thus we have one loop which is called as slip stitch.
Completing the last slip stitch means round 1 has 6 stitches.
R2
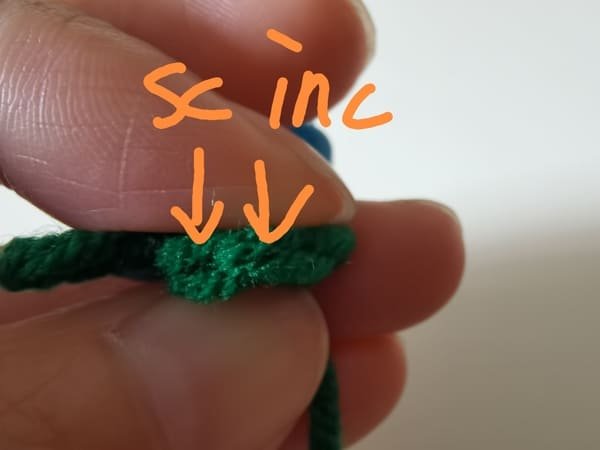
In Round 2 (R2), we adhere to the scheme ((sc, inc) * 3), which translates to performing 1 single crochet (sc) followed by 1 increase (inc) three times. This results in 9 stitches for the round.
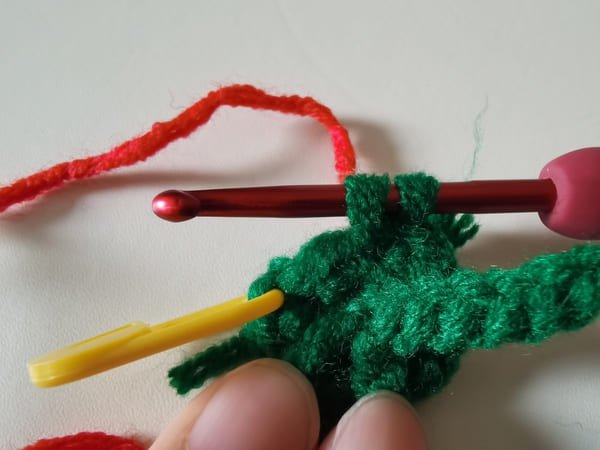
When you get to the last stitch, put the red yarn behind the dark green yarn before yarn over.
Yarn over with red yarn, the hook to bring out the two dark green loops on the hook, and the red yarn change is complete.
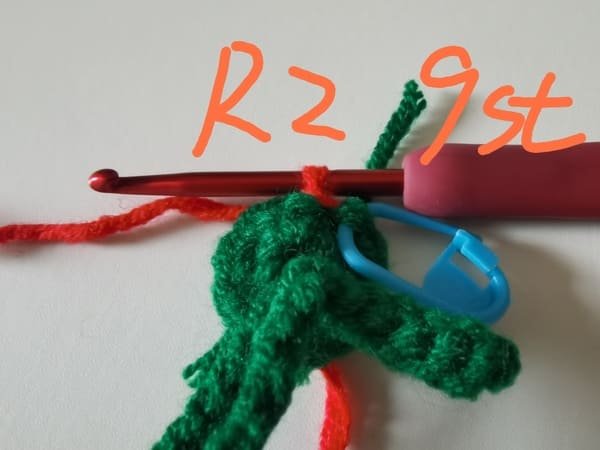
Completing the last slip stitch means round 2 has 9 stitches.
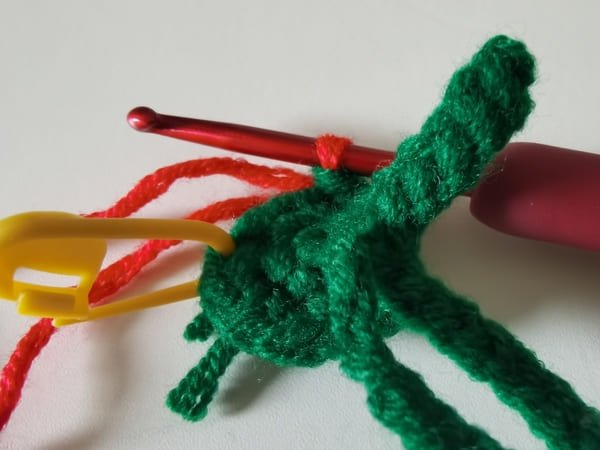
R3
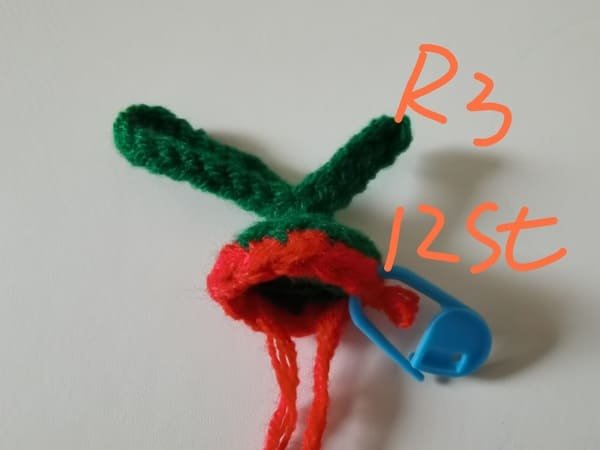
In Round 3 , the pattern is constructed with front loops only (FLO) using the formula (sc, inc, sc) * 3 for a total of 12 stitches.
You will be working front loops only for the round.
Once there, do the following three times:
1 single crochet (sc) in the first stitch
1 increase (inc) in the next stitch which is 2 sc to a single front loop
1 single crochet (sc) in the next stitch
R4
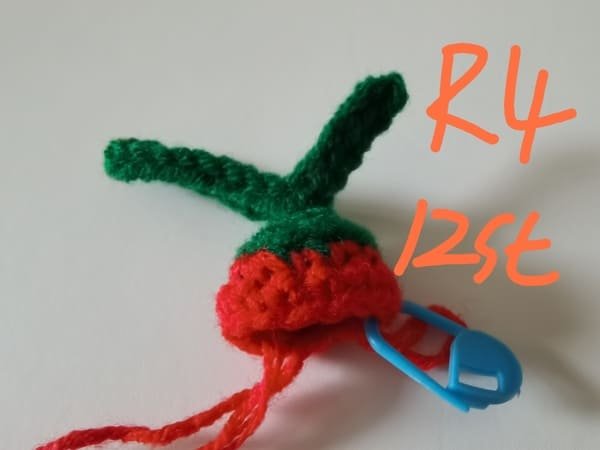
In round 4: we will do a single crochet in every stitch around making a total of 12 single crochets.
R5
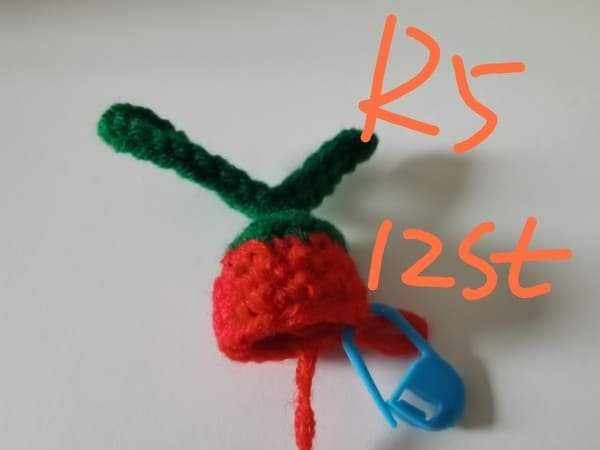
Same as round 4.
R6
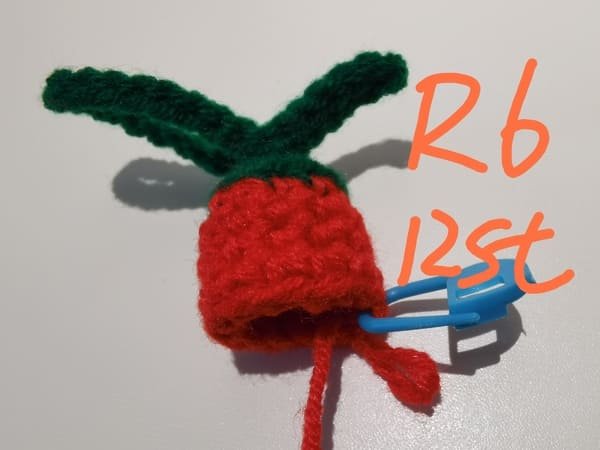
Same as round 5.
R7
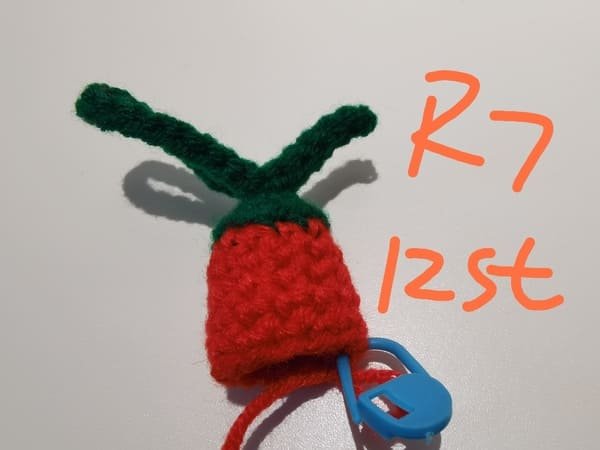
Same as round 6.
R8
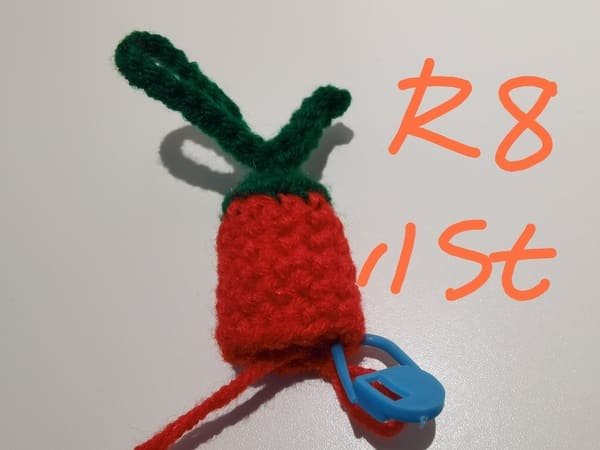
In round 8, we commence with a decrease followed by ten single crochets (sc). This brings the stitch count down from 12 to 11.
R9
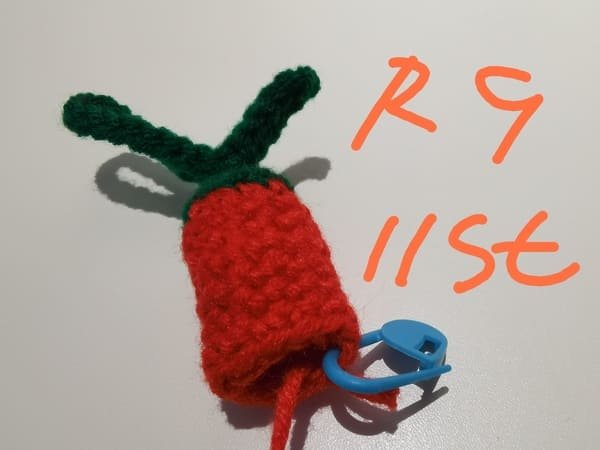
In round 9: we will do a single crochet in every stitch around making a total of 11 single crochets.
R10
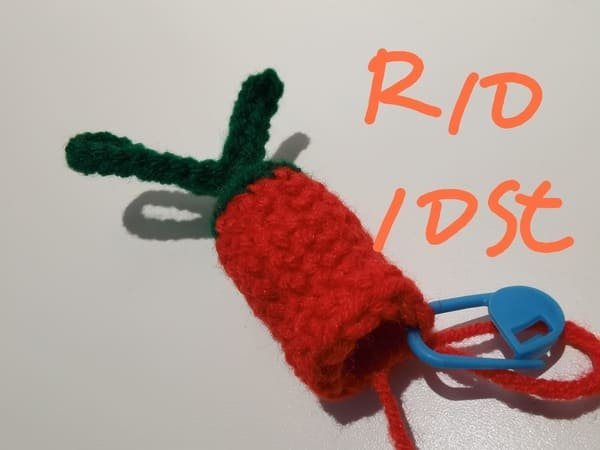
In round 10, we commence with a decrease followed by nine single crochets (sc). This brings the stitch count down from 11 to 10.
R11
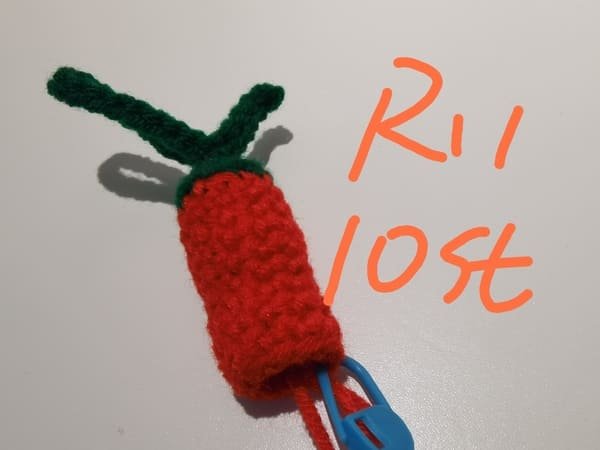
In round 11: we will do a single crochet in every stitch around making a total of 10 single crochets.
R12
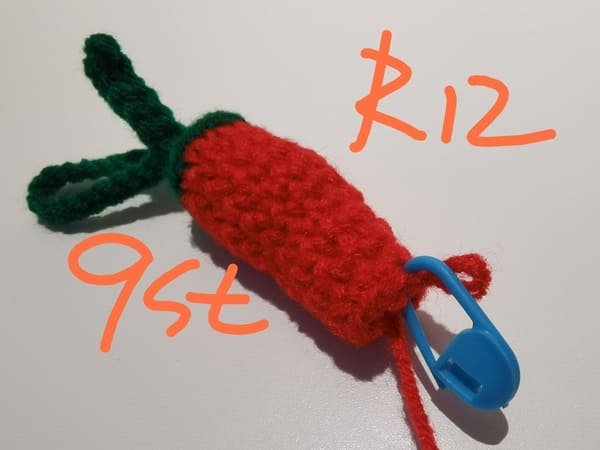
In round 12, we commence with a decrease followed by eight single crochets (sc). This brings the stitch count down from 10 to 9.
R13
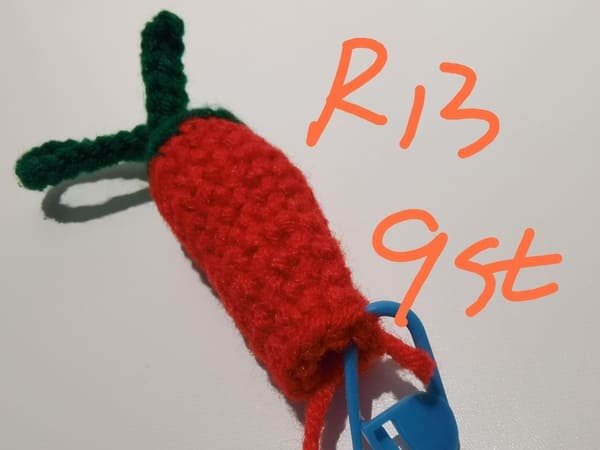
In round 13: we will do a single crochet in every stitch around making a total of 9 single crochets.
R14
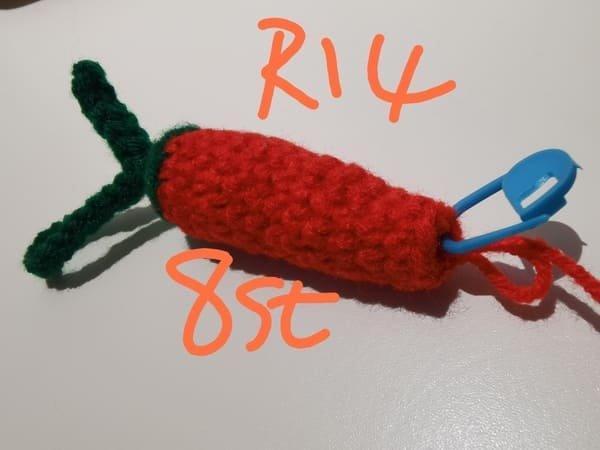
In round 14, we commence with a decrease followed by seven single crochets (sc). This brings the stitch count down from 9 to 8.
R15
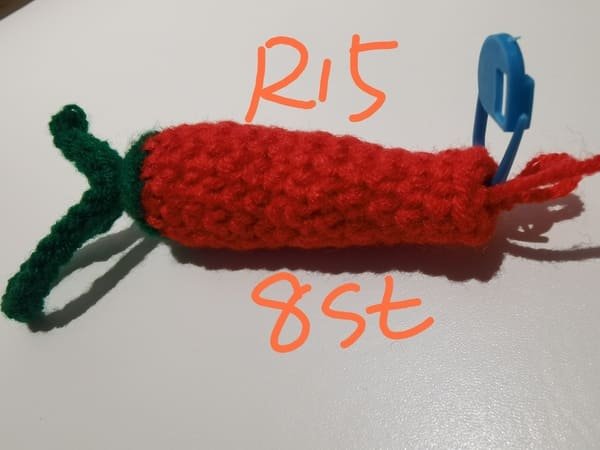
In round 15: we will do a single crochet in every stitch around making a total of 8 single crochets.
R16
In round 16, we commence with a decrease followed by six single crochets (sc). This brings the stitch count down from 8 to 7.
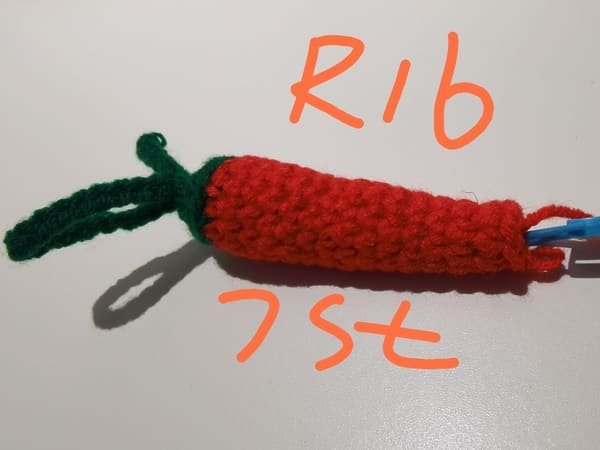
R17
In round 17: we will do a single crochet in every stitch around making a total of 7 single crochets.
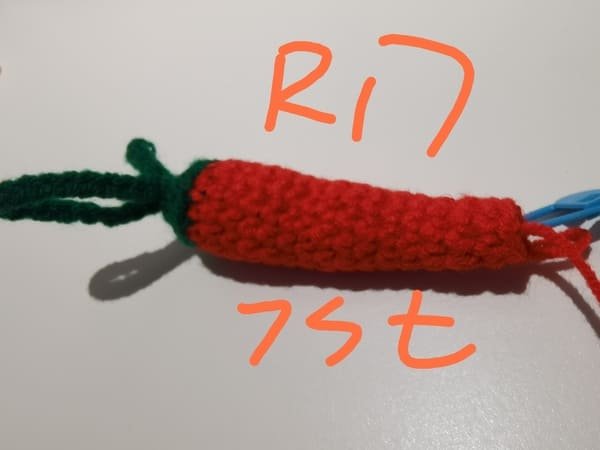
R18
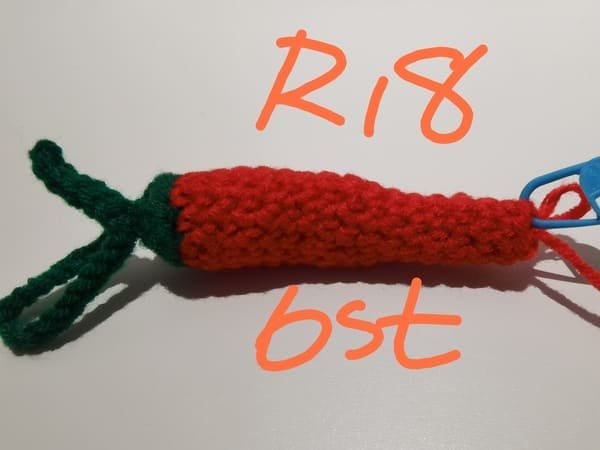
In round 18, we commence with a decrease followed by five single crochets (sc). This brings the stitch count down from 7 to 6.
R19
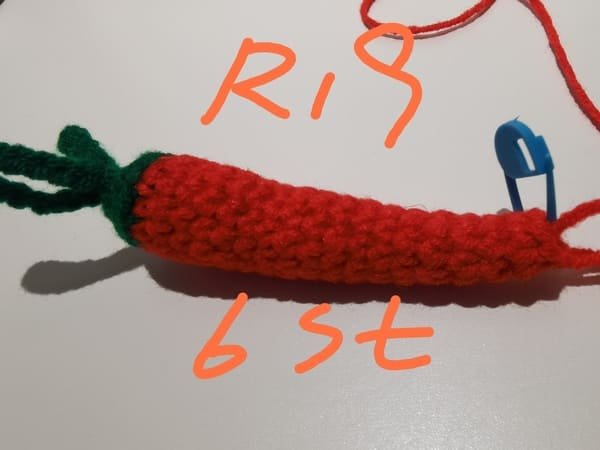
In round 19: we will do a single crochet in every stitch around making a total of 6 single crochets.
Fiberfill
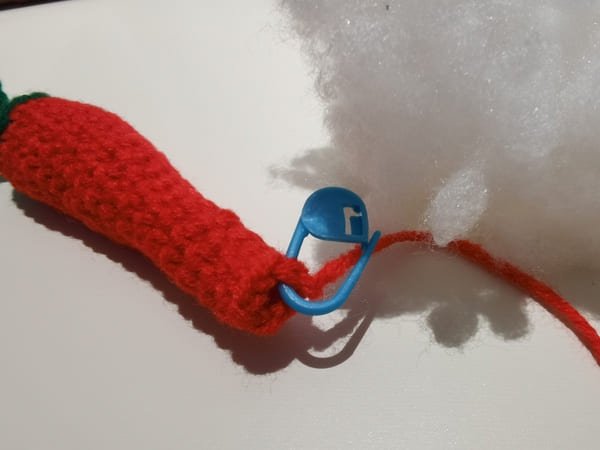
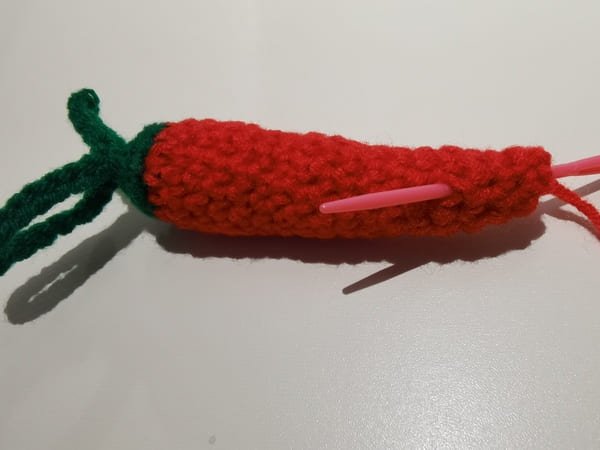
Put the fiberfill in to the hole of body of chili.
Because the holes in the chili are very small, it is difficult to put the fiberfill in. I used tweezers to take a small amount of fiberfill and slowly put it into the fabric.
Don’t be impatient.
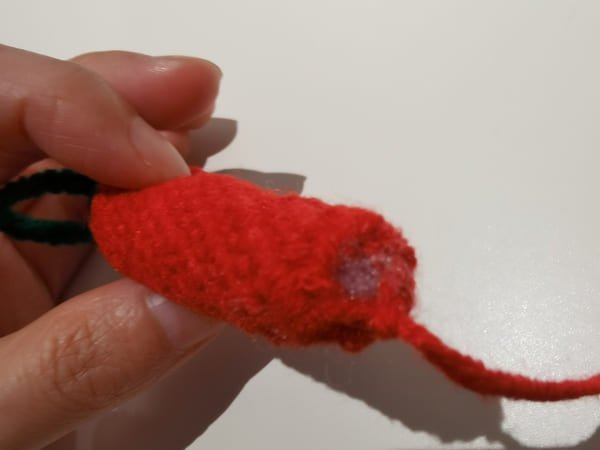
The fiberfill is completed.
Conceal the yarn end
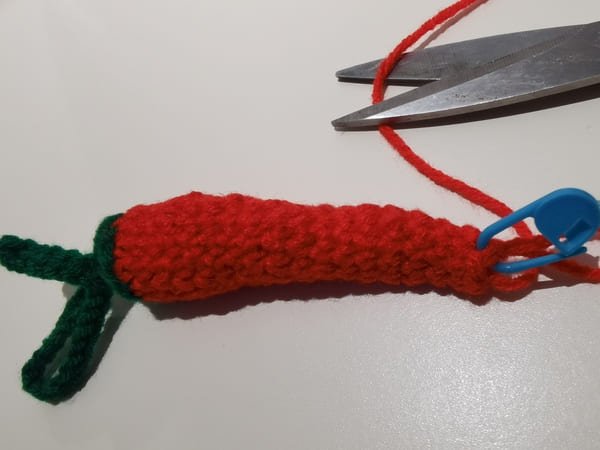
Leave 10 cm and cut yarn end.use hook to bring out the yarn end.
There are still six stitches for closing , and there are very conspicuous holes.
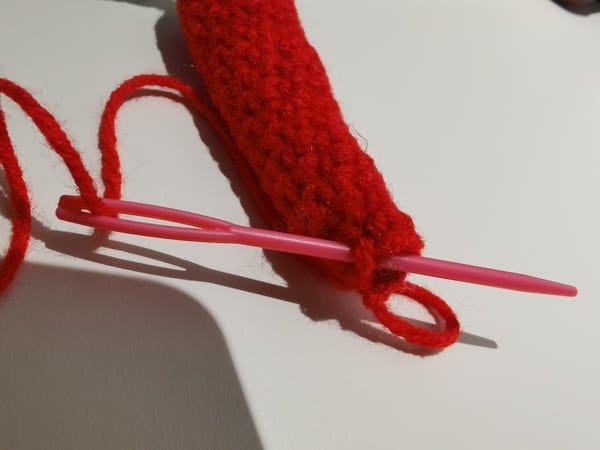
We use a yarn needle, close the gap by picking up one stitch every other stitch.
Then conceal the yarn end.
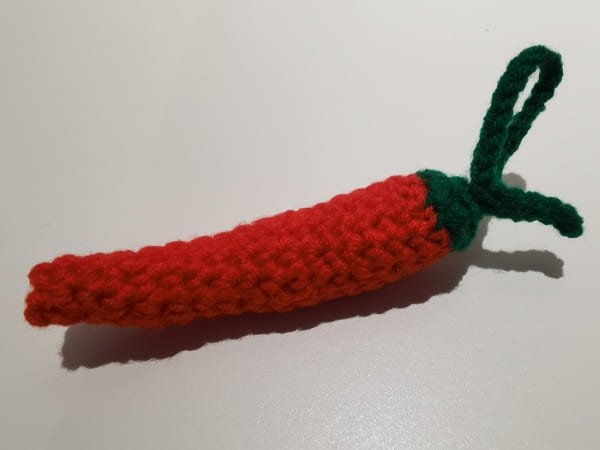
Chili crochet is completed.
Reference sources
1.Learn the most comprehensive guide for single crochet(sc)
Author:Sarah Stearns
Publication date: on June 15, 2021, updated:December 14, 2024
Title: How to single crochet (sc)for beginners
Summary as blow:
- Step-by-Step Single Crochet for Beginners
- Single Crochet into a Foundation Chain
- Single Crochet into another Row
- Single Crochet in the Round
- Increases and Decreases
- Working Single Crochet in Different Loops


