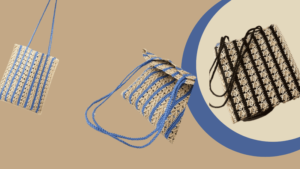
Crochet Waffle Bag: Raffia Yarn Shoulder Bag

Table of Contents
Crochet waffle bag : perhaps the single most exciting and internationally appreciated new texture project with regards to style and durability is the raffia yarn crochet waffle bag, with its elegant 3 dimensional stitching. This tutorial embraces the entire process inclusive of material selection, shape formation, and the pre-eminent detailing of the shoulder bag.
Raffia yarn imbues structure and an earthly charm to the bag while the crochet project’s readily accessible nature serves to encourage creativity to its holder, imparting upon the user a stylish accessory for everyday use.
Why we love the crochet waffle bag
Raffia yarn brings about a sense of satisfaction; it is tough yet pliable and light yet strong.
When it is coupled with a double waffle stitch, a modern crochet texture is formed that verges on woven.
This is a great project because;
🧶 After mastering waffle stitch, it becomes easy to tackle.
💼 This bag relaxes into position naturally. There is no requirement for stiffener or a lining.
🌞 This bag is a summer shoulder bag that is light, fashionable, and sustainable.
🎁 This is a great gift for people who enjoy handcrafted minimalist designs.
Material kit for crochet waffle bag
💙Raffia yarn: https://amzn.to/3KqdAwE
💙hook & yarn needle & marker buckle : https://amzn.to/3TXavWn
Abbreviation for crochet waffle bag
- ch = Chain stitch
- sc = Single crochet
- sl =Slip stitch
- st(s) =Stitch(es)
- R=Round
- dc = double crochet
- tr = treble crochet
- fbdc = front/back double crochet (as per your notation)
- sk = skip
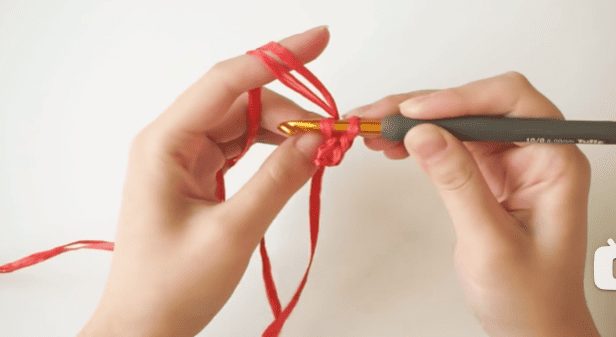
- mc=Magic ring
- dec=decrease
Video for crochet waffle bag
The referenced video guides the user on the crochet construction of a stunning shoulder bag with raffia yarn using a beautiful waffle stitch.
Each crochet step from the base of the bag to the strap is illustrated and hints on texture and shaping are provided.
Get those crochets ready and let us embark on a crochet journey to make an elegant, sophisticated bag that is perfect for daily use.
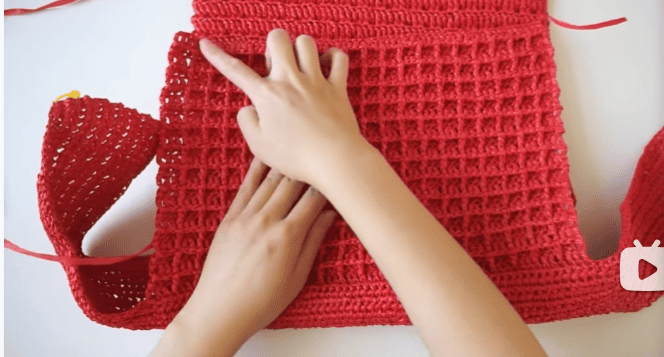
Crochet body
| Section | Row | Instructions |
|---|---|---|
| Front | Base | Ch 61 + 2ch |
| R1 | Skip 4, dc in each purl stitch to end | |
| R2 | 2ch, flip over, skip 3, fbdc in each stitch, dc to end | |
| R3 | 2ch, flip over, skip 3, [(dc, dc, tr), sk1] repeat, dc, dc, dc to end | |
| R4 | Same as R2 | |
| R5 | Same as R3 | |
| R6-R25 | Repeat R4-R5 | |
| Bottom & Side | R27 | Based on R26, from left count 38ch and mark last stitch, from right count 38ch and mark last stitch. Ch, 38sc in each back of chain stitch on both sides; normal sc in each stitch in the middle |
| R28-R32 | Ch, flip over, sc to end. Leave 15cm on each side and fasten off | |
| Back | R33 | Based on R32, count 38 stitches from left and right towards center, mark with stitch markers. Insert hook at marker positions. 2ch, dc to end between markers |
| R34 | 2ch, flip over, skip 3, fbdc in each stitch, dc to end | |
| R35 | 2ch, flip over, skip 3, [(dc, dc, tr), sk1] repeat, dc, dc, dc to end | |
| R36-R73 | Repeat R34-R35 |
Sew together
| Step | Section | Instructions |
|---|---|---|
| A | Sewing the front panel and side panel (counterclockwise) | 1. We start sewing from the left side. 2. In the first stitch, we crochet 2 single crochets (2 sc). 3. Then, we crochet 3 single crochets (3 sc) inside each waffle square. 4. Along the bottom, we make slip stitches (sl st), one stitch corresponding to one stitch on the other piece, to reinforce the base. 5. Next, we sew the front panel and right side together — crochet 3 sc in each waffle square, and end with 2 sc in the last stitch. 6. Once finished, we fasten off and conceal the yarn end neatly. |
| B | Sewing the Back panel and side panel | We follow the same method as used for sewing the front panel and side panel. |
| C | Edging the cover of bag | 1. We crochet 3 sc in each waffle square along the cover edge. 2. At each corner, we add 1 extra sc to make a smooth curve. 3. Along the outermost edge of the cover, we crochet 1 sc per stitch. |
| D | Finishing the bag opening | 1. We crochet 1 slip stitch (sl st) into each stitch along the bag opening. 2. On the last stitch, we leave about 15 cm of yarn, then make an invisible slip stitch to create a seamless finish. 3. Finally, we conceal the yarn end securely. |
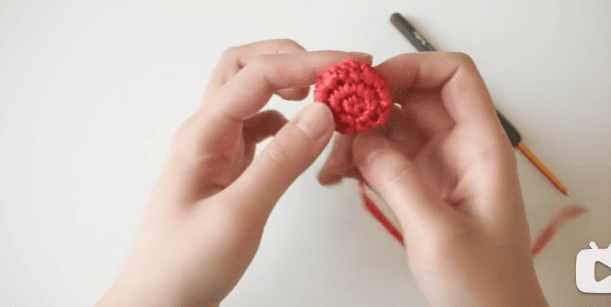
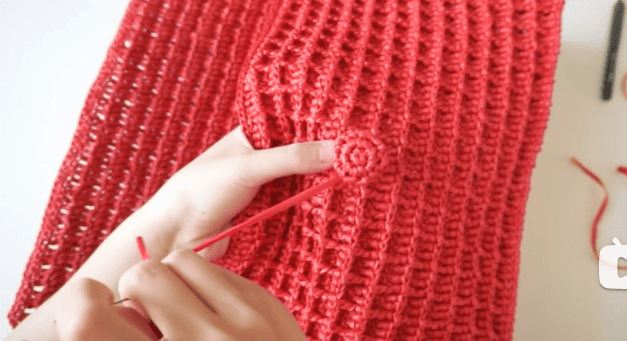
Crochet button
| Round | Instructions |
|---|---|
| R1 | We make a magic ring, then crochet 5 single crochets (5 sc) into it. |
| R2 | We increase in each stitch around — (inc × 5). (Total: 10 sts) |
| R3 | We repeat (1 sc, 1 inc) five times — (sc, inc) × 5. (Total: 15 sts) |
| R4 | We repeat (1 decrease, 1 sc) five times — (dec, sc) × 5. (Total: 10 sts) |
| R5 | We make 5 decreases — dec × 5. (Total: 5 sts) |
| R6 | We crochet 5 single crochets (5 sc). |
| Finishing | We leave a long yarn tail for sewing and fasten off. |
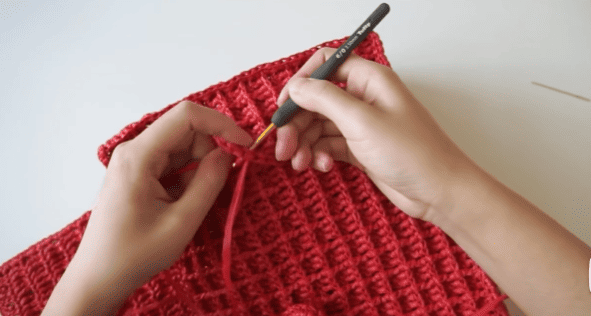
Crochet clasp

| Step | Instructions |
|---|---|
| 1 | We leave a 15 cm yarn tail at the beginning. |
| 2 | Then we crochet 15 chains (15 ch). |
| 3 | After finishing the chains, we leave another 15 cm yarn tail for sewing. |
Crochet strap
| Step | Instructions |
|---|---|
| 1 | We leave a 2.5–3 meter yarn tail before starting. |
| 2 | Using the long tail, we place it over the hook and crochet slip stitches (sl st) — a total of 110 stitches. |
| 3 | After finishing, we leave another 20–30 cm yarn tail at the end. (We need to make two straps in total.) |
| 4 | Then, we cut two extra yarn pieces, each about 40 cm long. We fold each in half and attach them to the starting end of each strap for sewing. |
Sew button
| Step | Instructions |
|---|---|
| 1 | We first find the sewing position on the bag.– On the front panel, we count from the middle of each side.– count up 7 rows from the bottom; the intersection point is where we attach the button. |
| 2 | We sew the button onto the stitch post, making multiple passes to ensure it is secure. |
| 3 | After sewing, we bring the yarn to the back side, tie a knot, and secure it again. |
| 4 | We then weave the yarn tail into adjacent stitch posts and cut off the excess. |
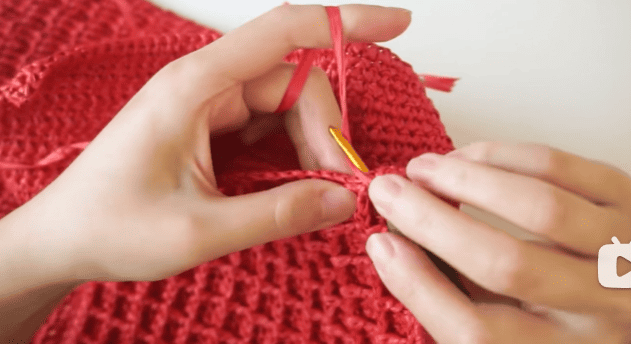
Sew clasp

| Step | Instructions |
|---|---|
| 1 | We first find the sewing position at the center of the bag cover. |
| 2 | We place the clasp at the marked position. Using a crochet hook, we pull the left and right yarn tails to the back of the fabric and tie a knot, forming a secure clasp loop on the front of the cover. |
| 3 | We then thread a yarn needle through the tails, weave them into adjacent stitch posts, and cut off the excess yarn. |
Sew strap
| Step | Instructions |
|---|---|
| Sew front of strap- step 1 | We first find the sewing position for the strap.– Count one waffle square below the button.– On the front panel, count 4 waffle squares from the left and right toward the center. The intersection point is where we attach the strap. |
| Sew front of strap- step 2 | We place the strap at the marked position.– Using a crochet hook, we pull the two yarn tails to the back of the fabric and tie a knot to secure them.– Then we go up to the stitch post of the upper waffle square, pull the yarn to the back again with the hook, tie another knot, and weave in the tails before cutting the yarn. |
| Sew front of strap- step 3 | We repeat the same method to sew the left strap in place. |
| Sew back of strap | Using the same technique, we sew the back side of the straps to complete the attachment. |
Base stitch for beginners
We’ve all been there! Here are some basic stitch we’ve learned along the way:
How To Crochet Magic Ring ? l Step-By-Step l Video & Text &Photo
Chain Stitch |Step By Step Guide| Text & Photo &Video
Single Crochet-You Want To Know The Most Detailed Information
Half Double Crochet In The Round-The Complete Guide
Double Crochet Stitches For Beginners
1.Learn the most comprehensive guide for single crochet(sc)
Author:Sarah Stearns
Publication date: on June 15, 2021, updated:December 14, 2024
Title: How to single crochet (sc)for beginners
Summary as blow:
- Step-by-Step Single Crochet for Beginners
- Single Crochet into a Foundation Chain
- Single Crochet into another Row
- Single Crochet in the Round
- Increases and Decreases
- Working Single Crochet in Different Loops