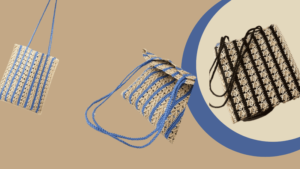
Crochet Handle Bag: Mixed Two-Strands Raffia Bag Tutorial
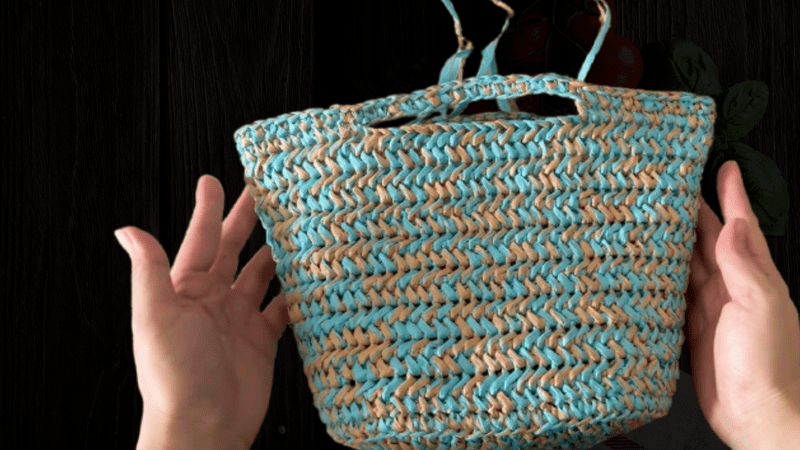
Table of Contents
Crochet handle bag: It is very satisfying to complete this project of crocheting a bag with a handle using raffia yarn of two different colors regardless of the practical and elegant fashion accessory it adds to an outfit. This.
This refers to the ease with which a complete novice can take considering they’ve just learned the foundations of crocheting, which means there’s always something all levels of crocheting enthusiasts can enjoy.
This project certainly makes for a unique challenge for even the experienced crocheters.
The purpose of this document is to ensure that our bags turn out to be perfected, well constructed and aesthetically appealing which is why every step from the tools to the final touches must be thoroughly detailed.
Why we love this
To crochet the Mixed Two-Strands Raffia Handle Bag is to experience the pleasure of weaving together artistry and practicality into a singular, delightful creation. First, the use of two strands of raffia yarn renders a textural finish to the bag, which is appealing and organic. The aesthetics of various hues promote our faculties in pattern-making and hence, each bag is a one of a kind creation. We appreciate how the slightest changes in the color or choice of a stitch has a drastic impact on the bag, and this opens the floodgates of our imaginations.
The satisfaction of the end product is overwhelming. It begins with a bottom portion that appears to be bottomless, on to what can be miles of substantial waist–and we construct the body to be stylish but form-fitting. In particular, we find delight in the creation of the chain handles which converts a mundane, flat strip of cloth into a centerpiece that serves a purpose.
As much as we appreciate the breath-taking visuals, we also adore how wonderfully practical this bag is. It has the capacity to store all of one’s daily essentials, and is light and easy to carry, which is just delightful. Not to mention the fact that it is made of raffia, which is a biodegradable material, so we can be proud in its sustainability!
Above all, this bag is something we appreciate all the way through the process, which provides both of us with a sense of achievement, along with a wonderful useful piece that we can use and display.
Material kit for crochet handle bag
💙Raffia yarn: https://amzn.to/3KqdAwE
💙hook & yarn needle & marker buckle : https://amzn.to/3TXavWn
Abbreviation for crochet handle bag
- ch = Chain stitch
- sc = Single crochet
- sl =Slip stitch
- st(s) =Stitch(es)
- R=Round
- dc=double crochet
- inc= Increase
- dense striped sc=Dense striped single crochet
- FBS=Fishbone stitch
- FBS inc = Fishbone Stitch increase
- flip over = Turn your work
Video for crochet handle bag
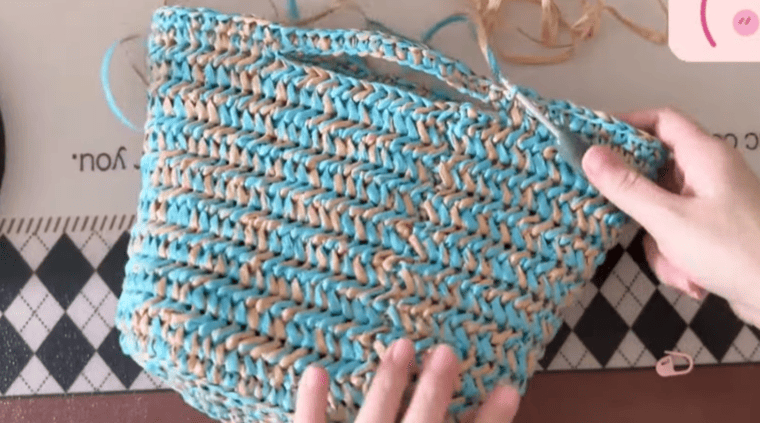
In this bag-making tutorial, together we will create a stylish handle bag using a simple crochet technique with mixed two strands of raffia yarn. We will walk you step by step through the bag bottom, body construction with handles, and the final touches.
Everyone from crochet lovers to newbies will be able to tackle this. Let’s create this beautiful masterpiece together
Crochet bottom

| Round (R) | Instruction | Description / Notes |
|---|---|---|
| Base | 13 + 3 ch | Foundation chain |
| R1 | 11 dc, 6 dc in same stitch, 10 dc, 5 dc in same stitch | Create the oval base with double crochet increases on both ends |
| R2 | 3 ch, 11 dc, (inc) × 6, 10 dc, (inc) × 5 | Continue increasing evenly around both ends |
| R3 | 3 ch, 10 dc, (inc) × 12, 10 dc, (inc) × 12 | Add more increases to expand the oval shape |
| — | sl back of chain stitch | Join to the back of the foundation chain with slip stitch |
| R4 | ch, dense striped sc, back of chain stitch | Work dense striped single crochet in back loop to start texture |
Once work on the bottom sections has been completed, we examine the bottom section to see if it is completely flat and even.
This offers a stable foundation to start constructing the body of the pouch.
Crochet body
| Row | Instruction | Notes |
|---|---|---|
| R1 | ch, sc, FBS (front side), add one FBS inc in the center on both sides | Start the first row with single crochet and forward Fishbone Stitch; increase one Fishbone Stitch on both sides to keep the shape balanced |
| R2 | ch, flip over, sc, FBS (back side) | Work single crochet and reverse Fishbone Stitch, total 8 pattern repeats |
| R1–R2 | Repeat for 8 sets (16 rows total) | Continue pattern repeat |
Stitch tension is also monitored on these rows.
Proper tension adjustments help to maintain uniformity on the sides of the bag and ensure neat attachment of the handles.
Crochet handle
| Step | Instruction | Notes |
|---|---|---|
| 1 | Mark the positions with stitch markers: count 12 stitches to the left and right from the bag opening, and attach markers. Repeat on the back side of the bag. | Ensures symmetry |
| 2 | Work 4 SL sts (slip stitches) to the marker position. | Move to start of marker position |
| 3 | Ch 18, then SL to the marker, SC to the marker. After another 18 ch, SL to the marker, SC to the handle area. | Creates the chain section for handle |
| 4 | At the handle area, SC in back of chain stitch; elsewhere, work normal SC. | Gives a neat attachment to handle |
| 5 | Finish with a normal SL and weave in all loose ends. | Clean finishing |
Errors in alignment at the stage of mark-up is handled with the utmost caution, as it’s one of the most crucial steps in production, for avoiding the possible unde desirable consequences of asymmetric handles and the final display of the product.
Base stitch for beginners
We’ve all been there! Here are some basic stitch we’ve learned along the way:
How To Crochet Magic Ring ? l Step-By-Step l Video & Text &Photo
Chain Stitch |Step By Step Guide| Text & Photo &Video
Single Crochet-You Want To Know The Most Detailed Information
Half Double Crochet In The Round-The Complete Guide
Double Crochet Stitches For Beginners
Reference sources
1.Learn the most comprehensive guide for single crochet(sc)
Author:Sarah Stearns
Publication date: on June 15, 2021, updated:December 14, 2024
Title: How to single crochet (sc)for beginners
Summary as blow:
- Step-by-Step Single Crochet for Beginners
- Single Crochet into a Foundation Chain
- Single Crochet into another Row
- Single Crochet in the Round
- Increases and Decreases
- Working Single Crochet in Different Loops