


Crochet Bucket Bag Free Pattern | Step-by-Step Tutorial For All Skill Levels
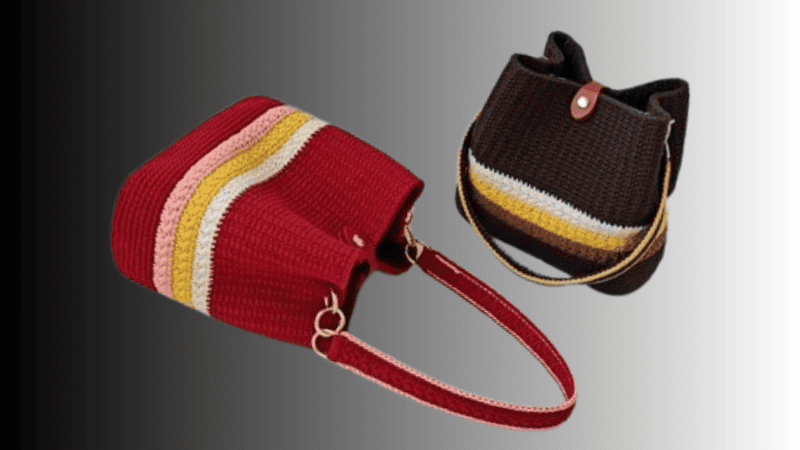
Table of Contents
Crochet bucket bag free pattern : realizingable your passion of designing, making, and using your handmade bag that artfully stylish yet functional, you exactly at the right address. You will in a moment Appreciate a Crochet Bucket Bag Free Pattern that will be entertaining for an absolute novice as well as an advanced crocheter. Its uncluttered architectural silhouettes and contemporary aesthetics will have you head over hooks in love with crocheting all over again with this crocheted bucket bag.
All of this, and much more, will be accomplished collaboratively in this guide — from the selection of appropriate raw materials and the requisite initial stitches, to accomplishing an entire crocheting pattern stepwise. Bring out your hook and yarn, and let us create greatness with this crocheted bucket bag!
Material kit for crochet bucket bag free pattern
💙hook & yarn needle & marker buckle : https://amzn.to/3TXavWn
💙spring o rings round:https://amzn.to/4mW9euR
💙leather snap buckles button: https://amzn.to/3KnN86P
💙short chain :https://amzn.to/484vyyC
💙PU leather bag bottom:https://amzn.to/47Z6IQw
Abbreviation for crochet bucket bag free pattern
- ch = Chain stitch
- sc = Single crochet
- sl =Slip stitch
- st(s) =Stitch(es)
- R=Round
- hdc=Half double crochet
- dc=Double crochet
- Striped SC=Striped single crochet
- Star st=Star Stitch
- Inc=Increase
- Dense sc=Dense Single Crochet
Video for crochet bucket bag free pattern
In this video, we’ll crochet a stylish bucket bag from start to finish together!
We’ll cover the base, body, opening, and strap using simple single crochet stitches. Perfect for beginners who love handmade fashion.
Grab your yarn and hook, and let’s create our bucket bag!
Crochet bottom
Please see picture as pattern:
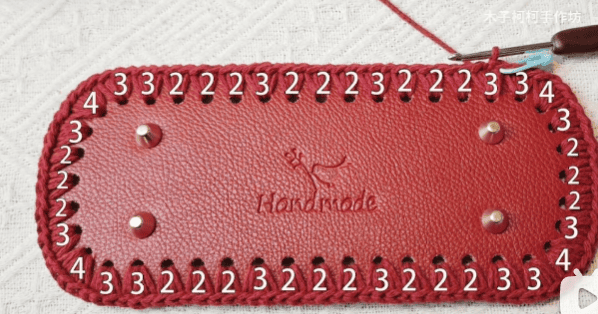
Then we need crochet slip stitch to the hole , the last stitch to make invisible stitch to close this hole.
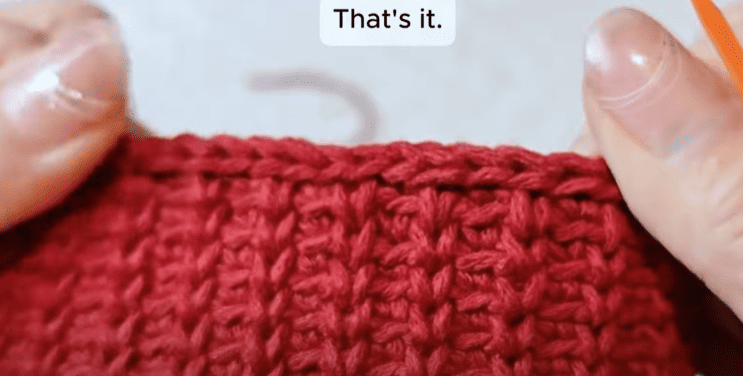
Crochet body

| Row (R) | Instruction | Details / Notes |
|---|---|---|
| R1 | see above picture | — (Base row) |
| R2 | ch, 32 sc, (sc, inc) × 2, 12 sc, (sc, inc) × 2, 36 sc, (sc, inc) × 2, 12 sc, (sc, inc) × 2, 4 sc | Increases evenly around; total 120 stitches |
| R3 | ch, 120 sc | Work in back of chain stitch |
| R4–R10 | ch, 120 sc | Spiral crochet, do not slip stitch to join at the end of each round |
| R11 | (Change yarn) 3 ch, star st × 60 | Begin star stitch section |
| R12 | ch, flip over, 2 hdc in each hole × 60, sl st, ch to fix, conceal yarn end | Completes one round of star stitch |
| R13 | (Change yarn) 3 ch, star st × 60 | Repeat star stitch pattern |
| R14 | ch, flip over, 2 hdc in each hole × 60, sl st, ch to fix, conceal yarn end | — |
| R15 | (Change yarn) 3 ch, star st × 60 | Repeat star stitch pattern |
| R16 | ch, flip over, 2 hdc in each hole × 60, sl st, ch to fix, conceal yarn end | — |
| R17 | ch, 120 sc | Crochet in each stitch, finish with invisible slip stitch without cutting yarn |
| R18–R38 | ch, (striped sc, dense sc) × 60 | Continue in spiral rounds, last stitch: invisible slip stitch without cutting yarn |
| R39(opening) | 120 sl st | Use yarn needle to make invisible slip stitch at end |
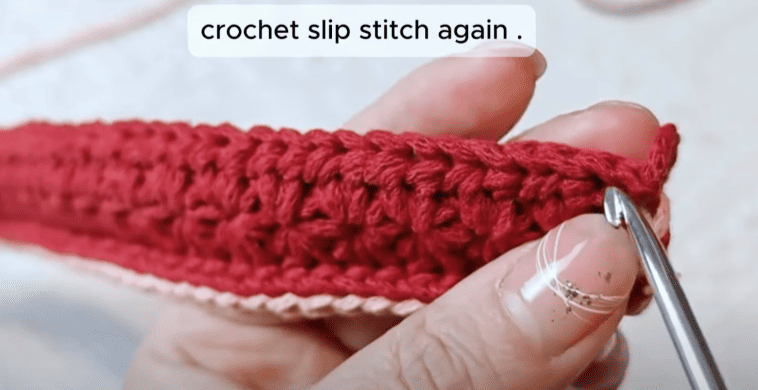
Crochet strap
| Row (R) | Instruction | Details / Notes |
|---|---|---|
| Base | Leave a 50 cm yarn tail, then ch 90 + 2 ch | We’ll use the long tail later for sewing |
| R1 | Starting from the second stitch from hook, work star stitch × 44, then 1 dc | This forms our first textured star stitch row |
| R2 | ch, flip over, 2 hdc in each hole, 1 hdc at the end, ch to fix it | Leave a 50 cm yarn tail for sewing |
| R3 | sl st on both sides; after the last sl st, pull the yarn end out and weave in the extra yarn neatly | This step gives our edge a clean finish |
| Next Step (Color Change) | Using pink yarn (or your favorite color), sl st on both sides again | After the last sl st, pull the yarn end out and weave it in carefully so it looks neat and tidy |
Sew D buckle
Position the D-Buckle at the strap. With the aid of a yarn needle, attach the D-buckle firmly to the strap using several stitches, ensuring the stitches are tight, secure and the joining of the D-buckle and strap is very strong.
Sew leather snap buckles button
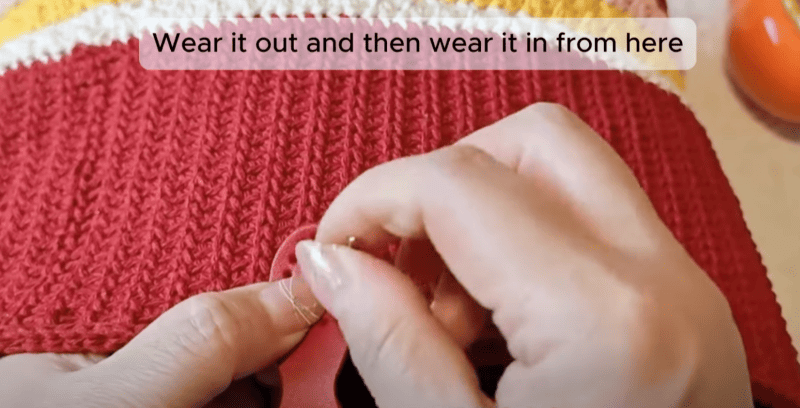
We locate the center of the top of the bag.
Next, we position the leather snap closure – one part is on the outer side of the opening and the other on the inner side. With the hand sewing needle, we attach the two parts and, once done, conceal and weave in any loose threads.
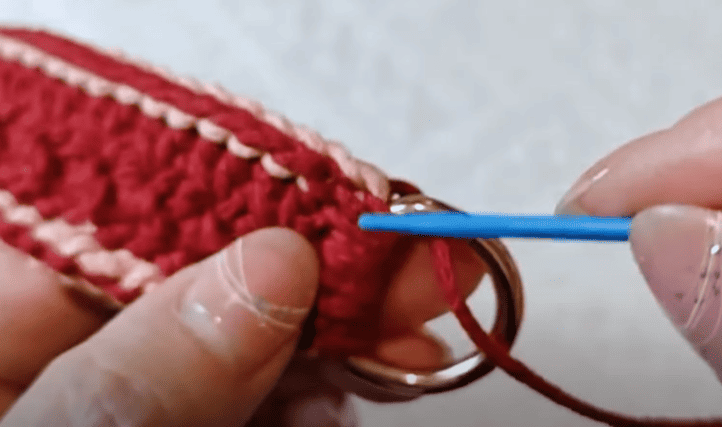
Install spring clip & chain
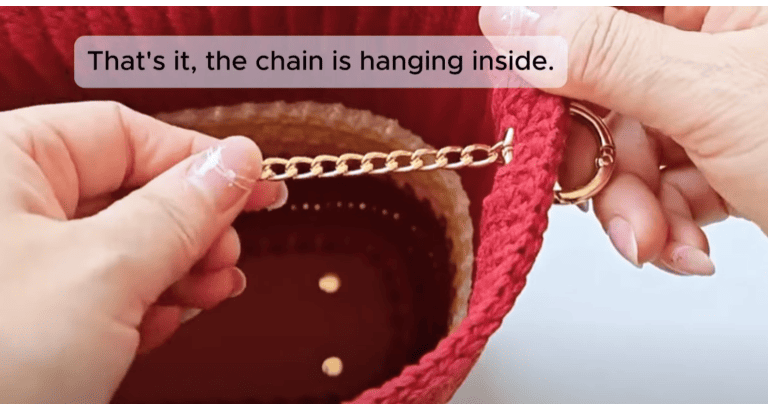
1.The top points on either side of the bag body are located and the spring clip is inserted halfway into the edge of the bag.
2.At this stage ‘the chain is held by the thumb of the clip and the clip is closed acoustically’.
3.The next step is to fix another movable spring clip and to D-attach the ring which is on the D-ring to this clip.
4.The same procedure is done on the opposite side of the bag.
Base stitch for beginners
We’ve all been there! Here are some basic stitch we’ve learned along the way:
How To Crochet Magic Ring ? l Step-By-Step l Video & Text &Photo
Chain Stitch |Step By Step Guide| Text & Photo &Video
Single Crochet-You Want To Know The Most Detailed Information
Half Double Crochet In The Round-The Complete Guide
Double Crochet Stitches For Beginners
Reference sources
1.Learn the most comprehensive guide for single crochet(sc)
Author:Sarah Stearns
Publication date: on June 15, 2021, updated:December 14, 2024
Title: How to single crochet (sc)for beginners
Summary as blow:
- Step-by-Step Single Crochet for Beginners
- Single Crochet into a Foundation Chain
- Single Crochet into another Row
- Single Crochet in the Round
- Increases and Decreases
- Working Single Crochet in Different Loops


