


Crochet Rose Pattern With Hair Rope The Most Comprehensive Text & Photo Tutorial
Crochet rose pattern with hair rope :crocheting a quick rose with a hair tie gives you a project that’s sweet, tough, and quick to wear. Go ahead: chain stitch here, a single crochet there, maybe a double shell for flair, and before long you have got a flower that looks fancy yet screams beginner-friendly. Trim the loose strands, your blossom is already begging to be shown off.
We use magic ring to crochet leaves shape and wind hair rope around the base until it hugs tight and stands proud. The trick is to keep the wrap snug so nothing droops once the thread settles.
A dab of glue between leaf and rose locks the two pieces like a friendship bracelet that never comes apart. Wait a second for the glue to cool and watch the pair bond as if they were stitched together at birth.
Every rose-tie we make, no kidding, is one of a kind-just like the head that will wear it. The little petals let us show off what we love about crochet while adding a splash of color to an ordinary ponytail. Why not sprinkle a few of these blooms into your week and carry a garden in your hair?
Table of Contents for crochet rose pattern with hair rope
Material kit of crochet rose pattern
- Hook: 3.0mm
- Yarn( red wine & blue )
- Yarn needle
- Marker
List of necessary tools
- Scissors
- Hot melt glue or glue
- Black hair rope
Abbreviation for crochet rose pattern with hair rope
These are the required abbreviations for crochet rose pattern with hair rope
- ch = Chain stitch
- sc = Single crochet
- sl =Slip stitch
- inc = Increase (usually 2 stitches in the same stitch)
- st(s) =Stitch(es)
- mc =Magic circle (or magic ring)
- dc=Double crochet
- hdc=Half double crochet
Best selling products
-

Raffia Cross Pattern Basket Handbag Kit
$19.99 -

Hexagonal Bucket Bag Kit
$29.99 -

Raffia Handbag Kit
$29.99 -

Hammock Bag Kit
$29.99 -

Wheat Bucket Bag Kit
$19.99
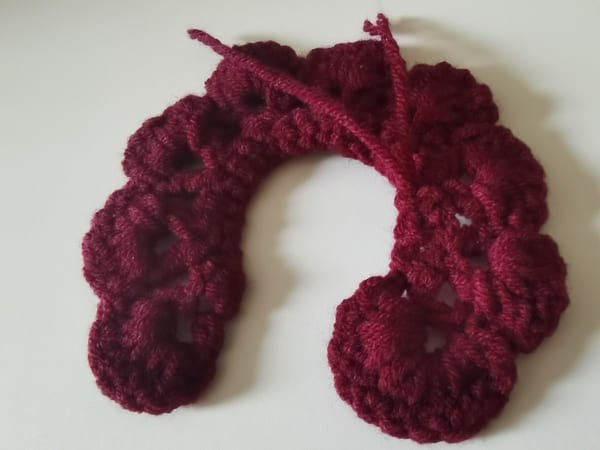
Crochet rose shape ( use wine red yarn) for crochet rose pattern
- R1:26ch-starting from the second back loop of last stitch -25sc
- R2:5ch,turn over,[(dc,2ch,dc),sk2] repeat 8 times, (dc,2ch,dc),
- R3:ch,(6dc, sl)repeat 8 times, 10dc,sl, ch
R1
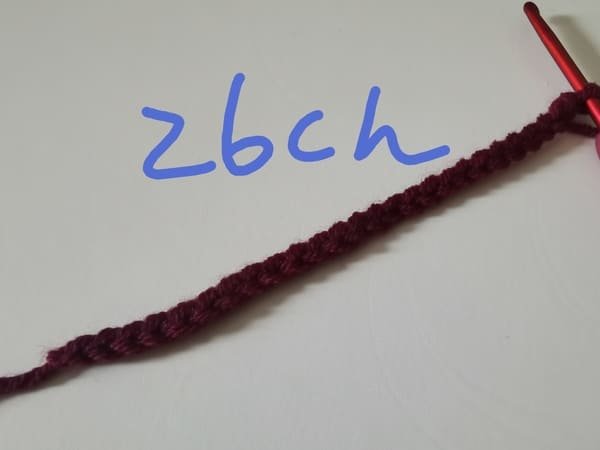
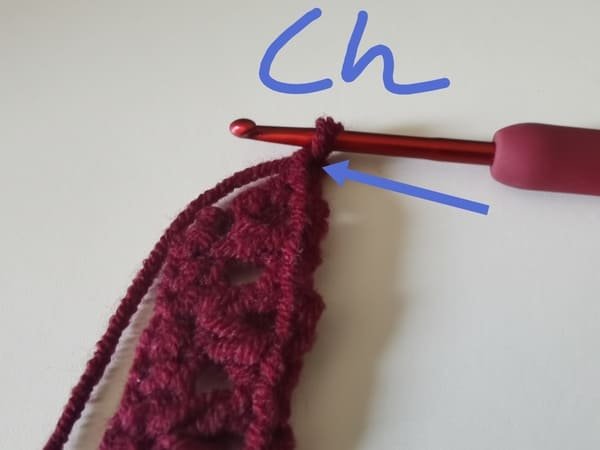
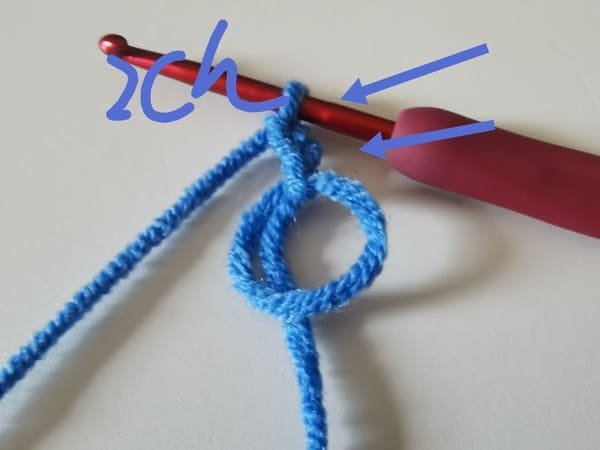
We need crochet 26 chain stitches firstly.
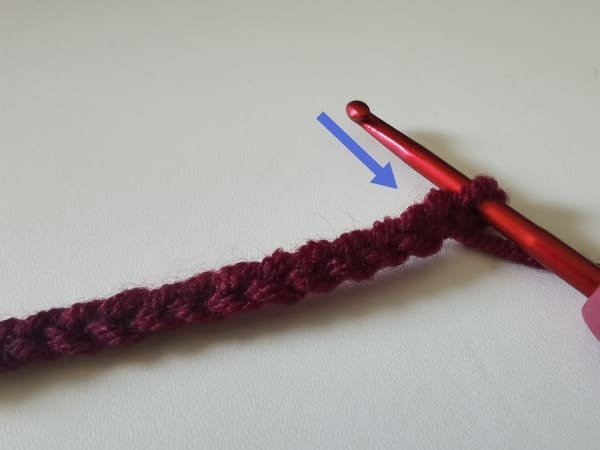
Show as picture ( the hook insert position)
The hook need insert the second back loop of last stitch .
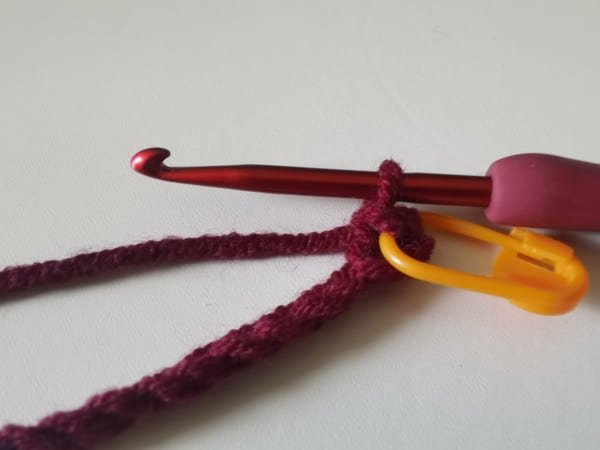
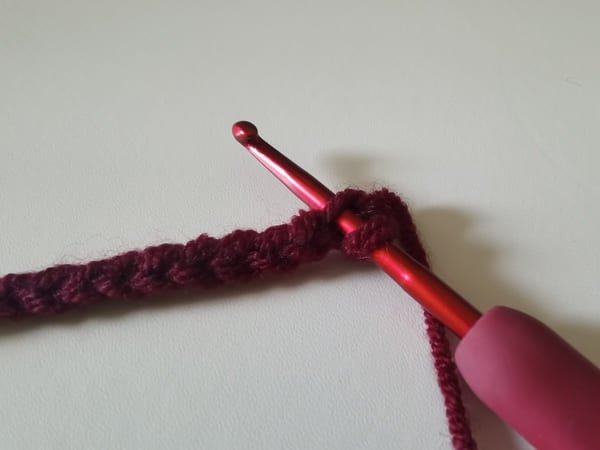
Yarn over , we get the two loops on the hook ,yarn over again , bring out the two loops , we can get one loop, which is single crochet .
We have to put the yellow marker when the first stitch is completed.
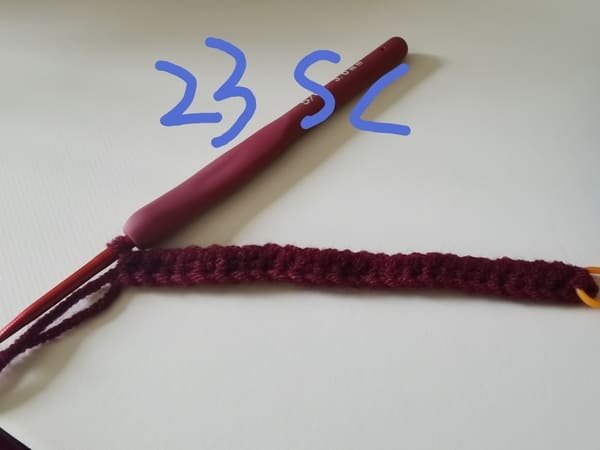
We need crochet 23 single crochets for round 1.
Sorry for that 23 sc should be 25 sc .
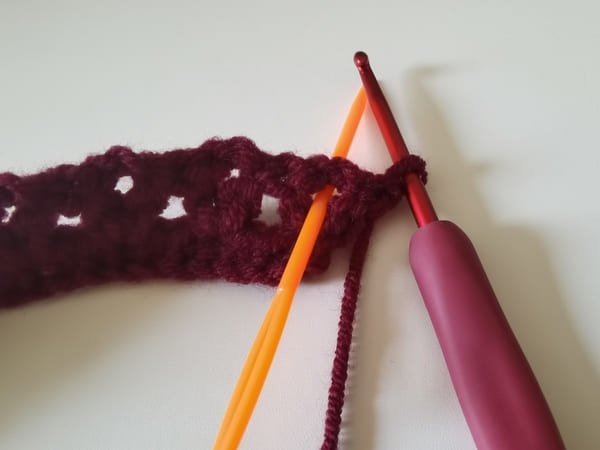
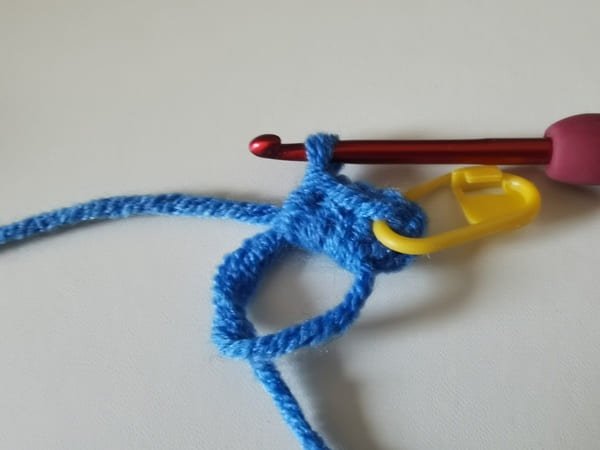
R2
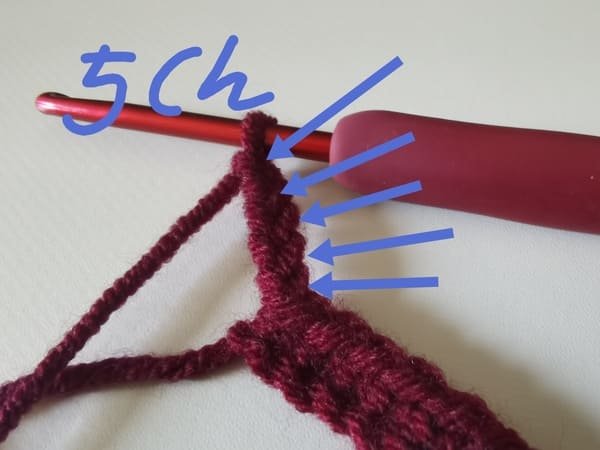
We need crochet 5 chain stitches again.
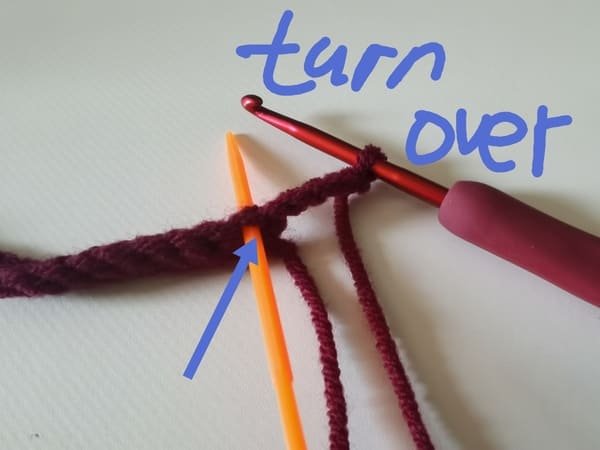
Turn over the fabric.
It is so important , do not forget this step.
The hook need insert the last V shape stitch of previous round. ( show as picture)
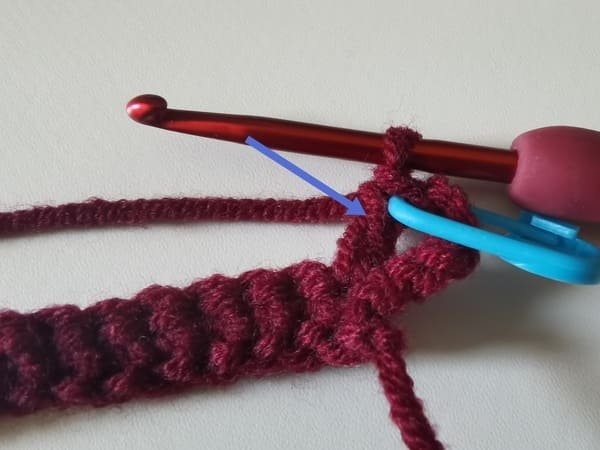
The first double crochet is completed.
Then we crochet 2 chain stitches again.
We need crochet double crochet in the same stitch again .
So, we get the first group .
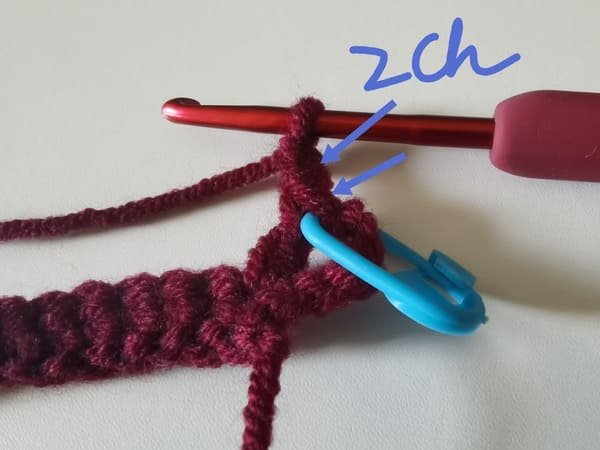
Skip 2 stitches later.
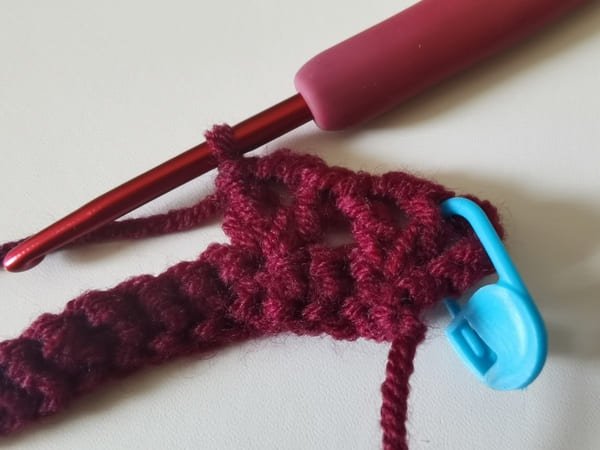
Then we get the second group( dc, 2ch, dc).
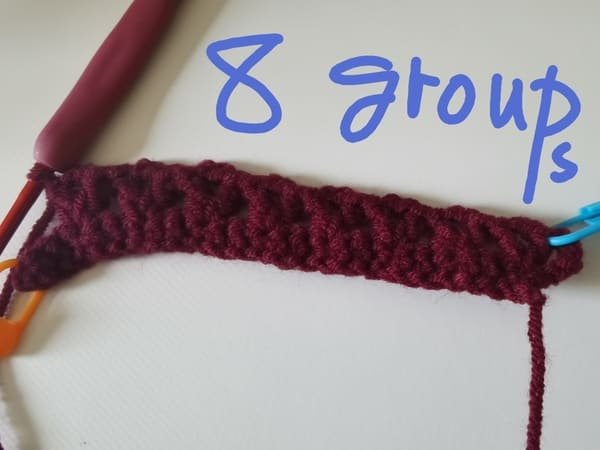
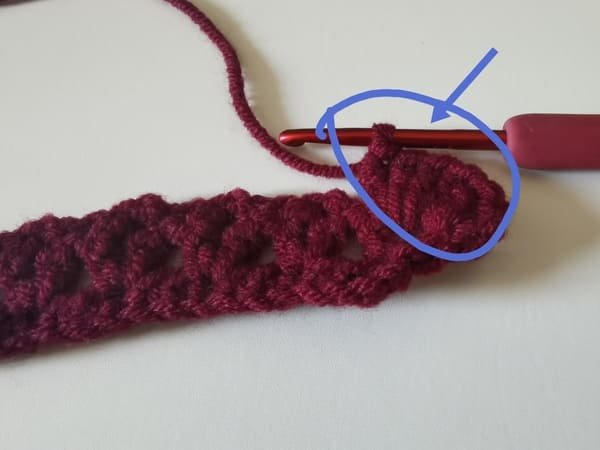
Use same the crochet order ,8 groups are completed.
Don’t think it’s complicated, it’s very simple to master the rules of crocheting.
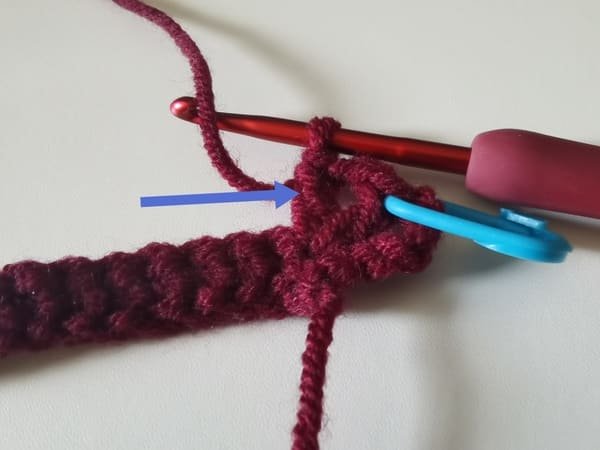
The hook insert the first stitch of previous round ( show as picture ), which is crochet order (dc, 2ch, dc)
The last group is completed for round 2 (show as picture )
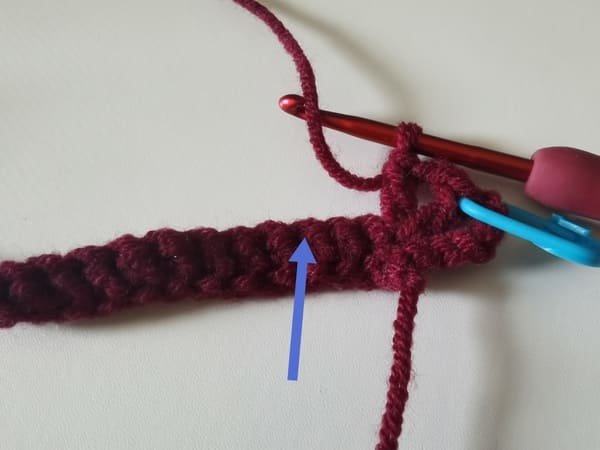
To sum up, we have completed 9 small pedals in this round.
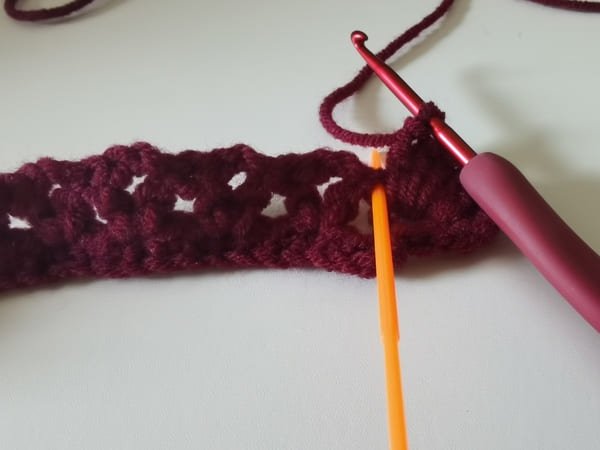
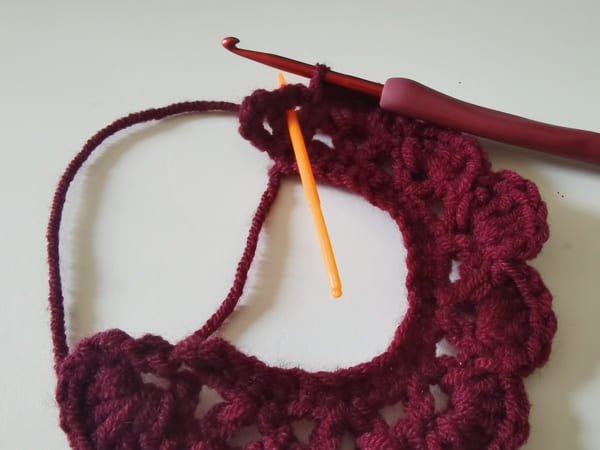
R3
We crochet chain stitch firstly.
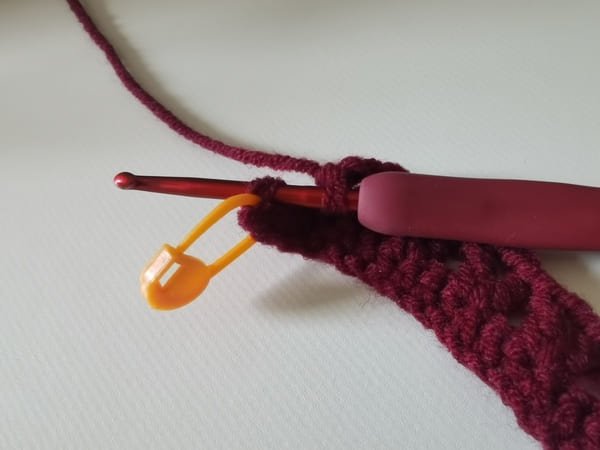
The hook insert the first small hole for the first group .
The 6 double crochets in the first small hole .
The hook insert the second small hole for the first group for slip stitch .
slip stitch is completed for the first group.
The second group is completed (6 double crochet , slip stitch).
The 8 groups are completed for round 2.
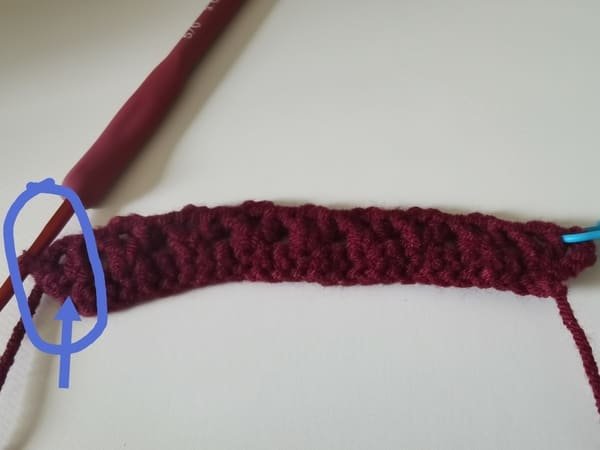
The hook insert the last small hole for the last group.
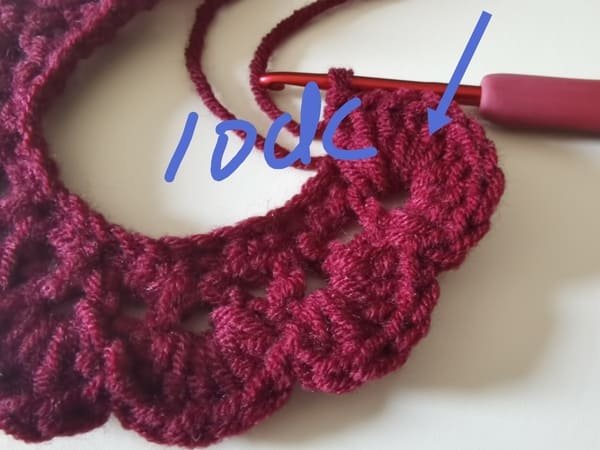
We crochet 10 double crochets for the last group.
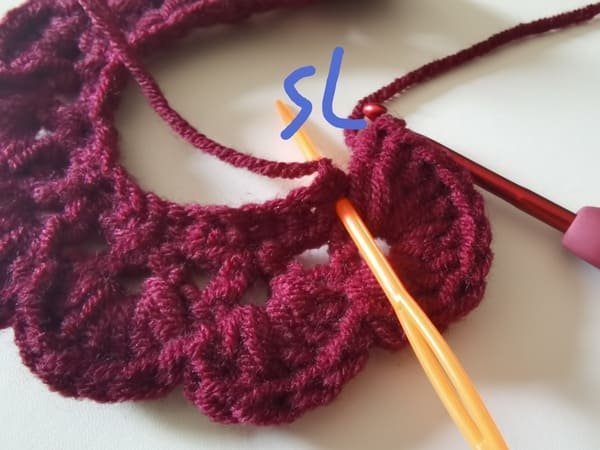
The hook insert the next small hole for the last group.
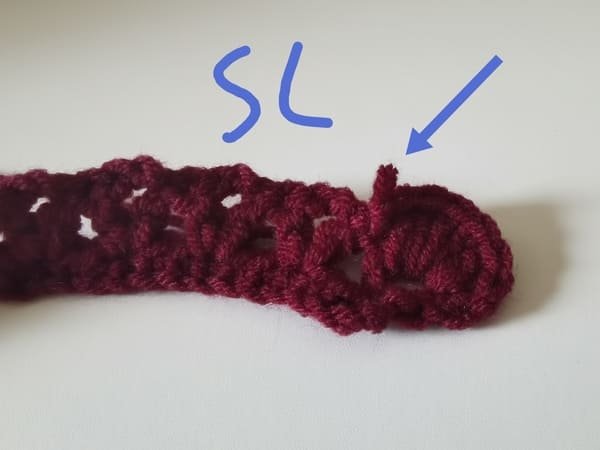
Slip stitch is completed for the last group.
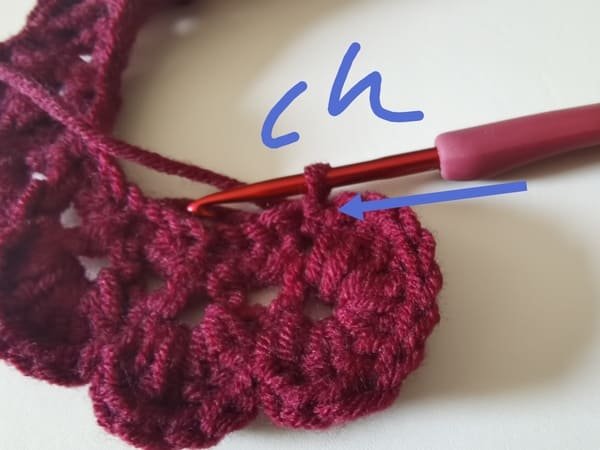
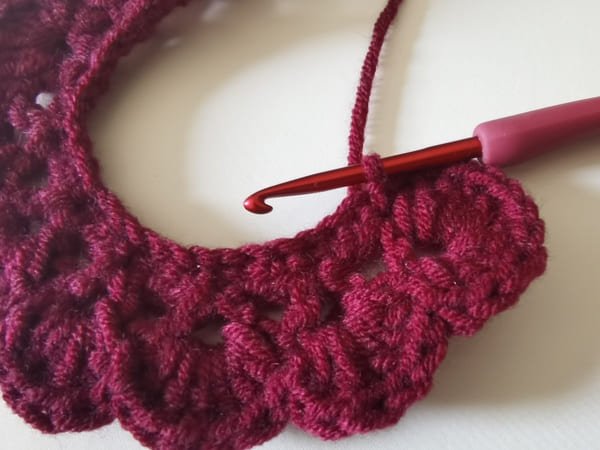
We crochet chain stitch again,which make it more secure.
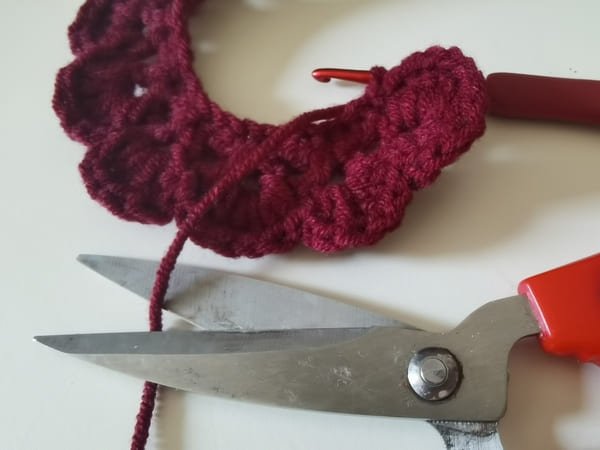
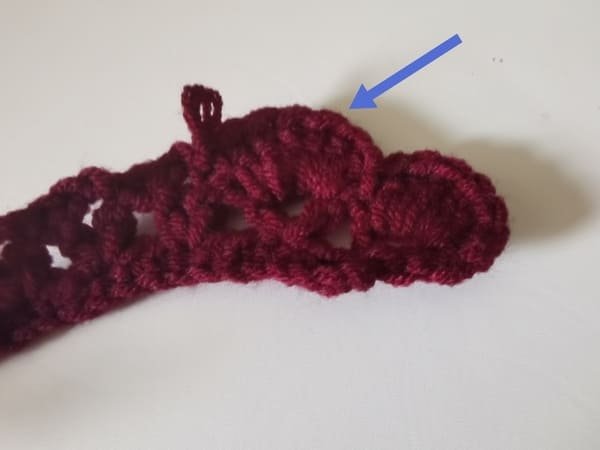
Leave 5 yarn end , and use scissor to cut yarn end.
Use hook to bring out the yarn end.
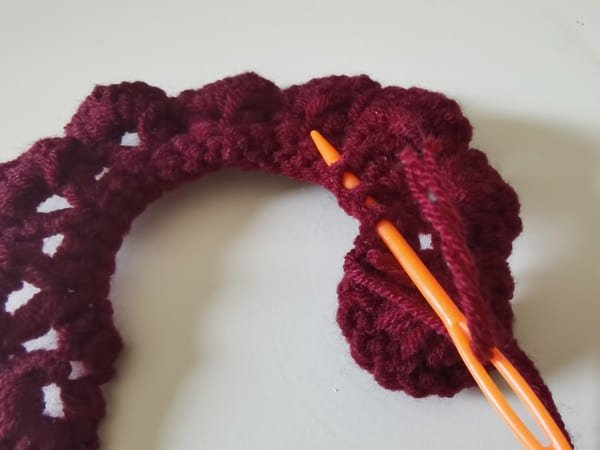
Conceal yarn end ( use yarn needle with same yarn to conceal the next the stitch several times).

Use scissor to cut the excess yarn end.
The rose shape fabric is completed.
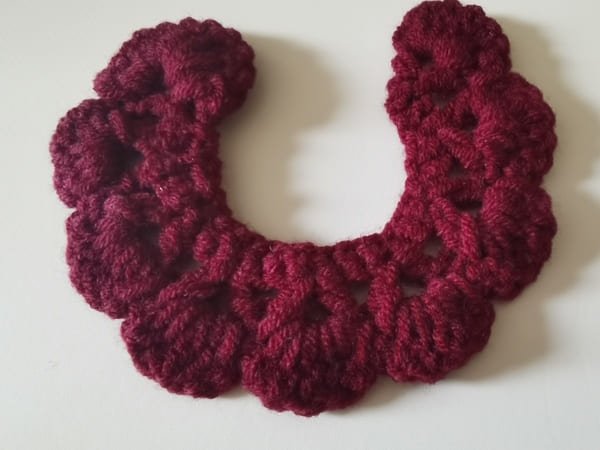
Crochet magic ring with leaf ( use blue yarn) for crochet rose pattern
- R1:2ch,15hdc
- R2:6ch-starting from the second back loop of last stitch(sl,sc,hdc,dc,dc),sk2,sl, repeat 5 times.
R1
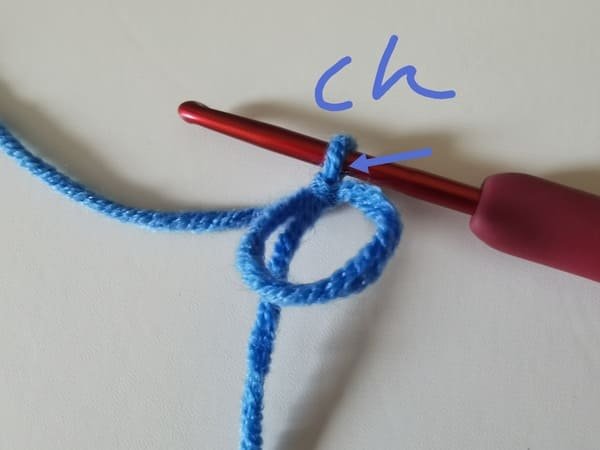
We crochet chain stitch to make the magic ring more secure.
It should be noted that this chain stitch is not counted in the number of stitches.
Then we crochet the 2 chain stitches again.
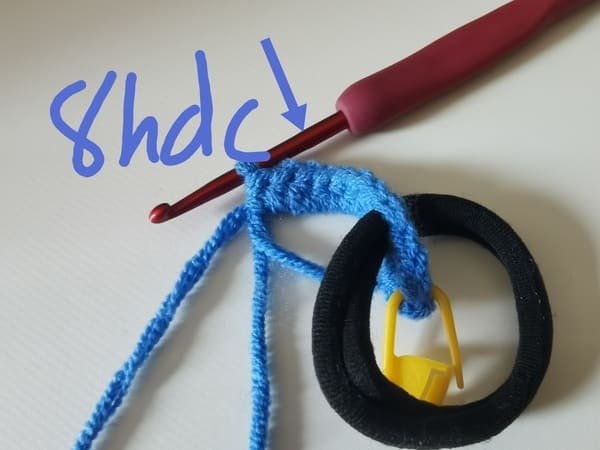
3 half double crochets are completed ( yarn over, we get the three loops on the hook, yarn over again ,bring out the three loops, we get one loop on the hook, which is half double crochet.)
We put the yellow market when the first half crochet is completed.
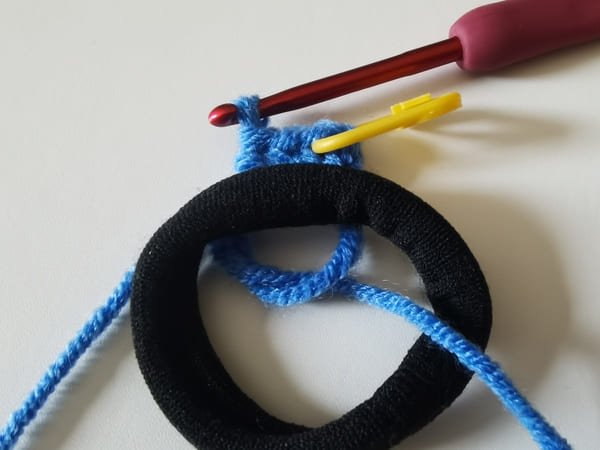
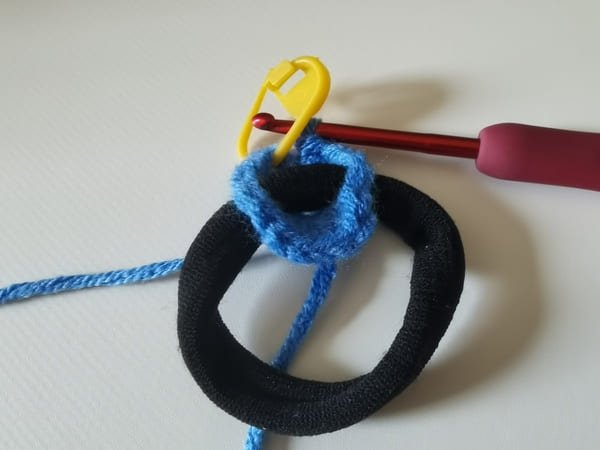
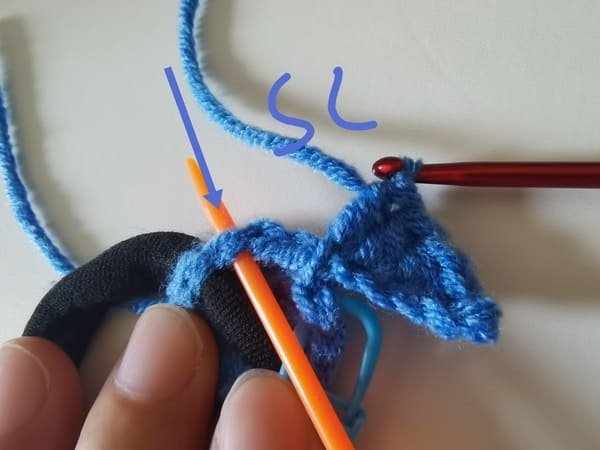
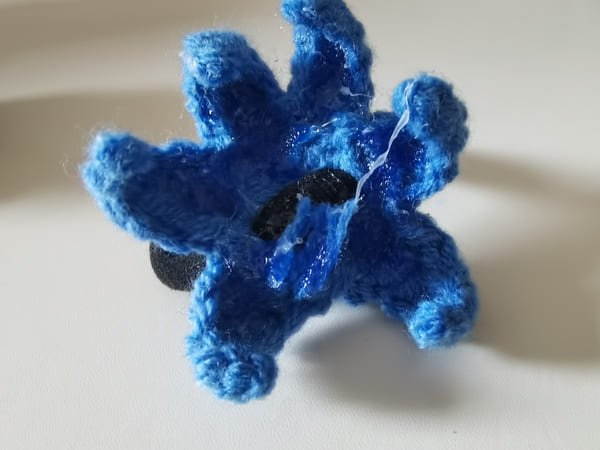
Then we put the black hair rope on the fabric when 3 half double crochets are completed.(show as picture).
The fourth half double crochet is completed,we put the hair rope in the fabric( show as picture).
11 half double crochet are completed.
Hair rope to the left :8 half double crochets
Hair rope to the right:3 half double crochets
Sum up: 11 half double crochets
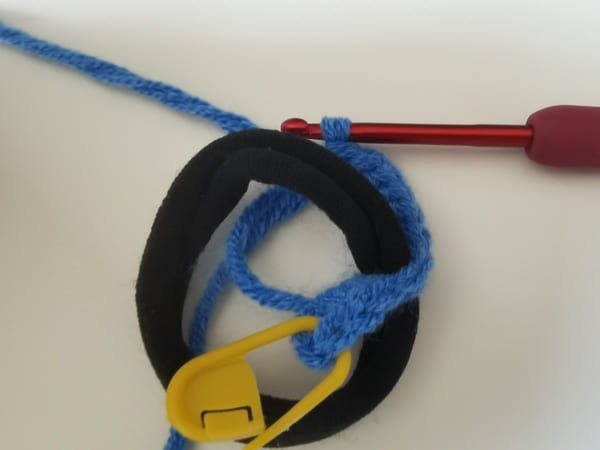
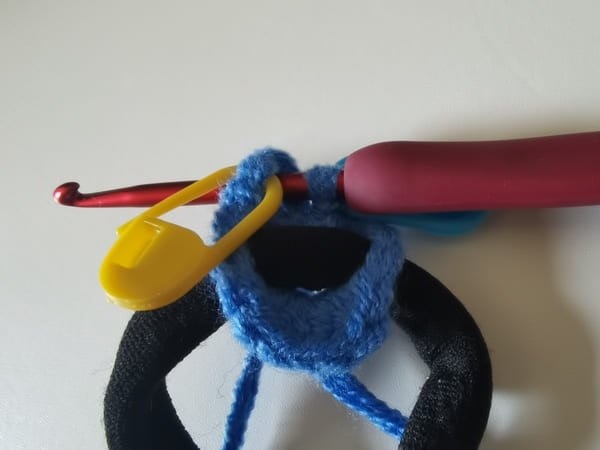
Then we put the hair rope on the fabric (show as picture).
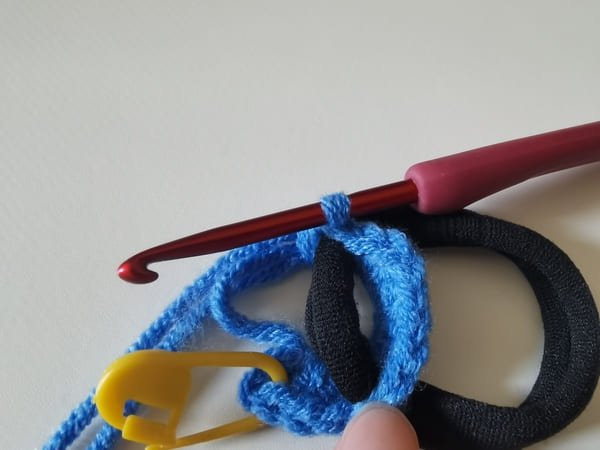
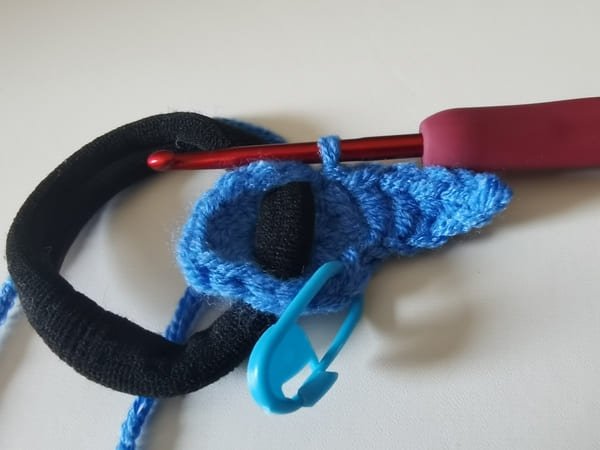
The 12th half double crochet is completed,we put the hair rope in the fabric( show as picture).
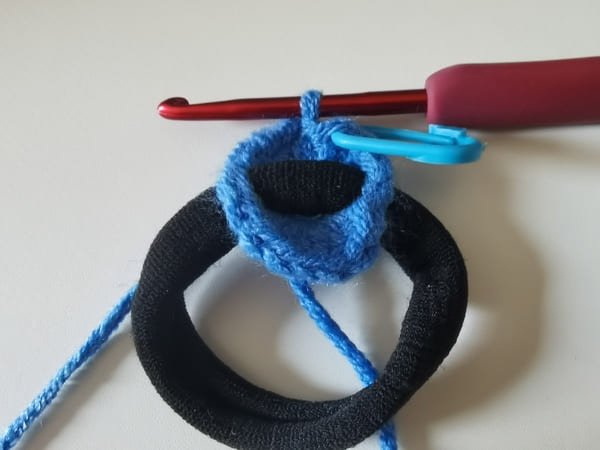
The 15th half double crochet(hdc) are completed.
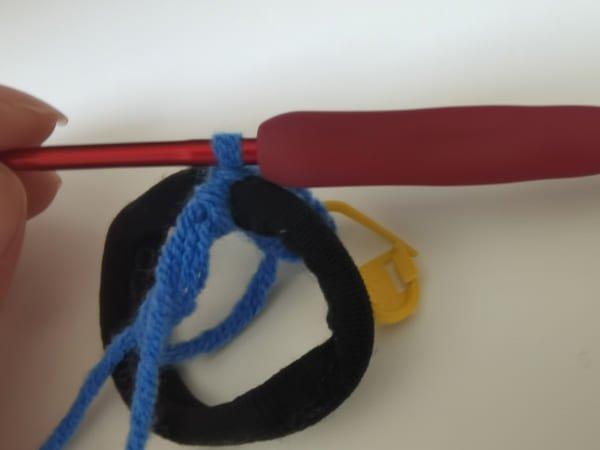
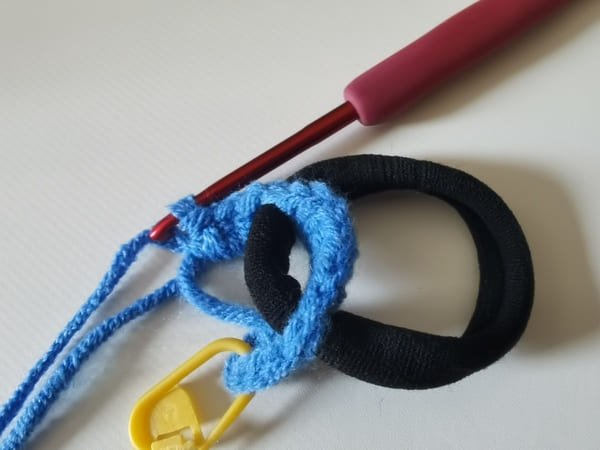
Tighten up the yarn end, let magic ring have no gap.( show as picture)
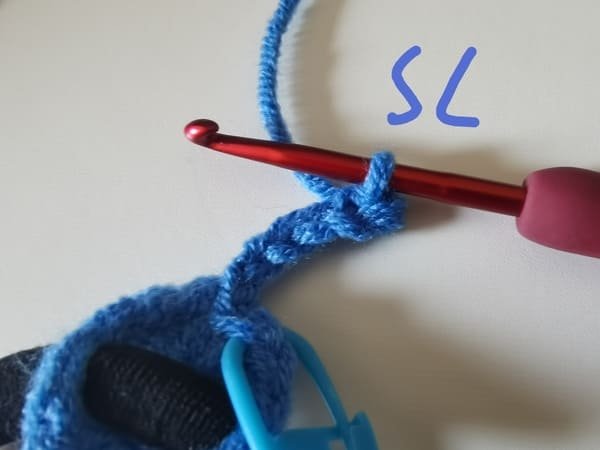
The hook insert the first stitch of previous round for slip stitch for round 1 .
Slip stitch is completed( yarn over , bring out the two loops on the hook , we get one loop on the hook, which is slip stitch.)
R2
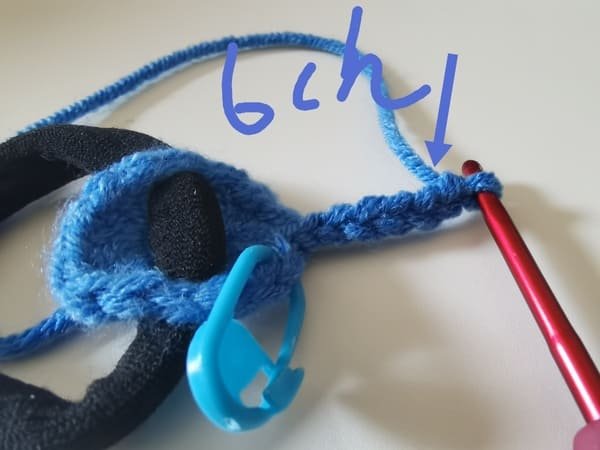
We crochet 6 chain stitches firstly.
The first slip stitch is starting from the second back loop of last stitch
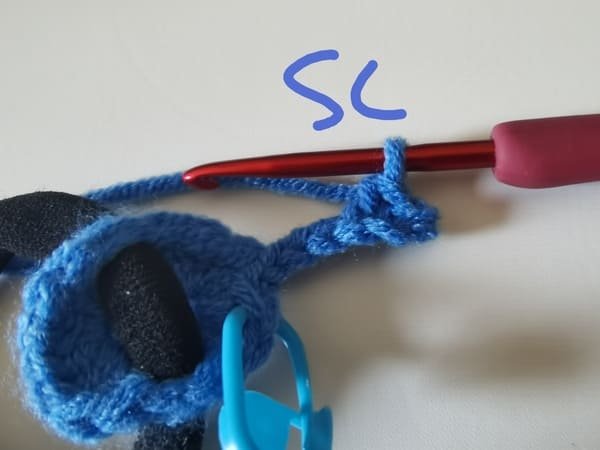
The second single crochet is starting from the third back loop of last stitch
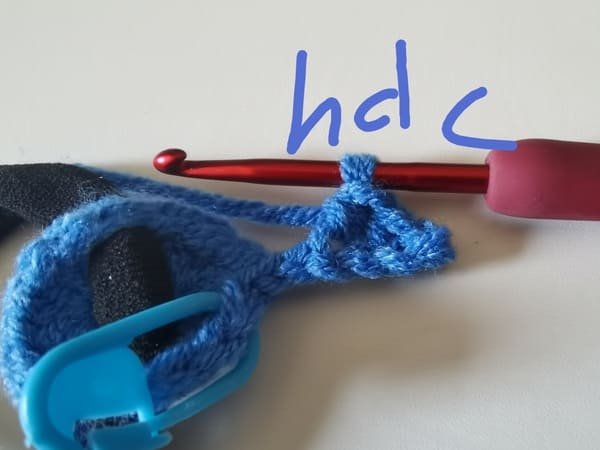
The third half double crochet is starting from the fourth back loop of last stitch.
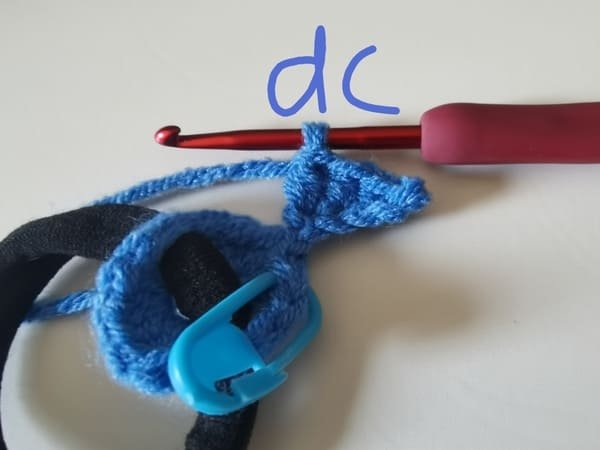
The fourth double crochet is starting from the fifth back loop of last stitch.

The fifth double crochet is starting from the sixth back loop of last stitch.
We need skip two stitches for slip stitch.
The first leaf is completed.
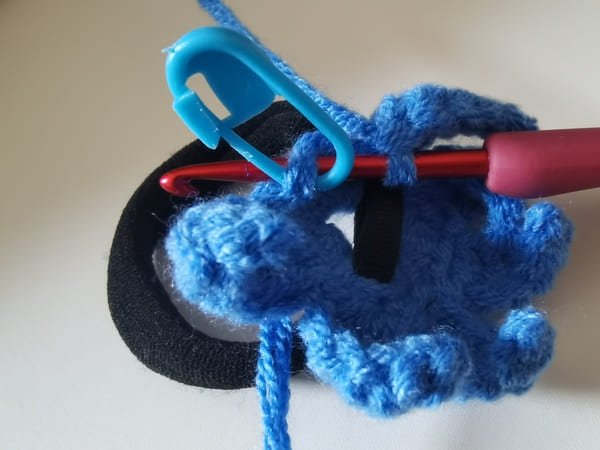
Use the same crochet order to make the left leaves.
Then we get the five leaves for round 2.
Then we put the hook to insert the first stitch of previous round .
Slip stitch is completed for round 2.
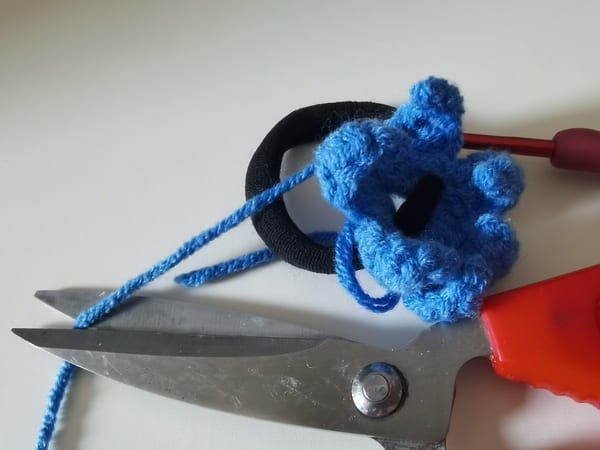
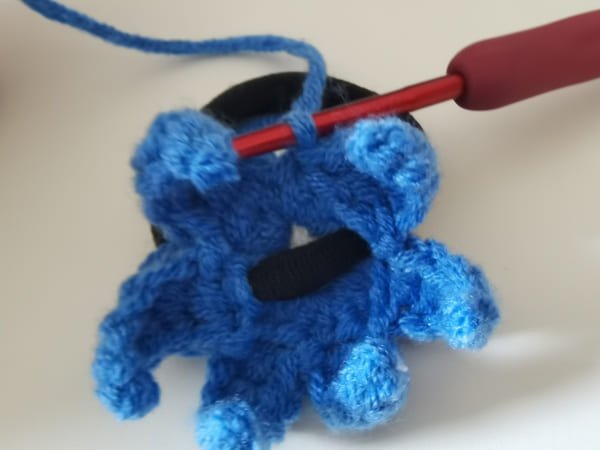
Leave 5 cm yarn end and use scissor to cut yarn end.
We use the hook to bring out the yarn end.
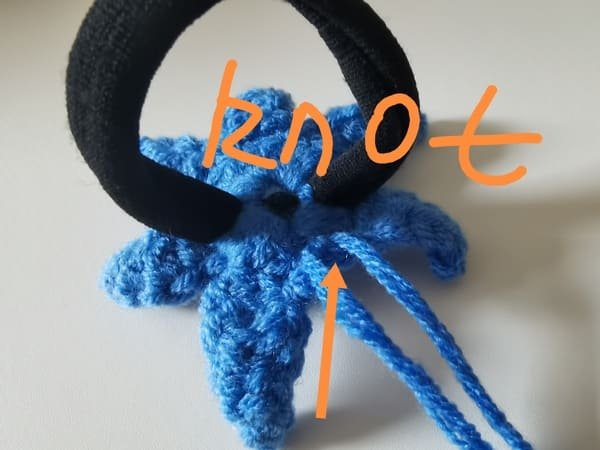
Tie know at the back of fabric several times, which is more secure.
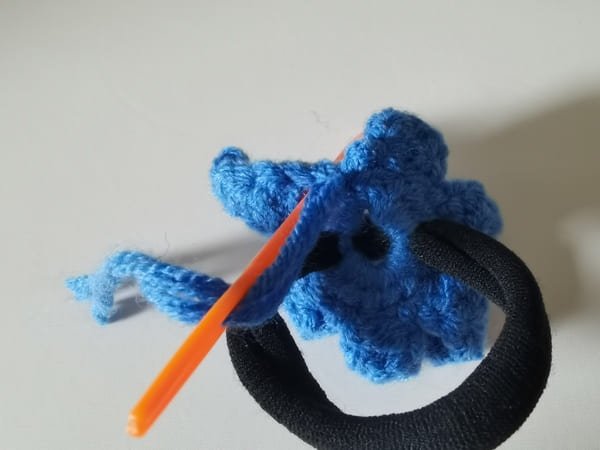
Use the yarn needle to conceal yarn end(conceal the next stitch several times).

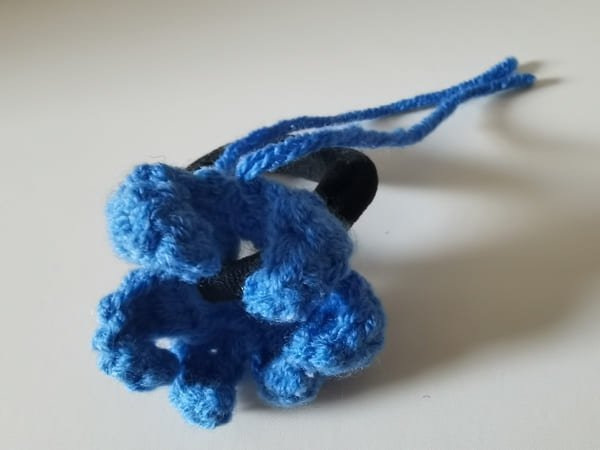
Magic ring with 5 leaves are completed.
Looks so cute.
Glue together
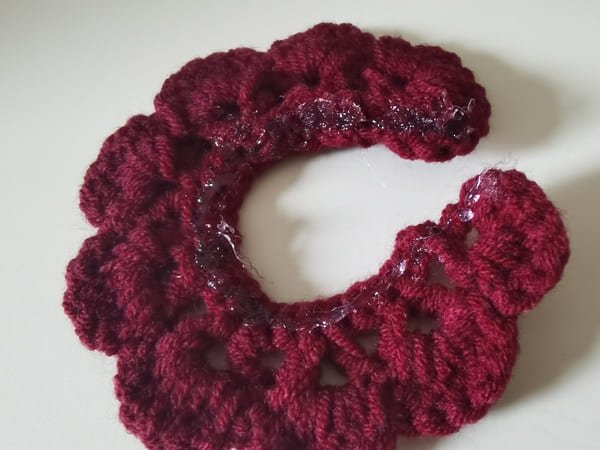
We put the glue at the bottom of fabric.
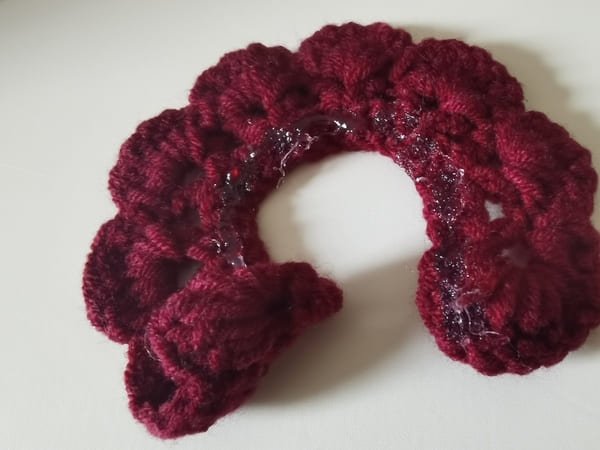
Roll it up slowly with our hands, and note that the 10 half double crochets need to be placed at the very end, so that the rose shape will look better.
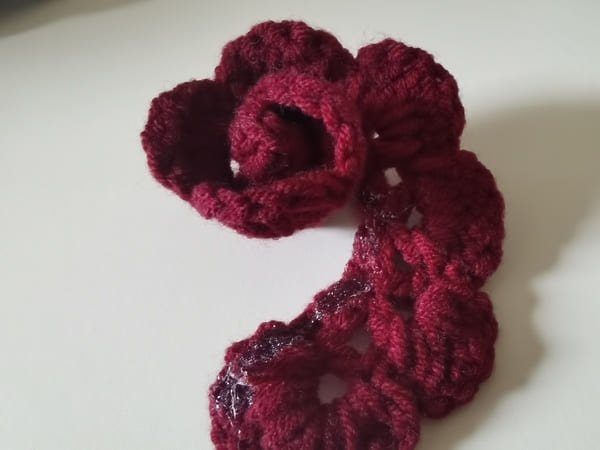
Part of rose shape.
My construction, for beginners, just need to roll it slowly, and it will naturally form a rose shape in the end.
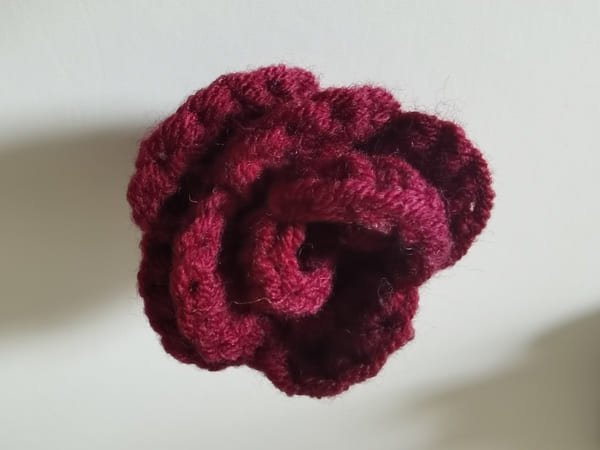
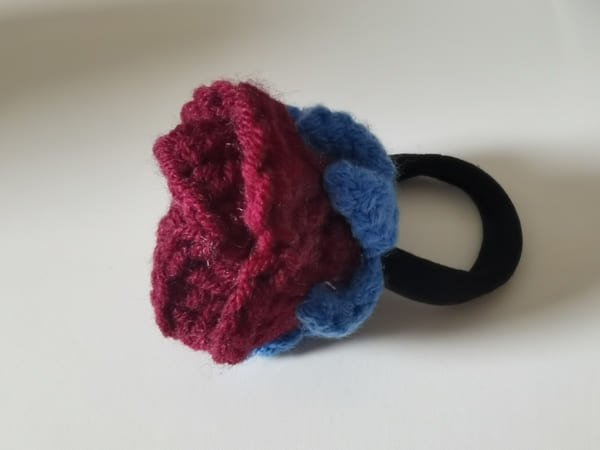
Rose shape is completed.
You just need to believe in yourself and be patient to complete a beautiful flower.
We put the glue the leaf at the bottom .
Put the rose on the leaf.
It should be noted that the leaves should be evenly glued to the outside of the flower, naturally, and not too rigidly.
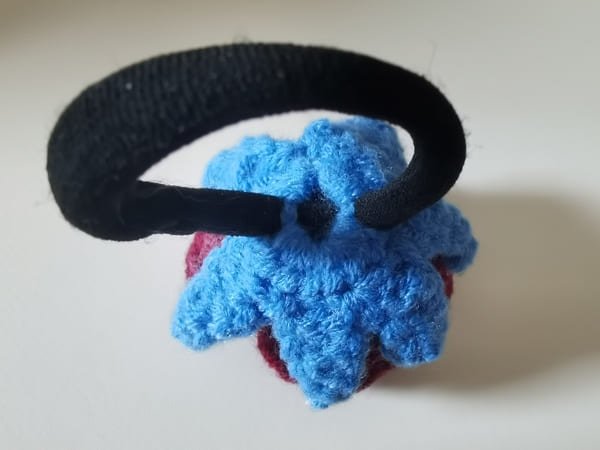
At the bottom of rose with leaves.
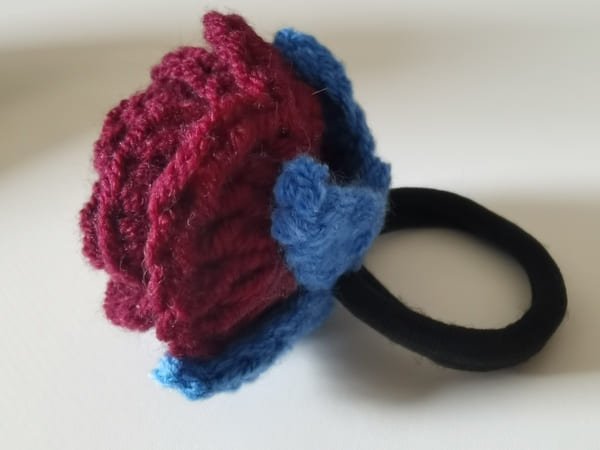
Side of crochet rose pattern is completed .
It is very delicate and beautiful. I think every thing woven by hand is very suitable for giving as a gift.
Reference sources
1.Learn the most comprehensive guide for single crochet(sc)
Author:Sarah Stearns
Publication date: on June 15, 2021, updated:December 14, 2024
Title: How to single crochet (sc)for beginners
Summary as blow:
- Step-by-Step Single Crochet for Beginners
- Single Crochet into a Foundation Chain
- Single Crochet into another Row
- Single Crochet in the Round
- Increases and Decreases
- Working Single Crochet in Different Loops


