


Half Double Crochet In Magic Ring Step-By-Step Instructions With Text And Pictures
Half double crochet in magic ring: many crocheters, whether crafting tiny amigurumi creatures or simply whipping up a coaster, soon discover that starting in the round with a magic ring is practically a rite of passage. The trick cinches the center shut so neatly that no unsightly gap dares to appear. Pair that technique with the humble half double crochet-stitch and the resulting fabric possesses both quiet firmness and a pleasant hint of drape.
What follows is a thorough walk through of how to lace half double crochets into a magic ring, presented in careful, numbered steps. Each section is backed by supporting photographs, straightforward notes, and the occasional pro tip, meaning complete beginners and seasoned hookers alike will find something valuable.
Table of Contents for half double crochet in magic ring
Understanding the magic ring
The term magic ring can strike newcomers as oddly extravagant for a simple knot, yet the element of surprise is genuine. By looping yarn around a finger, stacking several stitches atop that wrap, and then tugging the tail, the crafter closes the center as though no gap ever existed.
Half double crochet
The half double crochet-hdc for short-sits between the single- and double-crochet heights.
One yarn over, three quick loops on the hook, then a tidy pull through all three, we get one loop on the hook, which is half double crochet (hdc).
What you’ll need
Yarn Select a trusty worsted-weight fiber; its balance of heft and flexibility is forgiving for new stitches.
Hook Reach for the gauge printed on the ball-band-most commonly a 3.0 mm shaft for that weight.
Pair of scissors Simple, sturdy blades are all you really need to clip loose strands.
Yarn needle: A blunt-tipped needle threads through plies and disguises leftover ends.
Step-By-Step: Half double crochet in magic ring
✨ Step 1: Create the magic ring
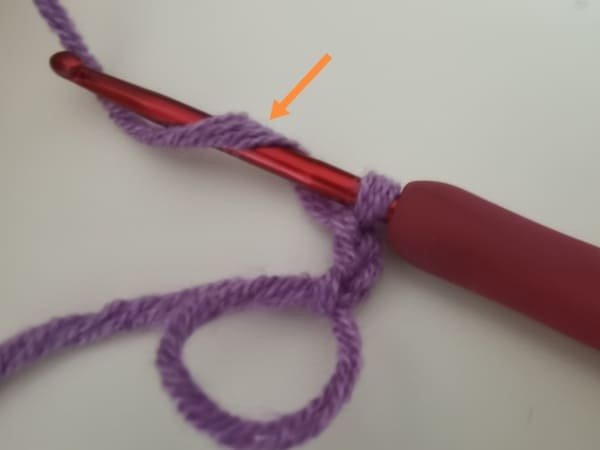
1.Loop the yarn over your two fingers to create a loose cross“X“.

2.Slide the hook under the top yarn and catch the yarn beneath it.
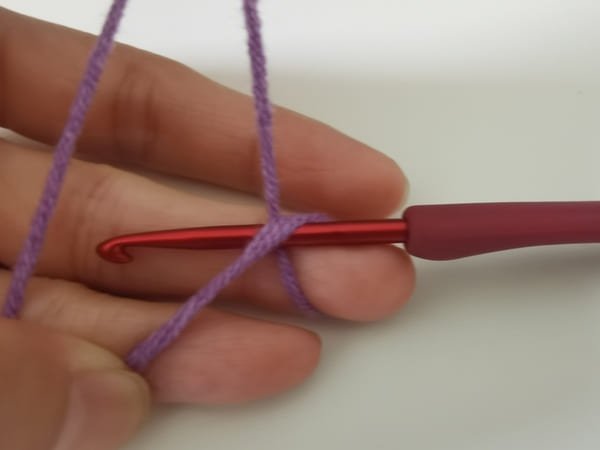
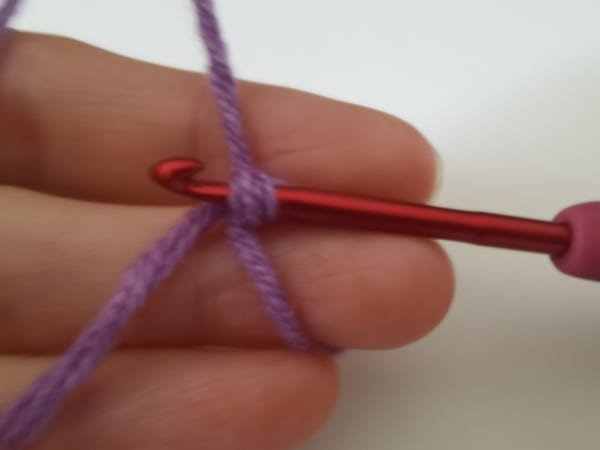
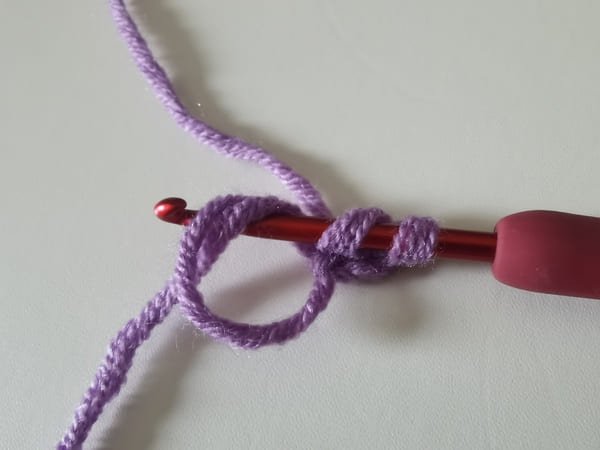
3.Draw that strand through, one chain stitch to hold the loop.

🔍 Long leftovers matter; leave at least six inches of yarn .that extra length gives you room to draw the ring shut with a few tidy pulls.
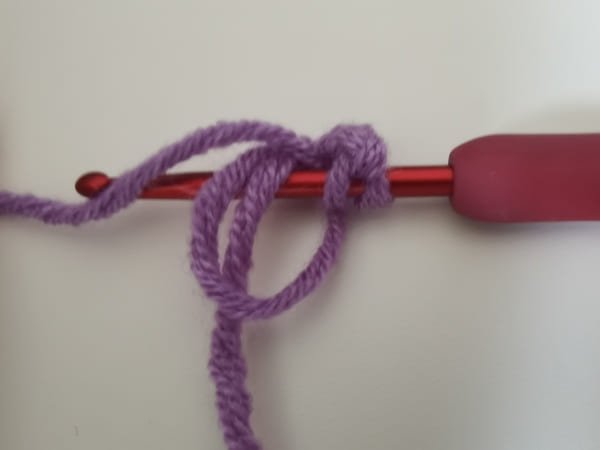
✨ Step 2: Chain 2 (turning chain)
To kick things off, we usually pull up a quick chain-2. That little lift keeps the first row of half doubles even with the hook.
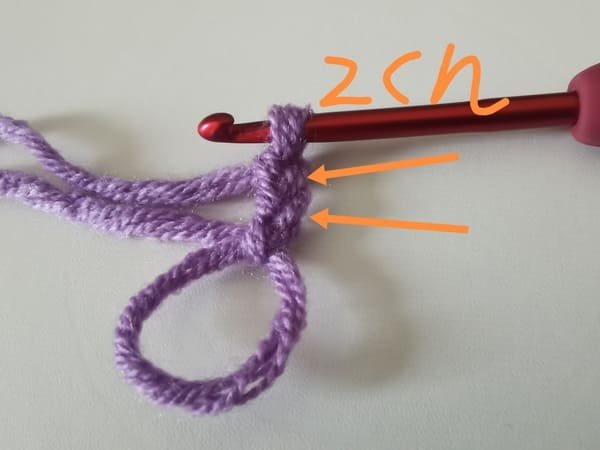
📌 Note: Some patterns count these 2 chains as a stitch, and some don’t. we recommend not counting the chain 2 as a stitch unless your pattern says so.
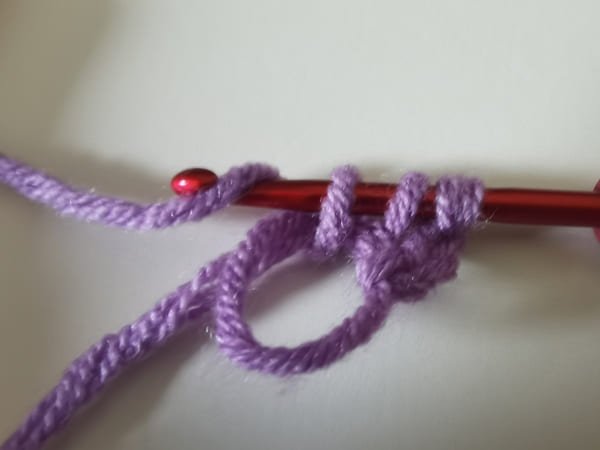
✨ Step 3: Start half double crochet in magic ring
1.Yarn over.
2.Insert hook into the center of the magic ring.
3.Yarn over again and pull up a loop. (3 loops on hook)
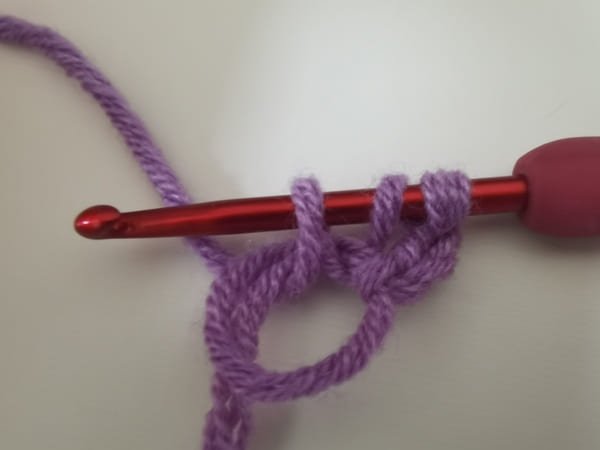
3.Yarn over once more and bring out all 3 loops .(1 loop on hook)
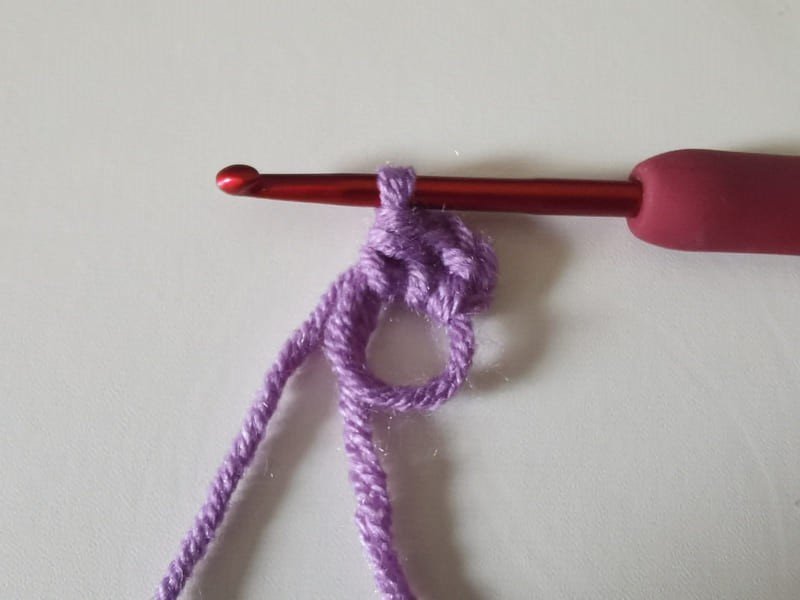
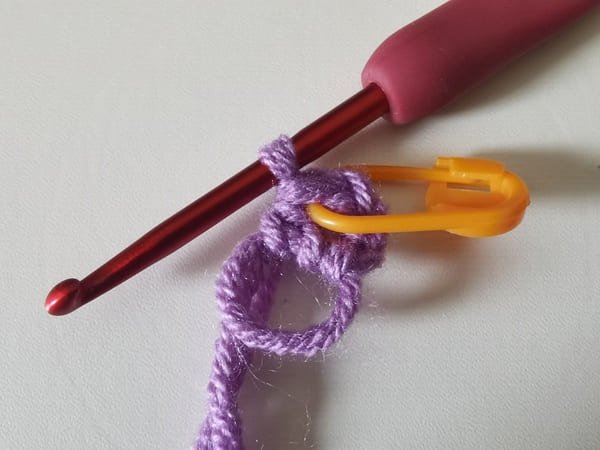
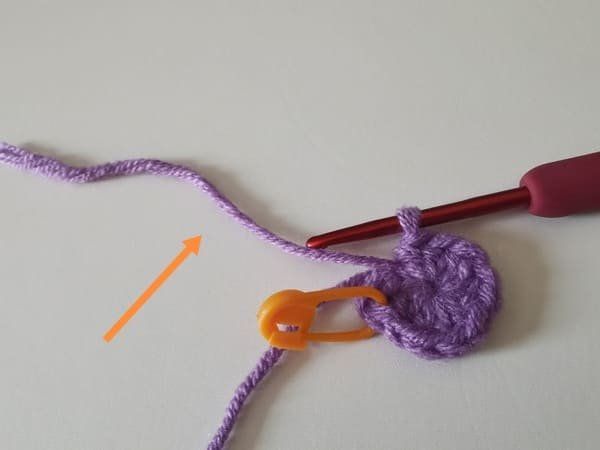
That’s your first half double crochet in the magic ring! we put the marker when the first half double crochet is completed.
4.Put marker with first stitch.
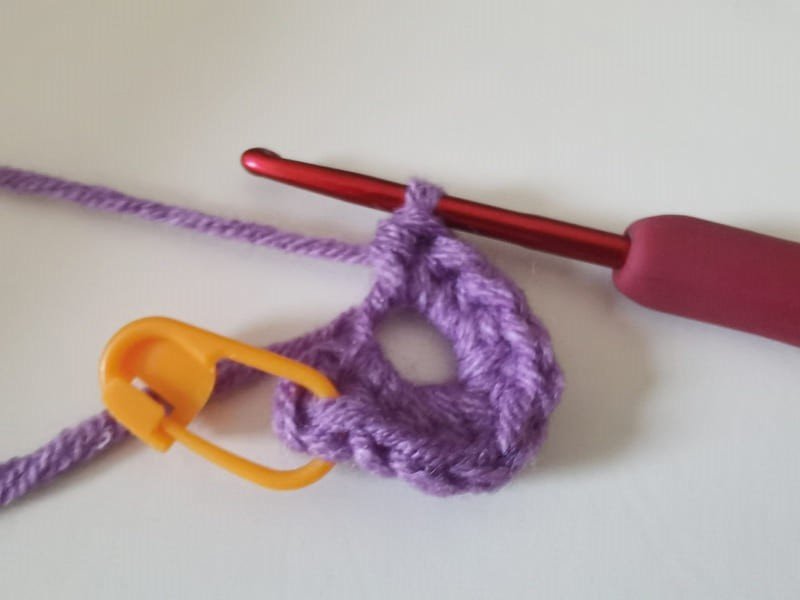
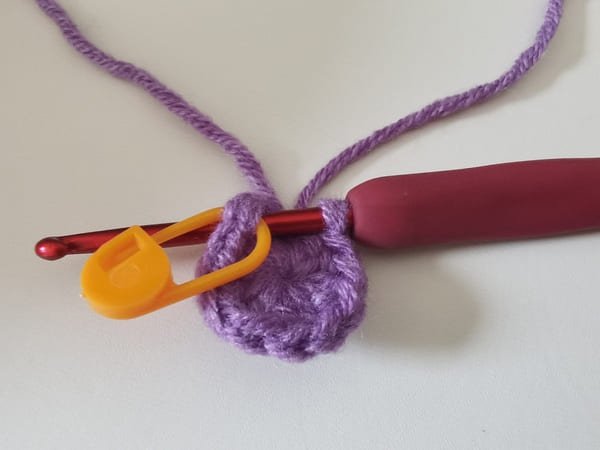
✨ Step 4: Repeat hdcs in the Ring
Keep working half-double crochet stitches into the center of the ring until the opening closes up. For a snug look, aim for 10 stitches.
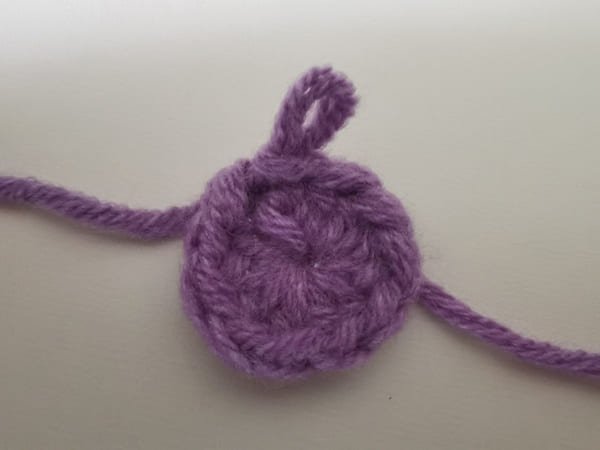
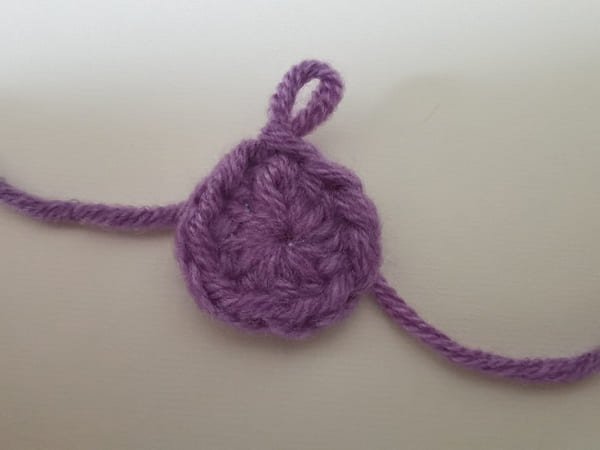
✨ Step 5: Close the magic ring
Having worked the required stitches into the magic ring, the next move is to cinch the assembly shut.
The process begins by pinching the fabric stitches with right hand while gently tugging the yarn tail with the opposite grip. As the tail is pulled, the central loop constricts and herds the stitches into a tidy cluster; we needs to yank hard enough to seal the gap yet easy enough to prevent any one stitch from bowing out of shape.
A moment after the initial closure, giving the tail a slight counter-tug commits the ring to memory and stops it from loosening.
✨ Step 6: Join with Slip Stitch
After filling the magic ring with the required half double crochets, the final step is to close magic ring . Position the hook in the top of the very first half double crochet, yarn over and bring out the two loops , then get one loop on the hook ,which slip stitch. This maneuver creates a slip stitch and draws the round to a neat, invisible finish.
A well-executed slip stitch ensures that the border between one round and the next is almost undetectable, preserving the projects symmetry. The motion is so brief that it can be easy to overlook, yet its effect on the overall appearance is substantial.
With the round properly joined, a quick chain sets the stage to work into the next tier. Consistent use of slip stitches keeps counts accurate, anchors pattern markers precisely, and, just as importantly, prevents the warn slant that can spoil circulate motifs.
Pro tips for success
| Tip | What We Do |
|---|---|
| Chain 2, not 3 | Odd as it sounds, we skip that third chain. two loops at the base keep the next half-double crochet line flat and tidy. |
| Tighten the ring slowly | We ease the tail in little by little. |
| Use a slip stitch to Join | We seal the round by slipping into the first hdc, not the chain. This hides the seam and keeps our work moving in one smooth circle. |
Frequently asked questions for half double crochet in magic ring
Q:How many chains for half double crochet in magic ring?
A:Most crocheters hook up 2 chains before dropping into the half double crochets. That tiny step creates just enough height without leaving a thick, obvious gap in the center.
Q:Preventing a lumpy center
A:To dodge a bumpy look, space the hdc evenly and give the tail a light tug to tighten everything. Pull too hard or crowd the stitches, and the middle will take on a weird, lumpy feel.
Q:one technique, many projects
A:Half double crochet in a magic ring works like a charm for hats, amigurumi, flowers, even coasters. The tidy round start keeps every piece looking sharp, no matter what.
Q:Closing the round neatly
A:Finish the round by slip-stitching into the first hdc instead of the chain. That little choice hides the join and keeps the circle nice and smooth.
Best selling products
-

Raffia Cross Pattern Basket Handbag Kit
$19.99 -

Hexagonal Bucket Bag Kit
$29.99 -

Raffia Handbag Kit
$29.99 -

Hammock Bag Kit
$29.99 -

Wheat Bucket Bag Kit
$19.99
Reference sources
1.Learn the most comprehensive guide for single crochet(sc)
Author:Sarah Stearns
Publication date: on June 15, 2021, updated:December 14, 2024
Title: How to single crochet (sc)for beginners
Summary as blow:
- Step-by-Step Single Crochet for Beginners
- Single Crochet into a Foundation Chain
- Single Crochet into another Row
- Single Crochet in the Round
- Increases and Decreases
- Working Single Crochet in Different Loops


