


Crochet Relief Pattern Bag | Step-By-Step Guide
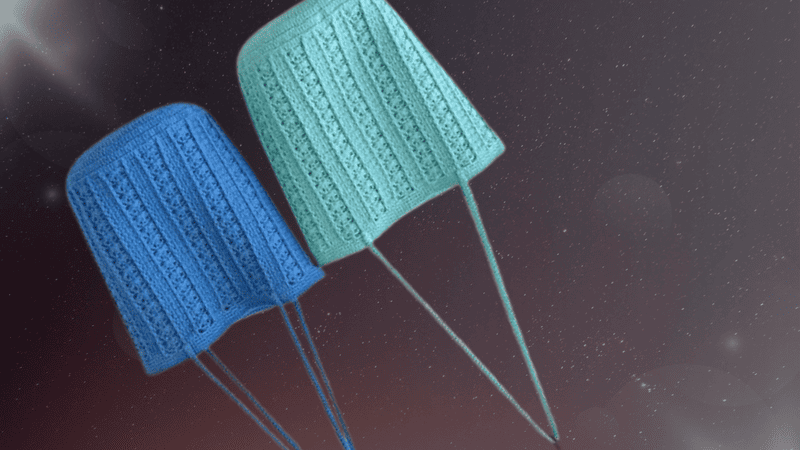
Table of Contents
Crochet relief pattern bag: Our journey into crafting a crocheted bag begins with one of the most gratifying career-maker projects: an accessory that is as functional as it is stylish yet offers space for playful experimentation with different stitches and textures. This tutorial centers on a Relief Pattern Strap and Bucket Bag, tailor-made for anyone enchanted by the marriage of structure and tactile fascination in a handcrafted design.
The textured crochet relief pattern imparts a sculptural rhythm to the bag, and the gentle curvature of the bucket silhouette supplies pragmatic versatility. Any weekend scenario—gathering fresh ingredients at the farmer’s market, lingering over mimosas with friends, or simply seeking an elegantly neutral everyday purse—falls neatly within the bag’s creative remit. Concluding the final assembly, we present a refined accessory: textured cylinder, reinforced base, impeccably finished opening, and a hand linked crab-stitch strap, all completed and ready to accompany us on fresh adventures.
Though the guide is intentional in keeping beginner crafters centered, seasoned crocheters will still find intrinsic value in the measured journey. We proceed through a clear progression of required materials, precise gauge notes, stepwise assembly cues, and polished finishing techniques, cultivating-growing skill with each round.
Material kit for crochet Relief Pattern Bag
💙hook & yarn needle & marker buckle : https://amzn.to/3TXavWn
💙cotton yarn : https://amzn.to/4glJupL
Abbreviation for crochet Relief Pattern Bag
- ch = Chain stitch
- sc = Single crochet
- sl =Slip stitch
- st(s) =Stitch(es)
- R=Round
- dc=Double crochet
- sk=Skip
- fpdc=Front post double crochet
- Jub st=Jujube stitch
- dc inc=Double Crochet Increase
Base stitch for beginners
We’ve all been there! Here are some basic stitch we’ve learned along the way:
How To Crochet Magic Ring ? l Step-By-Step l Video & Text &Photo
Chain Stitch |Step By Step Guide| Text & Photo &Video
Single Crochet-You Want To Know The Most Detailed Information
Half Double Crochet In The Round-The Complete Guide
Double Crochet Stitches For Beginners
Video for crochet Relief Pattern Bag
Watch as we expertly crochet the chic Relief Pattern Bag from start to finish.
Our step-by-step narration covers constructing the flat base, sculpting the richly textured body, contouring the top opening, and completing the durable crab-stitch strap.
By the end of the tutorial, you’ll have handcrafted a stunning and practical accessory. 🧶✨
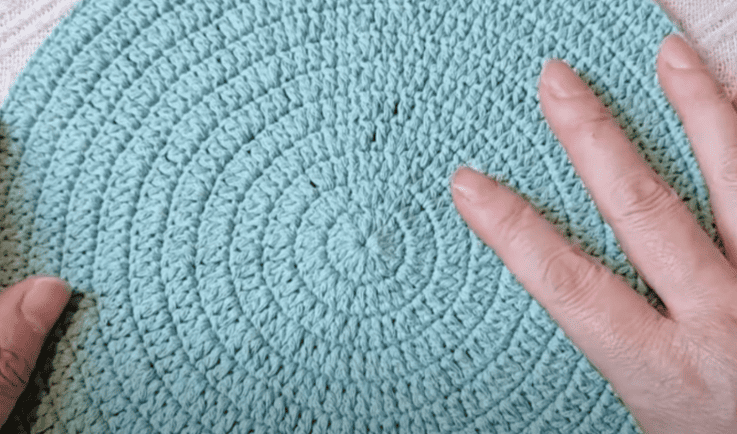
Crochet bottom
| Round | Starting Chain | Pattern Repeat | Total Stitches at End of Round |
|---|---|---|---|
| R1 | 3 ch | 14 dc into magic ring (plus starting ch counts as dc) | 14 dc |
| R2 | 3 ch | dc inc *14 (2 dc in each st) | 28 dc |
| R3 | 3 ch | (dc, dc inc) *14 | 42 dc |
| R4 | 3 ch | (dc inc, dc, dc) *14 | 56 dc |
| R5 | 3 ch | (dc, dc, dc, dc inc) *14 | 70 dc |
| R6 | 3 ch | (dc, dc, dc inc, dc, dc) *14 | 84 dc |
| R7 | 3 ch | (dc, dc, dc, dc, dc, dc inc) *14 | 98 dc |
| R8 | 3 ch | (dc, dc, dc, dc inc, dc, dc, dc) *14 | 112 dc |
| R9 | 3 ch | (dc, dc, dc, dc, dc, dc, dc, dc inc) *14 | 126 dc |
| R10 | 3 ch | (dc, dc, dc, dc inc, dc, dc, dc, dc) *14 | 140 dc |
| R11 | 3 ch | (dc, dc, dc, dc, dc, dc, dc, dc, dc, dc inc) *14 | 154 dc |
| R12 | 3 ch | (dc, dc, dc, dc, dc, dc inc, dc, dc, dc, dc, dc) *14 | 168 dc |
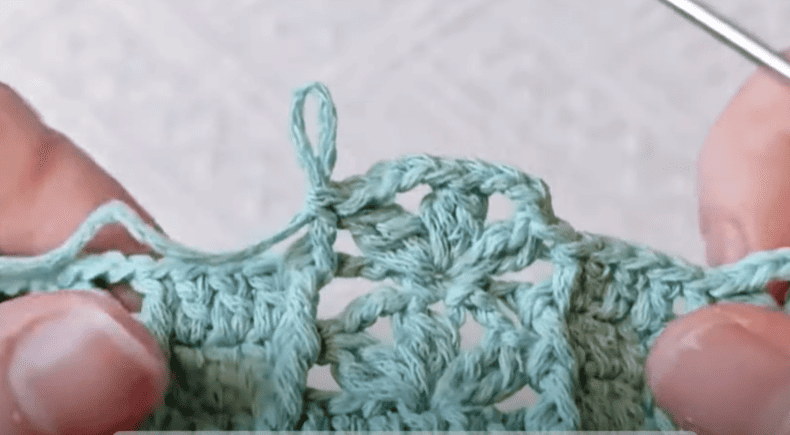
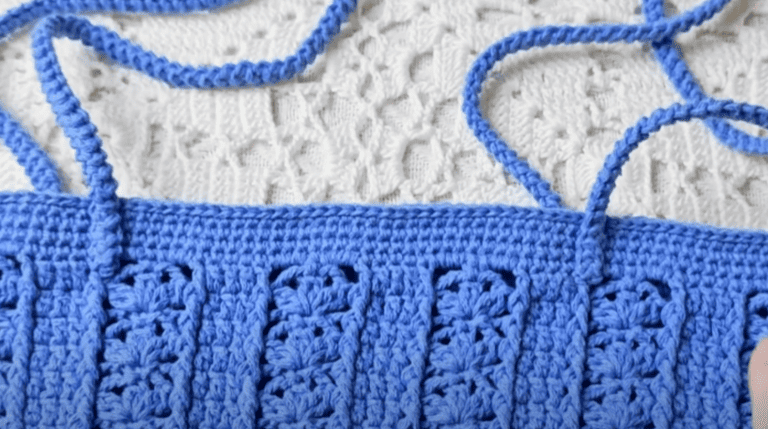
Crochet body
| Row/Round | Starting Chain | Pattern Repeat / Instructions | Notes |
|---|---|---|---|
| R1 | 2 ch | dc, 3 ch, jujube stitch, sk 3, { fpdc, 3 dc, fpbdc, sk 3, (jujube stitch, 3 ch, jujube stitch, 3 ch, jujube stitch), sk 3 } *11 times, sk 3, jujube stitch, 3 ch | Establishes main pattern: relief stitches + jujube motifs |
| R2 | ch 1 | sc, (3 ch, fpdc, 3 dc, fpdc) repeat to end | Creates arches + relief between motifs |
| R3–R14 | — | Repeat R1–R2 (work R1 for odd rows, R2 for even rows) | Builds length; continue alternating pattern |
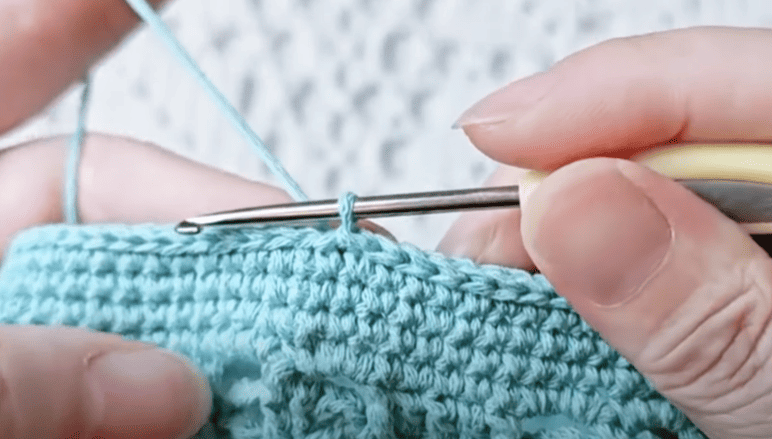
Crochet opening
| Row | Starting Chain | Pattern / Instructions | Notes |
|---|---|---|---|
| R1 | ch | sc to repeat across row | Begin foundation row of single crochet |
| R2 | ch | sc to repeat across row | Continue single crochet |
| R3 | ch | sc to repeat across row | Maintain even tension |
| R4 | ch | sc to repeat across row | Finish last row of single crochet |
| R5 | — | sl st at the last stitch for invisible finish using yarn needle; conceal yarn end | Creates a seamless edge |
Crochet strap
Form the strap
Employ crab stitch to work a length of reverse single crochet for each of the two straps, maintaining a final measurement of approximately 60 centimeters.
Define the attachment points
Following establishment of the bag opening, identify the two side margins. From each edge, advance inward a distance equivalent to three patterned motifs without tension, placing visible or temporary markers. These markers designate the future fastening sites for the straps.
Affix the straps
Centre the four strap terminals—two per strap—upon the pre-indicated markers on the bag opening. Secure each terminal by passing the needle repeatedly through the same stitch, preserving an uniform reverse stitch on the bag interior.
Repeat for the opposing terminal, maintaining symmetry. Once the connections are firm, sever the working yarn close to the final stitch and employ a darning needle to imbue the residual ends through the interior fabric, effecting an unobtrusive closure.
Sew magnetic buckle
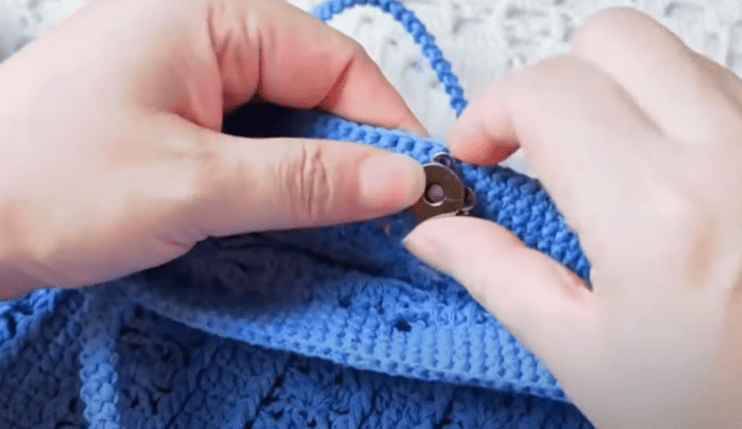
Step 1: On the interior surface of the bag flap, identify the precise geometric center of the upper edge. Place a small dot to generate a reference mark.
Step 2: Align the magnetic snap components—one half to the exterior, the complementary half to the interior—so that each center is indexed to the dot. Mark the position of the prongs with a fabric marking pencil.
Step 3: Execute a minimum of three adjacent straight stitches over each of the four positions to anchor the snap securely. Exchange the thread path to a practice in a repeating burr stitch fashion to strengthen the rivet.
Step 4: Trim excess thread flush with the fabric, then, in rows of two or three, weave the filament back behind the adjacent stitching to secure any loose tails, issuing a tidy reversal seal.
Tips
For a polished appearance, it is advantageous to bias any blocking or steaming toward simultaneous application as each segment is executed. Intermediate conditioning in this manner affords a more crisply defined silhouette, emulating a commercial quality that enhances visual appeal.
Upon insulating or protecting a segment of the terminal panel, apply a moderate heat, either by hand or by redirects steam, to eradicate any residual buckling or texture. The adhesive or interfacing will entirely mature, imparting a confident, flat repose. Proceed only after this micro-stage is achieved, to stave off a propagation of distortions.
Replicate this calculation along the upright expanse of the bag. Progress in graduated sections, shaping each panel to a coherent curvature beyond static expectation.
Reference sources
1.Learn the most comprehensive guide for single crochet(sc)
Author:Sarah Stearns
Publication date: on June 15, 2021, updated:December 14, 2024
Title: How to single crochet (sc)for beginners
Summary as blow:
- Step-by-Step Single Crochet for Beginners
- Single Crochet into a Foundation Chain
- Single Crochet into another Row
- Single Crochet in the Round
- Increases and Decreases
- Working Single Crochet in Different Loops


