Raffia Tote Bag Kit
$29.99
Supplies—braided raffia, a comfortable hook, finishing needle, and clear step-by-step guide—arrive in one package, so we can begin at once.
We appreciate how the experience teaches technique, sparks imagination, and results in a practical, eye-catching bag for the week ahead.
Description
Table of Contents for raffia tote bag kit
Raffia tote bag kit : When the sun is high, waves are rolling, and a light breeze dances around us, nothing feels better than grabbing a soft raffia tote and heading out the door. From lazy beach days to city errands, this woven bag slips over comfortably and looks good with just about anything. In this post how to crochet raffia totes special,
What Is a raffia tote bag?
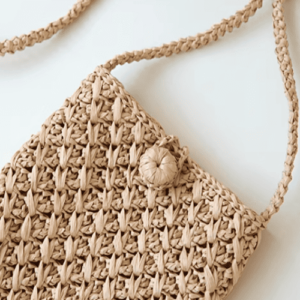
The word raffia comes from the long leaves of the raffia palm that grows in Madagascar. That plant ribbon is stripped, dried, and woven together to form a fiber that feels gentle, weighs almost nothing, and still refuses to tear easily. As a tote, it combines eco-minded production with an easy-going, handmade look that warms up any outfit.
Here are the top reasons were crushing on raffia totes right now:
🌿 Eco-friendly: Because the weave comes from a renewable palm, the bag keeps our footprint light.
👜 Lightweight & durable: It carries books, snacks, or sunblock without pulling our shoulder down.
🎨 Stylish & versatile: a few pops of color mean it plays well with every wardrobe.
Raffia tote bags are roomy, tough, and good-looking, so they make great shopping totes, beach bags, or everyday carry-alls.
Why do we love raffia tote bags?
Whenever we spot one, we think about easy summer mornings-picking up fruit at the farmers market, lounging on the sand, or sipping coffee at a shady sidewalk table. Its that blend of usefulness and charm that keeps us reaching for these bags:
- Spacious design There are space for our wallet, sunglasses, sunscreen, and even a paperback.
- Unique texture The handwoven finish to stripes means no two bags look the same, giving each piece its own artistic touch.
- Perfect for any occasion Whether we land at the beach, stroll through a city, or visit a resort, raffia totes fit right in.
Raffia tote bag kit
- Raffia yarn – 4 colors (your choice of sunny summer shades 🌞)
- 3.0 mm crochet hook – perfect for working with raffia
- Yarn needle – for sewing in ends and attaching pieces securely
- Stitch markers – to keep track of rounds and important points
List of necessary tools Scissors
Crochet body of raffia tote bag kit
- Begin with a foundation chain of 171 stitches.
- Round 1-104: work a single crochet in every stitch across the row.
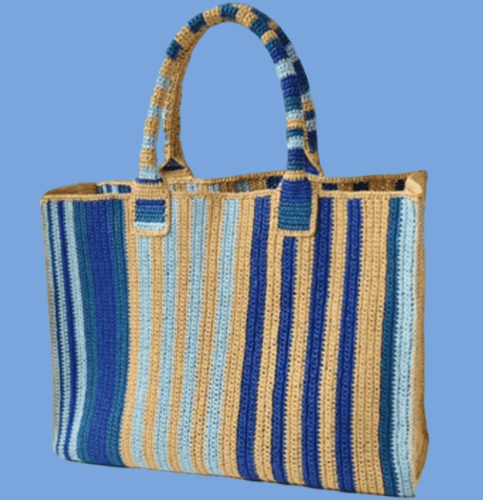
The bags body features vertical stripes made by cycling through four colors. For your reference, the pattern and crocheting order are detailed below.
- 005: light yellow
- 012: turquoise blue
- 020: sea blue
- 029: peacock blue
| Rows | Color item |
|---|---|
| Rows 1-4 | 012 |
| Rows 5-7 | 020 |
| Rows 8-14 | 005 |
| Rows 15-18 | 029 |
| Rows 19-22 | 005 |
| Rows 23-26 | 029 |
| Rows 27-31 | 012 |
| Rows 32-35 | 005 |
| Rows 36-39 | 029 |
| Rows 40-43 | 012 |
| Rows 44-47 | 005 |
| Rows 48-51 | 029 |
| Rows 52-55 | 005 |
| Rows 56-59 | 012 |
| Rows 60-63 | 005 |
| Rows 64-67 | 012 |
| Rows 68-71 | 029 |
| Rows 72-75 | 012 |
| Rows 76-79 | 005 |
| Rows 80-83 | 020 |
| Rows 84-90 | 012 |
| Rows 91-93 | 020 |
| Rows 94-96 | 005 |
| Rows 97-98 | 029 |
| Row 99 | 012 |
| Rows 100-101 | 012 |
| Row 102 | 029 |
| Rows 103-104 | 012 |
Crochet side&bottom of raffia tote bag kit
- 36 chain stitches(ch)
- Roun1–67: crochet 35 single crochets (35 SC) in each row.
- Round 68: Single crochet across the three straight edges, then place three single crochets into each of the corners for a tidy, polished finish.
Sew the side & bottom on the body of bag
- Initially, the side and bottom panels are positioned along the corresponding edges of the main bag body, with the seams meticulously aligned to ensure a uniform appearance.
- Temporary stitch markers are then applied to hold body of bag in position, thereby preventing any inadvertent shifting during assembly.
- Beginning at one corner, the hook is inserted through both the bag body and the attached edge, forming the first join.
- Slip stitches are worked along the seam, attention given to consistent tension so that the join is both aesthetically pleasing and robust.
At each corner the stitches are executed deliberately, thus preserving the intended rounded form rather than creating unsightly gaps.
When the final edge is joined, any stray yarn ends are woven in with care, resulting in a polished and durable finish.
Crochet opening of bag
In this row, we put one single crochet into every stitch all the way across.
When we reach the spots where the rows meet, be extra careful with those little transitions—check the video at the timestamp we marked for you.
And for the very last stitch, we use an invisible slip stitch so the edge looks tidy.
Crochet & sew the handle on the bag
- 11 chain stitches(ch)
- Roun1–115: crochet 10 single crochets (10 SC) in each row.
- R116: single crochet in each stitch (use yellow color yarn)
| Rounds | Color |
|---|---|
| R1–6 | 020 |
| R7–12 | 029 |
| R13–14 | 005 |
| R15–16 | 020 |
| R17–19 | 029 |
| R20–22 | 012 |
| R23–24 | 020 |
| R25–26 | 005 |
| R27–28 | 012 |
| R29–31 | 020 |
| R32–36 | 029 |
| R37–40 | 012 |
| R41–43 | 029 |
| R44–45 | 020 |
| R46–47 | 005 |
| R48–51 | 020 |
| R52–55 | 005 |
| R56–59 | 020 |
| R60–63 | 005 |
| R64–67 | 020 |
| R68–71 | 005 |
| R72–75 | 020 |
| R76–79 | 005 |
| R80–82 | 012 |
| R83–86 | 005 |
| R87–89 | 012 |
| R90–93 | 005 |
| R94–96 | 012 |
| R97–100 | 005 |
| R101–103 | 012 |
| R104 | 029 |
| R105–108 | 005 |
| R109–110 | 029 |
| R111–113 | 020 |
| R114-115 | 012 |
Sewing
- Before beginning assembly, sew the strap at the round 15
- Rows 1 through 14 form the main body of the bag; the next task is securing the strap to body of bag
- Identify sewing points on each side of the body; from the left edge, mark a line 10 cm inward.
- At that 10-cm line on the left, use needle, thread, or matching crochet yarn to attach the strap end, keeping the stitches tidy and firmly locked.
- Repeat on the right side, measuring another 10 cm inward from the edge of the body.
Attach the second strap end at this mark, checking that both sides match in appearance and that the connection feels solid.
Throughout, pull each stitch snug and consistent so the strap holds under everyday pulling and lifting.
When all seams are complete, test the assembly by giving the strap a gentle tug; any movement there indicates where further securing may be needed.
Reference sources
1.Learn the most comprehensive guide for single crochet(sc)
Author:Sarah Stearns
Publication date: on June 15, 2021, updated:December 14, 2024
Title: How to single crochet (sc)for beginners
Summary as blow:
- Step-by-Step Single Crochet for Beginners
- Single Crochet into a Foundation Chain
- Single Crochet into another Row
- Single Crochet in the Round
- Increases and Decreases
- Working Single Crochet in Different Loops