Hollow Bag Crochet Tutorial | Easy Step-by-Step Pattern We Can Make Together
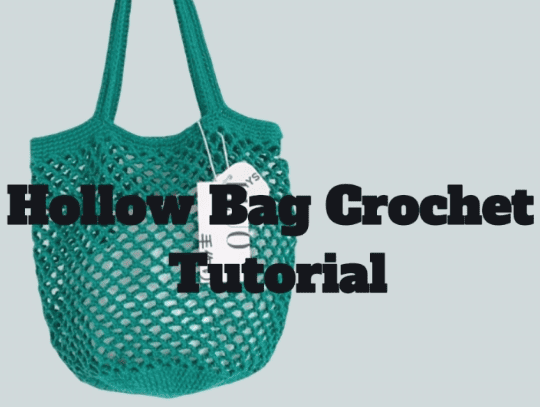
Table of Contents
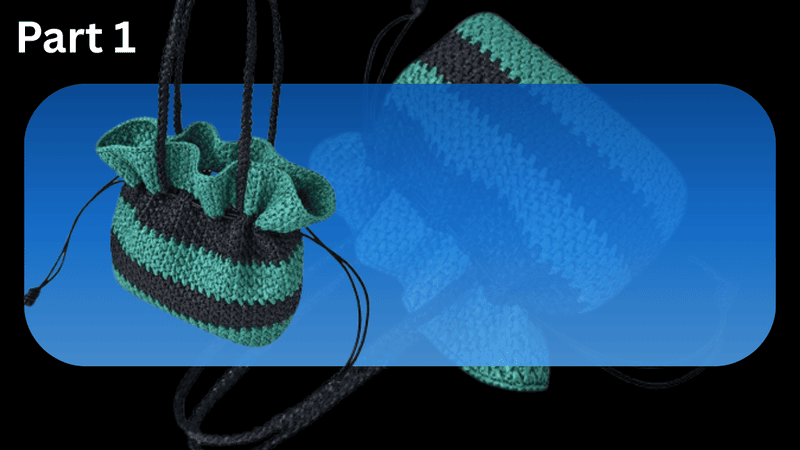
Hollow bag crochet : Crochet enthusiasts, today we’ll create a chic yet functional piece: the hollow bag. This design serves equally well as a breezy summer tote or a light, everyday carry-all, marrying effortless beauty with genuine practicality. Over the next few pages, I’ll guide you step-by-step, from selecting the right materials to adding the final details. Whether you’re just starting or have years of stitches behind you, you’ll find instruction here at every skill level.
A hollow bag emerges from airy, open stitches, producing a lightweight, meshed structure that feels contemporary and endlessly adaptable. I admire these pieces for their capacity to tote just the right essentials—a novel, a pair of sunglasses, a travel scarf, or a small basket of fresh produce from the market—while still displaying the artistry of your yarn choice. Opt for the proper fiber, and the result can be equally robust and trendy.
Why devote to a hollow bag?
- The design is breezy, making it perfect for warm weather.
- The construction is quick, rewarding you with instant gratification.
- It’s small enough to fling over your shoulder for a beach trip or farmer’s market run.
- The open stitch pattern invites playful color changes and pattern experimentation.
Gather your hooks and supplies, and let’s create a piece you’ll reach for all summer!
Base stitch for beginners
We’ve all been there! Here are some basic stitch we’ve learned along the way:
How To Crochet Magic Ring ? l Step-By-Step l Video & Text &Photo
Chain Stitch |Step By Step Guide| Text & Photo &Video
Single Crochet-You Want To Know The Most Detailed Information
Half Double Crochet In The Round-The Complete Guide
Double Crochet Stitches For Beginners
Material kit
- 150-200g cotton yarn
- 3.0 mm hook
- Yarn needle
- Marker buckle
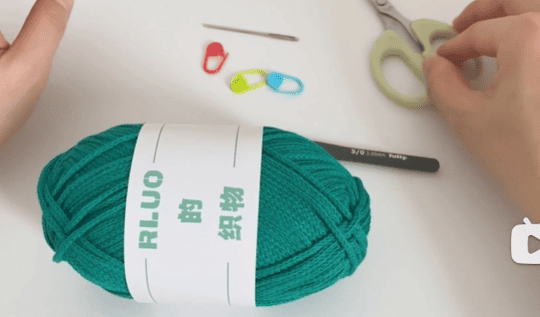
List of necessary tools
- Scissors
Abbreviation
- ch = Chain stitch
- sc = Single crochet
- sl =Slip stitch
- st(s) =Stitch(es)
- mc =Magic circle (or magic ring)
- dc=Double crochet
- sk=Skip
- F=two double crochet in same stitch
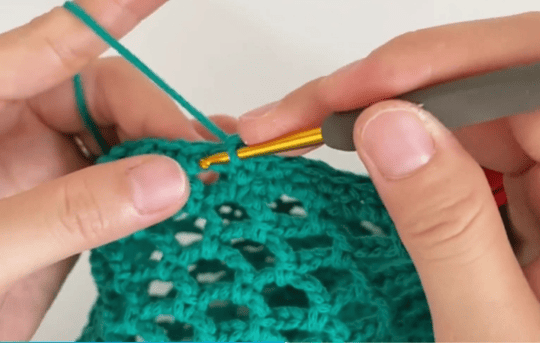
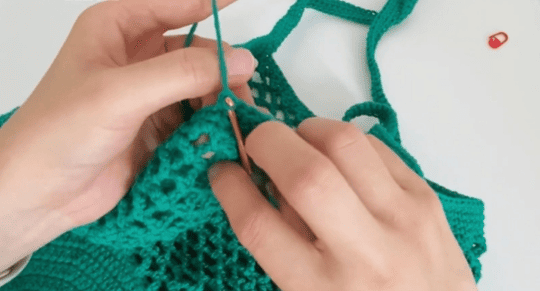
Video for hollow bag crochet
Welcome to our soothing and imaginative hollow bag crochet workshop! We invite you to follow along as we transform yarn into an elegant, breezy bag.
Beginning with a firm foundation, we advance to the open-mesh sides, and we end with robust, comfortable straps—empowered by straightforward stitches.
Throughout each stage, expect direct guidance, insightful hints, and encouragement to make the process as enjoyable as the finished piece.
Crochet base of hollow bag crochet
- f=double crochet
- fv=two double crochet in same stitch
| Round | Instruction | Stitch Count |
|---|---|---|
| R1 | 12f | 12 |
| R2 | 12fV | 24 |
| R3 | 12(f, fV) | 36 |
| R4 | 12(2f, fV) | 48 |
| R5 | 12(3f, fV) | 60 |
| R6 | 12(4f, fV) | 72 |
| R7 | 12(5f, fV) | 84 |
| R8 | 12(6f, fV) | 96 |
| R9 | 12(7f, fV) | 108 |
Crochet body of hollow bag crochet
| Round | Instruction |
|---|---|
| R1 | (Ch 5, skip 2 stitches, sc in next) repeat it |
| R2 | (Ch 5, sc in each circle) repeat it |
| R3 | Repeat R1 |
| R4 | Repeat R2 |
| R5 | Repeat R1 |
| R6 | Repeat R2 |
| R7 | Repeat R1 |
| R8 | Repeat R2 |
| R9 | Repeat R1 |
| R10 | Repeat R2 |
| R11 | Repeat R1 |
| R12 | Repeat R2 |
| R13 | Repeat R1 |
| R14 | Repeat R2 |
| R15 | Repeat R1 |
| R16 | Repeat R2 |
| R17 | Repeat R1 |
| R18 | Repeat R2 |
| R19 | Repeat R1 |
| R20 | Repeat R2 |
| R21 | Repeat R1 |
| R22 | Repeat R2 |
| R23 | Repeat R1 |
| R24 | Repeat R2 |
| R25 | Repeat R1 |
| R26 | Repeat R2 |
| R27 | Repeat R1 |
| R28 | Repeat R2 |
Crochet opening of hollow bag crochet
| Round | Instruction |
|---|---|
| R1 | Crochet 2 single crochet (sc) in each ch-5 space, and 1 sc in each chain stitch from the round |
| R2 | Crochet 1 single crochet in each stitch around |
Crochet strap of hollow bag crochet
Establishing the placement of strap
Prior to crocheting or sewing the straps, we will first confirm their precise location:
- Gently fold the bag along its vertical midline and affix a stitch marker at the midpoint of both the front and back sections.
- From each of these midpoints, measure outward four complete mesh spaces, placing a marker
- Once these two markers are in place, the original midline markers are to be removed, leaving two markers on each lateral side of the bag.
- You should now observe a total of 21 stitches spanning the distance between the remaining markers—this segment will serve as the foundation for attaching the straps.
Crochet strap
R1:
Continue progressing with single crochet stitches until the stitch marker is reached. Upon arrival, chain 90 to establish the first strap; ensure the chains lie parallel and untwisted, granting the strap a refined finish.
Counsel identical action for the opposing strap, anchoring it to the frame on the opposite side. Thus, the piece now possesses two chains that constitute the shoulder straps.
R2:
Commence a round of single crochet encircling the entire opening, including across the newly created straps.
At each of the four edges where the strap and the main body converge, work a two single crochets into one single crochet to smooth the junction and mitigate excess fabric bulk.
R3:
Duplicate the procedure of the previous round. Conclude this round with an invisible slip stitch, a technique chosen to eliminate the appearance of a joining seam.
R4:
The hook inert the inner edge to proceed with an additional round of single crochet to provide reinforcement to the straps themselves.
At the same four corners where the straps and the body meet, execute the same two single crochets into one single crochet to ensure consistent tapering. Conclude this round, consistent with earlier practice, using an invisible slip stitch to produce a tidy finish.
Reference sources
1.Learn the most comprehensive guide for single crochet(sc)
Author:Sarah Stearns
Publication date: on June 15, 2021, updated:December 14, 2024
Title: How to single crochet (sc)for beginners
Summary as blow:
- Step-by-Step Single Crochet for Beginners
- Single Crochet into a Foundation Chain
- Single Crochet into another Row
- Single Crochet in the Round
- Increases and Decreases
- Working Single Crochet in Different Loops