


Crochet Hollow Bag Tutorial | Easy & Stylish Handmade Bag Guide
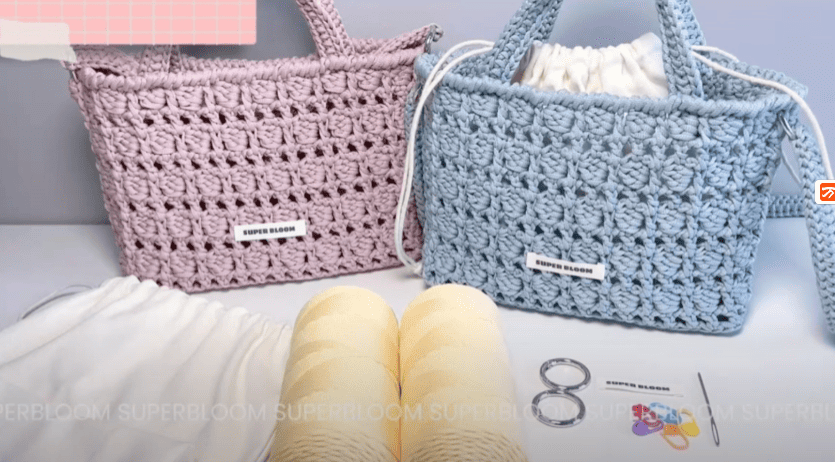
Table of Contents
Crochet hollow bag: crochet possesses a unique capacity to marry imaginative expression with practical use. Among its beguiling offerings is the hollow bag—only yarn and a hook are necessary to craft this deceptively simple yet sophisticated accessory.
The bags themselves are lightweight, airy and effortlessly chic, and they quickly captivated the crochet community. Guests, commuters and holiday-celebrants quickly are not flaunted the deceptively simple and sophisticated accessory.
Each airy bag offers a perfect, practical and stylish addition to any wardrobe. Whether our goal is a carefree summer tote, a crossbody that accompanies us weekly, or a bag that, let’s face it, is worthy of the chicest brunch snap, the crochet hollow bag is the answer and is remarkably simple to master.
Skill is hardly the point; even a novice discovering the craft for the very first time with the aid of a single hook and a skein of brightly colored yarn.
What is a crochet hollow bag?
These lightweight yet resilient bags adapt beautifully to small missions like
– Market or grocery totes
– Beach bags
– Summer handbags
– Everyday crossbody bags
– Eye-catching style statements
Hollow structure, visible but airy, gives the bags an elegant finish while enabling us to outpace the clock; clear stitches stretch widely with a lighter load of loops.
Why we love crochet hollow bags
Individual magnets draw us, yet five shared gentle pulls keep them close:
Chic simplicity. The airy crochet retains a laid-back but elevated presence that age or era cannot dull.
Starter with stitches. A chain, maybe a double, reaps progress; most patterns keep that palette of stitches.
Your palette, your talk. From handle choice to pop of yarn and possible lining, every inch submits to your signature.
Zippy rewards. Circling an airy mesh fast owes its speed to fewer barriers of crossing rods.
Earth wins. Trading a plastic checkout for a market hero stitched from saved yarn.
The central motion of this affair stitches flair with a gentler footprint; the badge of its pride is ours to double.
Base stitch for beginners
We’ve all been there! Here are some basic stitch we’ve learned along the way:
How To Crochet Magic Ring ? l Step-By-Step l Video & Text &Photo
Chain Stitch |Step By Step Guide| Text & Photo &Video
Single Crochet-You Want To Know The Most Detailed Information
Half Double Crochet In The Round-The Complete Guide
Double Crochet Stitches For Beginners
Material kit for crochet hollow bag
💙 hook & yarn needle & marker buckle : https://amzn.to/3TXavWn
💙 spring clip :https://amzn.to/45I5cAH
💙 lining bag: https://amzn.to/3VsE42E
💙 flat yarn :https://amzn.to/4lSrIvq (400g)
Abbreviation for crochet hollow bag
- ch = Chain stitch
- sc = Single crochet
- sl =Slip stitch
- st(s) =Stitch(es)
- R=Round
- dc=double crochet
- JS=jujube stitch
- sk=skip
Video for crochet hollow bag
This tutorial walks you, stitch by stitch, through the crocheting of a chic, airy tote. We begin by anchoring the base, then shape the textured body, and finally craft sturdy yet refined handles—each section employs straightforward stitches.
Together, we will assemble a featherweight accessory that is equally suited to everyday errands, market strolls, or sunlit beach escapes.
Crochet bottom

| Row | Instruction |
|---|---|
| Foundation | Chain 12 |
| R1 | 11 sc, work into the second to last purl stitch |
| R2 – R30 | ch, flip over, 11 sc (work into each chain stitch) |
| R31 | 88 sc evenly around the base |
Crochet body

| Row | Instruction |
|---|---|
| R1 | (dc, ch) repeat 44 times (44 groups) |
| R2 | (dc, ch, dc, jujube stitch) repeat 22 times (22 groups) |
| R3 | Repeat R1 |
| R4 | Repeat R2 |
| R5 | Repeat R1 |
| R6 | Repeat R2 |
| R7 | Repeat R1 |
| R8 | Repeat R2 |
| R9 | Repeat R1 |
| R10 | Repeat R2 |
Crochet opening

Step 1: We complete a single crochet round—progressing left to right—by stitching counterclockwise around our predetermined foundation.
Step 2: After placing the final stitch, we execute an invisible slip stitch into that stitch to form a seamless join.
Step 3: The yarn is then safely cut, and the tails are expertly woven in to provide a polished and undetectable finish.
Crochet handle

| Step | Instruction |
|---|---|
| 1 | Leave a yarn end about three times the length of the crochet hook for future sewing. |
| 2 | Start with the foundation using the “shrimp stitch” method and crochet until the piece measures 30 cm long. |
| 3 | Work one round of slip stitches around the edge to make it more beautiful and secure. |
| 4 | Cut the yarn, leaving a long enough tail for sewing, and finish off. |
Crochet strap
| Step | Instruction |
|---|---|
| 1 | Using the “shrimp stitch” method, crochet until the piece measures 150 cm long. |
| 2 | Work one round of slip stitches around the edge to make it more beautiful and secure. |
| 3 | After cutting the yarn, weave in all the extra ends neatly. |
Sew handle

Step 1: Position the second pattern repeat from each edge and mark the same metric so the handle aligns symmetrically across the bag body.
Step 2: To conceal the handle attachment and preserve the bag’s visual understatement, lay the handle into the bag’s interior prior to final stitching.
Step 3: Reinforce the handle by executing parallel lines of straight stitching across the securing point. Executing three passes is a commonly accepted minimum, but additional rounds may be warranted by handle length or anticipated loading.
Step 4: Conclude the process by trimming the working yarn to a length of three to four stitches, then threading a tapestry needle with the cut end. Working into the adjacent stitches along the wrong side, weave the tail for a span no shorter than four stitches, reversing direction at midspan to lock each yarn end.
Install strap

Step 1: Initial positioning requires threading the spring clip onto the strap of the bag.
Step 2: Subsequently, the precise reference points on either side of the bag body are identified, at which junctures the spring clips are applied and fastened with due firmness.
Sew & glue cloth label

The appropriate method for securing the cloth label may be either machine or hand sewing, or application of heat-activated adhesive, depending on the material and use context; the label is then oriented in the position deemed functionally and aesthetically optimal.
Put lining in to bag

With deliberate precision, we position the lining within the bag, ensuring that it adheres closely to the contours and that the entire interior surface is uniformly concealed.
Reference sources
1.Learn the most comprehensive guide for single crochet(sc)
Author:Sarah Stearns
Publication date: on June 15, 2021, updated:December 14, 2024
Title: How to single crochet (sc)for beginners
Summary as blow:
- Step-by-Step Single Crochet for Beginners
- Single Crochet into a Foundation Chain
- Single Crochet into another Row
- Single Crochet in the Round
- Increases and Decreases
- Working Single Crochet in Different Loops


