


How To Crochet Raffia Handbag (Fishbone Stitch) : A Step-by-Step Guide for Stylish Summer Crafting
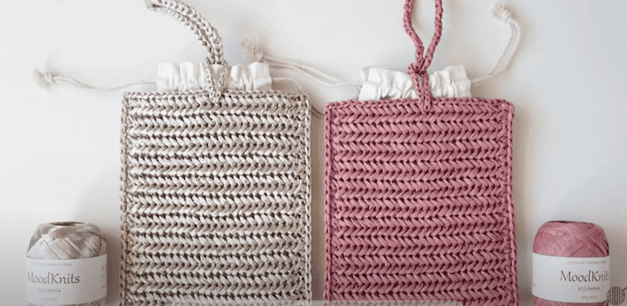
Table of Contents
Raffia handbag: remains our perennial preference for crafting chic accessories. Its lightweight, organic fibers lend a hint of rustic sophistication, imbuing every piece with an artisanal air. We appreciate its pliability: sufficiently sturdy to retain contour, yet yielding enough for effortless crocheting. The matte surface married with a subtle, organic luster endows our creations with a refined, grounded elegance.
Now, let us turn attention to our principal motif: the fishbone stitch. Those encountering it for the first time will find it a revelatory joy. The stitch visually embodies its title: a tidy, interlinked formation that mirrors the graceful architecture of a fish skeleton. It injects a pronounced, tactile face into the design, evoking the airy, segmented finish of wicker without excess bulk. Furthermore, its compact, layered formation provides the desired rigidity handbag structures require, ensuring the piece remains confident and well-formed rather than collapsing inward.
The integration of raffia with fishbone stitch achieves a subtly profound aesthetic. This partnership reconciles the gravitas of structured form with the ease of practical utility. The raffia’s organic weave speaks to tactile richness; the pronounced, rhythmic stitch yields a graphic discipline that counterpoints the softness. Yet the overall drape retains an airy informality, occupying a space that reconciles familiarity with innovation.
Given sustained attention and a willingness to experiment, what begins as commonplace and thread can evolve into an object that resonates beyond the sum of its origins.
Base stitch for beginners
We’ve all been there! Here are some basic stitch we’ve learned along the way:
How To Crochet Magic Ring ? l Step-By-Step l Video & Text &Photo
Chain Stitch |Step By Step Guide| Text & Photo &Video
Single Crochet-You Want To Know The Most Detailed Information
Half Double Crochet In The Round-The Complete Guide
Double Crochet Stitches For Beginners
Material kit
- Raffia yarn
- 3.5/5.0 mm crochet hook
- Yarn needle
- Stitch markers
Tool(hook, yarn needle, marker buckle): https://amzn.to/3TXavWn
Raffia yarn:160g , https://amzn.to/3IOPXgi
White drawstring bag:https://amzn.to/45dJgvV
Abbreviation
- ch = Chain stitch
- sc = Single crochet
- st(s) =Stitch(es)
- R=Round
- Ext Sl st=Extended Slip Stitch
- Fb st=Fishbone st
Video of raffia handbag
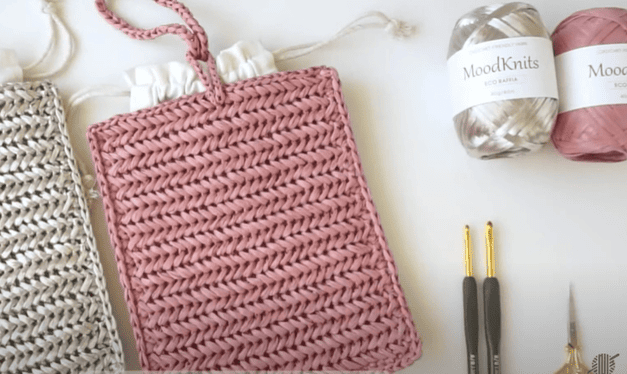
In this tutorial, we are going to create a lovely raffia handbag entirely by hand. We’ll work with sturdy raffia yarn and the refined fishbone stitch, carefully walking through the entire sequence—from the very first chain to the final, durable handles.
Designed whether we want an everyday carry or a thoughtful, hand-made present, the handbag blends beauty and practicality.
The video also includes handy hints to help keep our tension consistent and our lines crisp. Grab your hook, and let’s craft a raffia bag we’ll be proud to wear!
Crochet body of raffia handbag
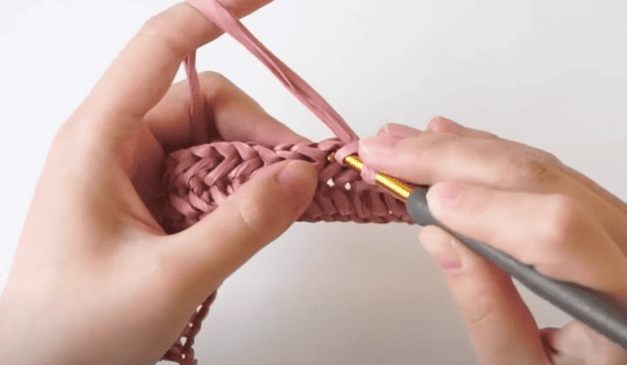
Use two strands to crochet.
| Row | Starting Action | Stitch Count | Notes |
|---|---|---|---|
| Base | Ch 26 | — | Foundation chain (26 chains) |
| R1 | Ch 1, turn | 26 Fishbone Stitches | Start in 2nd chain from hook |
| R2 | Ch 1, turn | 26 Fishbone Stitches | |
| R3 | Ch 1, turn | 26 Fishbone Stitches | |
| R4 | Ch 1, turn | 26 Fishbone Stitches | |
| R5 | Ch 1, turn | 26 Fishbone Stitches | |
| R6 | Ch 1, turn | 26 Fishbone Stitches | |
| R7 | Ch 1, turn | 26 Fishbone Stitches | |
| R8 | Ch 1, turn | 26 Fishbone Stitches | |
| R9 | Ch 1, turn | 26 Fishbone Stitches | |
| R10 | Ch 1, turn | 26 Fishbone Stitches | |
| R11 | Ch 1, turn | 26 Fishbone Stitches | |
| R12 | Ch 1, turn | 26 Fishbone Stitches | |
| R13 | Ch 1, turn | 26 Fishbone Stitches | |
| R14 | Ch 1, turn | 26 Fishbone Stitches | |
| R15 | Ch 1, turn | 26 Fishbone Stitches | |
| R16 | Ch 1, turn | 26 Fishbone Stitches | |
| R17 | Ch 1, turn | 26 Fishbone Stitches | |
| R18 | Ch 1, turn | 26 Fishbone Stitches | |
| R19 | Ch 1, turn | 26 Fishbone Stitches | |
| R20 | Ch 1, turn | 26 Fishbone Stitches | |
| R21 | Ch 1, turn | 26 Fishbone Stitches | |
| R22 | Ch 1, turn | 26 Fishbone Stitches | |
| R23 | Ch 1, turn | 26 Fishbone Stitches | Final row |
Two pieces sewn together
Align the sections
Position the two crocheted panels directly on top of each other, ensuring the outer edges and stitch rows are in precise alignment. To prevent any movement while sewing, anchor the layers using stitch markers or small clips placed at regular intervals along the perimeter. This precaution preserves alignment and guards against puckering throughout the sewing process.
Create the seam along the edges
With a double strand of yarn combined for added fortitude, insert your hook through both layers at the identical stitch of the first row. Complete one single crochet (sc) that unites the two panels. Proceed stitch by stitch, executing one single crochet in each matching stitch along the edge; monitor your tension closely to ensure the seam remains even, avoiding any gaps or overly tight areas.
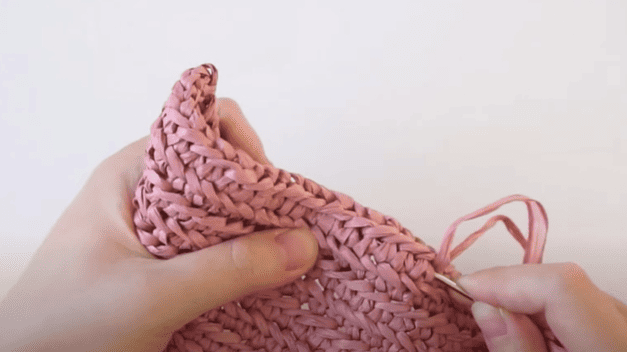
Treat the corners
Work three single crochet stitches into a single corner hole. This method reinforces the corners, helping to preserve their geometry and preventing any collapsing or distortion.
Sealing the seam
Once the seam is complete, gently pull the yarn to draw the last stitch snug, taking care not to exert excessive tension so that the fabric retains its intended flexibility.
Form a tight, secure knot to anchor the work, then sever the yarn, leaving a tail sufficiently long to be rewoven into the seam.
Thread a yarn needle with this tail and carefully interweave it into the existing stitches, concealing the ends so that the final surface exhibits an unobtrusive and polished look, free of any exposed yarn ends.
Crochet & sew long handle
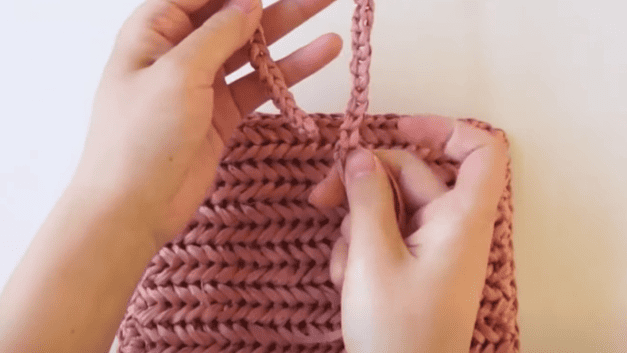
1. Left 140 cm length of yarn for the tail; then use a double strand, working both lengths together for added strength.
2. With the Extended Slip Stitch (Ext Sl st), crochet a straight row of 50 stitches, maintaining an even tension.
3. Leave a 20 cm tail, then snip the yarn cleanly.
4. Bring the two ends of the crocheted strip together, aligning the edges snugly, and seam them securely to form a continuous, unbroken loop.
5. Position this loop on the reverse side of row 23, directly at the midpoint of the bag opening; use a strong, forward-backward stitch to affix it tightly.
6. Once firmly in place, draw the yarn tail inward and tie a secure knot on the bag’s interior; finally, trim and weave the remaining ends into the lining to ensure a polished, invisible finish.
Crochet & sew short handle
1.Let a 50 cm tail of yarn hang, and use single strands held together as one.
2.With the extended slip stitch technique, work a foundation of 20 stitches placed in a single, even line. Upon completing the row, clip the yarn leaving a 20 cm tail.
3.Join the two row ends by matching the stitches and sewing a continuous seam, thereby creating a gentle circular band.
4.Position this band at the center of row 23 along the top opening of the handbag; secure it in place with tidy oversewing.
5.After the stitches hold, make a firm knot with the tail ends inside the tote to anchor it, cutting any remainder. conceal outstanding strands by weaving them back within the fabric.
Reference sources
1.Learn the most comprehensive guide for single crochet(sc)
Author:Sarah Stearns
Publication date: on June 15, 2021, updated:December 14, 2024
Title: How to single crochet (sc)for beginners
Summary as blow:
- Step-by-Step Single Crochet for Beginners
- Single Crochet into a Foundation Chain
- Single Crochet into another Row
- Single Crochet in the Round
- Increases and Decreases
- Working Single Crochet in Different Loops


