


Waffle Pattern Hollow Bag Crochet|Tutorial: Step-by-Step Guide
Table of Contents
Waffle pattern hollow bag crochet :The combination of tactile texture and luminous openness present in the waffle-pattern hollow crochet bag has an unpardonable allure. As dedicated crocheters, we constantly seek designs that marry contemporary aesthetics with everyday utility, and this bag validates that pursuit. The staggered-relief grid introduces a gentle three-dimensional play that captivates the eye, while the hollow configuration ensures breathability, pliancy, and unfailing performance throughout the day.
Whether we are perusing vendors at a weekend farmer’s market, meandering a shoreline promenade, or simply in need of an accommodating companion for daily necessities, this waffle-form bag delivers understated reliability. The true delight lies in its customizable nature: one can substitute any preferred fibre—raffia, fine cotton, robust jute or a blend of the three—and infuse the piece with a personally selected palette.
At first inspection, the waffle design seems sophisticated, yet with the guided progression we provide, a novice crocheter will confidently execute each row. Our outline details requisite materials, the process for erecting the waffle-stitch lattice, the methods for sculpting the body, the technique for crafting resilient, proportionate handles, and the final assembly that achieves a polished, attention-fixing tote.
Retrieve the skeins that inspire you, choose an equally suited hook, and together we will weave unassuming stitches into an object of both beauty and enduring function.
Video of waffle pattern hollow bag crochet
In this presentation, we will demonstrate the construction of a refined waffle-patterned hollow bag suitable for everyday carry.
Progressing incrementally, we will first master the textured waffle stitch, then contour the bag’s silhouette, and conclude by integrating the handles.
This design harmonizes integrity and elegance, rendering a contemporary, ventilated profile.
Throughout the process, we will offer practical advice for uniform tension and balanced curvature. Let us assemble our hooks and collaboratively craft an individualized waffle-patterned hollow bag.
Base stitch for beginners
We’ve all been there! Here are some basic stitch we’ve learned along the way:
How To Crochet Magic Ring ? l Step-By-Step l Video & Text &Photo
Chain Stitch |Step By Step Guide| Text & Photo &Video
Single Crochet-You Want To Know The Most Detailed Information
Half Double Crochet In The Round-The Complete Guide
Double Crochet Stitches For Beginners
Material kit of waffle pattern hollow bag crochet
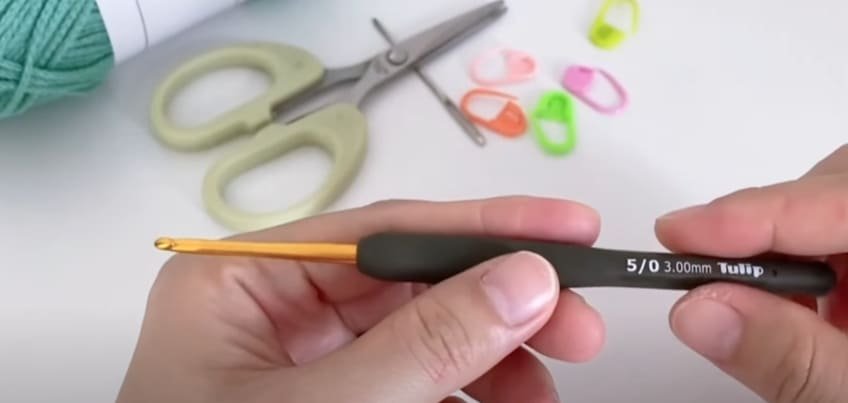
- Two yarn
- 3.0 hook
- Yarn needle
- Marker buckle
Tool(hook, yarn needle, marker buckle): https://amzn.to/3TXavWn
Yarn: total 400g, each color:200g:https://amzn.to/452t55T
Abbreviation of waffle pattern hollow bag crochet
- ch = Chain stitch
- sc = Single crochet
- sl =Slip stitch
- st(s) =Stitch(es)
- dc=Double crochet
- sk=Skip
- R=Round
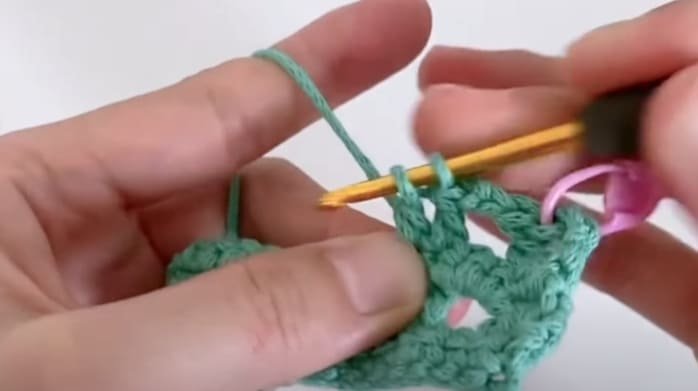
Crochet bottom
| Row | Starting Action | Stitch Pattern | Notes |
|---|---|---|---|
| Base | Ch 62 | — | Foundation chain |
| R1 | Ch 1, flip over | 62 sc | Work 1 sc into each chain |
| R2 | Ch 3, flip over | 1 dc, (ch 2, skip 2, 2 dc) repeat | Creates hollow structure |
| R3 | Ch 1, flip over | 62 sc | Fill in the stitch with solid single crochet |
| R4 | Ch 3, flip over | 1 dc, (ch 2, skip 2, 2 dc) repeat | Repeat of Row 2 |
| R5 | Ch 1, flip over | 62 sc | Repeat of Row 3 |
| R6 | Ch 3, flip over | 1 dc, (ch 2, skip 2, 2 dc) repeat | Repeat of Row 2 |
| R7 | Ch 1, flip over | 62 sc | Repeat of Row 3 |
| R8 | Ch 3, flip over | 1 dc, (ch 2, skip 2, 2 dc) repeat | Repeat of Row 2 |
| R9 | Ch 1, flip over | 62 sc | Repeat of Row 3 |
| R10 | Ch 3, flip over | 1 dc, (ch 2, skip 2, 2 dc) repeat | Repeat of Row 2 |
| R11 | Ch 1, flip over | 62 sc | Repeat of Row 3 |
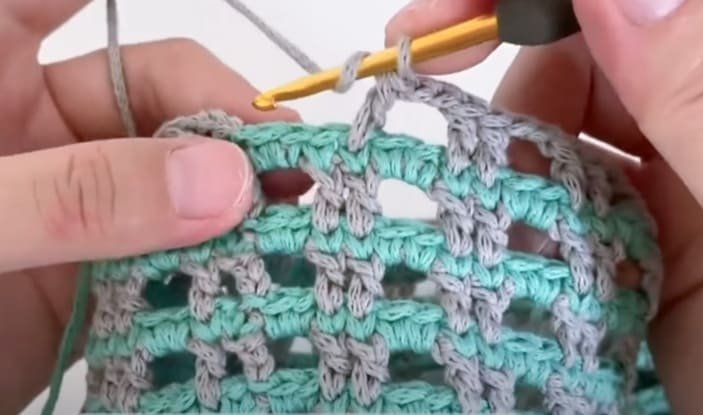
Crochet body
| Round | Yarn Color | Instructions |
|---|---|---|
| R12 | Gray | Ch 3 (counts as dc), dc, [(2 dc, ch 2, sk 2, 2 dc)] repeat around, end with ch 2, sl st to top of ch-3 |
| R13 | Green | Sc in each st and join with sl st to first sc |
| R14 | Gray | Repeat R12 |
| R15 | Green | Repeat R13 |
| R16 | Gray | Repeat R12 |
| R17 | Green | Repeat R13 |
| R18 | Gray | Repeat R12 |
| R19 | Green | Repeat R13 |
| R20 | Gray | Repeat R12 |
| R21 | Green | Repeat R13 |
| R22 | Gray | Repeat R12 |
| R23 | Green | Repeat R13 |
| R24 | Gray | Repeat R12 |
| R25 | Green | Repeat R13 |
| R26 | Gray | Repeat R12 |
| R27 | Green | Repeat R13 |
| R28 | Gray | Repeat R12 |
| R29 | Green | Repeat R13 |
| R30 | Gray | Repeat R12 |
| R31 | Green | Repeat R13 |
| R32 | Gray | Repeat R12 |
| R33 | Green | Repeat R13 |
| R34 | Gray | Repeat R12 |
| R35 | Green | Repeat R13 |
| R36 | Gray | Repeat R12 |
| R37 | Green | Repeat R13 |
Crochet opening of bag
Handle marker placement Instructions
| Step | Description |
|---|---|
| 1 | Use the bottom center of the bag as a reference. Count 4 openwork squares to the left and 4 squares to the right. |
| 2 | Move vertically up from those points to the top edge of the bag and place a stitch marker at each point. |
| 3 | There should be 7 openwork squares between the two stitch markers. |
| 4 | Repeat the same method on both the front and back panels of the bag to ensure symmetrical handle placement. |
Bag opening crochet table (R1–R6)
Need crochet two opening of bag.
| Round | Yarn Color | Direction | Instructions |
|---|---|---|---|
| R1 | Gray | Front side, start from stitch marker | Ch 3 (counts as dc), dc, ch 2, skip 2, 2 dc, repeat to next stitch marker |
| R2 | Green | Flip over | ch,sc |
| R3 | Gray | Flip over | Ch 3 (counts as dc), dc, ch 2, skip 2, 2 dc |
| R4 | Green | Flip over | Ch 1, work 1 sc in each sch,sc |
| R5 | Gray | Flip over | Ch 3 (counts as dc), dc, ch 2, skip 2, 2 dc |
| R6 | Green | Flip over | ch,sc |
Crochet strap
| Row | Instruction | Stitch Count | Notes |
|---|---|---|---|
| R1 | 102 chains, single crochet repeat, 102 chains, single crochet repeat | Two 102-chain sections with single crochets in between | Crochet two straps, each with 102 chains, joined by single crochet stitches |
| R2 | Single crochet around | — | Decrease at the four strap corners using sc2tog; finish the round with an invisible slip stitch |
Crochet two rounds of single crochet on the inner side.
Work 2 single crochets into each grid along the bag opening, and 1 single crochet into each remaining stitch. Finish with an invisible slip stitch.
Reference sources
1.Learn the most comprehensive guide for single crochet(sc)
Author:Sarah Stearns
Publication date: on June 15, 2021, updated:December 14, 2024
Title: How to single crochet (sc)for beginners
Summary as blow:
- Step-by-Step Single Crochet for Beginners
- Single Crochet into a Foundation Chain
- Single Crochet into another Row
- Single Crochet in the Round
- Increases and Decreases
- Working Single Crochet in Different Loops


