


Crochet Frog Pattern The Most Comprehensive Step-By-Step Explanation
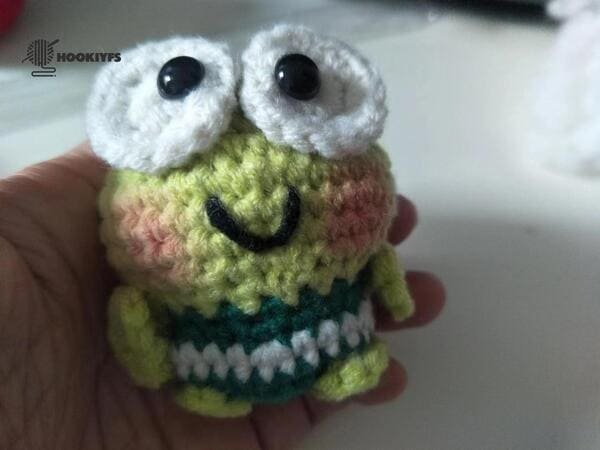
Table of Contents
Material kit of crochet frog pattern
- Hook: 3.0mm
- Stuffing: (polyester fiberfill)
- Yarn(light green & dark green &white &black )
- Safety eyes
- Yarn needle
- Marker
List of necessary tools
- Scissors
- Hot melt glue or glue
- Blush
Abbreviation for crochet frog pattern
These are the required abbreviations for crochet frog pattern
- ch = Chain stitch
- sc = Single crochet
- sl =Slip stitch
- inc = Increase (usually 2 stitches in the same stitch)
- dec =Decrease (typically done by crocheting two stitches together)
- st(s) =Stitch(es)
- mc =Magic circle (or magic ring)
- Flo=( through front loops only)
Best selling products
-

Raffia Cross Pattern Basket Handbag Kit
$19.99 -

Hexagonal Bucket Bag Kit
$29.99 -

Raffia Handbag Kit
$29.99 -

Hammock Bag Kit
$29.99 -

Wheat Bucket Bag Kit
$19.99
Buy crochet frog pattern kit
Every frog that we create is made with the tender care for each stitch. every detail embodies a rosy round belly and inquisitive eyes, which pays attetion to the detail requiring to bring a smile.
The touch of sass makes for a soft yarn and squish stuffed animal. this means it is the kind of frog that will beg to be listened to.
If you are a fellow maker, then arms up in victory because we have the frog ready for you. this means our offered plushies will be at your finger tips and froggies will be able to come to life bringing joy everywhere!
Tips
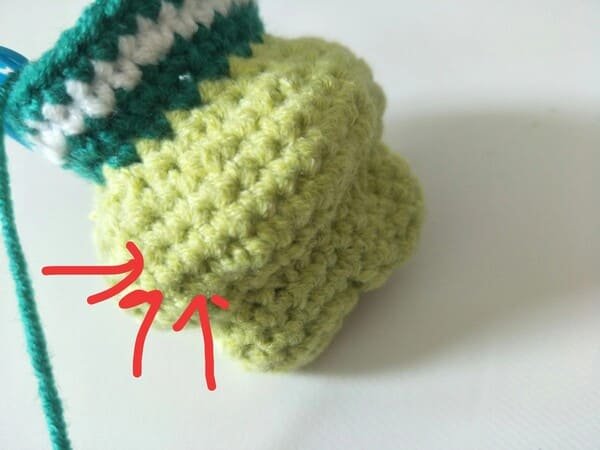
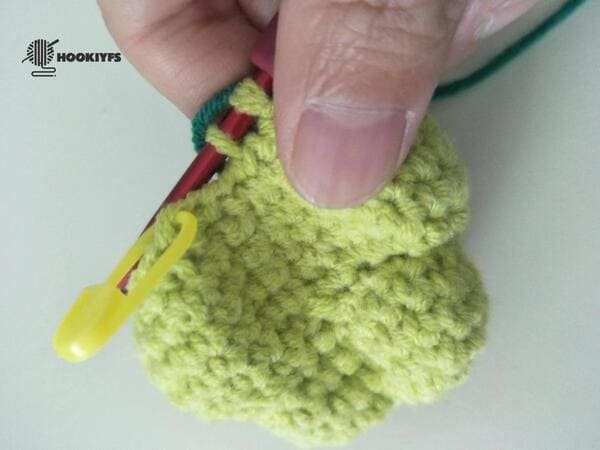
During the crocheting process, we must count the total number of rows crocheted, which is the key to ensuring the success of the overall fabric crochet sequence.
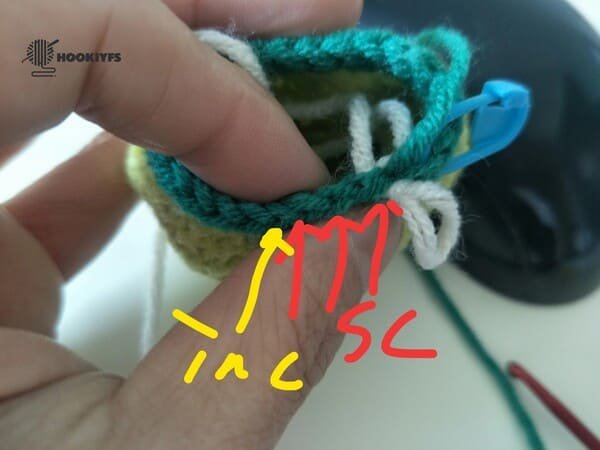
As shown in the figure, a raised shape refers to a row
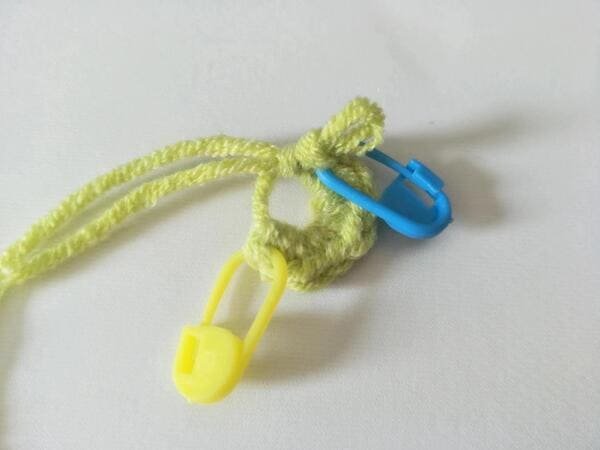
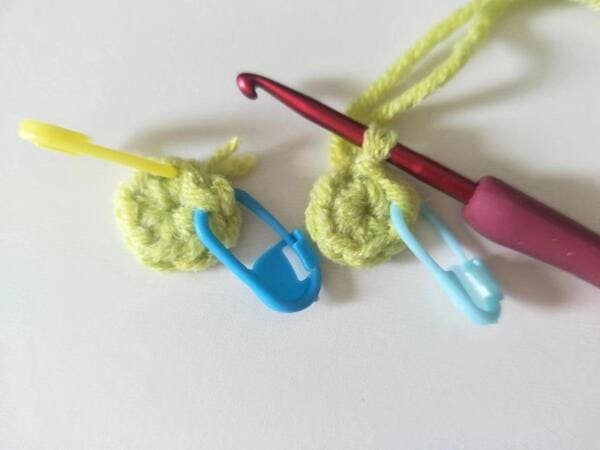
Even with consistent crocheting, I tend to miss out on stitches quite often.
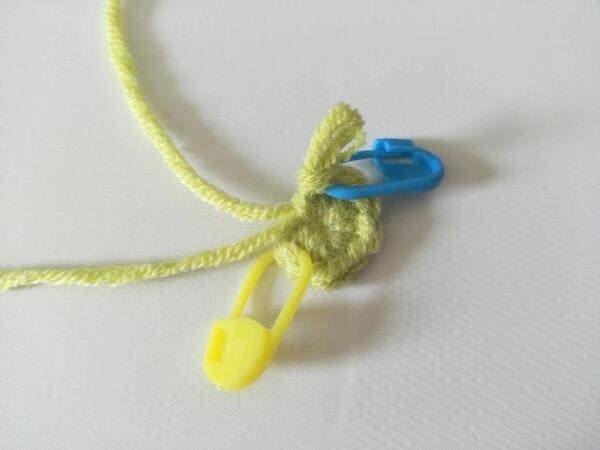
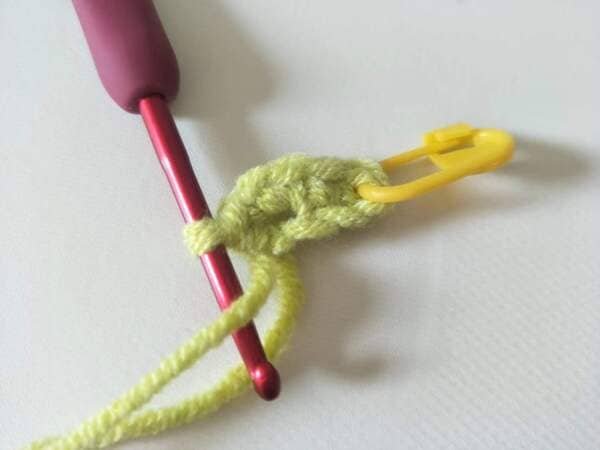
As a recommendation, every beginner should attach the marking button (yellow in this article) as we finish the first stitch, so that we don’t overlook the first one.
Also, don’t forget to fasten the marking button (blue one in the article) after the final stitch as well.
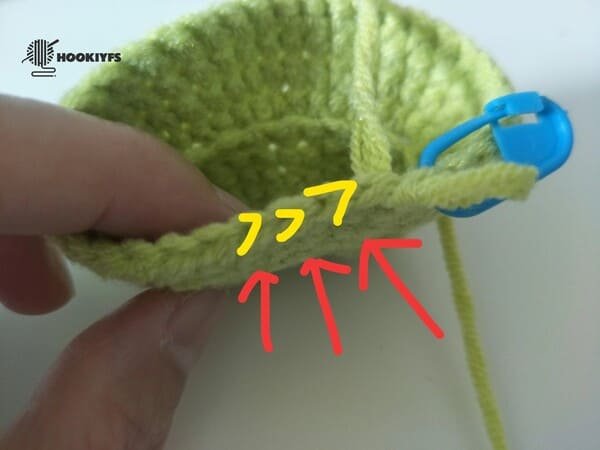
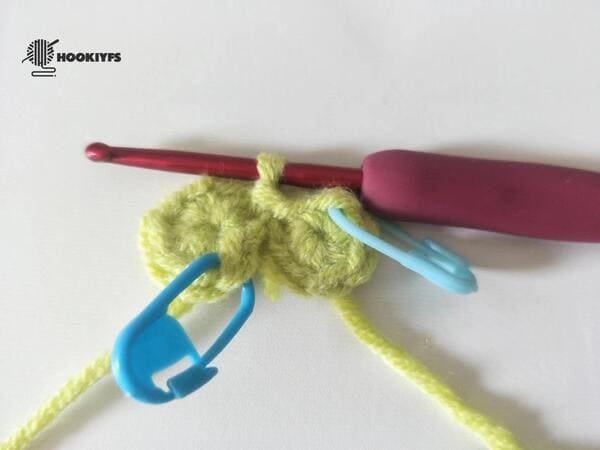
Similar to any round in crochet, a round has its own section of stitches which, for the sake of the round being properly crocheted, need to be right in number.
A stitch is marked with a symbol resembling the letter V, and is referred to as a stitch.
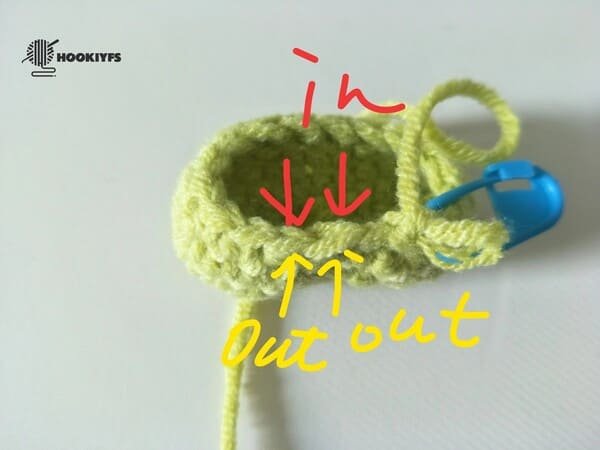
In=BLO( through back loops only)
out=FLO( through front loops only)
In the round 6,we need crochet flo single crochet , so i put the picture for you more understanding.
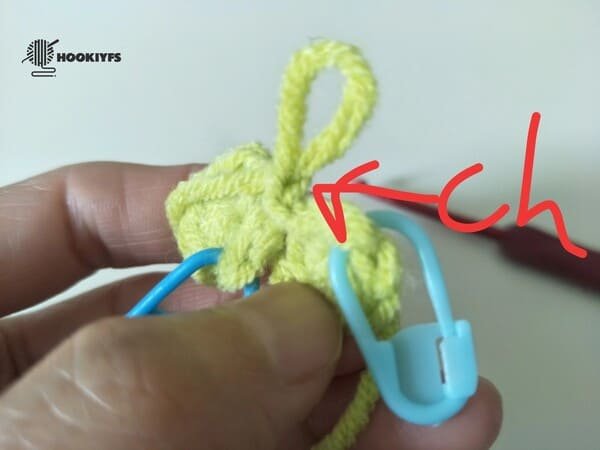
In order to keep the elevation in each round of crocheting and to ensure that the entire piece is straighter, starts with chain stitch.
Crochet the body (use light green yarn )for crochet frog pattern
- R1: 8 sc into mc(6)
- R2: (sc,inc)*8(24)
- R3-R4:24sc(24)
- R5:(2sc,dec)*6(18)
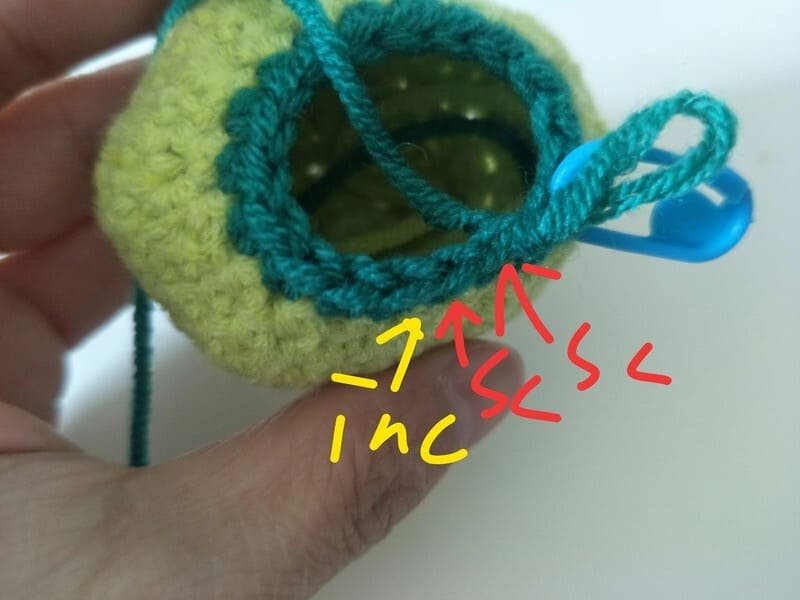
- R6:flo(inc)*18(36)
- R7-R9:36sc
- R10:(2sc,dec)*9(27)
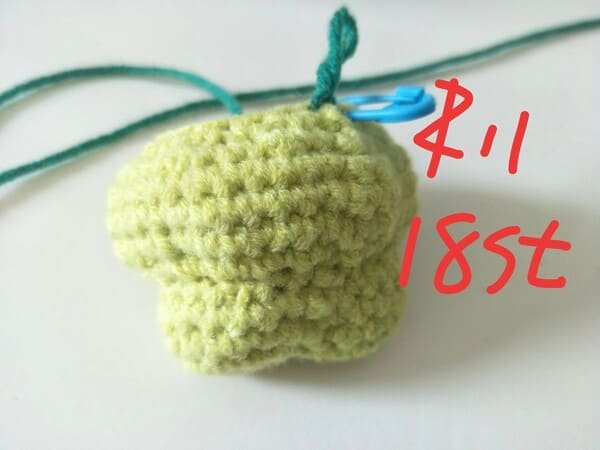
- R11:(sc,dec)*9(18)
- R12:18sc(18)
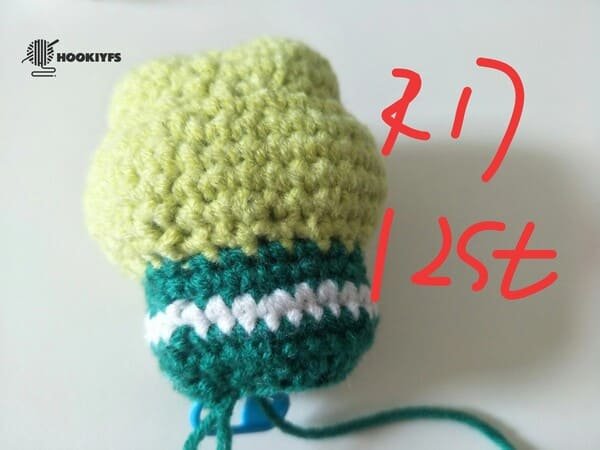
- R13:(2sc,inc)*6(24)
- R14:(3sc,inc)*6(30)
- R15:30sc(30)
- Fiberfill
- R16:(3sc,dec)*6(24)
- R17:(dec)*12(12)
- Fiberfill
- R18(dec)*6(6)
R1
8 single crochet in to the magic ring.
Magic ring;Use the index finger and thumb on the left hand to pull the yarn end in a tight leftward direction while pinching the fabric with the right hand. This procedure assists in making the middle of the circle or the part of the circle very small up to an ‘O’ gap.
Slip Stitch (sl)– Firstly, putting our hook in the first yellow V-shaped stitch, do a yarn over, and pull through the two outer loops sitting on the hook.
Want to learn magic ring , please click:How To Crochet Magic Ring ? l Step-By-Step l Video & Text &Photo
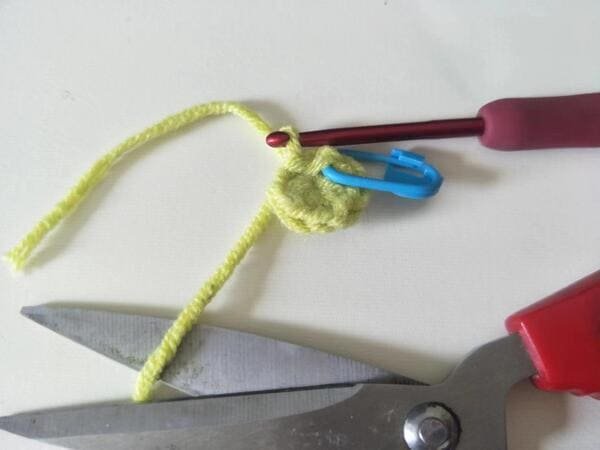
Cut yarn end for the first one,and conceal the yarn end.
R2
Also we need crochet another again-8 single crochet in to the magic ring.
The hook is inserted into the first stitch of the other piece of fabric, and a loop is pulled out, completing the first step of combining the two fabrics.
Crochet order: (sc, inc) repeat 8 times
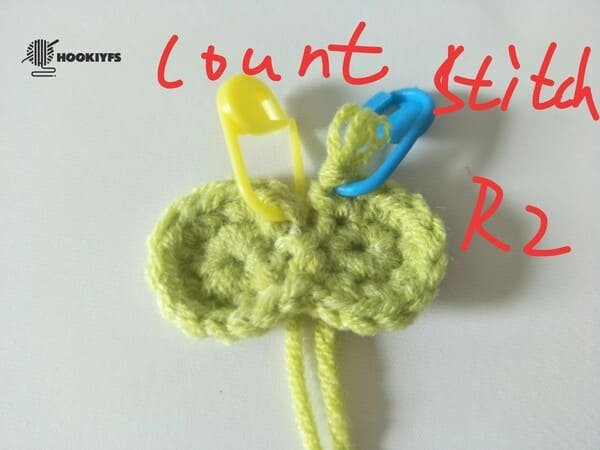
From the stitch count of the yellow mark button to the stitch count of the blue mark button.
Be patient. this is the key to getting a cute little frog in the end.
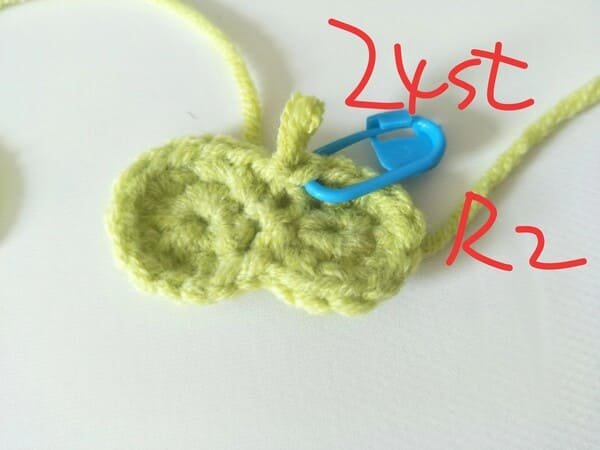
Complete this round by counting the total stitches, which should be 24 st.
After that, do a slip stitch to finish off round 2.
R3
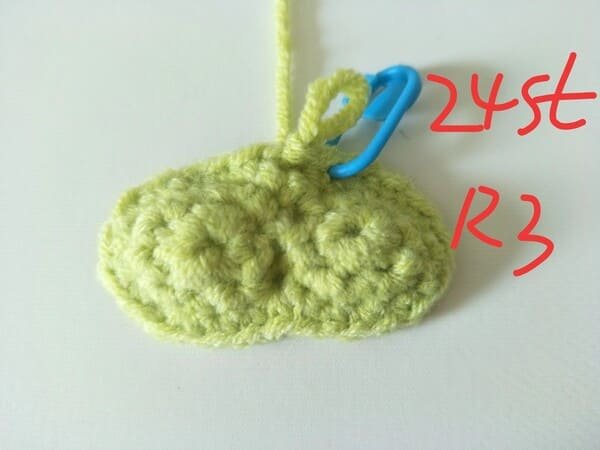
Single crochet(sc) into each stitch is needed. Total of 24 sc is needed.
When finishing this round it is also important to count the total stitches.
R4
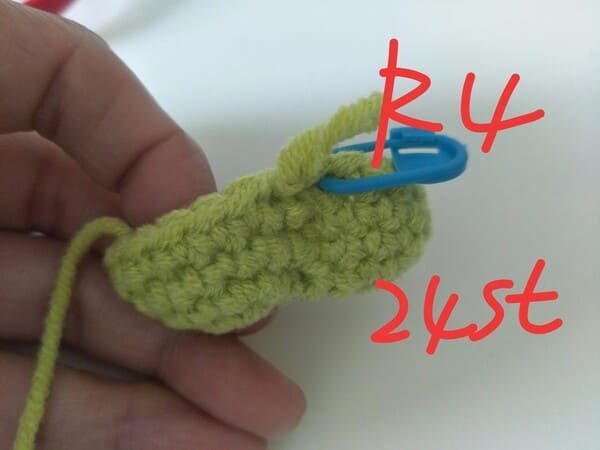
Same as round 3.
R5
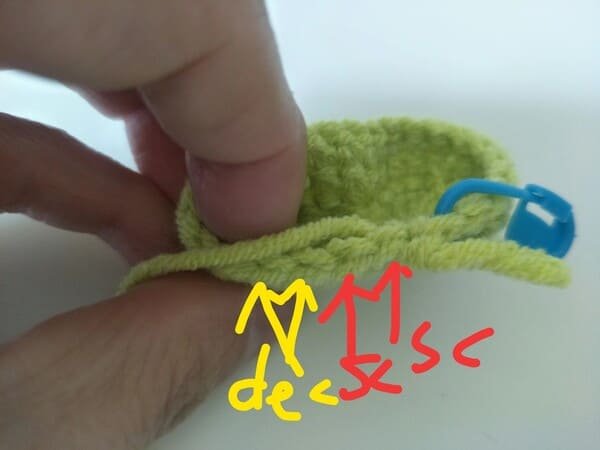
Crochet order: (2sc, dec) repeat 6 times
Just preceding the final four stitches of this round, do 2sc, dec one last time.
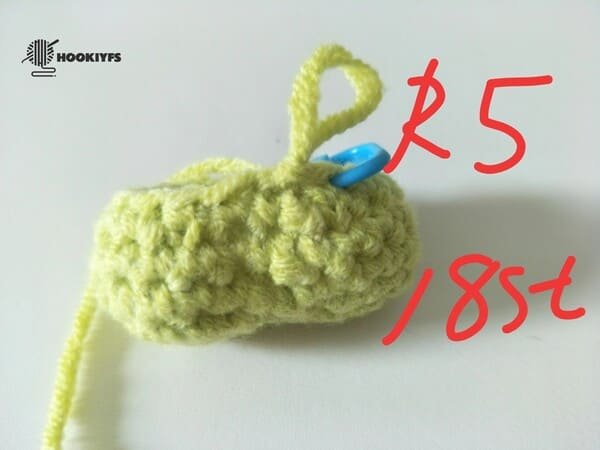
Complete this round by counting the total stitches, which should be 18 st.
After that, do a slip stitch to finish off round 5.
R6
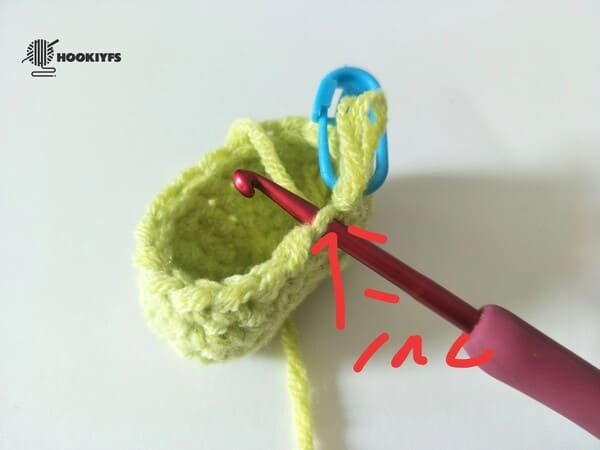
Crochet Order: inc in every stitch; do this 18 times.
Just preceding the final one stitches of this round, do inc one last time.
As shown in the picture, we use the flo–The hook is inserted through front loops only.
Complete this round by counting the total stitches, which should be 36 st.
After that, do a slip stitch to finish off round 6.
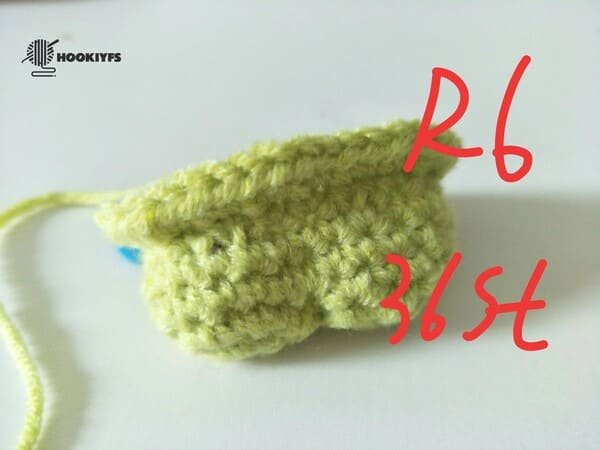
R7
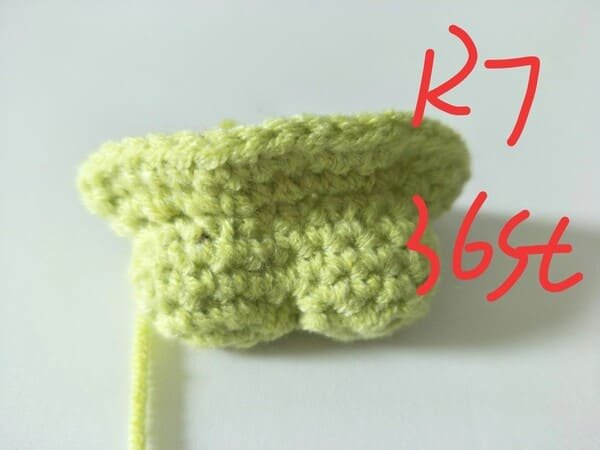
Single crochet(sc) into each stitch is needed. total of 36 sc is needed.
R8
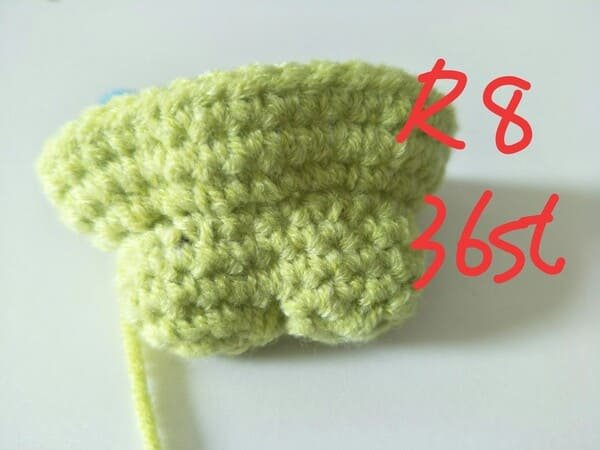
Same as round 7.
R9
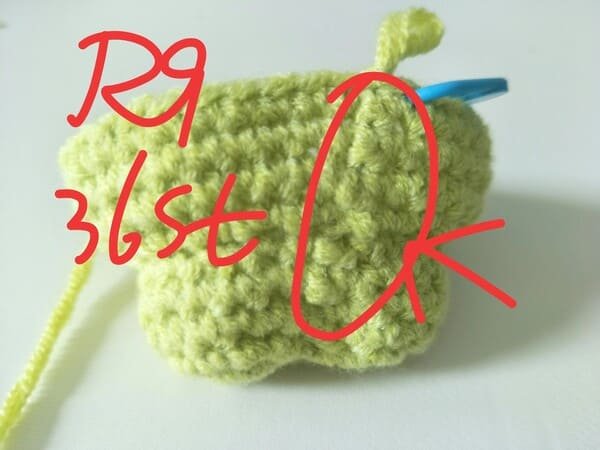
Same as round 8.
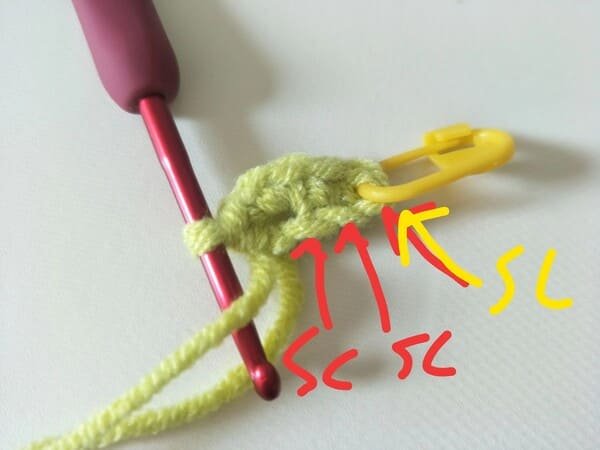
During the crocheting process, a row of slip stitch marks will gradually form (as shown in the red box in the picture)
R10
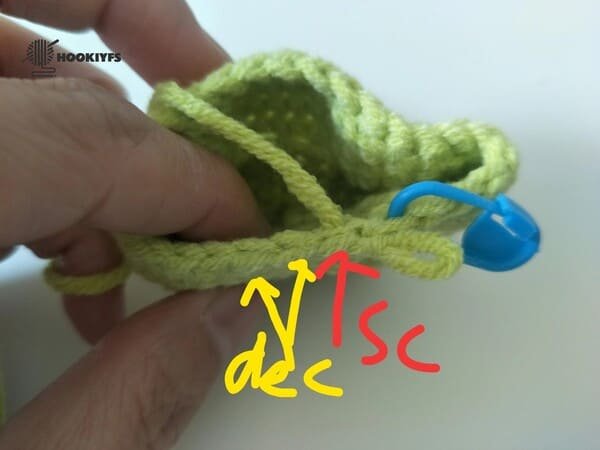
Crochet order: (2sc, dec) repeat 9 times
Just preceding the final four stitches of this round, do 2sc,dec one last time.
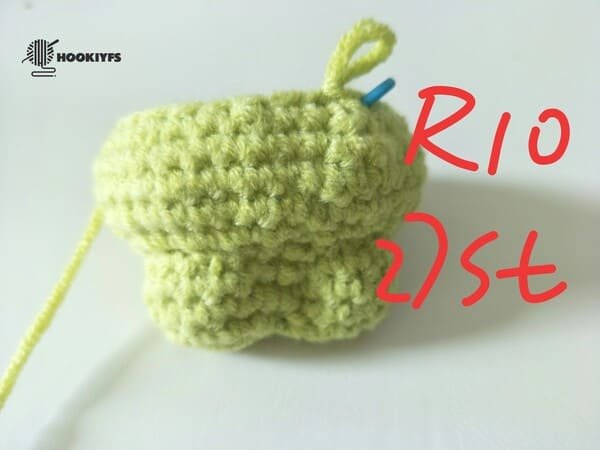
Complete this round by counting the total stitches, which should be 27 st.
After that, do a slip stitch to finish off round 10.
R11
Crochet order: (sc, dec) repeat 9 times
Just preceding the final three stitches of this round, do 2sc,dec one last time.
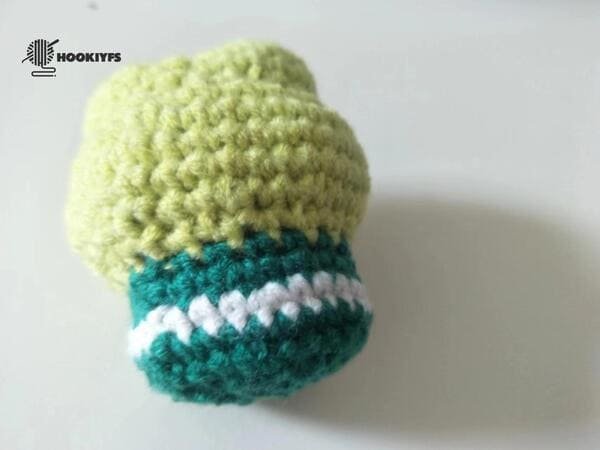
When we finish the last stitch, change to dark blue yarn and place it behind the two light blue loops.
Yarn over, then change of dark green yarn is completed.
Complete this round by counting the total stitches, which should be 18 st.
After that, do a slip stitch to finish off round 11.
R12
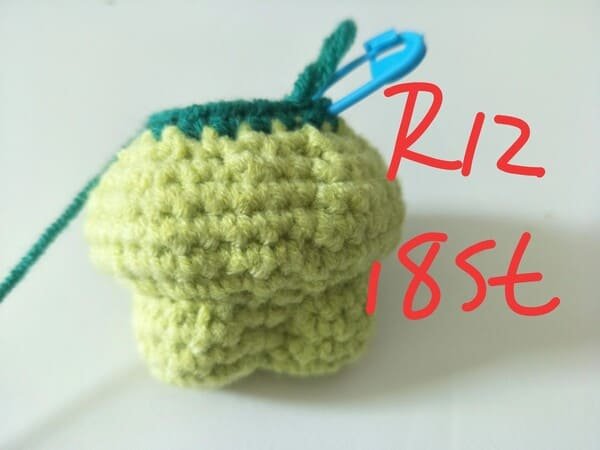
Single crochet(sc) into each stitch is needed. total of 18 sc is needed.
R13
Crochet order: (2sc, inc) repeat 6 times
Just preceding the final three stitches of this round, do 2sc,inc one last time.
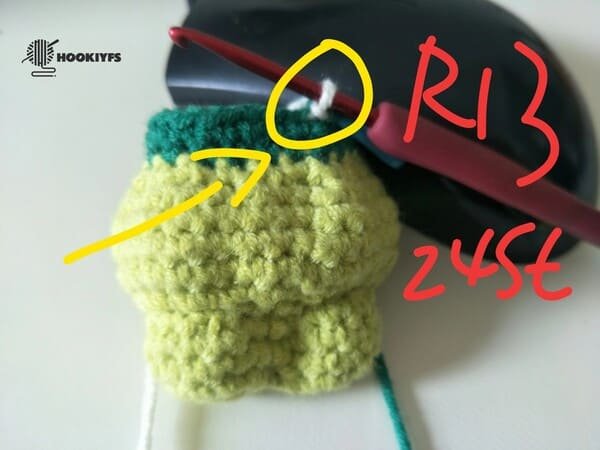
Complete this round by counting the total stitches, which should be 24 st.
After that, do a slip stitch to finish off round 13.
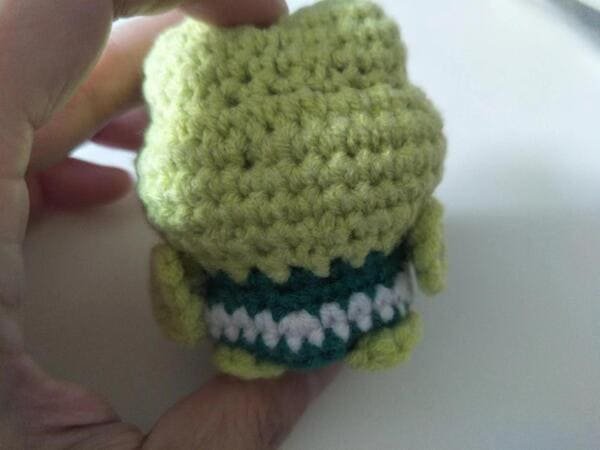
Use same method for change white yarn.
R14
Crochet order: (3sc, inc) repeat 6 times
Just preceding the final four stitches of this round, do 3sc,inc one last time.
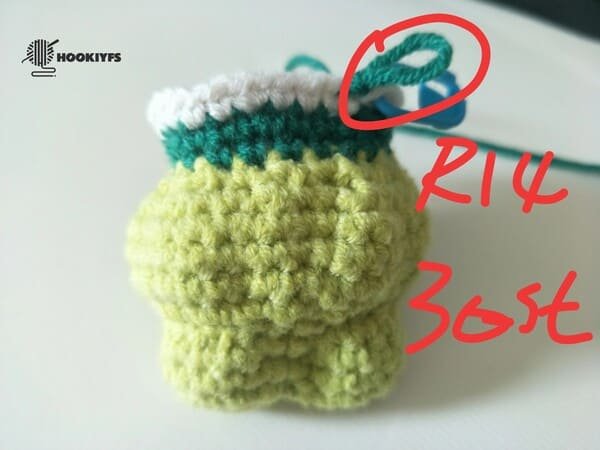
Complete this round by counting the total stitches, which should be 30 st.
After that, do a slip stitch to finish off round 14.
Use same method for change dark green yarn.
R15
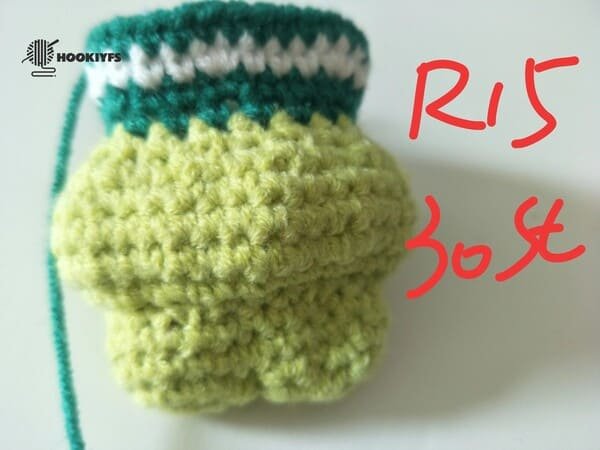
Single crochet(sc) into each stitch is needed. total of 30 sc is needed.
Fiberfill
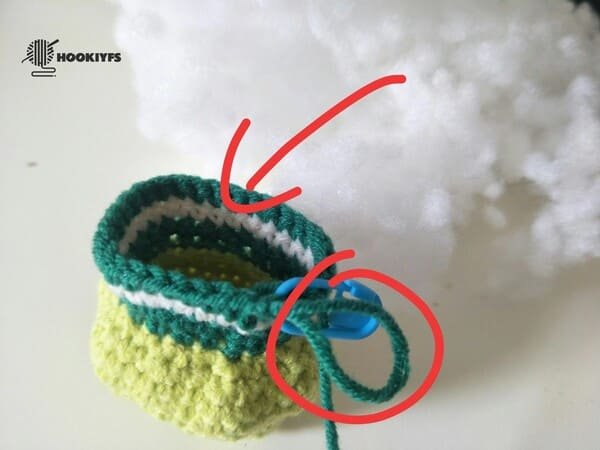
The purpose of enlarging the loop is to avoid being unable to find it after filling in the future because the loop is too small.
Put the fiberfill in to the hole of body for frog.
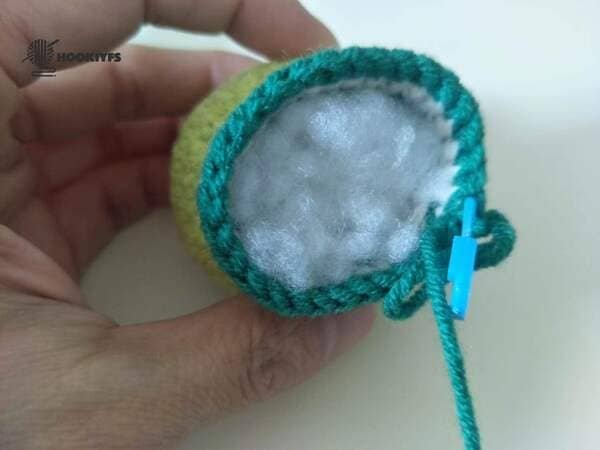
Thinking ahead is crucial when stuffing our frog head – especially if we need to frog.
We also want to be mindful of not overstuffing, particularly around seams, to prevent too much stretching.
Part 1 of fiberfill is completed.
R16
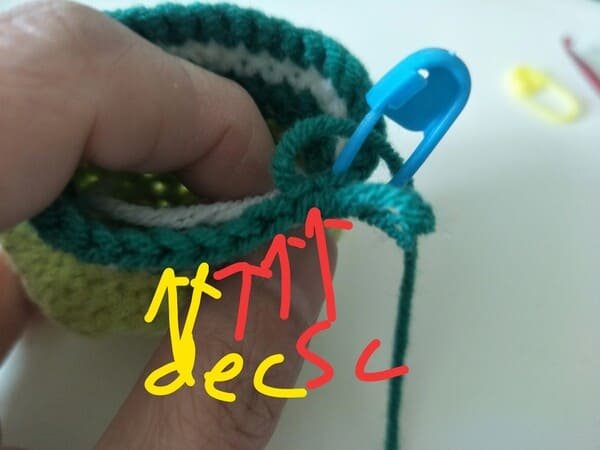
Crochet order: (3sc, dec) repeat 6 times
Just preceding the final five stitches of this round, do 3sc,decone last time.
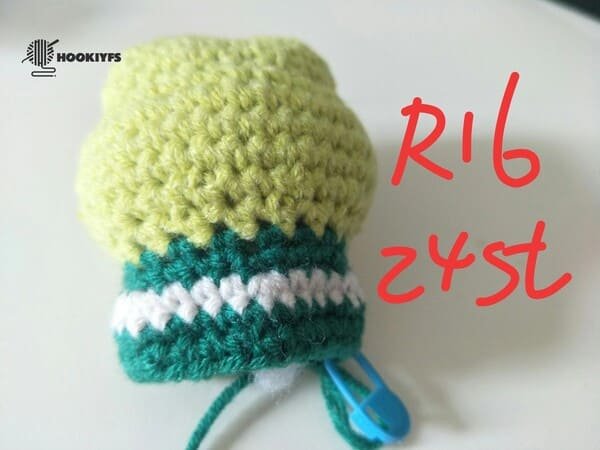
Complete this round by counting the total stitches, which should be 24 st.
After that, do a slip stitch to finish off round 16.
R17
Crochet order: (3sc, dec) repeat 6 times
Just preceding the final five stitches of this round, do 3sc,dec one last time.
Complete this round by counting the total stitches, which should be 12 st.
After that, do a slip stitch to finish off round 17.
Fiberfill
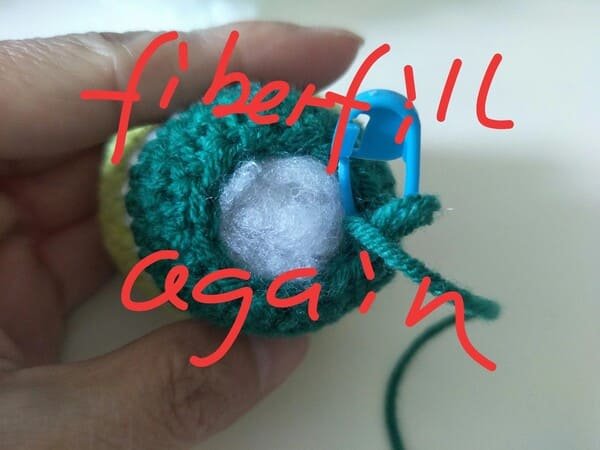
The filling at this time is to fill the gap between R16 and R17.
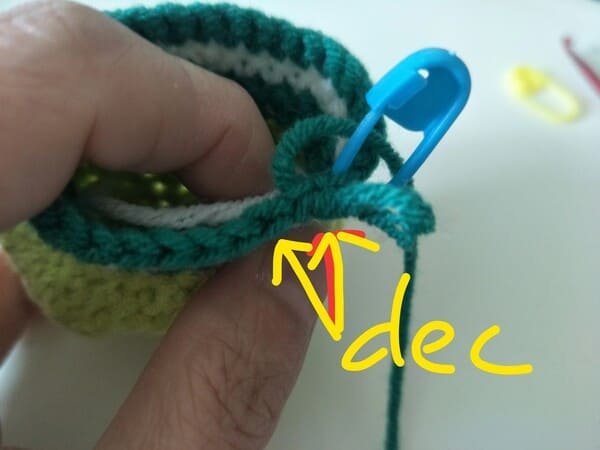
R18
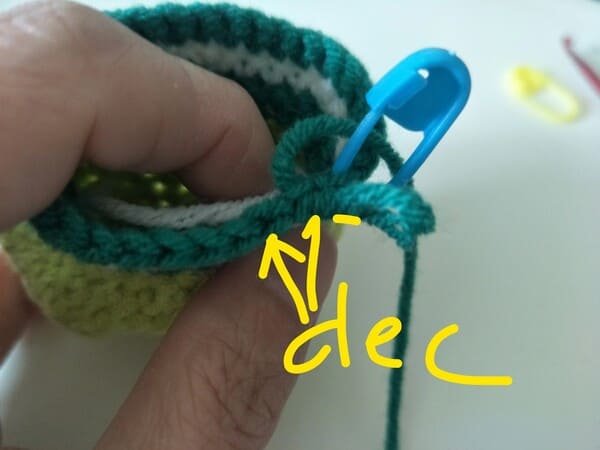
Crochet order: ( dec) repeat 6 times
Just preceding the final one stitches of this round, do dec one last time.
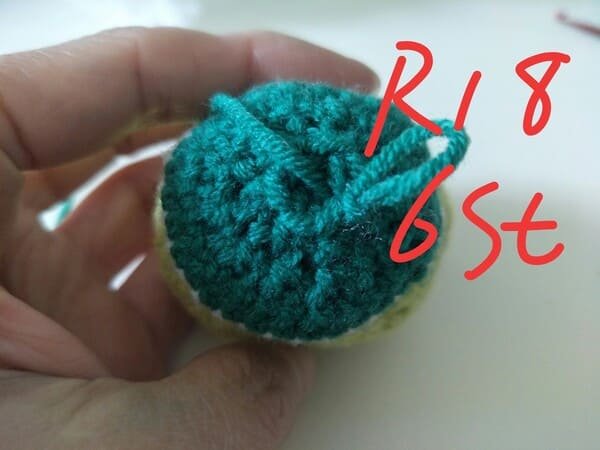
Complete this round by counting the total stitches, which should be 6 st.
After that, do a slip stitch to finish off round 18.
We find out the hole of center of body for frog
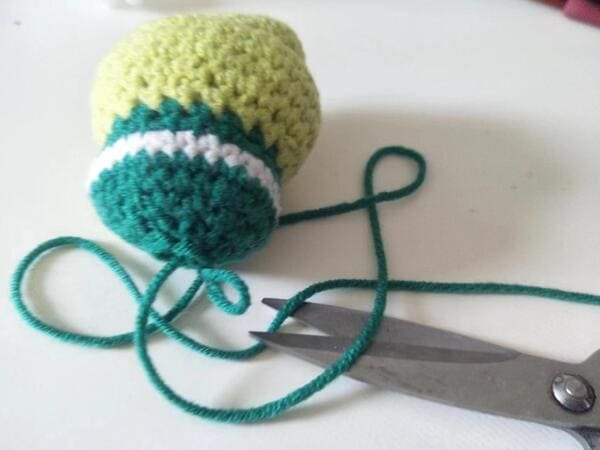
Leave 10 cm yarn end.
Cut yarn end.
Use hook to bring out the yarn end.
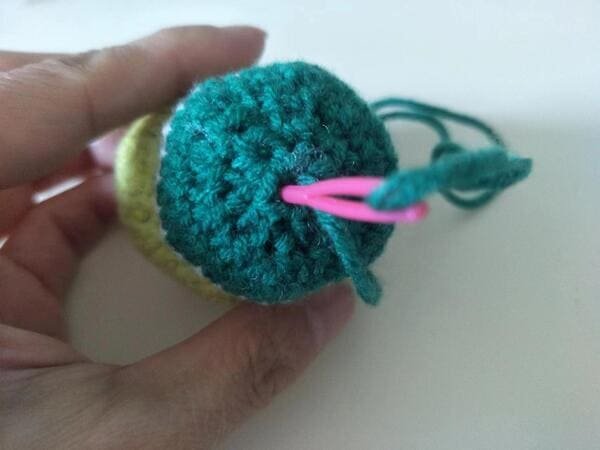
Additionally the center of body also has a hole, which can be closed using spacing out a stitch and picking a stitch with a yarn needle).
This technique allows to shrink the hole to an very small size.
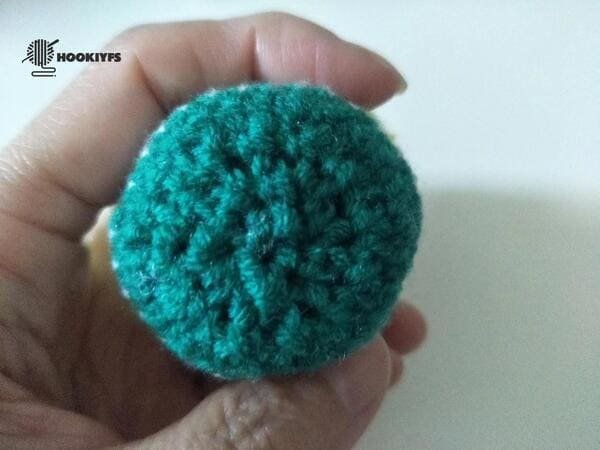
No gap at the bottom of body for frog crochet pattern.
The body of frog is completed.
Crochet the arm (use light green yarn )for crochet frog pattern
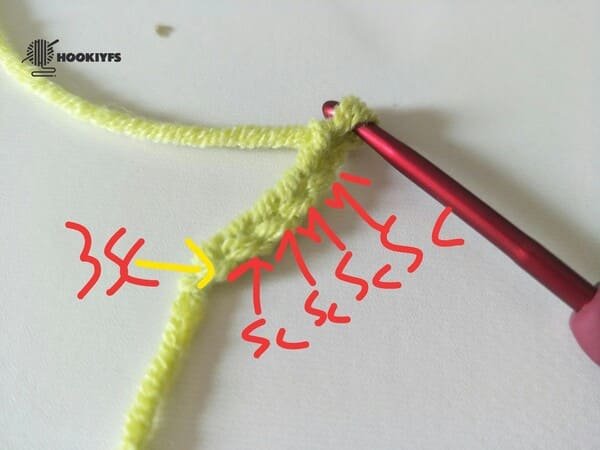
- 4ch-starting from the fourth to second stitch-sc,sc,3sc,sc,sc,sl
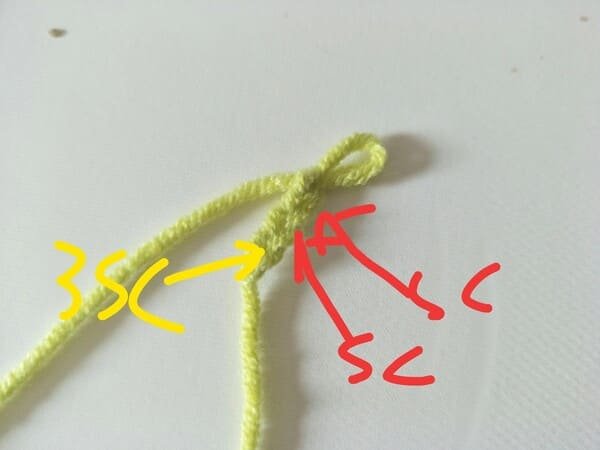
Ch 4 (now have a foundation chain of 4).
Now working on the second chain from the hook (so you skip the first chain and work into the second):
Crochet order:1 sc in 2nd ch from hook ,sc in next ch,3sc in next each ch .
Side of arm is completed.
Crochet order :sc in next ch,sc in next each ch, sl in last ch.
then cut yarn end.
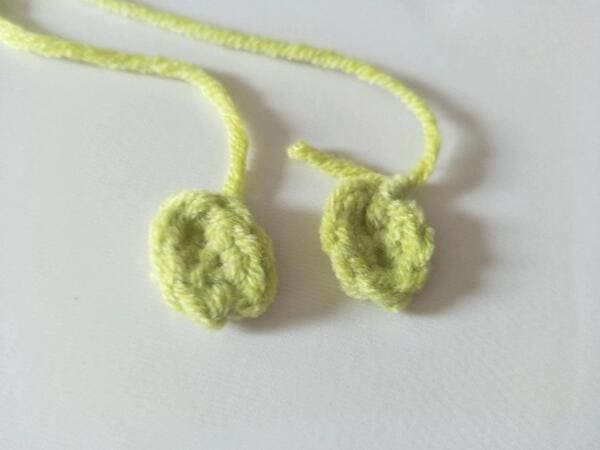
We need crochet another use same method.
Crochet the feet (use light green yarn )for crochet frog pattern
- 6ch-starting from the fourth to second stitch-sc,sc,sc,sc,3sc,sc,sc,sc,sc ,sl
Ch 6 (now have a foundation chain of 6).
Now working on the second chain from the hook (so you skip the first chain and work into the second):
Crochet order:1 sc in 2nd ch from hook ,sc in next ch,sc in next ch,sc in next ch,3sc in next each ch.
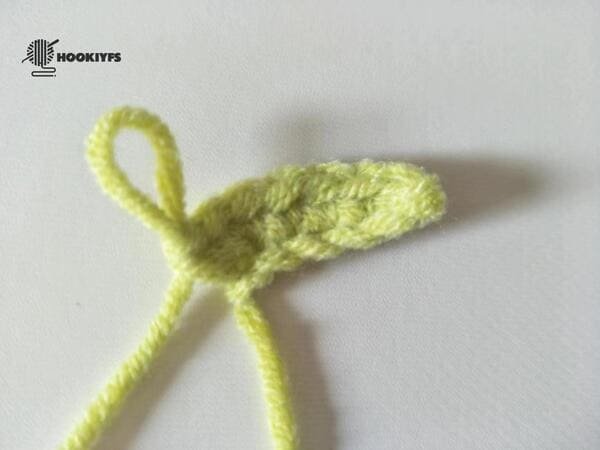
Side of foot is completed.
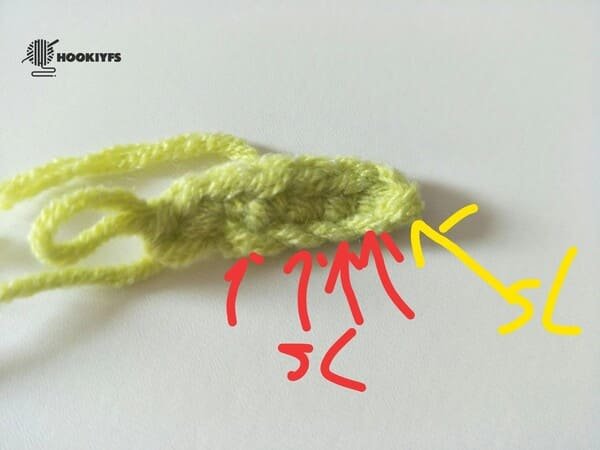
Crochet order:sc in next ch,sc in next ch,sc in next ch,sc in next ch,sl in the last ch.
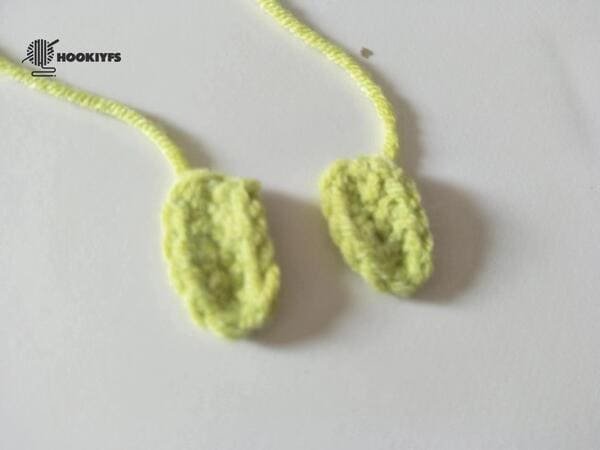
We need crochet another use same method.
Crochet the eyes (use white yarn )for crochet frog pattern
- R1: 8 sc into mc(6)
- R2::(inc)*8 (16)
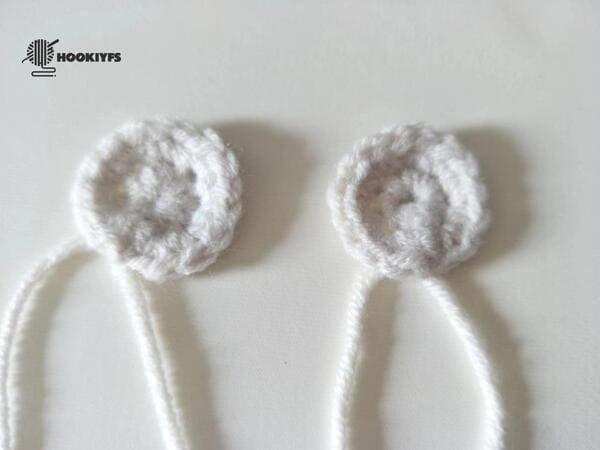
R1: For eyes : at the beginning round 1 is 8 sc into a magic circle
R2: An inc in each stitch gives 16 stitches.

Cut yarn end and tie knot on the back of eyes.
Sew the foot on the body for crochet frog pattern
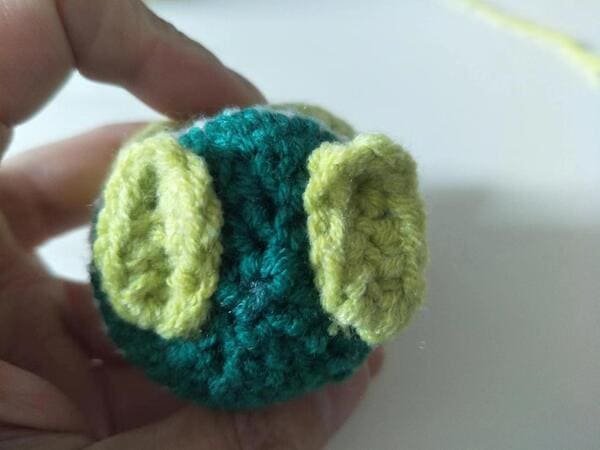
Sew the feet on the round 18 of body.
It is recommended to sew the feet forward, so that we can reach the frog’s feet from the front.
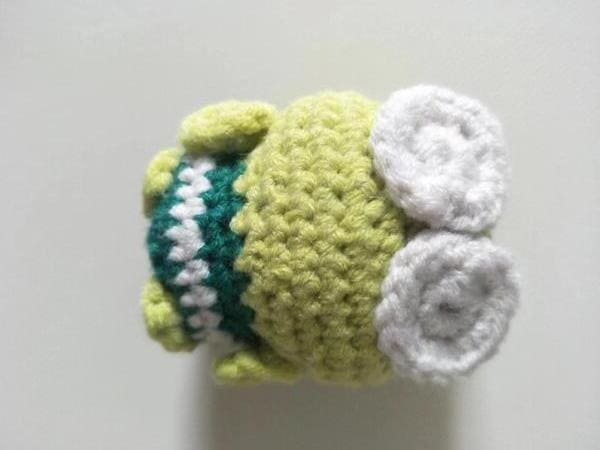
Sew arms on the body for crochet frog pattern
Sew the arm on the round 10 of body.
My suggestion is to sew the hands to make them look clenched, so the frog will look more lively and cute.
Safety eyes & sewing the mouth & apply blush
Glue the big eyes from R2-R6.
There is no space between the two eyes.
Safe eyes:glue the eyes to the innermost part of the two pieces of white eye fabric.
Sew mouth:use yarn needle to sewing the shape of mouth.
Apply blush:Apply blush on both sides of the mouth, not too much.
Now ,we get a cute frog.
Reference sources
1.Learn the most comprehensive guide for single crochet(sc)
Author:Sarah Stearns
Publication date: on June 15, 2021, updated:December 14, 2024
Title: How to single crochet (sc)for beginners
Summary as blow:
- Step-by-Step Single Crochet for Beginners
- Single Crochet into a Foundation Chain
- Single Crochet into another Row
- Single Crochet in the Round
- Increases and Decreases
- Working Single Crochet in Different Loops


