


Crochet Houndstooth Bag: A Complete Guide to Making A Timeless & Stylish Bag
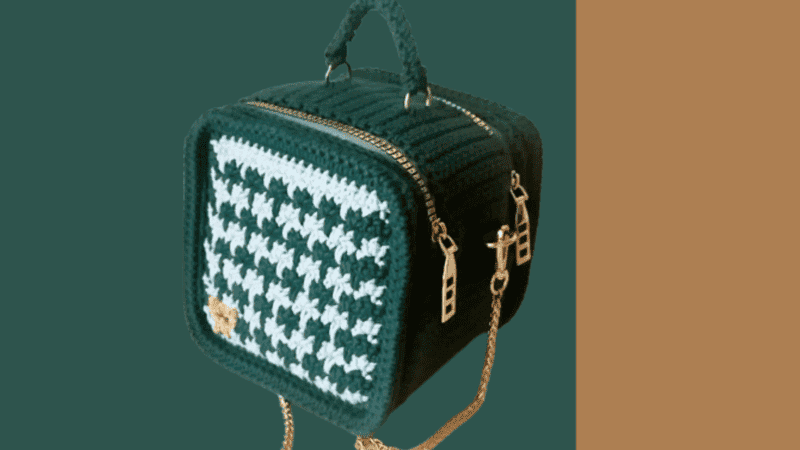
Table of Contents
Crochet successfully transcends traditional motifs; bold accessory-making enables the medium to assert contemporary flair.
By transforming the understated elegance of the houndstooth pattern, we fashion a handwoven handbag, the Crochet Houndstooth Bag, that marries geometric refinement with artisanal craftsmanship.
Following that foundation, we will dissect the pattern inch by inch, translating every traditional abbreviation into a verb. Expect margin notes on shaping, refinement on gauge, and glossaries on double-faced colourwork that reveal the hidden mechanics of the houndstooth motif.
At the conclusion you will be equipped with a polished handbag, knowledgeable regarding aesthetic and tactile variation, and fluent in everyday coordination of the piece.
What is a crochet houndstooth bag?
Houndstooth, the ageless pattern of woven fabric defined by bent, darting checks, is standardized practice in the haute closet world. De rigueur in sober black and ivory, today it has blossomed under the imagination of couturiers, drifting effortlessly into ruby, emerald, antique gold, and bone-tinged crème.
Ever the alias of refined taste, it finds residence in tailored overcoats, flirtatious hemlines, and delicately draped cashmere wraps.
Transposing this textile regimen into the world of crochet liberates it into three-dimensional form. By substituting the loom for the hook, one intersperses abbreviated single crochet in twin contrasting hues, thereby optimizing the arrested motion of warp and woof to fabricate structural sheen.
The end textile, ablaze with pristine angularity, possesses the crisp tautness of acetatem profusion, swollen into tactility.
Introducing a Houndstooth bag into one’s everyday arsenal is an exercise in signature understatement. An inhaled spiral of raffia reeds yields a vessel with asserted spine, forged to carry the spare lipstick and cyber brick with grace.
Substitute an airy, mercantile lash of cotton—fine, mercerized, silk-kissed—and the purse morphs into gracious pliancy, swaying with intent rather than rigid anology.
Dress code flexibility fused with the intrinsic aura of the handmade guarantees that this carry-all is the quintessential portal between the push button pipelines of the perennial wardrobe and the cosseting aura of handmade reverie.
Material kit for crochet houndstooth bag
💙 4.00mm hook & yarn needle & marker buckle : https://amzn.to/3TXavWn
💙 2.00 mm round yarn: https://amzn.to/41NoKkS
💙 D buckle: https://amzn.to/46cvfyX
💙 Chain stitch: https://amzn.to/4mcLq5r
💙 Rivets stud: https://amzn.to/46j2FvT
Abbreviation for crochet houndstooth bag
- ch = Chain stitch
- sc = Single crochet
- sl =Slip stitch
- st(s) =Stitch(es)
- R=Round
- sk=Skip
- hdc=Half double crochet
- inc=Increase
- elong sc = Elongated single crochet
Base stitch for beginners
We’ve all been there! Here are some basic stitch we’ve learned along the way:
How To Crochet Magic Ring ? l Step-By-Step l Video & Text &Photo
Chain Stitch |Step By Step Guide| Text & Photo &Video
Single Crochet-You Want To Know The Most Detailed Information
Half Double Crochet In The Round-The Complete Guide
Double Crochet Stitches For Beginners
Video
In this presentation, we will instruct you on the systematic formation of an elegant houndstooth handbag. By adhering to our progressive tutorial, you will master the traditional two-color stitch, establish an exceptionally stable foundation, and apply refined joining techniques to the handles.
The outcome of our collaborative effort will be a sophisticated accessory, characterized by its classic motif, practical endurance, and suitability for daily indulgence.
Crochet body
We use same method to crochet two pieces.
| Row | Instructions | Notes |
|---|---|---|
| Base | 20 ch + 1 ch | Foundation chain |
| R1 | Flip over, 20 sc | Work single crochet across |
| R2 | ch, flip over, (inc, ch, skip 2) repeat, sc, sc | Increase pattern row |
| R3 (change yarn) | ch, flip over, (sc, sc, elongated sc) repeat, sc, sc | Start houndstooth effect |
| R4 | ch, flip over, sc, ch, skip 1, (inc, ch, skip 1) repeat, inc, skip, sc | Decorative increase row |
| R5 (change yarn) | ch, flip over, sc, sc, sc, elongated sc, (sc, sc, elongated sc) repeat, sc, sc, sc | Continuation of houndstooth |
| R6–R21 | Repeat Rows 2–5 | Build bag body height |
| R22 | ch, flip over, 20 sc | Straight sc row |
| R23 (change yarn) | ch, flip over, sc in each stitch, 8 stitch at ther corner into each increase | Reinforce shaping |
| R24 | sc in each front loop stitch | Creates seam base |
| R25–R27 | sc in each stitch | Straight rounds |
| R28 | Sew R24 & R27 together with sc in back loop | Join for shaping |
| R29–R30 | sc in each stitch | Final edging |
| Finish | Use yarn needle, invisible slip stitch for last stitch | Neat closure |
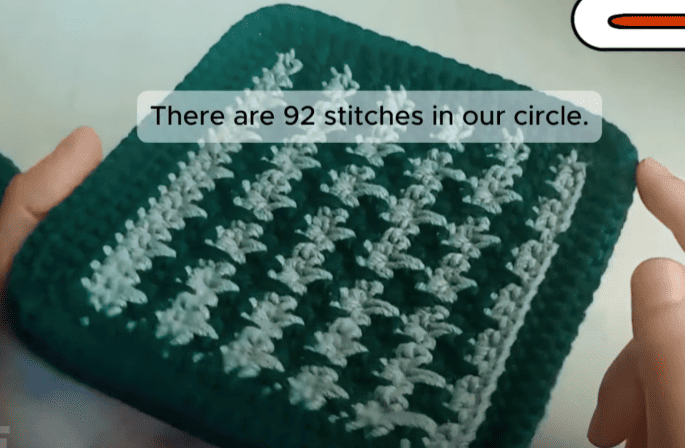
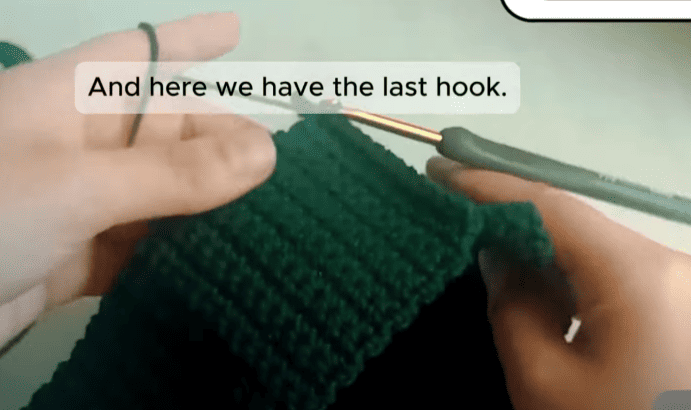
Crochet bottom (side)
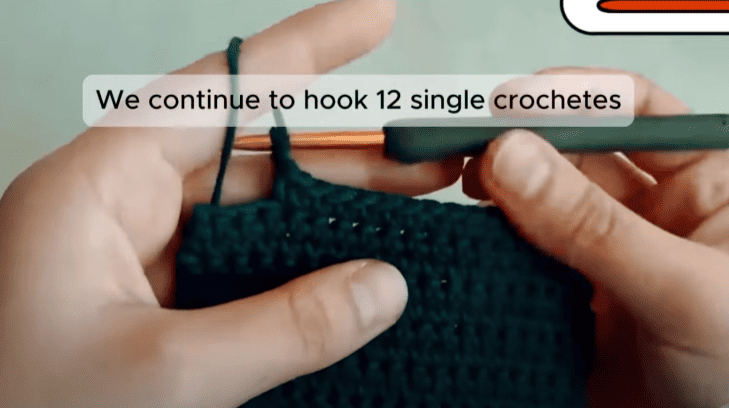
Crochet bottom (side)
| Row(s) | Instructions | Total Stitches |
|---|---|---|
| Base | 18 chains | – |
| R1 – R64 | ch, flip over, 17 sc | 17 |
| R65 | ch, flip over, 3 sl st, ch, 12 sc | 16 |
| R66 – R100 | ch, flip over, 12 sc | 12 |
Sew bottom
We position the shapes with the right surfaces facing inward, centering the diminutive fragment upon the midline of the expanse segment.
A continuous strand of single crochet is employed to unite the two, forming a firm seam.
Sew D buckle
We secure a D-ring buckle to the midpoint of Round 12 and again on Round 25; this fixture will provide a later anchor point for the attachment of the shoulder strap.
Sew zipper with bottom (side)
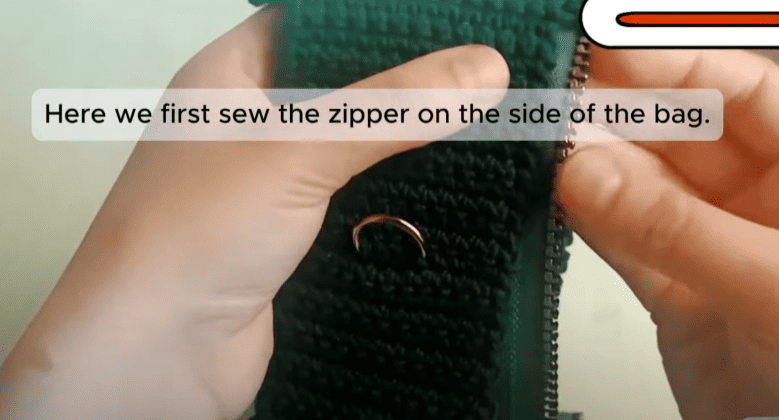
Step 1: Identify the designated sewing marks along the two shorter vertical edges of the piece.
Step 2: Position the zipper so that its teeth align precisely with these edges. Employ a hand-sewing needle and thread; insert the needle through the fabric and the zipper tape, proceeding with a consistent in-and-out motion to affix the tape securely to the edge.
Sew zipper with body
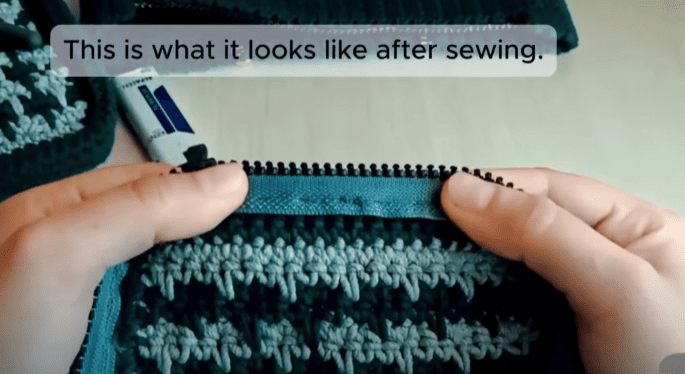
Step 1: We identify the indicated sewing points along the front surface of the bag body at the last two rows. Verification occurs to ensure the zipper uniformly traverses and overlaps both corners without deviation.
Step 2: Aligning the zipper to the short edges, we proceed to hand-stitch using a fine needle, executing a precise in-and-out motion to secure the tape fully and steadily to the substrate.
Sew body with bottom (side)
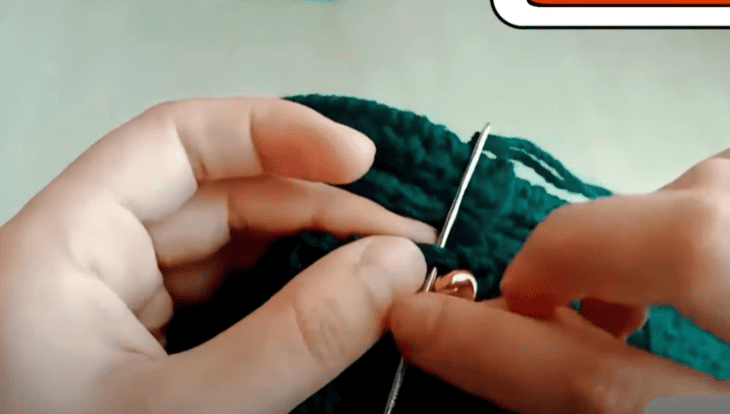
Step 1 : Position a stitch marker at the upper center point on the bag side . Following the same principle, identify the midpoint of the bag body and place a second stitch marker there.
Step 2: From the marker, commence hand-stitching, matching each new stitch to the stitch to which it corresponds in the previous row until the seam is complete.
Put lining in bag

To enhance the overall structural integrity of the bag, the incorporation of a lining layer on the interior surface becomes a pertinent design strategy.
Install strap
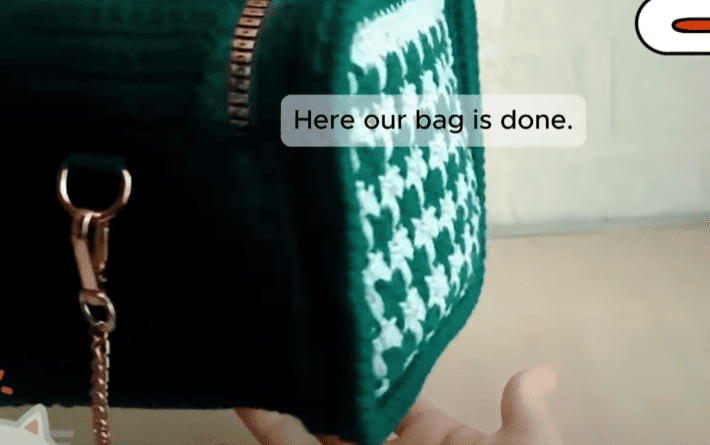
The chain strap is secured to the D-ring buckle fixed to the body of the bag.
Reference sources
1.Learn the most comprehensive guide for single crochet(sc)
Author:Sarah Stearns
Publication date: on June 15, 2021, updated:December 14, 2024
Title: How to single crochet (sc)for beginners
Summary as blow:
- Step-by-Step Single Crochet for Beginners
- Single Crochet into a Foundation Chain
- Single Crochet into another Row
- Single Crochet in the Round
- Increases and Decreases
- Working Single Crochet in Different Loops


