


Mini Crossbody Bag Crochet – Cute & Compact Handmade
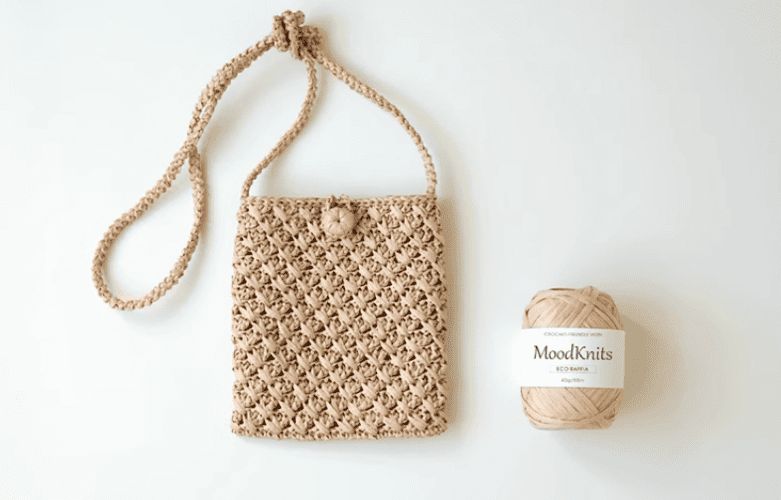
Table of Contents for mini crossbody bag crochet
Mini crossbody bag crochet: If you want a fun, low-pressure project that ends with a fashion-forward piece you can actually put on, the Mini Crossbody Bag Kit fits the bill. The bundle walks you through crocheting a featherweight yet sturdy bag that slips on easily and holds just the extras needed for day-to-day life. Whether you are grabbing groceries, meeting friends for brunch, or wandering a new town, this hands-free miss fits all the small essentials-and the added satisfaction of having made it yourself.
Base stitch for beginners
We’ve all been there! Here are some basic stitch we’ve learned along the way:
How To Crochet Magic Ring ? l Step-By-Step l Video & Text &Photo
Chain Stitch |Step By Step Guide| Text & Photo &Video
Single Crochet-You Want To Know The Most Detailed Information
Half Double Crochet In The Round-The Complete Guide
Double Crochet Stitches For Beginners
What makes our mini crossbody bag crochet special?
We think crafting should be quick, rewarding, and just plain enjoyable-whether we-ve picked up a crochet hook or a pencil. That-s why this kit packs everything we need to begin the moment it arrives. There-s no scrambling for yarn, no second-guessing a pattern-we-ve handled all that legwork so we don-t have to.
Material kit:
- Soft, premium raffia yarn in earthy shades that keep the bag light and planet-friendly.
- A sturdy 3.5mm crochet hook that sits comfortably in the hand, even through an evening binge.
- Yarn needle: put the strap to sewing on the bag, and conceal yarn end.
Abbreviation
- ch = Chain stitch
- sc = Single crochet
- sl =Slip stitch
- R=Round
- sk=Skip
- dc=Double crochet
Video of mini crossbody bag crocet
Crochet the base of bag
- 27 ch
- R1:54 sc
1.Start with a foundation chain.
Ch 27. This strand of stitches will be the bottom edge of your bag.
2.Work on one side of the chain.
In the 2nd ch from the hook, work 2 single crochet (sc).
3.Single crochet across.
Now put 1 sc in every remaining ch until you reach the very last chain.
4.Work along the opposite side.
Keep placing 1 sc in every stitch all the way down the other side of the chain.
✅ _By the end, you will have 54 single crochet stitches,which is form the base of bag.
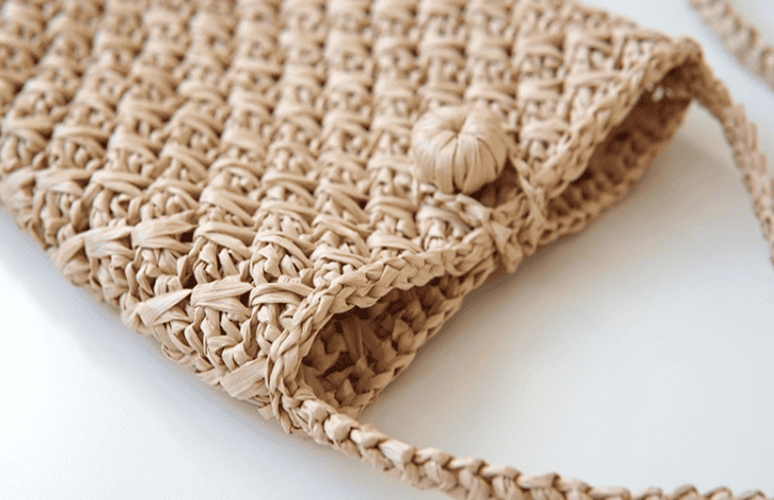
Crochet the body of mini crossbody bag crochet
- R1-R15: (2 dc, 1sc) repeat 18 times
The method of knitting the body is a bit complicated. I suggest you watch the video, which is more efficient for learning knitting.
- R16: sl for the last round.
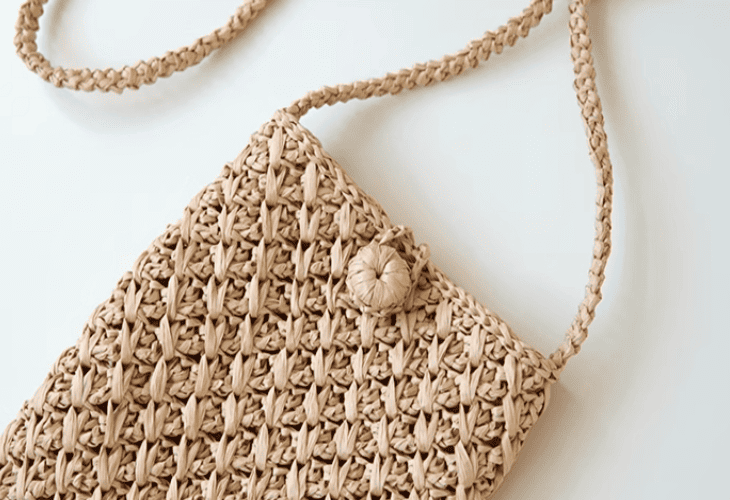
Crochet & sew the button on the bag
- 5sc in to magic ring
At the beginning, let’s leave a 20cm yarn tail before we start crocheting. Continue working until we see the button form into a cute, rounded shape. Once we’re happy with how it looks, we can fasten off and cut the yarn.
Sewing
1️⃣ We put the button in the middle of the second-to-last round of the bag.
2️⃣ Using the long yarn tail we left over from earlier, thread it through the yarn needle.
3️⃣ Sew the button securely to the bag, making sure it is centered and aligned with the button loop.
4️⃣ Tie a knot on the inside of the bag and weave the ends neatly in to keep the bag looking neat.
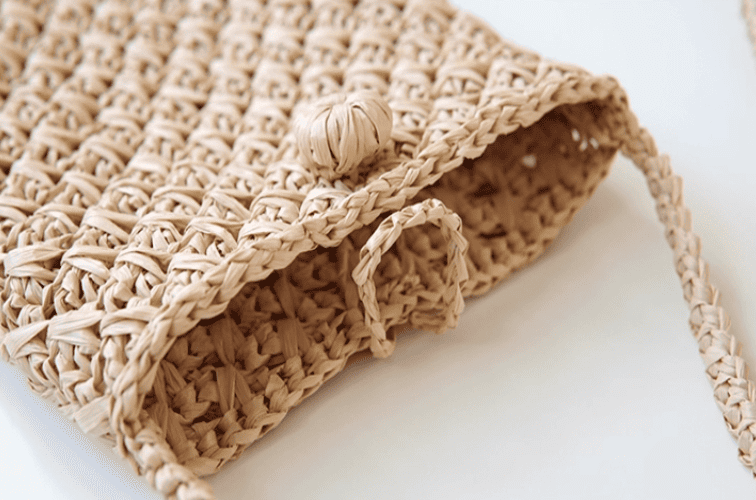
Crochet & sew the button loop on the bag
- 18 ch
Sewing
Leave a 20cm yarn end on each. tie know for chain stitch , which form the loop. next, sew the button loop firmly onto the back piece of the bag, double-checking that the loops can be cover the button.
Crochet & sew strap on the bag
1️⃣ Crochet the strap using the crab stitch
Well walk through making the bag strap with a crab stitch, or reverse single crochet. This little stitch spins the yarn toward the front, giving the strap a twisty look that’s also super strong. Here’s how to begin: * Tie your yarn to the spot where you want the strap to grow. * Chain one stitch to lift up. * Instead of moving forward, poke your hook backward into each stitch, pulling a loop and finishing just like a regular single crochet. * Keep stitching in this backward motion until the strap is about 110 centimeters long. Feel free to stop sooner or keep going if you want a longer or shorter carry.
2️⃣ Leave a long yarn tail for sewing
When you reach the right length, dont snip the yarn too close. Leave a tail that measures at least twenty to thirty centimeters, maybe a bit more. That extra strand will save you headaches later because it gives you plenty of thread to stitch the strap onto the body of the bag.
3️⃣ Sew the strap to the bag
Read to attach the strap? Set one end flat against the side of the bag, watching for any twist. Grab a yarn needle, thread the long tail you saved, and begin to sew. Go back and forth through both layers a few times; the extra passes help lock the strap in place so it can carry all your goodies.
Do the same thing to the other end of the strap on the other side of the bag.
4️⃣ Check the strength and finish
When both ends are stitched down, give the strap a light pull to see that it holds tight. Trim and tuck any loose threads so your bag looks neat and ready to use.
Reference sources
1.Learn the most comprehensive guide for single crochet(sc)
Author:Sarah Stearns
Publication date: on June 15, 2021, updated:December 14, 2024
Title: How to single crochet (sc)for beginners
Summary as blow:
- Step-by-Step Single Crochet for Beginners
- Single Crochet into a Foundation Chain
- Single Crochet into another Row
- Single Crochet in the Round
- Increases and Decreases
- Working Single Crochet in Different Loops


