


Mushroom Crochet Pattern The Most Comprehensive Step-By-Step Explanation
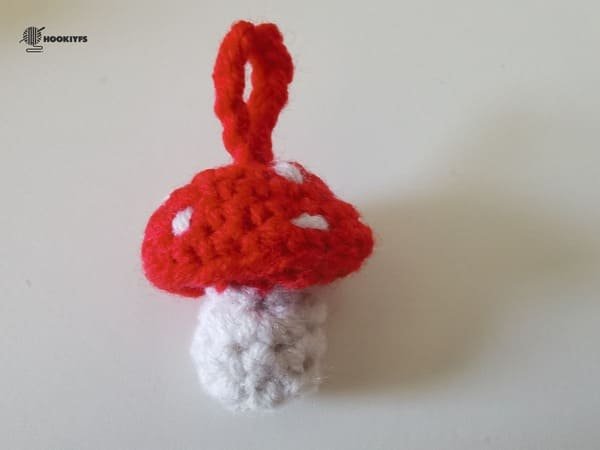
Table of Contents
We crochet mini mushrooms because they infuse a bit of fancy and delight into our daily routines. though these little toadstools are miniature in size, they are brimming with character and appeal. Whether we are adorning a shelf, gifting a friend, or engaging in a soothing pastime, crocheting mini mushrooms allows us to savor the enchantment of the handcrafted world.
For mushroom enthusiasts like us, these projects stand out with both speed and satisfaction, making them ideal for the scrapes of yarn lingering around, as well as the desire to practice a few new stitches. moreover, their ease of execution makes for an inviting challenge for the entire crafty community. With every stitch comes the gift of mindfulness, while each completed mushroom acts as a testament to the boundless opportunities for unfettered imagination.
For us, crocheting tiny mushrooms is more than a pastime; it aids in forging bonds, allows for free expression, and cherishing the delightful simple pleasures derived from handcrafts. and if we’re being honest? they simply are too adorable to pass up.
Material kit of mushroom crochet pattern
- Hook: 3.0 mm
- Stuffing: (polyester fiberfill)
- Yarn(red & rice white )
- Yarn needle
- Marker
List of necessary tools
- Scissors
Abbreviation for mushroom crochet pattern
These are the required abbreviations for mushroom crochet pattern
- ch = Chain stitch
- st(s) =Stitch(es)
- mc =Magic circle (or magic ring)
- sl=slip stitch
- sc=single crochet
- inc=increase
- dec=decrease
- blo=through back loops only
Best selling products
-

Raffia Cross Pattern Basket Handbag Kit
$19.99 -

Hexagonal Bucket Bag Kit
$29.99 -

Raffia Handbag Kit
$29.99 -

Hammock Bag Kit
$29.99 -

Wheat Bucket Bag Kit
$19.99
Buy mushroom crochet pattern kit 🍄
Our mini mushroom crochet pattern kit will be your best friend whether you’re a beginner or a seasoned ‘stitcher.’ Need perfect comfort for a handmade gift? order your own tiny toadstool ‘treasures’ from us and receive every bit of woodland charm you were dreaming of.
Comes with our signature luxurious soft high quality yarn, step by step instructions tailored specially for you, crochet all the addiction patterns you want and every bit of love so you can enjoy a stress free escape doing what you do best- working with your fingers!
Tips
Starting off with a chain stitch (ch) makes sure that the piece is straight and also manages the height of round in crocheting.
Even with experience crocheting, I often forget stitches more often than not.
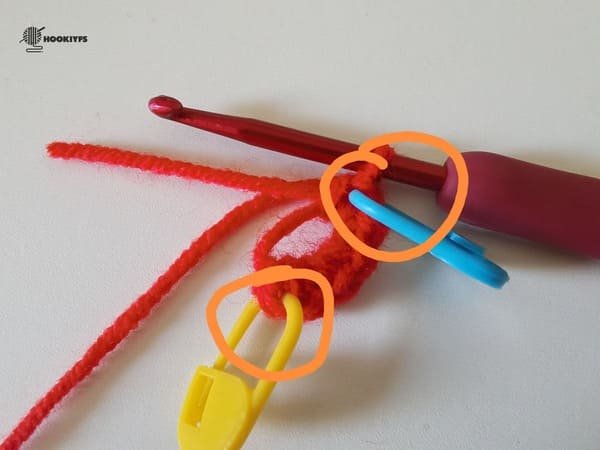
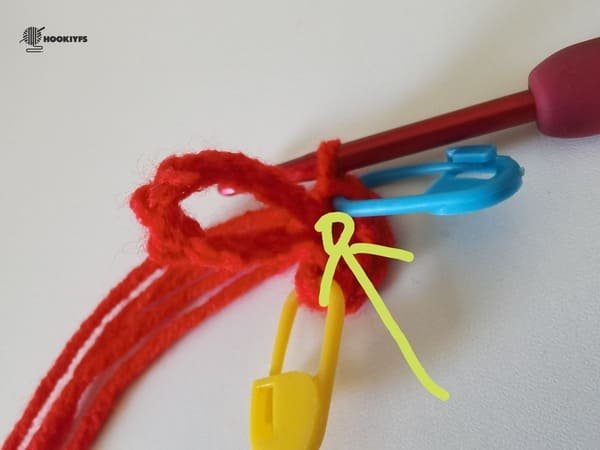
I recommend that every beginner to crocheting fasten the marking button (yellow in this article) after completing the first stitch.
Also, don’t forget to fasten the marking button (blue one in the article) after finishing the last stitch as well.
As with any round in crochet, a round has its own set of stitches which, in order for this round to be crocheted correctly, must be right in number.
A stitch is denoted by a sign that as V and hence is called a stitch.
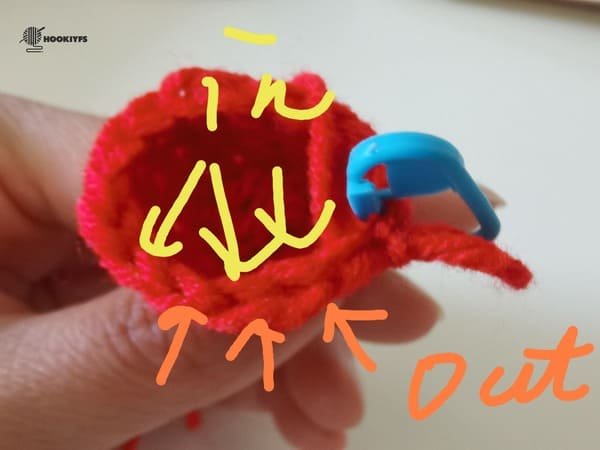
In=BLO (through back loops only)
Out=FLO (through front loops only)
For this article, we will use the blo technique for round 6 crocheting.
Crochet the body (use red & rice white yarn )for mushroom crochet pattern
- 10 ch for hand carrying
- R1: 6 sc into mc(6)
- R2: (inc)*6(12)
- R3:(sc,inc,sc)*4(16)
- R4-R5:16sc(16)
- R6(sc,dec,sc)*4(12)
- R7:dec*6(6)
- R8:6sc(6)
- R9:(2sc,inc)*2(8)
- R10:8sc(8)
- R11:(2sc,dec)*2(6)
- Fiberfill

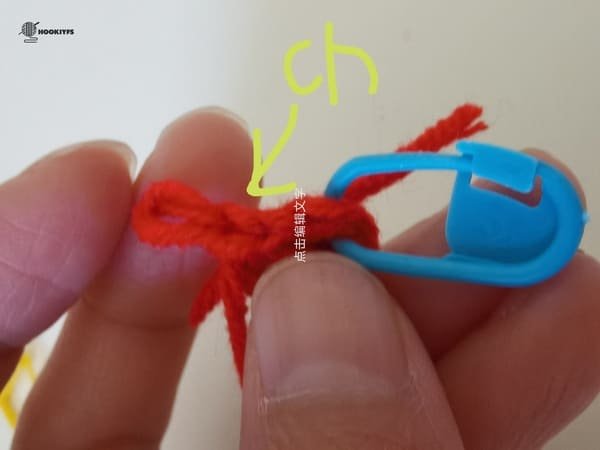
By hand, we do 10 chain stitches to create a delightful tiny loop, ideal for hand carrying with a bit of flair.
It’s our imaginative approach toward merging practicality with a sprinkle of handmade wonder.
R1
6 single crochet (sc )into the magic ring.

Magic ring:with the index, and the thumb of the left hand, pull the yarn end towards the left while pinching the fabric with the right hand. this helps to shape the center of the circle or the circular part very small to an ‘O’ gap form.
Put the hand carrying on the center of magic ring.
Hand carrying is tightening with magic ring.
Firmly connected to the hand carrying with magic ring.
Tie knot on the magic ring.
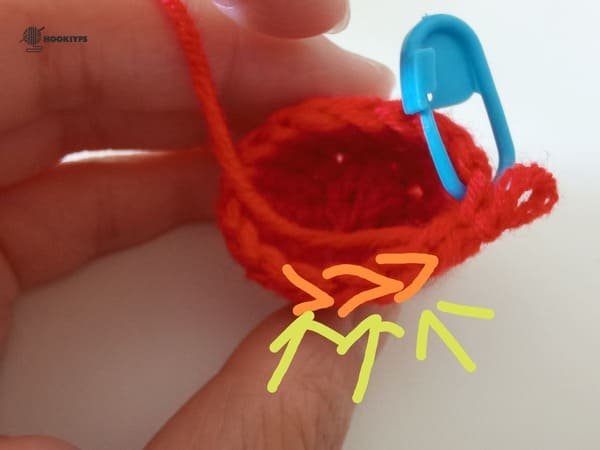
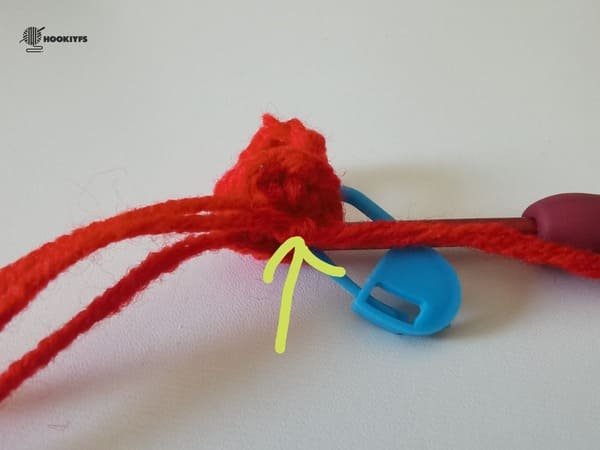
Slip Stitch (sl)– To do a sl st, Insert your hook in the 1st yellow V shaped stitch and do a yarn over and pull through2 outer loops which are sitting on the hook.

Conclude this round by performing a final tally of the stitches which should add up to 6 st.
Proceed by doing a slip stitch to finish off round 1.
Sorry for that, R2 in the picture should be changed to R1.
R2
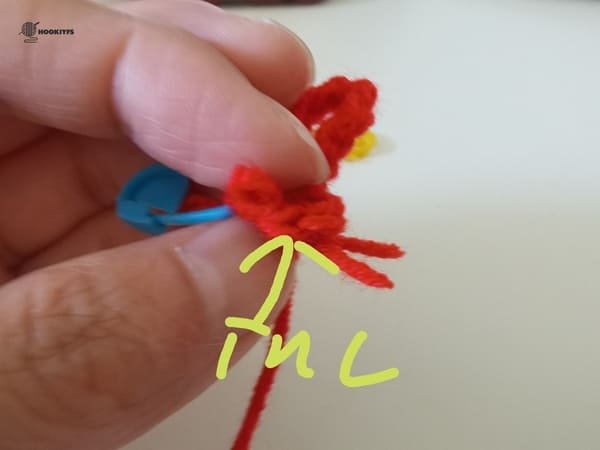
Crochet Order: inc in each stitch, repeat 6 times.
Kindly note that the last stitch for this round is also an inc.
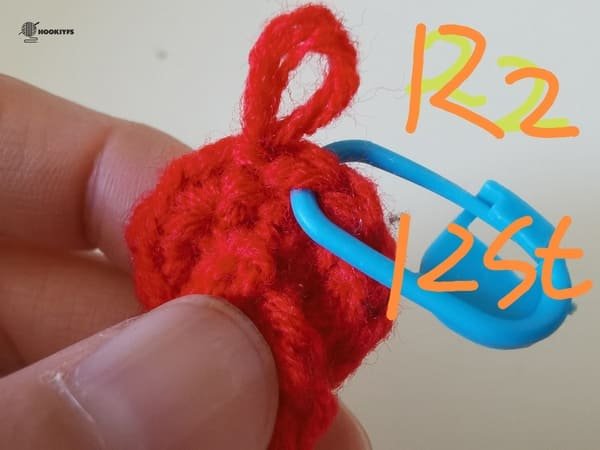
Conclude this round by performing a final tally of the stitches which should add up to 12 st.
Proceed by doing a slip stitch to finish off round 2.
R3
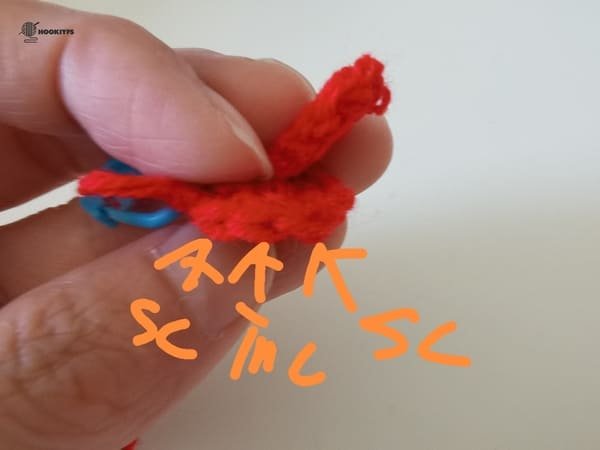
Crochet order: (sc, inc,sc ) repeat 4 times
Right before the last three stitches of this round, do sc, inc,sc once more.
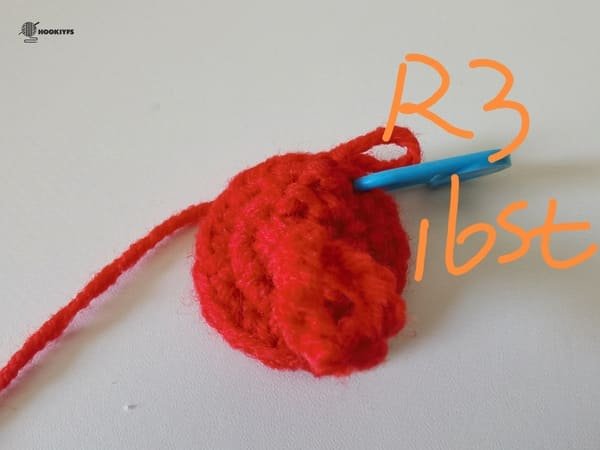
Conclude this round by performing a final tally of the stitches which should add up to 16 st.
Proceed by doing a slip stitch to finish off round 3.
R4
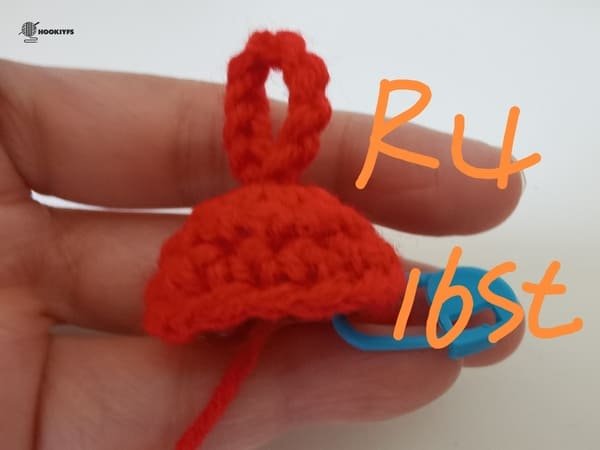
Crochet order:single crochet in each stitch ,need crochet 16 times.
After sl, we get 16 st for round 4.
R5
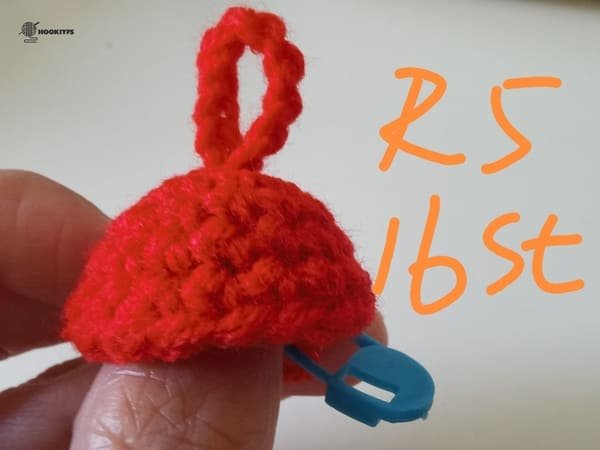
Same as round 4.
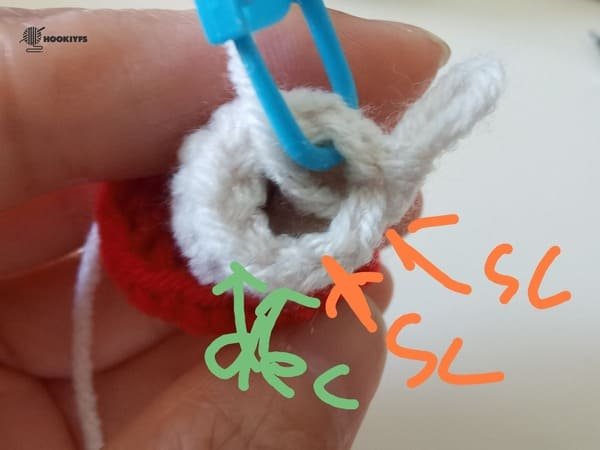
R6
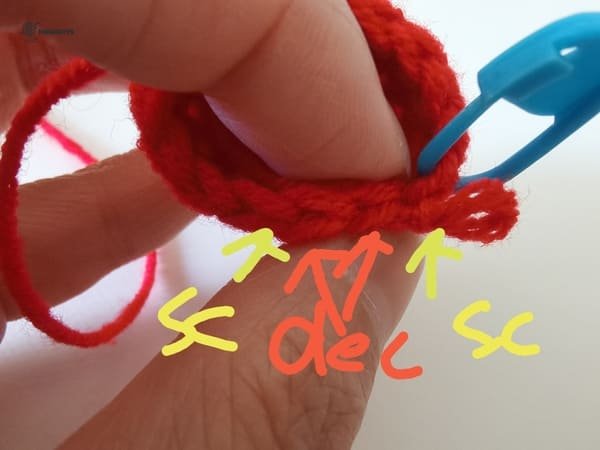
Crochet order: (sc, dec,sc ) repeat 4 times
Right before the last four stitches of this round, do sc, dec,sc once more.
Wan to learn invisible dec method, please click :Single Crochet Decrease -Three Method In More Details Slowly For Beginner | Video&Text&Picture
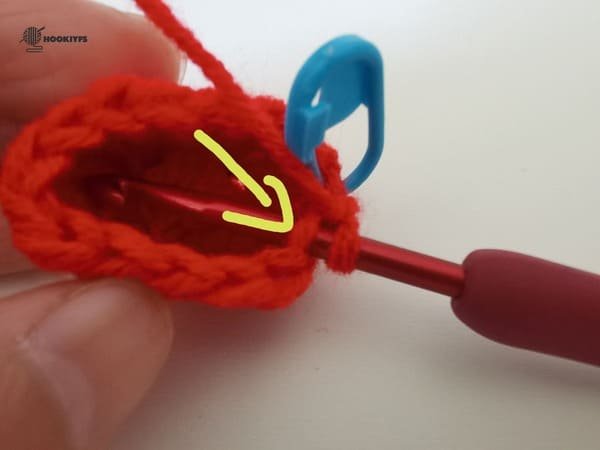
As shown in the picture, in the sixth round we use the method of hooking( blo= through back loops stitch only.)
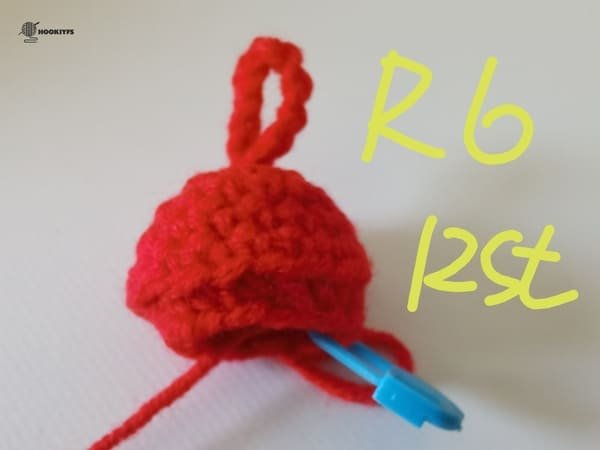
Conclude this round by performing a final tally of the stitches which should add up to 12 st.
Proceed by doing a slip stitch to finish off round 6.
R7
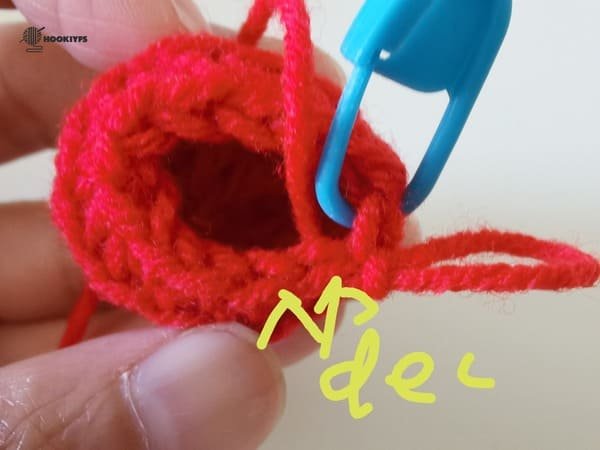
Crochet order:(dec) repeat 6 times
Right before the last two stitches of this round, do dec once more.
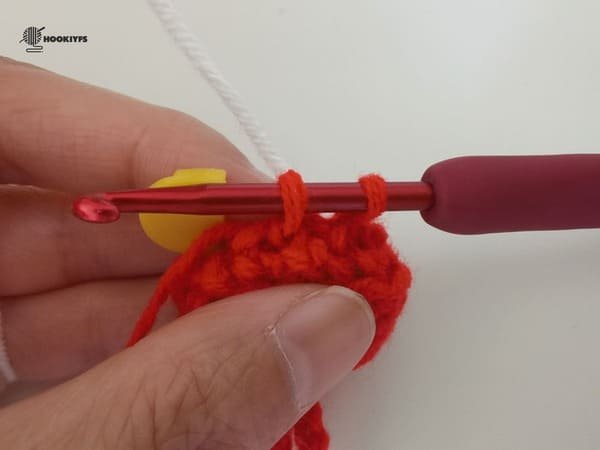
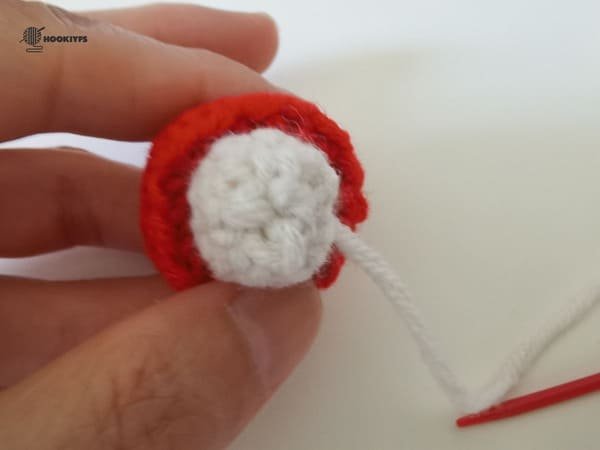
Before we finish the last stitch, change to rice white yarn and place it behind the two red loops.
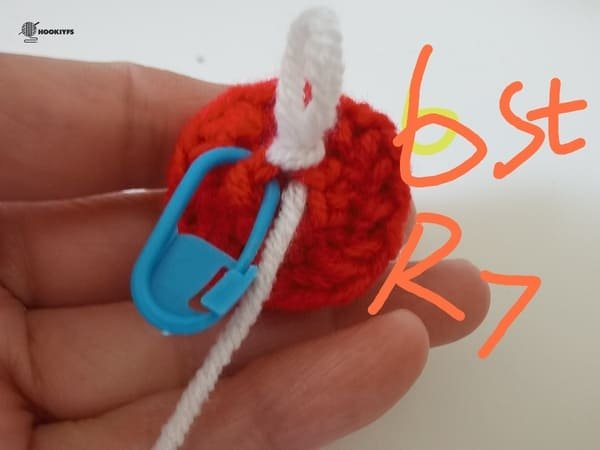
Yarn over, hook bring out the two red loops on the hook, then ,we get the rice white loop,then we finish to complete the rice white yarn .
After sl, we get 6 st for round 7.
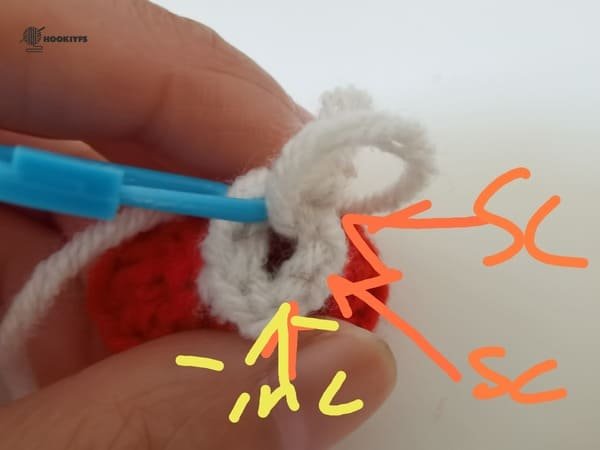
R8
Sorry, the picture was lost during the upload process.
Crochet order:single crochet in each stitch ,need crochet 6 times.
After sl, we get 6 st for round 8.
R9
Crochet order: (2sc, inc ) repeat 2 times
Right before the last three stitches of this round, do 2sc, inc once more.
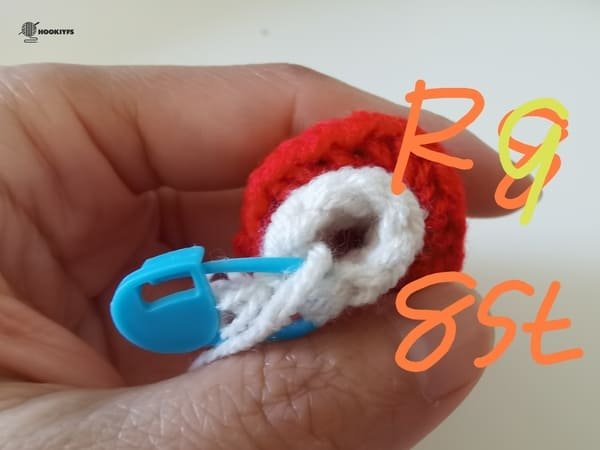
Conclude this round by performing a final tally of the stitches which should add up to 8 st.
Proceed by doing a slip stitch to finish off round 9.
View of round 9 on the hand.
R10
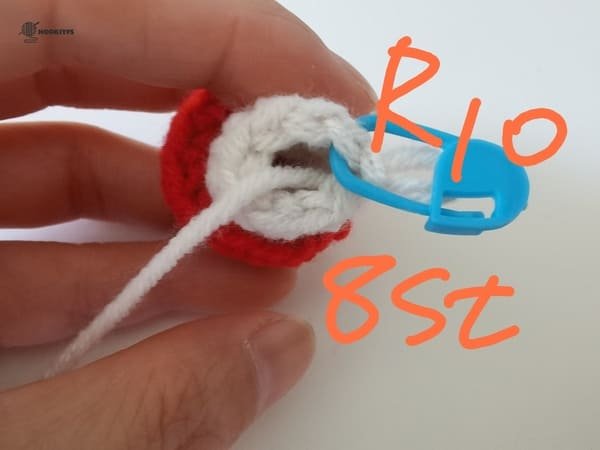
Crochet order:single crochet in each stitch ,need crochet 8 times.
After sl, we get 8 st for round 10.
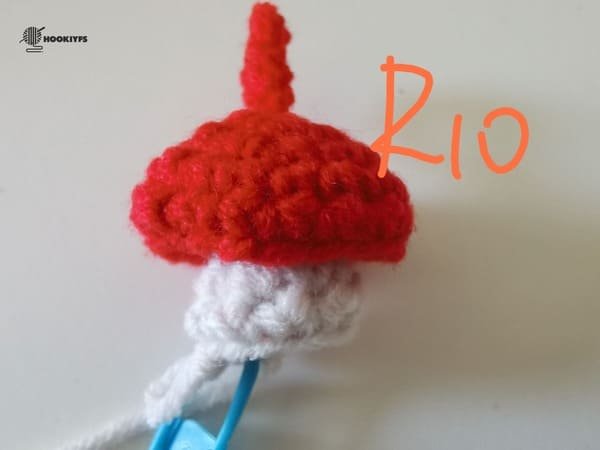
View of round 10 on the hand.
R11
Crochet order: (2sc, dec ) repeat 2 times
Right before the last four stitches of this round, do 2sc, dec once more.
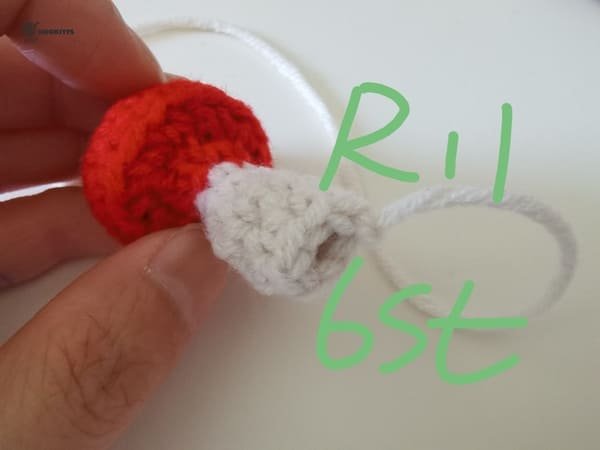
Conclude this round by performing a final tally of the stitches which should add up to 6 st.
Proceed by doing a slip stitch to finish off round 11.
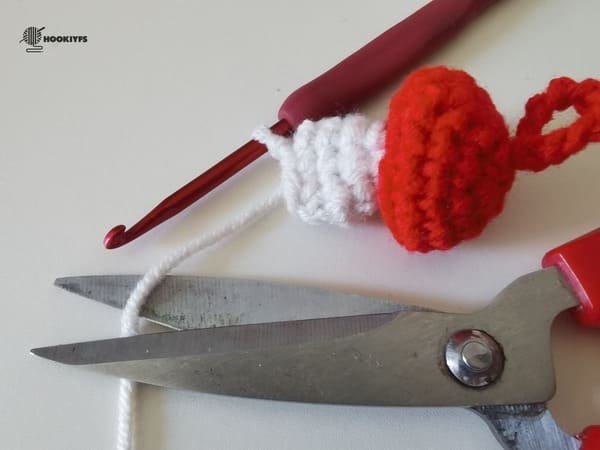
Leave 10 cm yarn end. and cut the yarn end.
Fiberfill
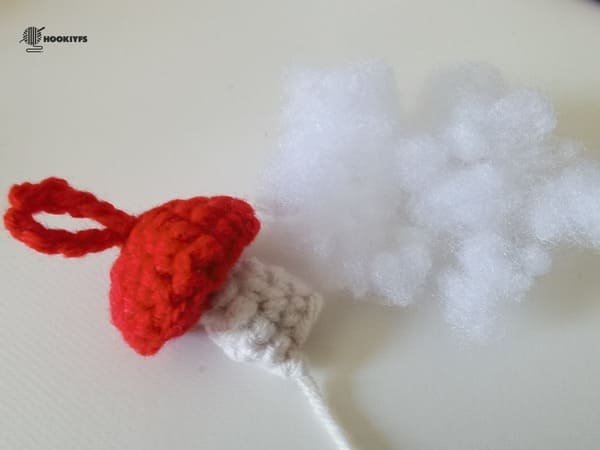
Put the fiberfill in the hole of bottom.
Only a small amount of fiberfill is needed. In my experience, if you fill it too much, the mushroom will look ugly.
After filling, we pass the yarn end through the yarn needle, using spacing out a stitch and picking a stitch with a yarn needle, and then pull the yarn end tight, we will receive a bottom without any gaps.
Use the yarn needle with rice white to sew the seed shape for muschroom.
The mushroom crochet pattern is completed.
This pattern is so mini for mushroom , special for small key chain and pendant.
Reference sources
1.Learn the most comprehensive guide for single crochet(sc)
Author:Sarah Stearns
Publication date: on June 15, 2021, updated:December 14, 2024
Title: How to single crochet (sc)for beginners
Summary as blow:
- Step-by-Step Single Crochet for Beginners
- Single Crochet into a Foundation Chain
- Single Crochet into another Row
- Single Crochet in the Round
- Increases and Decreases
- Working Single Crochet in Different Loops


