


Raffia Cross Pattern Underarm Bag Crochet |Step By Step Tutorial
Table of Contents
Raffia Cross Pattern Underarm Bag Crochet :If you’ve been on the hunt for a chic, eco-conscious handbag project, our raffia cross-pattern underarm bag crochet tutorial is the ideal choice. This guide will lead you through the entire crafting journey, provide useful hints for handling raffia yarn, and detail the cross-stitch technique that imparts the bag’s distinct texture. Whether you’re just starting out or you’ve been crocheting for years, you’ll find satisfaction in creating a fashionable, long-lasting underarm bag ready for daily use.
Why choose a raffia underarm bag?
Raffia yarn is gaining traction in contemporary crochet for its organic aesthetic, airy weight, and resilient body. Unlike cotton or wool, raffia maintains its shape beautifully, making it a superb choice for structured handbags. When paired with the cross-pattern stitch, the result is a piece that marries refinement with everyday utility.
What we appreciate about raffia bags
Resilience: Raffia is tightly fibred and retains its silhouette over time.
Planet-friendly: Sourced from palm waste, raffia is biodegradable and renewable.
Light and chic: The breezy fabric is a natural match for summer outfits.
Video of raffia cross pattern underarm bag crochet
“Participate in our guided workshop where we will crochet an elegant raffia underarm bag featuring a textured cross pattern.
We will meticulously demonstrate each phase: forming the cross-stitch surface, contoured bag silhouette, and refined handle integration.
Work alongside us to craft a distinctive, sustainable accessory that harmonizes contemporary design with conscientious materials.”
Base stitch for beginners
We’ve all been there! Here are some basic stitch we’ve learned along the way:
How To Crochet Magic Ring ? l Step-By-Step l Video & Text &Photo
Chain Stitch |Step By Step Guide| Text & Photo &Video
Single Crochet-You Want To Know The Most Detailed Information
Half Double Crochet In The Round-The Complete Guide
Double Crochet Stitches For Beginners
Material kit of raffia cross pattern underarm bag crochet
- 3.00 hook
- Raffia yarn
- Marker buckle
- Yarn needle
- Magnetic buckle
Dimensions: 24cm long, 6cm wide, 17cm high (32cm including handle)
Crochet time: Approximately 10 hours for beginner.
Tool(hook, yarn needle, marker buckle): https://amzn.to/3TXavWn
Raffia yarn:160g https://amzn.to/40C6A4Z
Magnetic Button for Sewing:https://amzn.to/4ofc8g6
Abbreviation for raffia cross pattern underarm bag crochet
- ch = Chain stitch
- sc = Single crochet
- sl =Slip stitch
- st(s) =Stitch(es)
- dc=Double crochet
- sk=Skip
- R=Round
- Xhdc=Crossed half double crochet
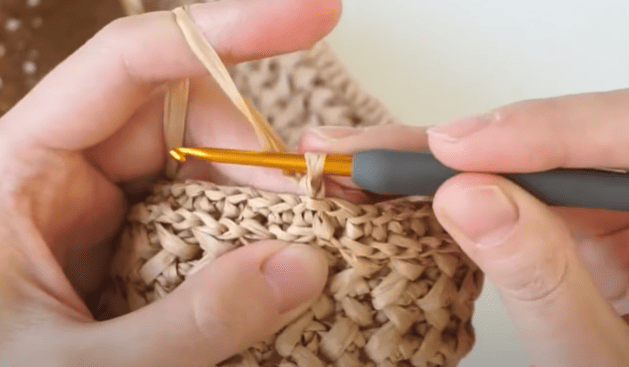
Crochet bottom for raffia cross pattern underarm bag crochet
| Round | Instruction (short form) | Total Stitches |
|---|---|---|
| R1 | sc, 38sc, 3sc, 38sc, 2sc | 82 |
| R2 | inc, 38sc, inc×3, 38sc, inc×2 | 88 |
| R3 | (sc, inc), 38sc, (sc, inc)×3, 38sc, (sc, inc)×2 | 94 |
| R4 | (sc, inc, sc), 38sc, (sc, inc, sc)×3, 38sc, (sc, inc, sc)×2 | 100 |
| R5 | (3sc, inc), 38sc, (3sc, inc)×3, 38sc, (3sc, inc)×2 | 106 |
| R6 | (2sc, inc, 2sc), 38sc, (2sc, inc, 2sc)×3, 38sc, (2sc, inc, 2sc)×2 | 112 |
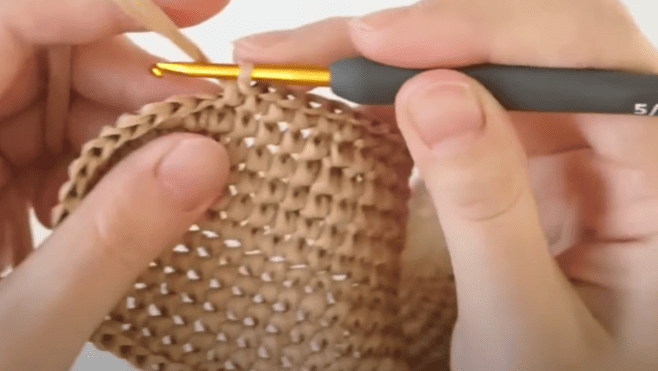
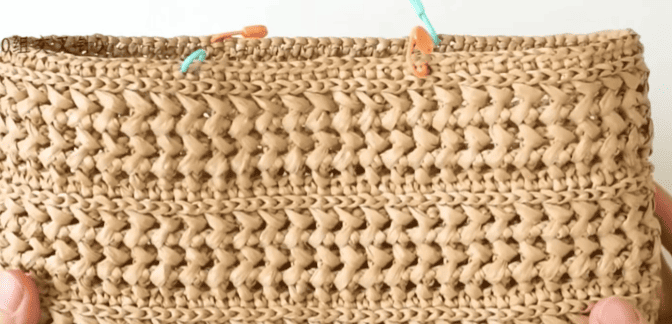
Crochet body for raffia cross pattern underarm bag crochet
| Round | Instruction | Stitch Count / Sets |
|---|---|---|
| R1 | Ch; work 112 sc in back loop of chain | 112 sc |
| R2 | Ch 2; 56 sets Xhdc | 56 sets |
| R3 | Ch 2, flip; 56 sets Xhdc | 56 sets |
| R4 | Ch 2, flip; 56 sets Xhdc | 56 sets |
| R5 | Ch 2, flip; 56 sets Xhdc | 56 sets |
| R6 | Ch 2, flip; 56 sets Xhdc | 56 sets |
| R7 | Ch; work 112 sc in back loop of chain (repeat R1) | 112 sc |
| R8 | Ch 2; 56 sets Xhdc | 56 sets |
| R9 | Ch 2, flip; 56 sets Xhdc | 56 sets |
| R10 | Ch 2, flip; 56 sets Xhdc | 56 sets |
| R11 | Ch 2, flip; 56 sets Xhdc | 56 sets |
| R12 | Ch 2, flip; 56 sets Xhdc | 56 sets |
| R13 | Ch; work 112 sc in back loop of chain (repeat R1) | 112 sc |
| R14 | Ch 2; 56 sets Xhdc | 56 sets |
| R15 | Ch 2, flip; 56 sets Xhdc | 56 sets |
| R16 | Ch 2, flip; 56 sets Xhdc | 56 sets |
| R17 | Ch 2, flip; 56 sets Xhdc | 56 sets |
| R18 | Ch 2, flip; 56 sets Xhdc | 56 sets |
| R19 | Ch; work 112 sc in back loop of chain (repeat R1) | 112 sc |
| R20 | Ch 2; 56 sets Xhdc | 56 sets |
| R21 | Ch 2, flip; 56 sets Xhdc | 56 sets |
| R22 | Ch 2, flip; 56 sets Xhdc | 56 sets |
| R23 | Ch 2, flip; 56 sets Xhdc | 56 sets |
| R24 | Ch 2, flip; 56 sets Xhdc | 56 sets |
| R25 | Ch; work 112 sc in back loop of chain (repeat R1) | 112 sc |
Crochet handle
Handle Position
Center of the Bag Opening:
Reserve a total of 20 stitches
Affix four stitch markers, situating two at each terminal stitch of the 20-stitch span, thereby delineating the future handle aperture.
Both sides of handle
Maintain an uninterrupted stretch of 36 stitches on either side of handle.
Handle crochet table
| Round | Instruction | Stitch Count / Sets |
|---|---|---|
| R1 | Ch 3; 16 sets Xhdc, dc | 16 sets Xhdc + 1 dc |
| R2 | Ch 3, flip; 14 sets Xhdc, dc | 14 sets Xhdc + 1 dc |
| R3 | Ch 3, flip; 12 sets Xhdc, dc | 12 sets Xhdc + 1 dc |
| R4 | Ch 3, flip; 10 sets Xhdc, dc | 10 sets Xhdc + 1 dc |
| R5 | Ch 3, flip; 8 sets Xhdc, dc | 8 sets Xhdc + 1 dc |
| R6 | Ch 3, flip; 6 sets Xhdc, dc | 6 sets Xhdc + 1 dc |
| R7 | Ch 3, flip; 4 sets Xhdc, dc | 4 sets Xhdc + 1 dc |
📍 Important: Employ the identical crochet technique to create the second segment of the handle, thereby producing a pair of symmetrical handle components.
Sew handle
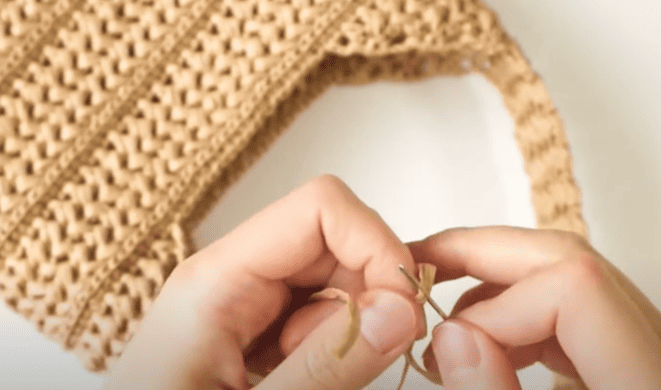
- Maintain a spacing of four stitches on either side of the handle region.
- Use a yarn needle , joining stitch to stitch, and sew them together in pairs.
- Complete the process by firmly concealing the loose yarn ends within the fabric.
Install magnetic buckle

Marking the center of the opening
We laid the bag flat and identified the midpoint of the opening, making identical marks on both gusset edges.
Determining the height
The snaps were positioned 1.5 to 2 cm (⅝ to ¾ inch) below the top raw edge, ensuring constant spacing down each side of the final piece.
Assembly
We used a dedicated tool to seat the magnetic snaps from the bag’s inner making certain each prong penetrated cleanly and held evenly.
Testing the snaps
The snaps were exercised through a full cycle of opening and closing. Excessive resistance prompted a cautious downward elongation of the slot, followed by re-fitting to restore secure alignment.
Final check
The snaps were once again verified for axial alignment and flush seating, confirming that the opening retained a level and smooth contour, free of distortion.
Reference sources
1.Learn the most comprehensive guide for single crochet(sc)
Author:Sarah Stearns
Publication date: on June 15, 2021, updated:December 14, 2024
Title: How to single crochet (sc)for beginners
Summary as blow:
- Step-by-Step Single Crochet for Beginners
- Single Crochet into a Foundation Chain
- Single Crochet into another Row
- Single Crochet in the Round
- Increases and Decreases
- Working Single Crochet in Different Loops


