


Small Crochet Crossbody Bag: Complete Guide, Patterns, & Styling Tips
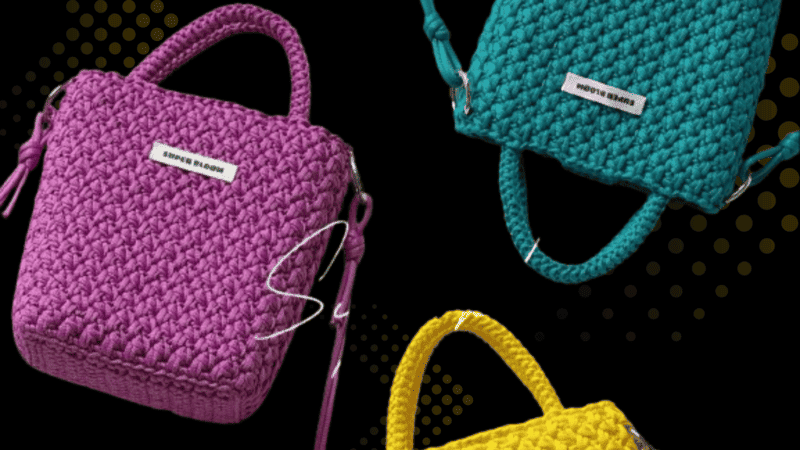
Table of Contents
Small crochet crossbody bag: hand crowing handbags forever radiate a genteel beauty, yet the petite crochet crossbody is the one most coveted.
Compressed yet capacious, it is feathery, elegant, serviceable, and unresentfully slung against the shoulder; what more does one require when only crucial valuables merit company and the silhouette is to remain unscuffed? Be it a dapper errand to the greengrocer, a conspiratorial espresso rendezvous, or a leisurely sweep through a sun-soaked street fête, the style itself whispers of artistry and sunlit afternoons.
This concise compendium will illuminate the petite crochet crossbody bag: the magnetism, the measures for artisans-at-home, recommended fibres and stitches.
Why choose a small crochet crossbody bag?
When selecting an accessory, an effective synthesis of utility and aesthetic appeal elevates any outfit. A petite crochet crossbody satisfies both criteria with subtle elegance:
Liberated Mobility ‒ Suspended crosswise across the torso, the strap maintains balance while releasing both arms for natural activity.
Featherweight Design ‒ Tailored for the essentials—mobile device, keys, slender wallet, and a single lipstick—each item is effortlessly at hand.
Divinely Distinct ‒ Being crafted and closed in our very stitching, the bag is a captured echo of personal color and imaginative flair.
Sustainable Choice ‒ Electing organic or recycled yarns, we keep footfall light, diverting materials from landfills and wistfully declining throwaway fashion.
Contemporary Appeal ‒ Distinctive enough for sandy strolls and cosmopolitan rooftop evenings, crochet bags command attention across the globe.
Base stitch for beginners
We’ve all been there! Here are some basic stitch we’ve learned along the way:
How To Crochet Magic Ring ? l Step-By-Step l Video & Text &Photo
Chain Stitch |Step By Step Guide| Text & Photo &Video
Single Crochet-You Want To Know The Most Detailed Information
Half Double Crochet In The Round-The Complete Guide
Double Crochet Stitches For Beginners
Material kit for small crochet crossbody bag
💙 hook & yarn needle & marker buckle : https://amzn.to/3TXavWn
💙 belt yarn: https://amzn.to/427jo3X
💙 magnetic buckle: https://amzn.to/3JKzScc
💙 spring clip :https://amzn.to/45I5cAH
Abbreviation for small crochet crossbody bag
- ch = Chain stitch
- sc = Single crochet
- sl =Slip stitch
- st(s) =Stitch(es)
- R=Round
- sc2tog= single crochet 2 together
Video for small crochet crossbody bag
In the accompanying video, we shall lead you through a methodical progression to construct a chic, compact crocheted crossbody bag.
We commence at the bag’s foundation, advancing through the main body, and conclude with the strap assembly.
Along the way, we will evaluate appropriate yarn selections, review uncomplicated stitch techniques, and share practical advice for ensuring both longevity and aesthetic appeal.
Crochet bottom

| Round/Row | Instructions | Total Stitches |
|---|---|---|
| Base | 9 ch + 1 ch turning | – |
| R1 | 9 sc in each purl stitch | 9 |
| R2–R18 | ch, flip over, 9 sc in each chain stitch | 9 |
| R3 (shaping round) | ch, 60 sc around; take note: 3 sc in each corner | 60 |
Crochet body

| Row | Instructions | Total Stitches (approx.) |
|---|---|---|
| R1 | Ch, 60 sc in back of chain stitch | 60 |
| R2 | Ch, (sc2tog, ch) repeat to end | |
| R3 – R27 | Ch, flip over, (sc2tog, ch) repeat to end | |
| R27 (end) | Invisible slip stitch to the last stitch | – |
Crochet handle

| Step | Instructions |
|---|---|
| 1 | Leave a yarn end 2 times the length of the hook before starting |
| 2 | Using 2 chains as starting chain, crochet the handle with crab stitch (reverse single crochet) |
| 3 | Crochet the handle to a length of approximately 25 cm, and make two pieces |
| 4 | After finishing, leave a yarn end 2 times the hook length, then cut the yarn and pull through, keeping the tail for sewing |
Crochet small piece

| Row | Instructions | Total Stitches |
|---|---|---|
| Base | Ch 5 + 1 turning ch | – |
| R1 | 5 sc in back of chain stitch (purl stitch) | 5 |
| R2 – R5 | Ch, flip over, 5 sc (chain stitch) | 5 |
Install magnetic buckle on the small piece

Step 1: Locate the midpoint of the third row of your small crocheted piece; this position will accommodate the magnetic snap.
Step 2: Position the male and female halves of the snap against the fabric, and slide the prongs through the stitches. Employ fine-tipped tweezers to press the prongs inward, ensuring a tidy and secure fit on the reverse side.
Sew the small piece on the body of bag

Confirm the sew position
| Step | Instruction | Notes / Details |
|---|---|---|
| 1 | From the bottom of the bag, along the slip stitch line up to the bag opening, place the first marker. | This is Marker 1 |
| 2 | Count 20 stitches to the right from Marker 1, place the second marker. | Marker 2 |
| 3 | Count 10 stitches to the right from Marker 2, place the third marker. | Marker 3 |
| 4 | Count 20 stitches to the right from Marker 3, place the fourth marker. | Marker 4 |
| 5 | Verify stitch counts: between Marker 1 & 2 = 19 stitches, between Marker 3 & 4 = 19 stitches | Ensures symmetry |
| 6 | From Marker 1 & 2, Marker 3&4 count inward 8 stitches, then place 4 markers at each position | These are the positions where the small crocheted piece will be sewn |
Sew small piece
Step 1: Position the small piece within the bag body, resting between the two placed markers; verify that it coincides with exactly five bag stitches across its opening edge.
Step 2: Align the bag with its interior facing us, and whip-stitch the motif into place, anchoring one motif stitch to one bag stitch to establish clean, uniform tension.
Step 3: Repeat the procedure with the second piece, mirroring the first small piece attachment.
Step 4: When both pieces are secured, trim the working yarn, then weave the ends into the bag lining to conceal them.
Sew the handle on the body of bag

Confirm the handle position
| Step | Instruction | Notes / Details |
|---|---|---|
| 1 | From the bottom of the bag, along the slip stitch line up to the bag opening, place the first marker. | Marker 1 |
| 2 | Count 20 stitches to the right from Marker 1, place the second marker. | Marker 2 |
| 3 | Count 10 stitches to the right from Marker 2, place the third marker. | Marker 3 |
| 4 | Count 20 stitches to the right from Marker 3, place the fourth marker. | Marker 4 |
| 5 | From Marker 1 & 2, and from Marker 3 & 4, count 2 stitches inward from each marker and place a marker | These positions mark where the handles (small crocheted pieces) will be sewn |
Sew handle
Step 1: The handle is sewn to the interior of the bag body to achieve a cleaner aesthetic.
Step 2: A reinforced zigzag stitch is applied in several repetitions to enhance durability.
Step 3: Completion of stitching is signaled by securing a firm knot on the reverse side; the thread ends are then concealed within the handle to maintain a tidy finish.
Strap

Step 1: We take the 1.5-meter strap and fold it in half to find its midpoint.
Step 2: The spring clip is then passed through the doubled material; guiding the yarn around the index finger, we form a slip knot to secure the tail.
Step 3: The completed assembly is finished by clicking the spring clip onto the two raised pattern positioned on either side of the bag’s body.
Cloth label
The cloth label may be secured at the designated location by employing either a yarn needle or a hot-glue application.
Reference sources
1.Learn the most comprehensive guide for single crochet(sc)
Author:Sarah Stearns
Publication date: on June 15, 2021, updated:December 14, 2024
Title: How to single crochet (sc)for beginners
Summary as blow:
- Step-by-Step Single Crochet for Beginners
- Single Crochet into a Foundation Chain
- Single Crochet into another Row
- Single Crochet in the Round
- Increases and Decreases
- Working Single Crochet in Different Loops


