


Turtle Crochet Pattern The Most Step By Step Explanation
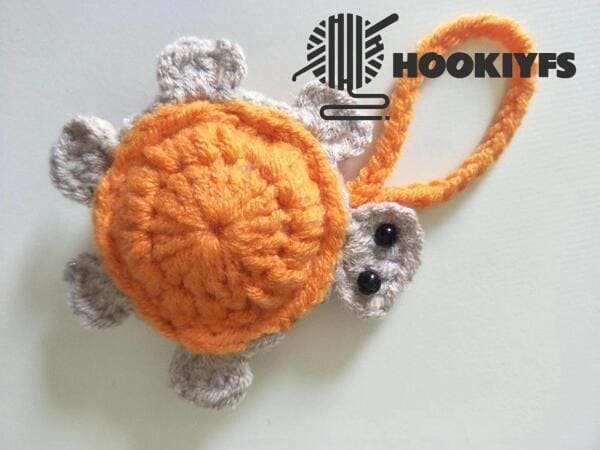
Table of Contents for turtle crochet
Material kit of turtle crochet
- Hook: 3.0mm
- Stuffing: (polyester fiberfill)
- Yarn(light brown&orange)
- Safety eyes
- Yarn needle
- Marker
List of necessary tools
- Scissors
- Hot melt glue or glue
Abbreviation for turtle crochet
These are the required abbreviations for turtle crochet.
- ch = Chain stitch
- sl =Slip stitch
- inc = Increase (usually 2 stitches in the same stitch)
- st(s) =Stitch(es)
- mc =Magic circle (or magic ring
- dc=double crochet
- tr=triple crochet
Best selling products
-

Raffia Cross Pattern Basket Handbag Kit
$19.99 -

Hexagonal Bucket Bag Kit
$29.99 -

Raffia Handbag Kit
$29.99 -

Hammock Bag Kit
$29.99 -

Wheat Bucket Bag Kit
$19.99
Buy turtle crochet kit
A turtle crochet kit! all the materials you need come with the kit: yarn, safety eyes, stuffing, and a detailed pattern. You can unwind while working on our easy, beginner-friendly projects.
With each and every stitch, you will witness your very own turtle come to live.
Each kit comes step by step instructions which makes it stress free. We can’t wait to see your creations! Turtle Crochet Kit
Tips

For beginners, they don’t know what a stitch looks like. As shown in the picture, a V-shape represents each stitch.
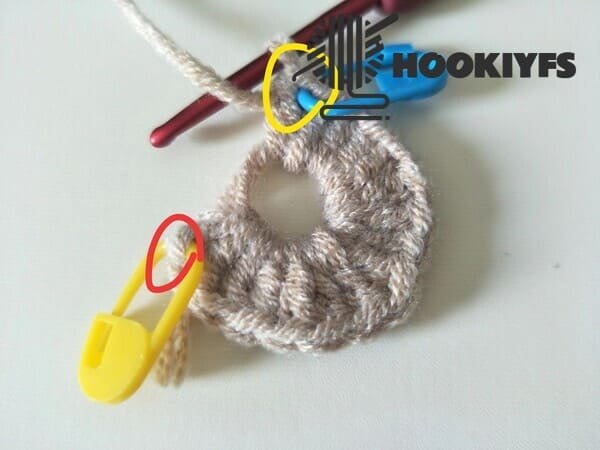
When you finish the first stitch, fasten the yellow marking button, and when you finish the last stitch, fasten the blue marking button.
Crochet the body (use light brown yarn )for turtle crochet
- R1: 16 dc into mc(16)
- R2: inc * 16 (32)
- R3:(5ch,4tr,4ch,sl),[ 5sl,(4ch,2dc,3ch,sl)]*5,5sl.
R1
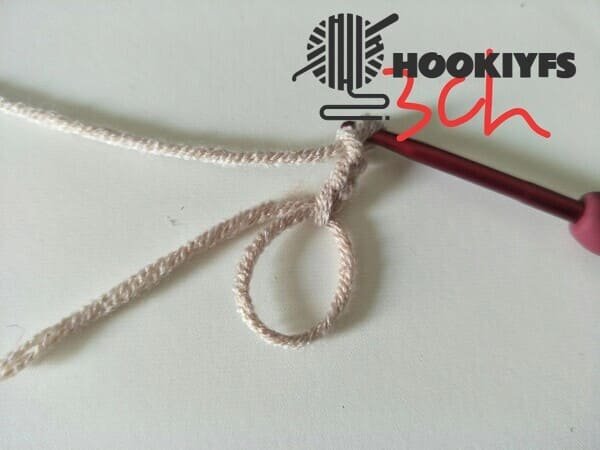
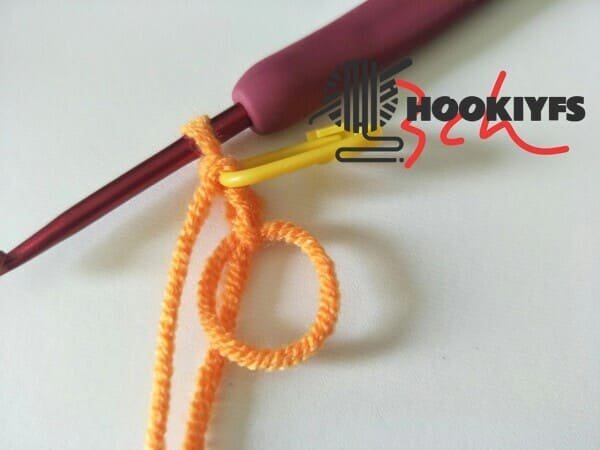
3 ch in to the magic ring ,which equivalent to the first double crochet.
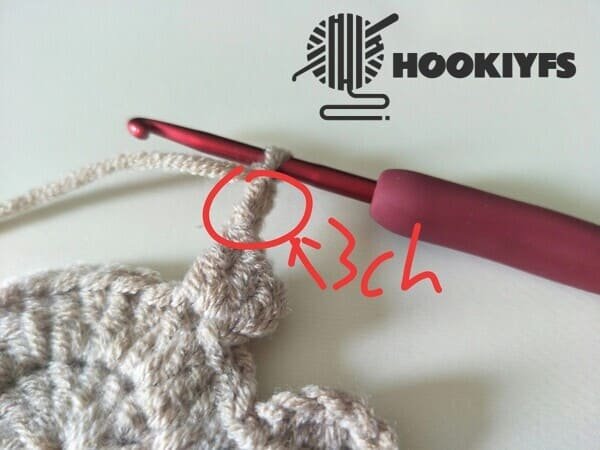
The third chain stitch buckle is marked with a yellow button.
Want to learn mc, please click:How To Crochet Magic Ring ? l Step-By-Step l Video & Text &Photo
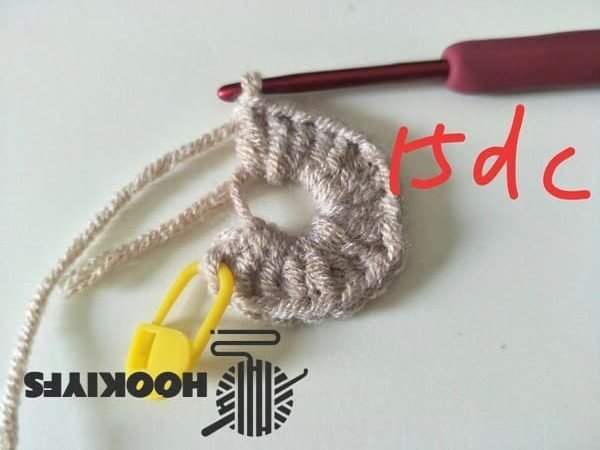
Crochet 15 double crochet(dc) is completed.
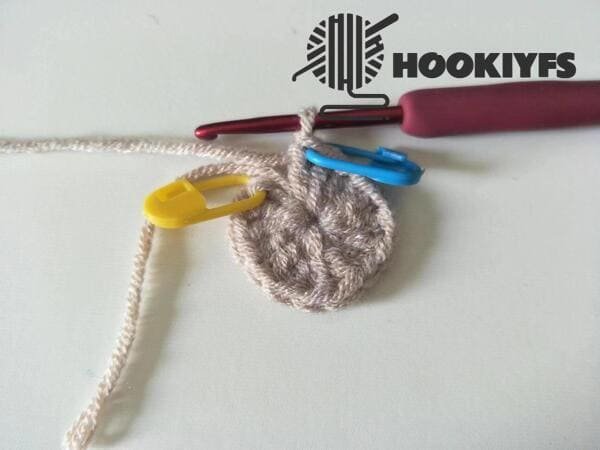
Use the strength of your left index finger and thumb to pull to the left, so that the center of the magic ring gradually becomes smaller, and finally reaches the O gap.
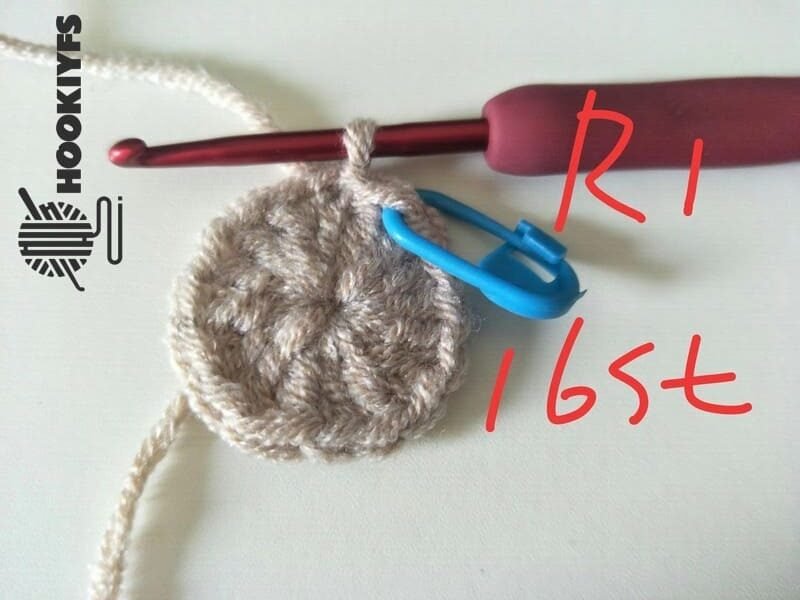
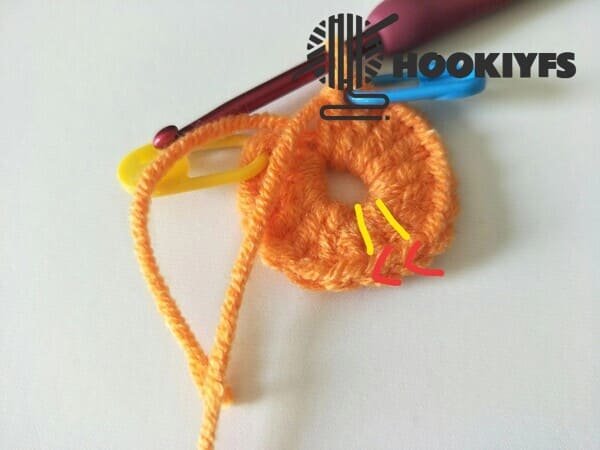
After slip stitch(sl),we get 16 st for R1.
R2
Also crochet 3 ch for R2 firstly, which equivalent to the first double crochet.
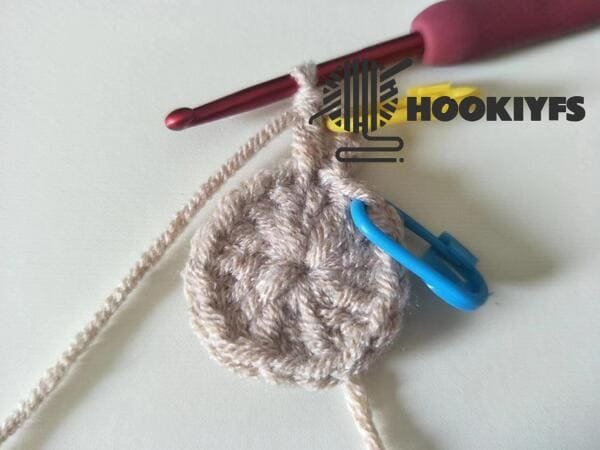
Crochet another double crochet in the same stitch. the picture shows the finished look.
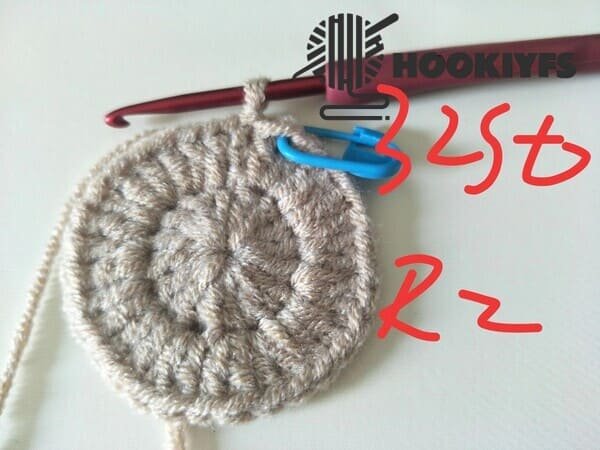
In the next 14 stitches, crochet two double crochet stitches in each stitch.
After sl, we get 32 st for R2.
We must count the number of stitches after completing this row to ensure that it is correct before we can proceed to the next row of crochet.
If it is wrong, find the reason and correct it.
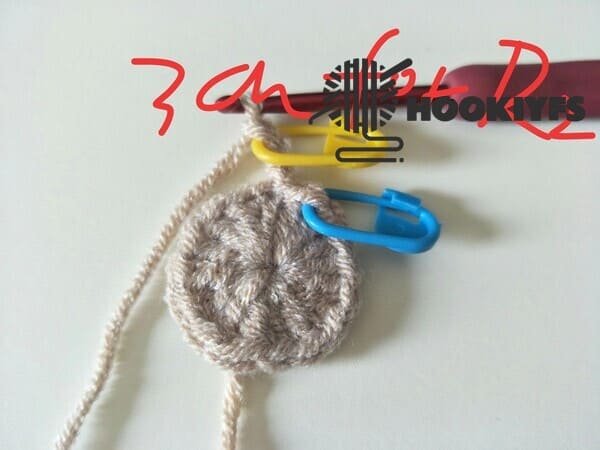
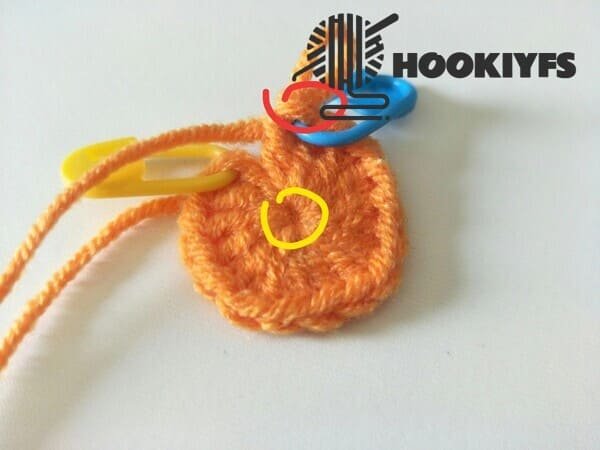
R3
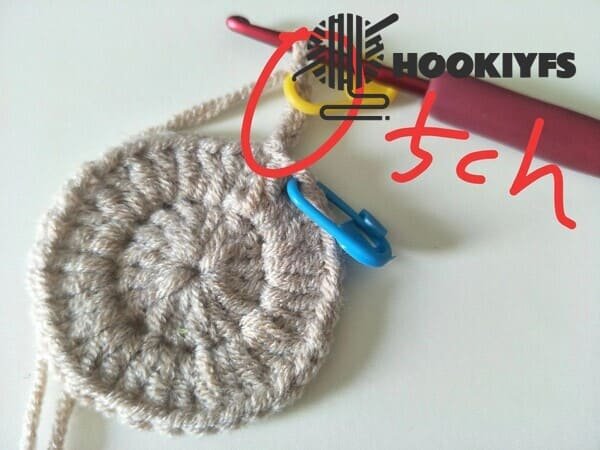
Add 5 ch for R3 firstly.
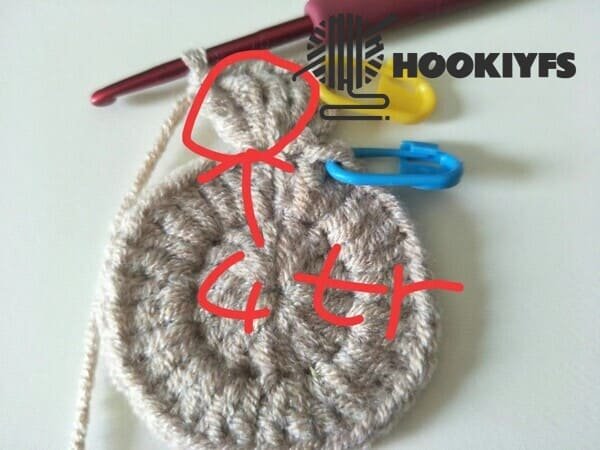
We need crochet head of turtle-crochet 4 triple crochet (tr) in the same stitch.
The difference between the triple crochet (tr) and the double crochet(dc) is that the tr is wound twice, while the dc is wound once.
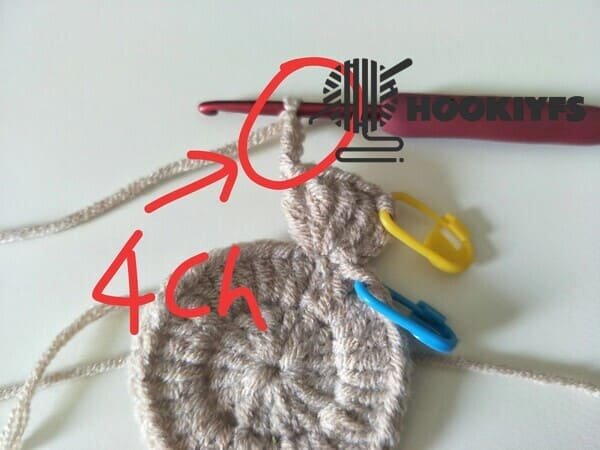
Crochet 4 chain stitch (ch)again.
Slip stitch in the same stitch.
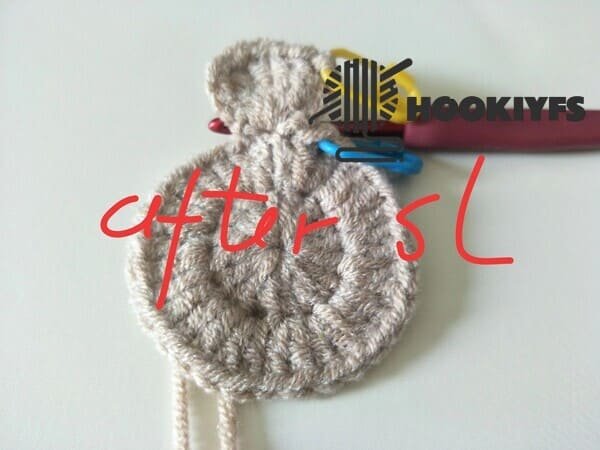
The fabric effect after the head is completed.
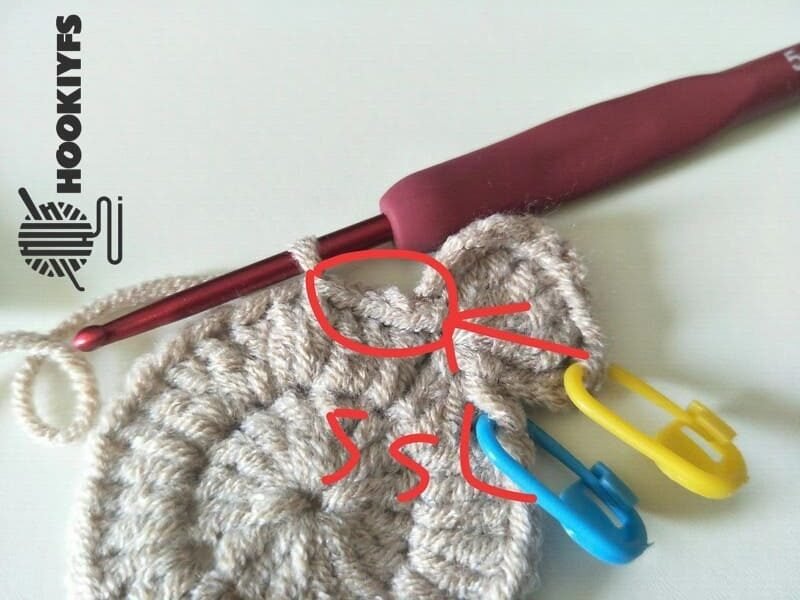
Crochet 5 slip stitches In the next 5 stitches.
After the fifth slip stitch, crochet 4 chain stitches again.
From here, we will begin crocheting the first foot shape.
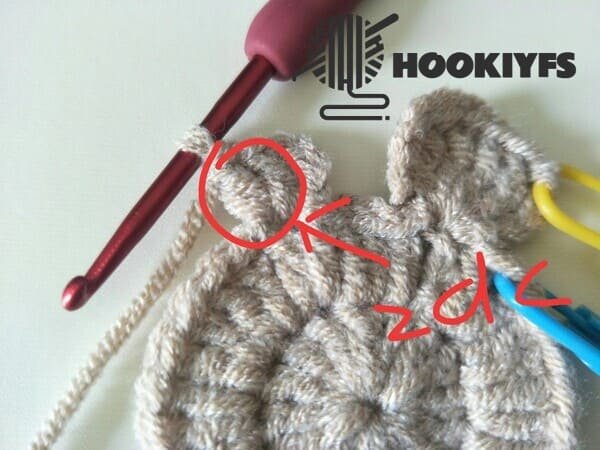
In the same stitch, we need to crochet 2 double stitch again.
The red circle in the picture shows the shape of the 2 dc after completion.
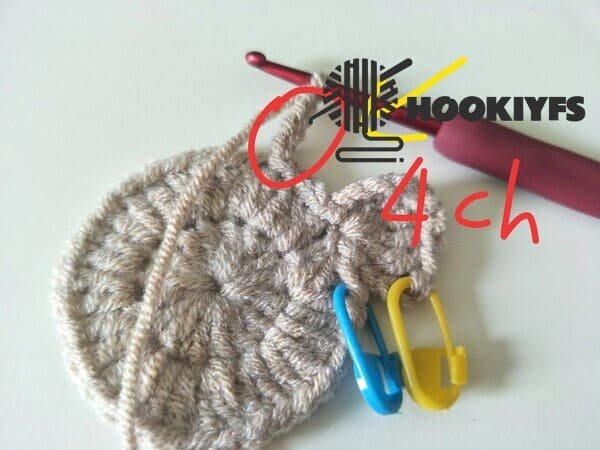
Crochet 3 chain stitch again.
Find the same stitch (i.e. the position of crocheting 2 dc) to slip stitch.
This way we have completed the pattern of the first foot of turtle.
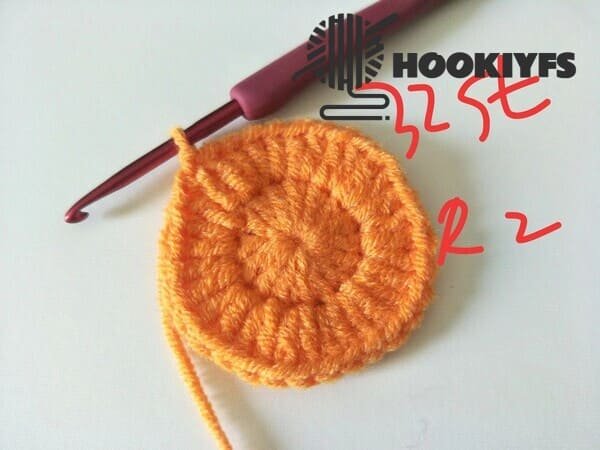
For next crochet order :[ 5sl,(4ch,2dc,3ch,sl)] repeat 4 times,5sl.
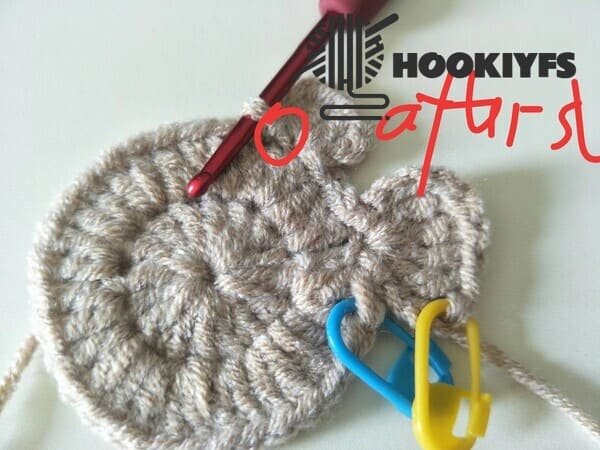
Then we get the pattern of body of turtle.
This is the picture of the last stitch of the crochet, a loop in the yellow box.
Place the hook on the back of the fabric and pull out the front loop. then crochet 1 single crochet again (secure it ) and cut the yarn end.
The picture shows the finished effect.
Crochet the back (use orange yarn )for turtle crochet
R1: 16 dc into mc(16)
R2: inc * 16 (32)
We need to crochet two pieces.
3 ch in to the magic ring,which equivalent to the first double crochet.
The third chain stitch buckle is marked with a yellow button.
15 double stitches(dc) in to the magic ring.
Employing the magic loop technique provides clean, professional results when beginning to crochet in a circular fashion.
Magic loop enables the user to pull the magic loop tight without forming any gaps.
This is vital while making amigurumi dolls or any circular shape which needs a firm solid center.
In the end, we yarn’s tail to close the loop. this method is efficient and simple while also adding a delicate touch to the overall look of the work.
First, crohet 3 chain stitches, then crochet a double stitch in the same stitch. In the next 15 stitches, crochet 2 dc again.
After sl , we get 32 st for R2
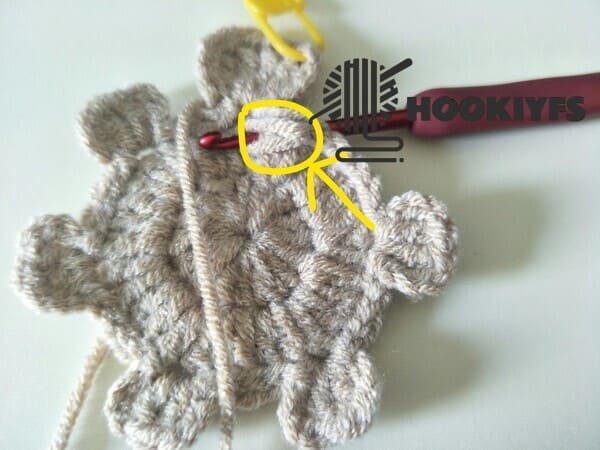
Sewing the orange back on the body of turtle crochet
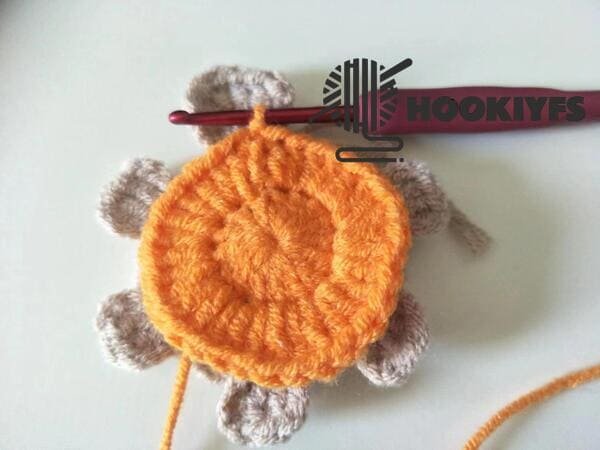
Without cutting the yarn end, I put the orange fabric on top of the light brown fabric.
Use the slip stitch (sl) method to sew the two fabrics together.
If this is your first time sewing, don’t be nervous and sew slowly.
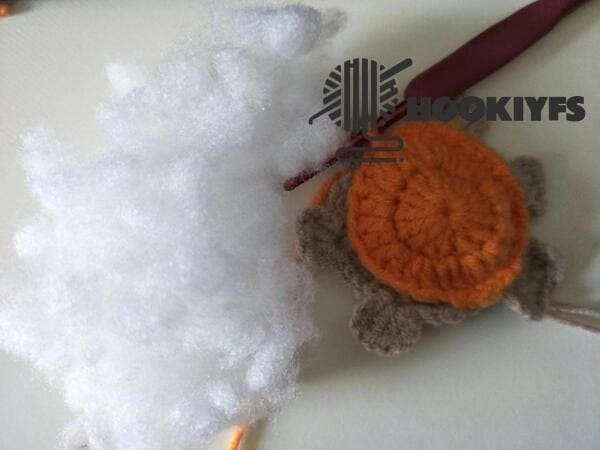
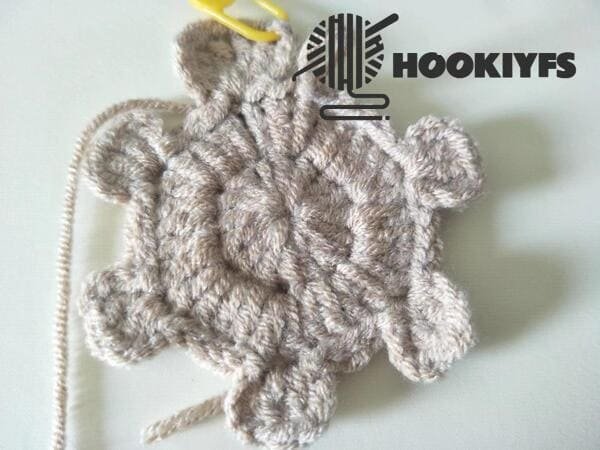
When there are still 6 stitches left, we fill the holes with fiberfill.
Add the filling gradually, and the final effect is to make the turtle more three-dimensional.
Crochet hand carrying for turtle crochet
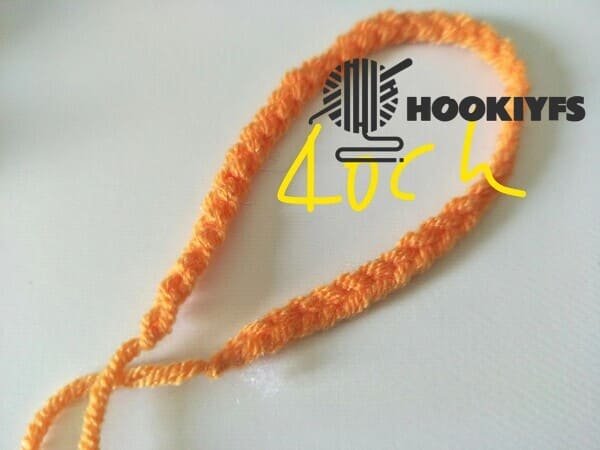
Crochet 40 chain stitch (ch) for hand carrying.
In this way, we can carry it by hand or use it as a pendant of bag.
Sewing the another orange back on the body for turtle crochet
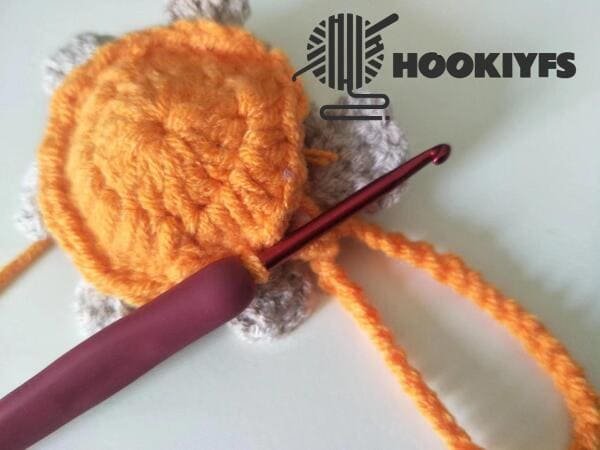
Sew the other orange piece to the other side of turtle body again.
When there are still 6 stitches left, we put hand carrying in the hole. then we crochet 6 sl again.
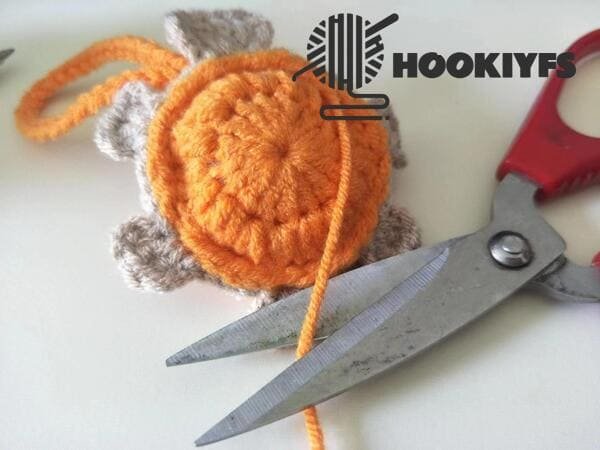
Cut yarn end and use hook to bring out the yarn end.
We can crochet a cute little orange turtle, full of charm and personality.
First use a magic ring and weave a round shell with bright orange yarn to make it look lively and eye-catching.
With 5 tiny feet, sewn eyes and a gentle smile on its face, our little turtle will soon come to life.
Reference sources
1.Learn the most comprehensive guide for single crochet(sc)
Author:Sarah Stearns
Publication date: on June 15, 2021, updated:December 14, 2024
Title: How to single crochet (sc)for beginners
Summary as blow:
- Step-by-Step Single Crochet for Beginners
- Single Crochet into a Foundation Chain
- Single Crochet into another Row
- Single Crochet in the Round
- Increases and Decreases
- Working Single Crochet in Different Loops


