


Circular Handbag Crochet Tutorial: Make Your Own Stylish Round Bag
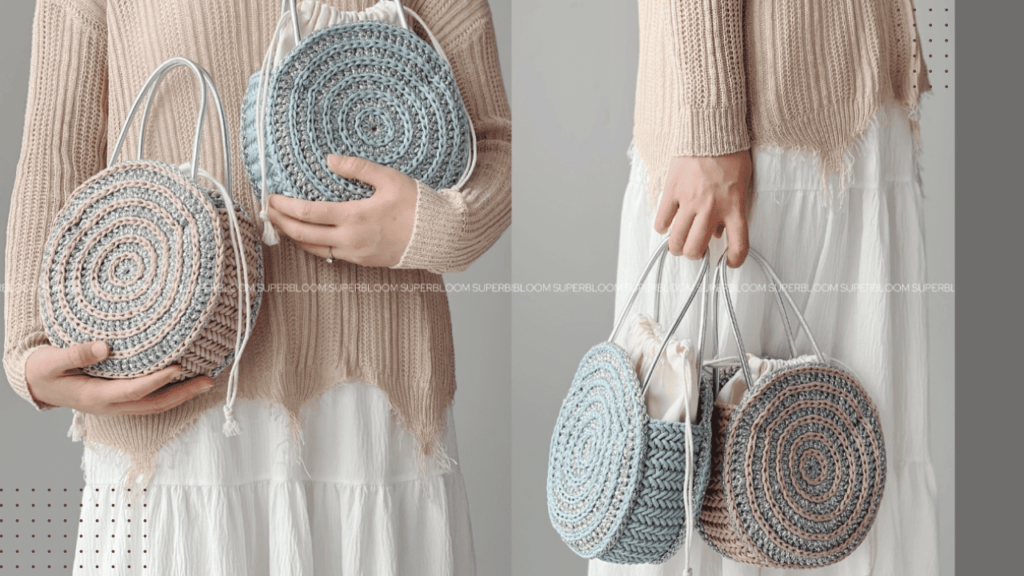
Table of Contents
Circular handbag crochet tutorial:circular silhouettes lead the charge. Departing from the classic boxy forms most closets contain, a round bag introduces a gently sculpted profile that feels fresher than ever. It traverses occasion and season with ease: from sun-washed boardwalk strolls to evening gallery hops, a single circular piece can refine shorts and a tank or elevate a monochrome dress with subtle sophistication.
This tutorial paves the way to crocheting that winning round handbag, step by patient step. If you’ve never held a hook before, fear not; I’ve intentionally kept each instruction light and un-intimidating. When the final yarn tail is woven in, you’ll possess a covetable accessory and the gratifying assurance that you can shape more—gifts for friends, market stock, or personal treasure troves—entirely by hand.
What makes the circular bag a worthy project?
- Trendy yet timeless: Its charming silhouette feels a without shouting for attention, landing it on the short list of accessories poised to stick.
- Beginner-friendly: The expanding rounds and fluent single crochets keep the mental math light; no intricate pattern reading or specialty stitches are required. With a handful of yarn, a hook, and a sprinkle of patience, we’re set to turn that trend into a personal creation.
- Customizable: We have the flexibility to choose from an array of yarn colors, textures, and strap styles, allowing for a truly personalized creation.
Base stitch for beginners
We’ve all been there! Here are some basic stitch we’ve learned along the way:
How To Crochet Magic Ring ? l Step-By-Step l Video & Text &Photo
Chain Stitch |Step By Step Guide| Text & Photo &Video
Single Crochet-You Want To Know The Most Detailed Information
Half Double Crochet In The Round-The Complete Guide
Double Crochet Stitches For Beginners
Video of circular handbag crochet tutorial
This instructional video presents a comprehensive, step-by-step demonstration for crocheting a fashionable circular handbag, guiding viewers from the initial foundation to the completed accessory.
We will begin by creating the circular body, proceed to extend the vertical sides of the bag, and finally unite both panels to complete the handbag structure.
Additional segments present methods for incorporating a durable strap and applying decorative finishing details, ensuring the final piece is both resilient and attractive.
Designed to accommodate both novices and seasoned crocheters, the tutorial emphasizes clarity and accessibility throughout.
Please prepare your preferred yarn and crochet hook as we embark upon crafting a contemporary circular bag, an ideal companion for daily use or a thoughtful, handcrafted gift.
Material kit for circular handbag crochet tutorial
💙4.00 mm hook/6.00 mm hook & yarn needle & marker buckle : https://amzn.to/3TXavWn
💙4.00 mm silver yarn : you can look at the same material.
💙3.00 mm yards flat polyester :https://amzn.to/47uQWfU
Strap and lining bag
Abbreviation for circular handbag crochet tutorial
- ch = Chain stitch
- sc = Single crochet
- sl =Slip stitch
- st(s) =Stitch(es)
- R=Round
- dc=Double crochet
- FBS=Fish bone stitch
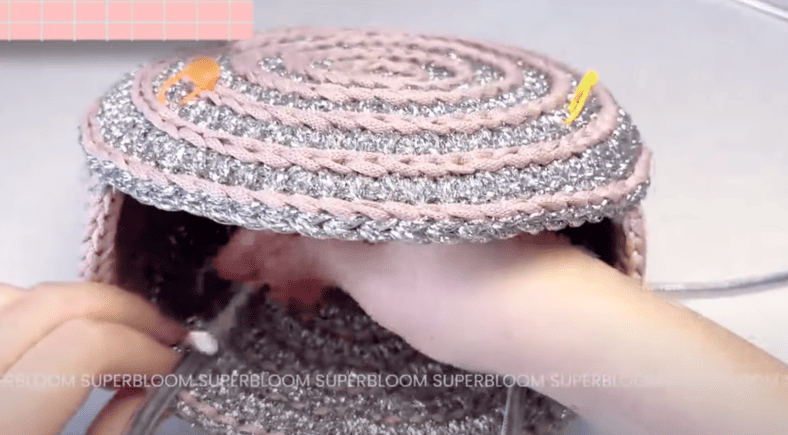
Crochet body for circular handbag crochet tutorial
We use sliver yarn to crochet two pieces for body of bag.
F=double crochet
FV=double crochet increase
| Round | Instruction | Total Stitches |
|---|---|---|
| R1 | 12 F into magic ring | 12 |
| R2 | 12 FV (increase in each stitch) | 24 |
| R3 | 12 (F, FV) | 36 |
| R4 | 12 (2F, FV) | 48 |
| R5 | 12 (3F, FV) | 60 |
| R6 | 12 (F, FV) | 72 |
| End | Last stitch: invisible slip stitch, conceal yarn end | — |
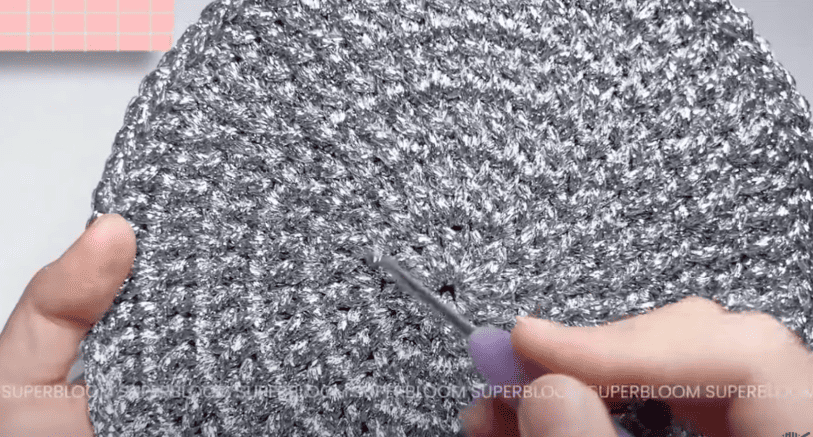
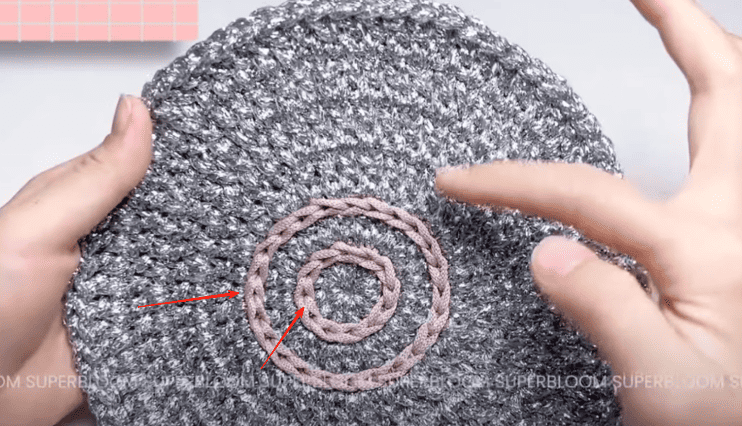
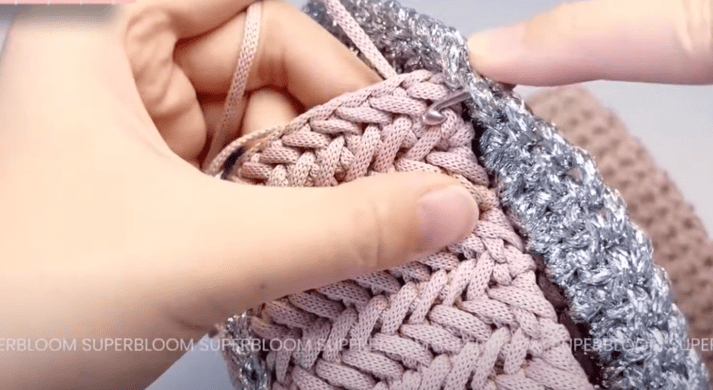
Crochet slip stitch to form bump pattern on the bag
Step 1: Attach the flat tape yarn to the bag body.
Step 2:Work one slip stitch in every stitch around, establishing a circular row.
Step 3:Upon completing the row, execute an invisible slip stitch to conceal the round’s termination.
Step 4:Persevere by repeating Steps 2 and 3 for six complete rows.
These rounds will produce pronounced ridges that enhance both the tactile and structural qualities of the bag.
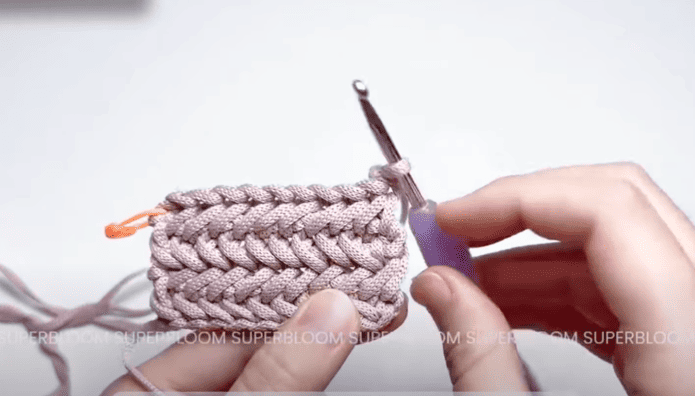
Crochet bottom for circular handbag crochet tutorial
| Round/Row | Instruction | Stitch Count |
|---|---|---|
| Base | We start with 10 chains (ch). | — |
| R1 | Flip over and crochet 9 Fish bone St (F). | 9 |
| R3 | Chain 1 (ch), flip over, crochet 10 Fish bone St (F). | 10 |
| R4 | Flip over and crochet 9 Fishbone St (F). | 9 |
| R5–R50 | We repeat Round 3 and Round 4 until the base reaches desired length. | Alternates 10 / 9 |
Sew
Step 1: Prepare the yarn
Select the flat tape yarn appropriate for your project, and thread a length of it through a tapestry needle. This tool permits precise control and security as the base section is anchored to the cylindrical body.
Step 2: Start stitching
Position the needle in the terminal stitch of the flat base before webbing it through the nearest loop of Fishbone Stitch on the bag’s side. This first probe creates a horizontal datum that guarantees the base and body are circumferentially and vertically aligned.
Step 3: Continue around
Execute a series of slip stitches, evenly distributed, that attach the base to the body around its entire perimeter. Monitor your tension with the same delicacy that guides a violin bow, permitting the seam to remain taut enough that the bag retains its form, yet relaxed enough to preempt distortion.
Step 4: Finish with an invisible slip stitch
Arriving back at the original insertion point, conclude with a slip stitch executed such that it reclines within the adjoining loop. This maneuver conceals the working yarn’s tail within the inside cabin of the bag, effecting one last minim of fabric.
Tips for us:
Identify the start of the round with a stitch marker, ensconcing the junction in visible yet unobtrusive color.
Maintain an aqueous spacing of stitches to forfend the river-eddies of unevenness.
Create a raised seam with discreet, cadence-appropriate tension that permits the flat tape to flare without hollows.
Other body with same method to sew bottom of bag.
Install strap
Step 1: Mark Strap Placement Identify the hole created by the raised slip stitch in the second-to-last round of the bag body. This will serve as the anchor point for the shoulder strap.
Step 2: Attach the Strap Carefully thread the strap through the marked hole, ensuring it travels through smoothly and without twisting.
Step 3: Tailor Strap Length Adjust the strap to the appropriate length for balanced, comfortable carrying. Once the desired length is attained, the strap will remain fixed, completing the assembly of the bag.
Reference sources
1.Learn the most comprehensive guide for single crochet(sc)
Author:Sarah Stearns
Publication date: on June 15, 2021, updated:December 14, 2024
Title: How to single crochet (sc)for beginners
Summary as blow:
- Step-by-Step Single Crochet for Beginners
- Single Crochet into a Foundation Chain
- Single Crochet into another Row
- Single Crochet in the Round
- Increases and Decreases
- Working Single Crochet in Different Loops


