


Ghost Crochet Pattern Step By Step Tutorial
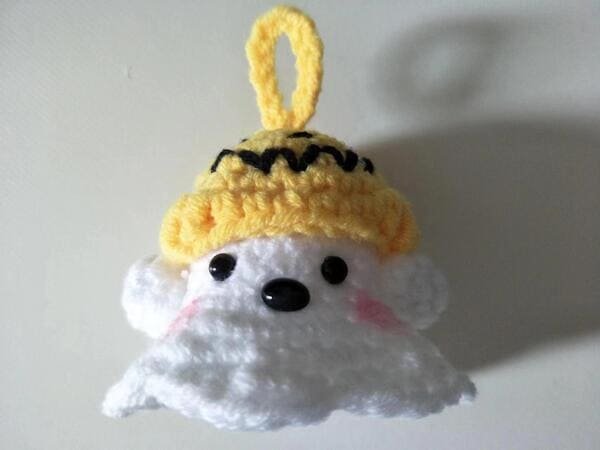
Table of Contents For Ghost Crochet
Material of ghost crochet
Material kit
- Crochet Hook: the thickness of hook matches that yarn
- Stuffing: (polyester fiberfill)
- Safety & nose eyes
- Yarn(white & yellow)
- Yarn needle and marker
List of necessary tools
- Scissors
- Hot melt glue or glue
Abbreviation for crochet
These are the required abbreviations for ghost crochet pattern.
- ch – Chain stitch
- sc – Single crochet
- sl – Slip stitch
- inc – Increase (usually 2 stitches in the same stitch)
- st(s) – Stitch(es)
- mc – Magic circle (or magic ring)
- hdc-Half double crochet
- dc-Double crochet
- tr-treble crochet
Crochet the body (use white yarn )for ghost crochet
- R1: 6 sc into mc(6)
- R2: 2 sc in each st repeat 6 (12)
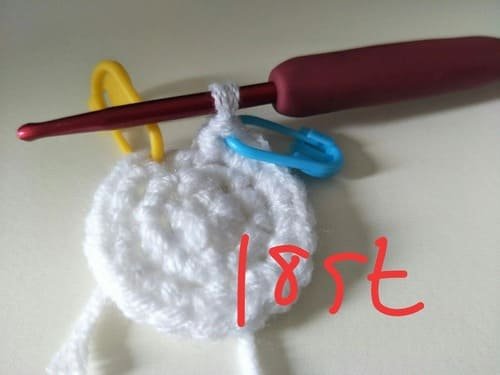
- R3: (1 sc, inc) repeat 6 (18)
- R4:(1sc,inc,1sc) repeat 6 (24)
- R5-R9:(24sc)in each st(35)
- R10:(3sc,inc) repeat 6 (30)
- R11:(2sc,inc,2sc) repeat 6(36)
- R12:(5sc,inc)repeat6(42)
- R13:(1sc,hdc,dc,hdc,sc,sl)repeat7(42)
Tips
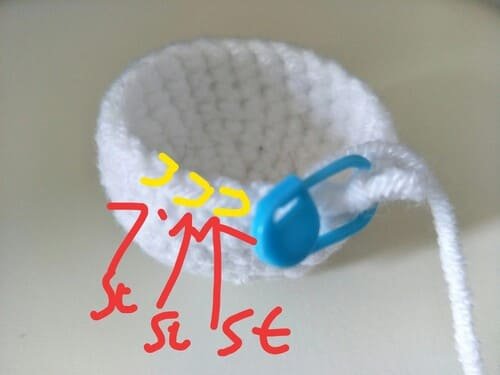
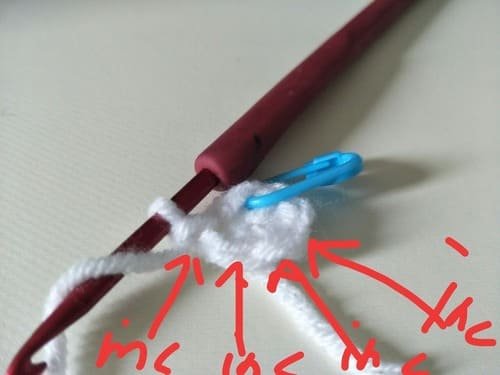
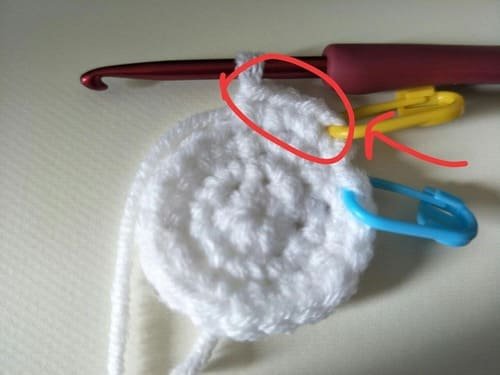
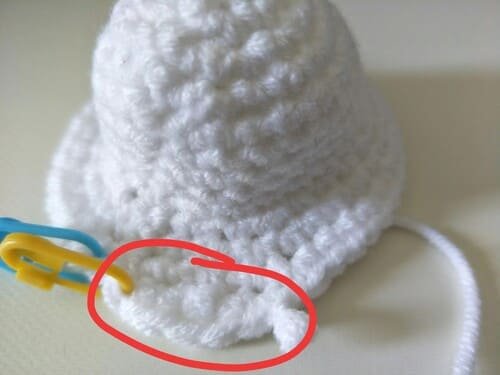
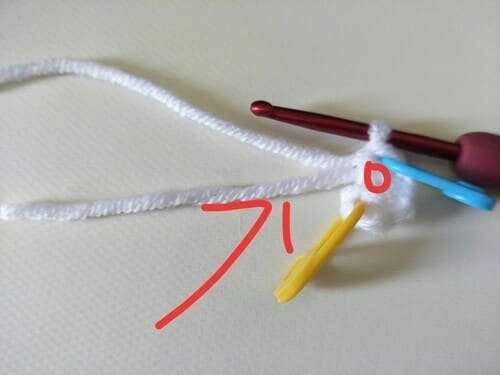
For beginner, the first thing we need to understand is what shape each stitch corresponds to.
V(yellow )is each stitch.
From the appearance, the raised circle(red) means that we have crocheted a row.
Because we have to crochet more than 10 rows for a project, we have to learn how to count the rows.
Avoid over-crocheting or under-crocheting.
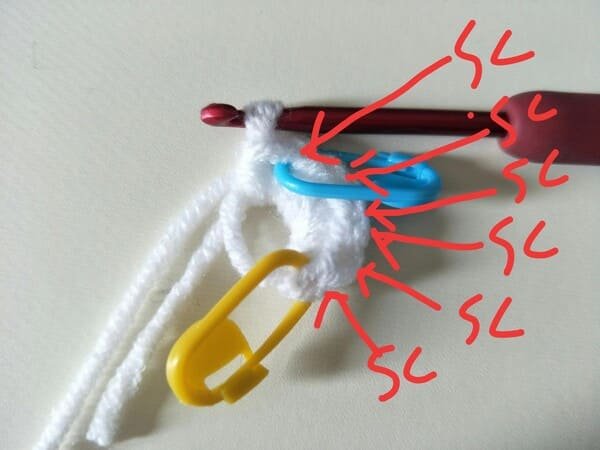
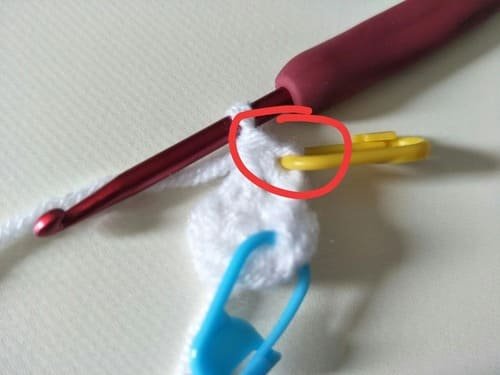
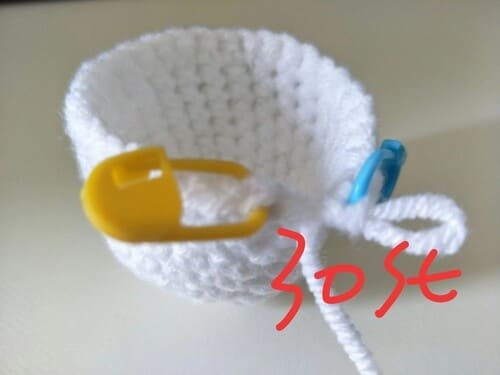
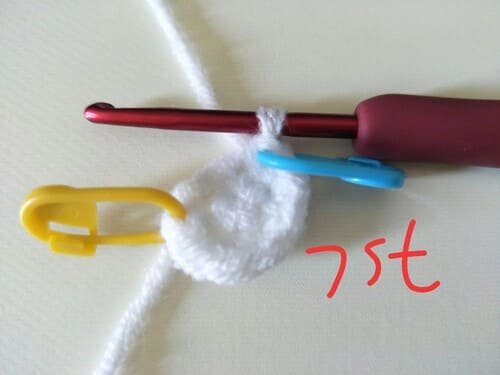
Every time we finish the first single stitch, we use a yellow marker button.
Every time we finish the last single stitch, we use a blue marker button.
This way we can better find out how many stitches we have crocheted in this row.
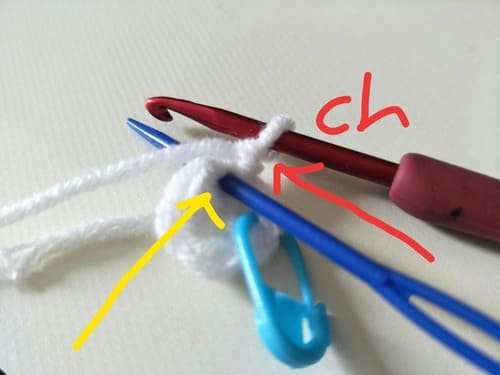
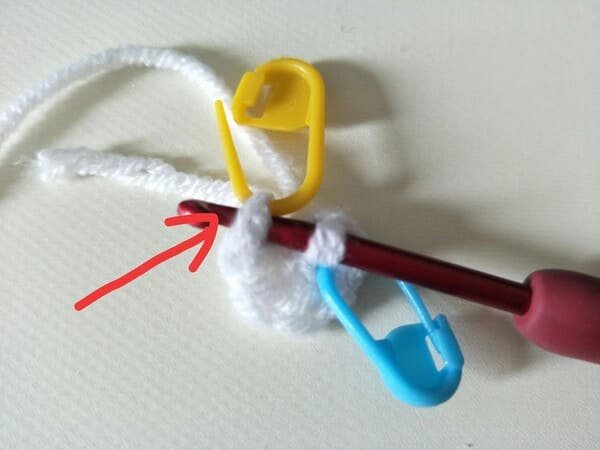
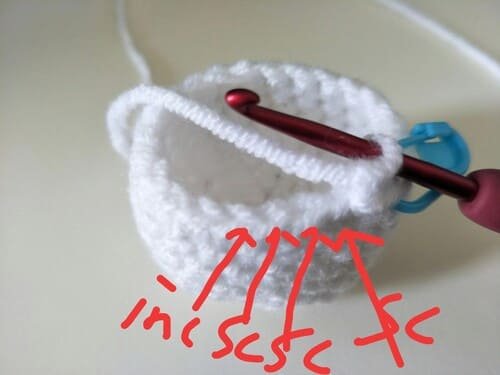
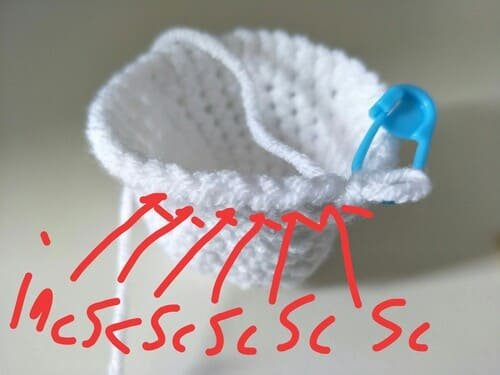
When crocheting each row, we need to add a chain stitch first.(If a standing chain stitch is not utilized, the beginning of a new row will either twist or lie flat, both of which would cause misalignment in the pattern.)
show as yellow arrow: we need to do the first single stitch (SC) right after the chain stitch (CH). this will be at the first round of slip stitch (SL) position.
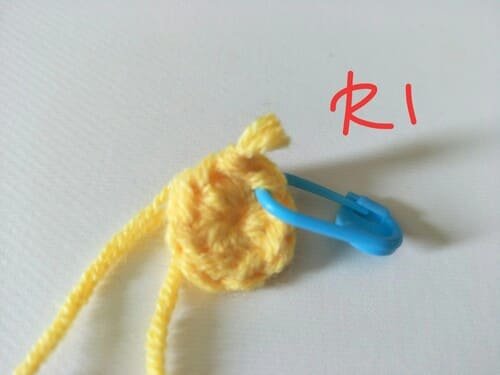
R1:
Begin with a magic ring (also referred to as magic circle or adjustable ring).
Into the ring, work 6 single crochet ‘sc’ stitches.
If we do not how to crochet magic ring, please click here: How To Crochet Magic Ring ? l Step-By-Step l Video & Text &Photo
Using our left hand tighten the yarn end (pushing to the left), while gripping fabric straight with your right hand.
The hook is inserted into the first stitch (the position of the yellow mark button) to complete the slip stitch( step: yarn over, Bring out all the loops on the hook.)
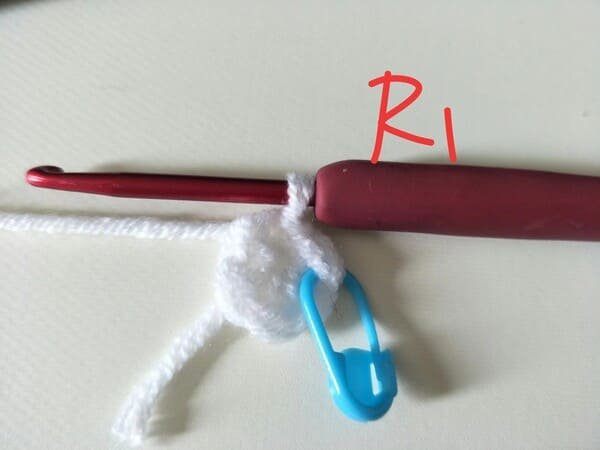
R1 is completed.
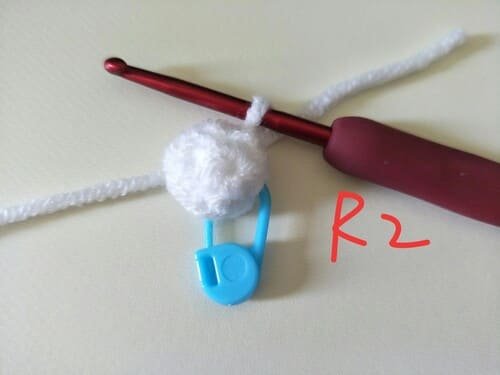
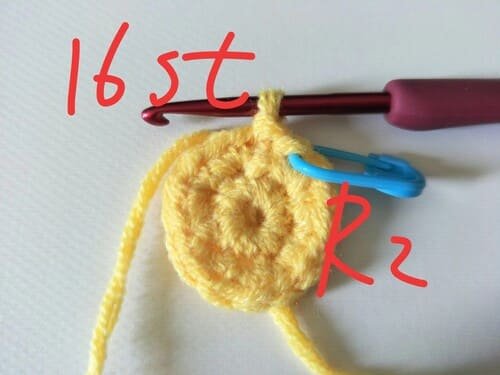
R2:
R2: 2 sc in each st repeat 6 (12)
Beginners sometimes make mistakes , so we must strictly crochet two stitches per stitch(Inc).
Add Ch (Don’t forget to crochet a chain stitch first.)
The yellow box shows the effect after the first Inc is completed.
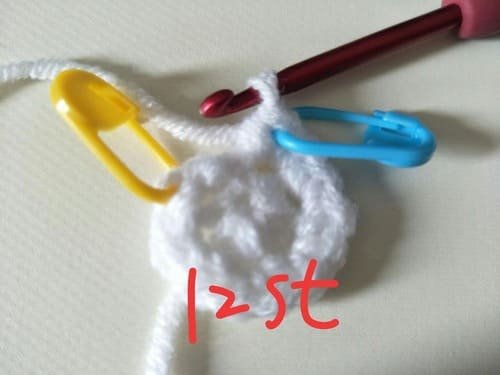
Before Sl, count the number of stitches in a row to see if it is 12. If it is wrong, find out why and where I went wrong. and correct it.
After Sl(slip stitch), we got R2.
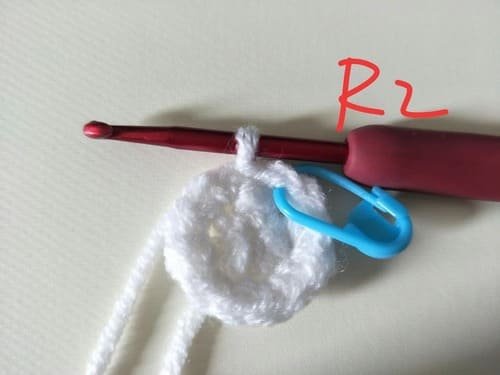
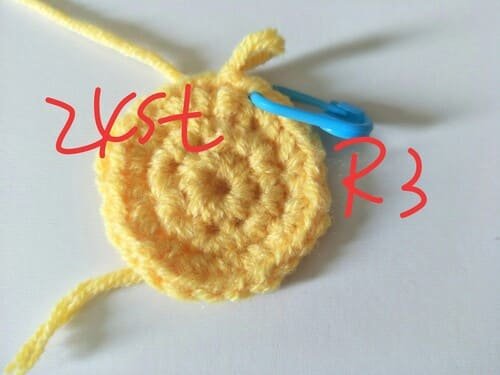
R3
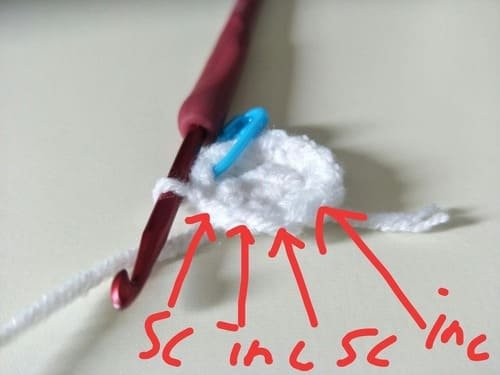
R3: (1 sc, inc) repeat 6 (18)
We should not take it lightly because it is simple, we should strictly follow the crochet pattern.
Before Sl, count the number of stitches in a row :18.
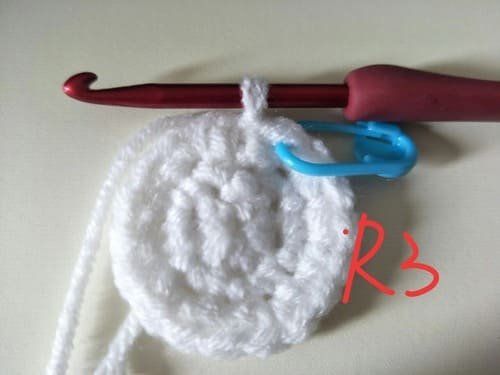
After we complete Sl, R3 is complete.
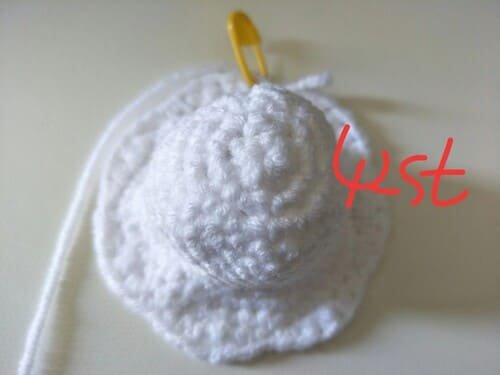
R4
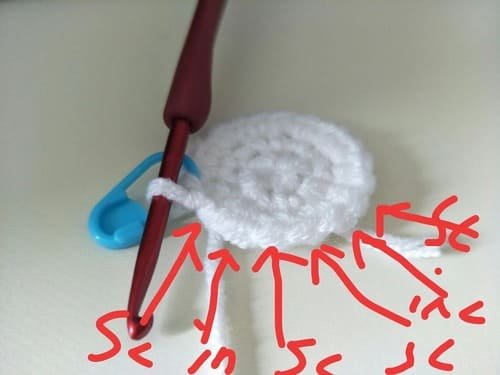
R4:(1sc,inc,1sc) repeat 6 (24)
Although we have the pattern, it is easy to make mistakes.
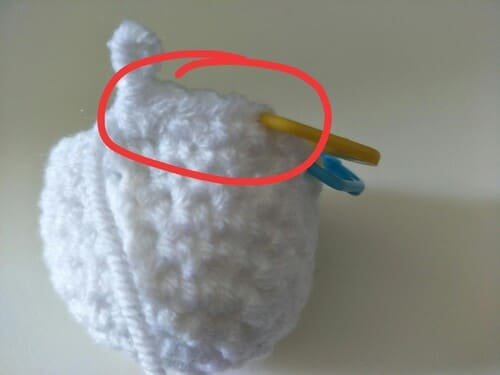
My method is to be calm and strictly follow the method of (1sc,inc,1sc) as group to crochet project.
Red frame as shown- this we completed the first group for (1sc,inc,1sc)
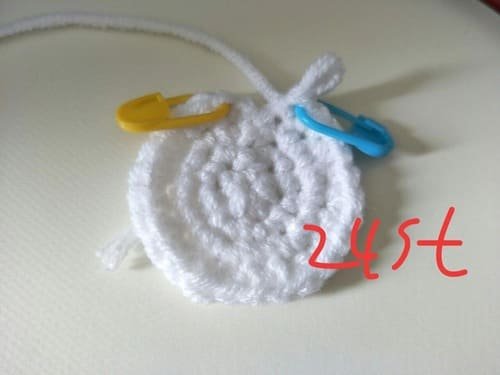
Before Sl, count the number of stitches in a row :21.
After Sl, R4 is finished.
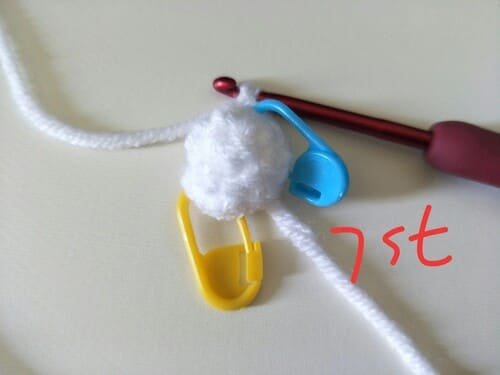
R5

(24sc)in each st(35)
We need to note that in each row, you should first crochet a chain stitch.
Start crocheting a single stitch, buckle the mark button when we finish the first stitch, and then buckle the mark button when we finish the last stitch.
The total number of stitches after completion is 24. Don’t think it’s easy and don’t count, because it’s easy to miss stitches.
R6
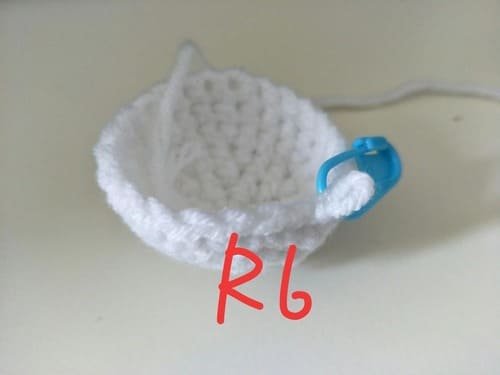
(24sc)in each st(35)
R7
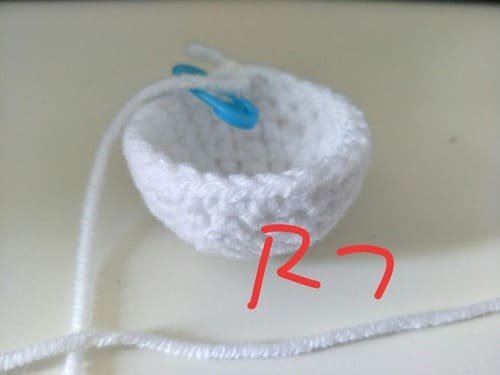
(24sc)in each st(35)
R8

(24sc)in each st(35)
R9
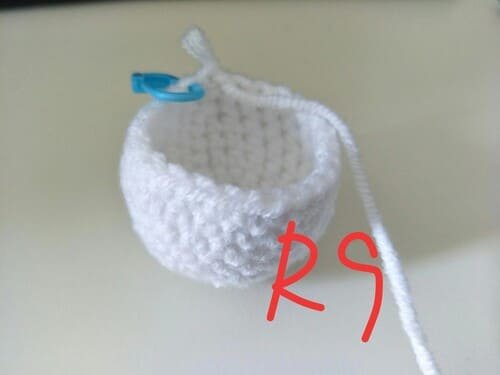
(24sc)in each st(35)
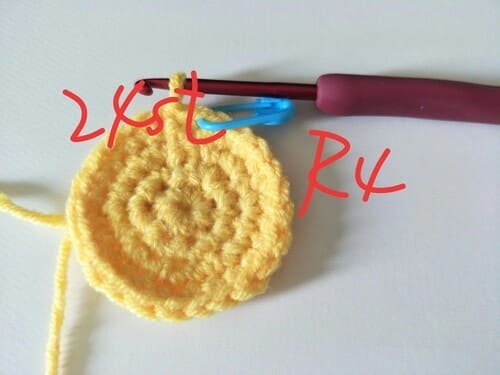
R10
R10:(3sc,inc) repeat 6 (30)
Red frame as shown- this we completed the first group for (3sc,inc)
For the next group, we must also strictly follow pattern.
Starting from the yellow mark button, count to the blue mark button, there are 30 stitches in total.
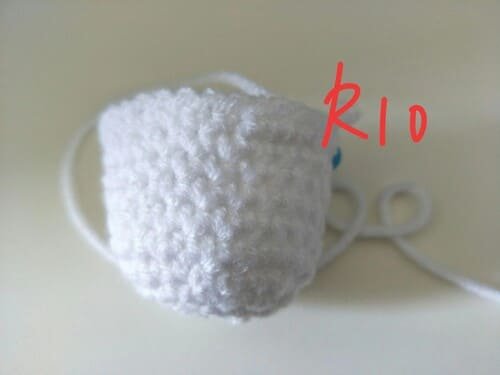
After Sl, we finish R10.
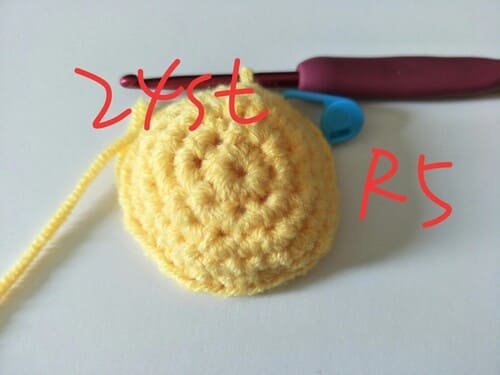
R11
R11:(2sc,inc,2sc) repeat 6(36)
It is also easy to make mistakes in this row. If we treat it as a group(2sc,inc,2sc) , the next group should start in the same order(2sc,inc,2sc) .
We should also be patient during the crocheting process. If we make a mistake, don’t feel bothered to let it go. we still have to dismantle it again, find the cause, and correct it.
Total stitches :36 for R11
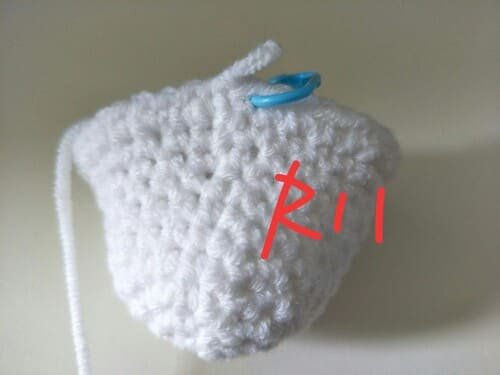
After Sl, R11 is completed.
R12
R12:(5sc,inc)repeat6(42)
We treat it as a group(5sc,inc) , the next group should start in the same order((5sc,inc).
The total number of stitches to complete this row is 42.
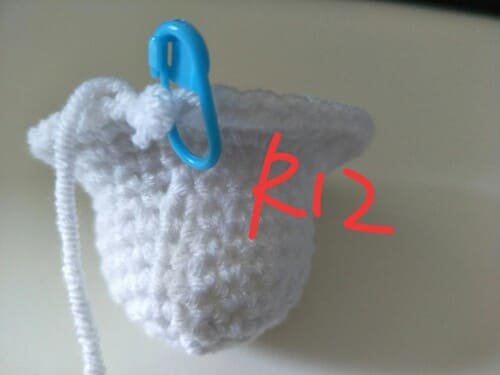
After Sl, R12 is completed.-Why I took pictures of each step is to make it more intuitive。
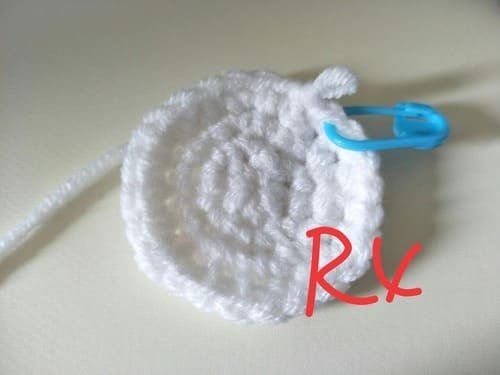
R13
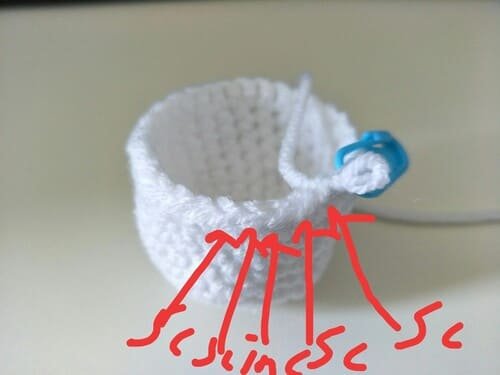
R13:(1sc,hdc,dc,hdc,sc,sl)repeat7(42)
As long as we strictly follow this order(1sc,hdc,dc,hdc,sc,sl) as a group, we can complete the lace weaving effect.
Differences of Hdc vs Dc
Hdc: yarn over, bring out three loops on the hook , then get a loop.
Dc: yarn over, bring out two loops, yarn over again, bring out two loops on the hook, then get a loop.
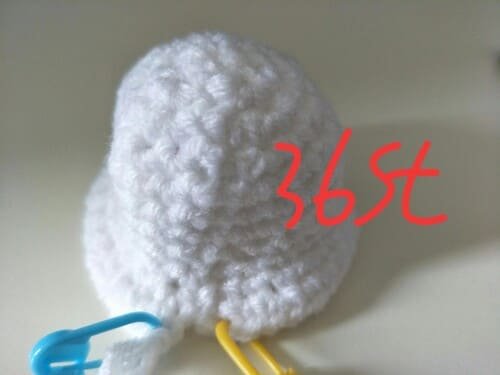
After completion, we have confirmed the stitch count of 42 and can also see the shape of the lovely lace.
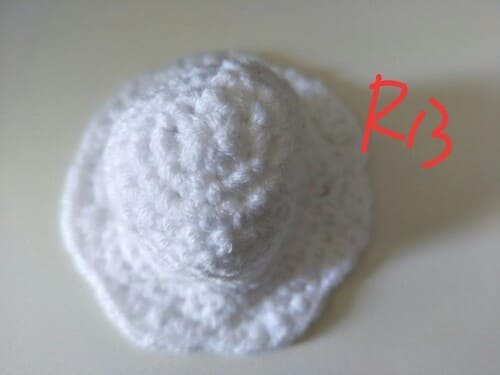
After Sl, we got R13.
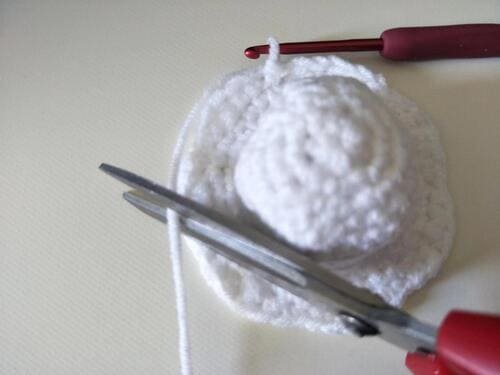
Fasten off and leave in end.
Use the crochet hook to pull out the yarn after cutting and tie it tightly.
Hide the excess yarn end on the back of the fabric with sewing needle.
Crochet the hand (use white yarn )for ghost crochet
- R1: 5 sc into mc(5)
- R2:(sc,inc)repeat 2,2sc (7)
- R3:(7sc)in each st(7)

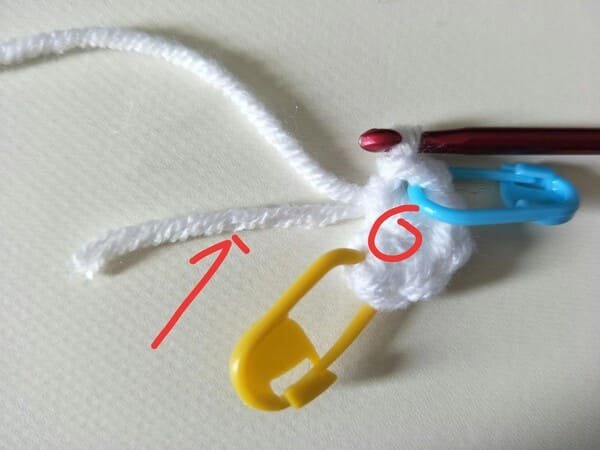
R1: 5 sc into mc(5)
If we find it difficult to make a magic ring, you can start learning from here:How To Crochet Magic Ring ? l Step-By-Step l Video & Text &Photo
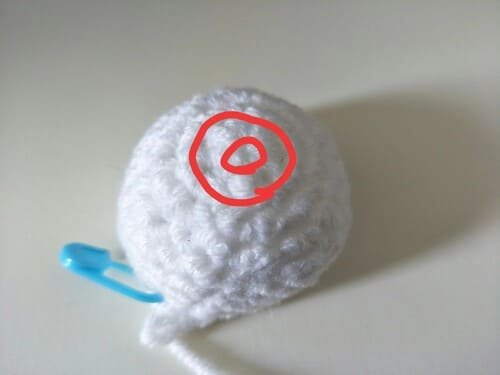
After pulling the yarn end tightly with your left hand, we can see that the center of the magic ring will slowly shrink into an” O gap”.
Also we need to complete Sl , then we got magic ring.
R2:(sc,inc)repeat 2,2sc (7)
We need to note that in this form, we need to complete two groups of(sc,inc), then crochet 2 single crochet again.
R2 is completed.
R3:(7sc)in each st(7)
We need crochet SC in each stitch.

After Sl, we got R3, then fasten off and leave in end.
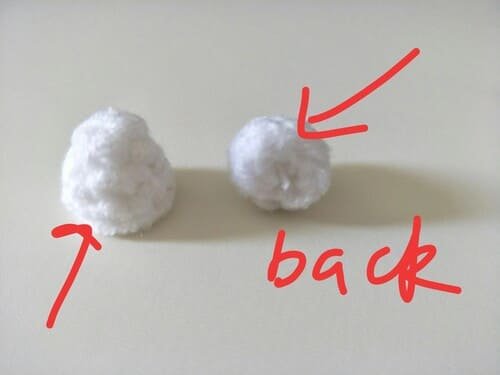
Left arrow show as positive of hand.
Light arrow show as back of hand .
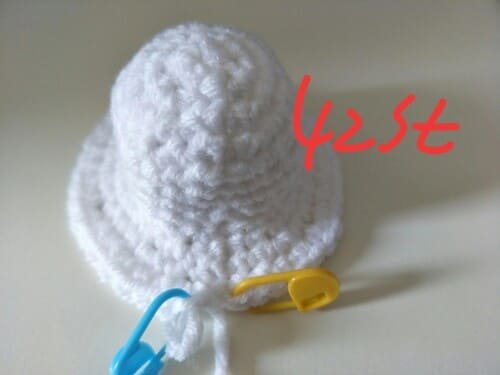
Crochet the hat (use yellow yarn )for ghost crochet
- R1: 8 sc into mc(8)
- R2:(inc)repeat 8 (16)
- R3:(1sc,inc ) repeat 8(24)
- R4-5:24st in each st(24)
- R6:(4sc,hdc,dc,2tr,dc,hdc) repeat 2,4sc(24)
8 sc into mc(8)
This is what we look like after completing our 8 sc for magic ring.
R2:(inc)repeat 8 (16)
Increase means crocheting two stitches on each stitch.
Make use total of stitch for R2 is 16 st.
R3🙁1sc,inc ) repeat 8(24)
We need to remain patient and calm, and complete(1sc,inc ) as a group. repeat 8 times to complete this row.
Make sure total stitch is 24.
R4:24st in each st(24)
Each stitch crochet one single stitch for this row. make sure total stitch is 24.
R5:24st in each st(24)
Same as R4.

R6:(4sc,hdc,dc,2tr,dc,hdc) repeat 2,4sc(24)
It may look complicated, but it is actually a very common crochet method. Just master the order and don’t make mistakes.
For Tr Motion:
Wrap the yarn twice→ Yarn over → Pull through one loops → Yarn over again → Pull through both loops →Yarn over again → Pull through both loops→ Yarn over again→ Get one loop
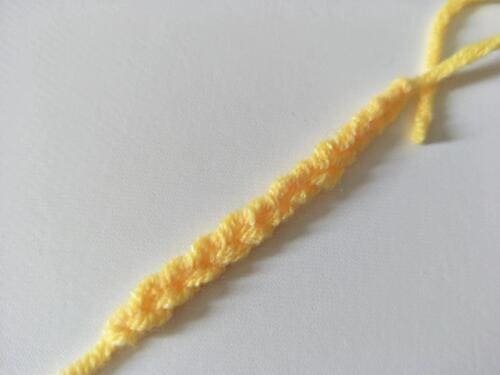
Need crochet 14 ch for carrying bracelet.
Want to learn how to crochet chain stitch, please click here:Chain Stitch |Step By Step Guide| Text & Photo &Video
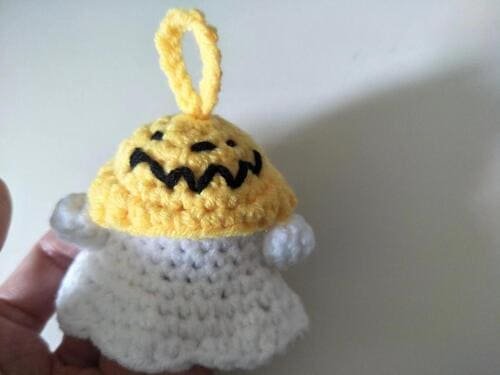
Sew some cute emojis for ghost crochet

For carrying bracelet: after completing the 14 lock stitches, we fold it in half and sew it to the top of the hat. It will be more secure after being reinforced with glue.
Sew some cute emojis:Because the color of the hat is yellow, we used Halloween elements and sewed them on the hat. we used a sewing needle and black yarn. this is not difficult and you can DIY it yourself.
Sew hand and hat on the body for ghost crochet
After the hat is finished, glued it on the ghost’s body. (Put slip stitch position on the side , not front ), which will be more beautiful.
Fix both hands just below the Tr crochet. the proportions will be more harmonious.
Apply blush & safety eyes & mouth for ghost crochet
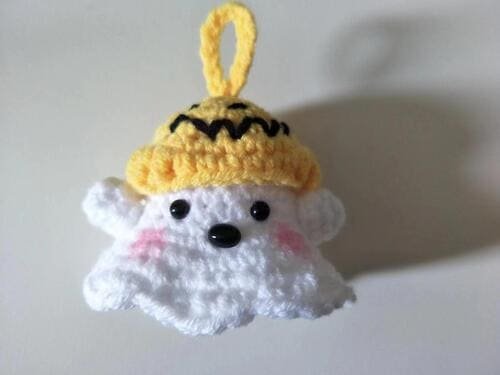
Safe eyes :after the positions of both hands are determined, the position of the eyes can be quickly determined. the center of the hands is a plane. Just determine the average distance between the eyes.
Safe mouth:the mouth is directly below the two eyes.
Apply blush:blush is applied on both sides of the mouth. there is no strict requirement for this. we can do it according to our preferences.
Reference sources
1.Learn the most comprehensive guide for single crochet(sc)
Author:Sarah Stearns
Publication date: on June 15, 2021, updated:December 14, 2024
Title: How to single crochet (sc)for beginners
Summary as blow:
- Step-by-Step Single Crochet for Beginners
- Single Crochet into a Foundation Chain
- Single Crochet into another Row
- Single Crochet in the Round
- Increases and Decreases
- Working Single Crochet in Different Loops


